此文创作于2020-4-30
所使用的docker、Fabric、fabric-samples均为最新版本latest
本文主要翻译于Building Your First Network
对于环境的搭建,不再过多叙述,CSDN的很多大佬都写过相关博客,大家可以去借鉴一些。
放上一篇自己的博客(部分不多叙述的内容):fabric-samples的安装
这里直接描述first-network:
-
进入该文件中:
cd first-network -
为了防止有网络启动中,关闭所有网络:
./byfn.sh -m down -
(!!!)在很多的教程中,首先执行这个命令:./byfn.sh -m generate
-
首先让我们运行该
cryptogen工具。我们的二进制文件位于bin目录中,因此我们需要提供工具所在的相对路径。
../bin/cryptogen generate --config=./crypto-config.yaml
生成的cert和key将输出到目录first-network/crypto-config下。
您应该在终端中看到以下内容:
org1.example.com
org2.example.com
- 接下来,我们需要告诉该
configtxgen工具在哪里寻找configtx.yaml需要提取的 文件。我们将在当前的工作目录中告诉它:
export FABRIC_CFG_PATH=$PWD
- 然后,我们将调用该
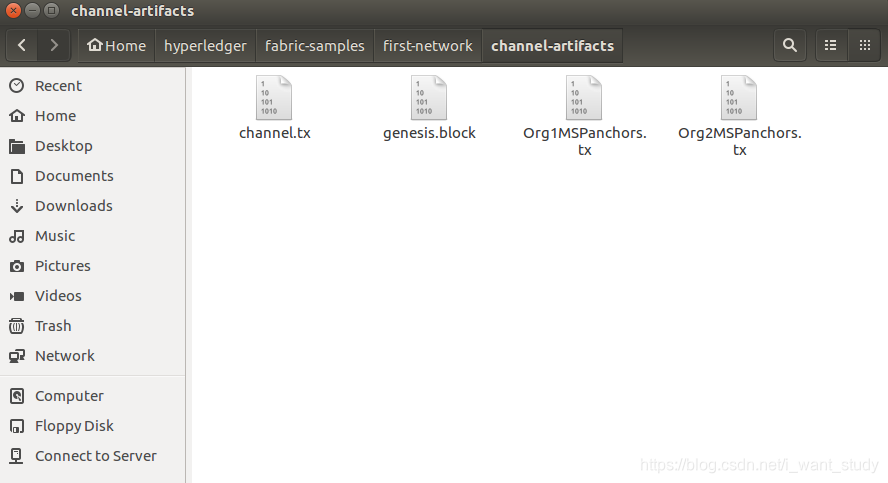
configtxgen工具来创建gensis.block(你没看错,也就是3中图片所展示的其中一个文件,这里又重新生成一遍):
../bin/configtxgen -profile SampleMultiNodeEtcdRaft -channelID byfn-sys-channel -outputBlock ./channel-artifacts/genesis.block
orderer的创始块和我们将要后续创建的artifacts将输出到channel-artifacts目录中。上面命令中的channelID是系统通道的名称。
- 创建通道配置交易网络(生成了
channel.tx,3的其中一个文件)
接下来,我们需要创建通道交易artifacts。确保替换$CHANNEL_NAME或设置CHANNEL_NAME为可在以下说明中使用的环境变量:
export CHANNEL_NAME=mychannel && ../bin/configtxgen -profile TwoOrgsChannel -outputCreateChannelTx ./channel-artifacts/channel.tx -channelID $CHANNEL_NAME
请注意,在创建网络的创世区块时,
TwoOrgsChannel配置文件使用你指定的orderer服务配置。
- 接下来,我们将在正在构建的通道上为
Org1定义锚点。同样,请确保$CHANNEL_NAME为以下命令替换或设置环境变量。
../bin/configtxgen -profile TwoOrgsChannel -outputAnchorPeersUpdate ./channel-artifacts/Org1MSPanchors.tx -channelID $CHANNEL_NAME -asOrg Org1MSP
现在,我们将在同一通道上为Org2定义锚点:
../bin/configtxgen -profile TwoOrgsChannel -outputAnchorPeersUpdate ./channel-artifacts/Org2MSPanchors.tx -channelID $CHANNEL_NAME -asOrg Org2MSP
- 启动网络
如果您
byfn.sh以前运行了上面的示例,请确保在继续操作之前关闭了测试网络(./byfn.sh -m down)。
我们将利用脚本来启动我们的网络。docker-compose文件引用了我们先前下载的镜像,并使用我们先前生成的genesis.block。
首先,让我们开始我们的网络:
docker-compose -f docker-compose-cli.yaml -f docker-compose-etcdraft2.yaml up -d
如果要查看网络的实时日志,请不要提供该-d标志。如果让日志流传输,则需要打开第二个终端以执行CLI调用。
- 创建并加入频道
回想一下,我们使用上面
configtxgen“ 创建通道配置交易”部分中的
工具创建了通道配置交易。您可以使用configtx.yaml传递给configtxgen工具的相同或不同的配置文件,重复该过程以创建其他通道配置事务。然后,您可以重复本节中定义的过程以在网络中建立其他通道。
我们将使用以下命令输入CLI容器:
docker exec -it cli bash
如果成功,您应该看到以下内容:
bash-5.0#
- 接下来,作为创建通道请求的一部分,我们将把在“ 创建通道配置事务”部分(称为
channel.tx)中创建的生成的通道配置事务工件传递给orderer。
export CHANNEL_NAME=mychannel
peer channel create -o orderer.example.com:7050 -c $CHANNEL_NAME -f ./channel-artifacts/channel.tx --tls --cafile /opt/gopath/src/github.com/hyperledger/fabric/peer/crypto/ordererOrganizations/example.com/orderers/orderer.example.com/msp/tlscacerts/tlsca.example.com-cert.pem
请注意
--cafile,我们作为此命令的一部分进行了传递。这是orderer根证书的本地路径,使我们可以验证TLS握手。
该命令返回一个创世块-
<CHANNEL_NAME.block>我们将使用它来加入频道。它包含在中指定的配置信息。channel.tx
如果您未对默认通道名称进行任何修改,则该命令将返回标题为的原型mychannel.block。
如果peer0.org2.example.com想要加入通道,完整命令应该是这样的:
CORE_PEER_MSPCONFIGPATH=/opt/gopath/src/github.com/hyperledger/fabric/peer/crypto/peerOrganizations/org2.example.com/users/[email protected]/msp CORE_PEER_ADDRESS=peer0.org2.example.com:9051 CORE_PEER_LOCALMSPID="Org2MSP" CORE_PEER_TLS_ROOTCERT_FILE=/opt/gopath/src/github.com/hyperledger/fabric/peer/crypto/peerOrganizations/org2.example.com/peers/peer0.org2.example.com/tls/ca.crt peer channel join -b mychannel.block
上面直接执行是因为默认配置了:
CORE_PEER_MSPCONFIGPATH=/opt/gopath/src/github.com/hyperledger/fabric/peer/crypto/peerOrganizations/org1.example.com/users/[email protected]/msp
CORE_PEER_ADDRESS=peer0.org1.example.com:7051
CORE_PEER_LOCALMSPID="Org1MSP"
CORE_PEER_TLS_ROOTCERT_FILE=/opt/gopath/src/github.com/hyperledger/fabric/peer/crypto/peerOrganizations/org1.example.com/peers/peer0.org1.example.com/tls/ca.crt
- 这部分的内容可能解释的有些模糊,大家还是参考这个文档Create & Join Channel部分吧。
- 更新锚节点
更新通道定义以将定义Org1的锚点为peer0.org1.example.com
peer channel update -o orderer.example.com:7050 -c $CHANNEL_NAME -f ./channel-artifacts/Org1MSPanchors.tx --tls --cafile /opt/gopath/src/github.com/hyperledger/fabric/peer/crypto/ordererOrganizations/example.com/orderers/orderer.example.com/msp/tlscacerts/tlsca.example.com-cert.pem
现在更新通道定义,将定义Org2的锚点为peer0.org2.example.com。与Org2锚节点定义的命令相同,我们需要在此调用之前加上适当的环境变量。peer channel join
CORE_PEER_MSPCONFIGPATH=/opt/gopath/src/github.com/hyperledger/fabric/peer/crypto/peerOrganizations/org2.example.com/users/[email protected]/msp CORE_PEER_ADDRESS=peer0.org2.example.com:9051 CORE_PEER_LOCALMSPID="Org2MSP" CORE_PEER_TLS_ROOTCERT_FILE=/opt/gopath/src/github.com/hyperledger/fabric/peer/crypto/peerOrganizations/org2.example.com/peers/peer0.org2.example.com/tls/ca.crt peer channel update -o orderer.example.com:7050 -c $CHANNEL_NAME -f ./channel-artifacts/Org2MSPanchors.tx --tls --cafile /opt/gopath/src/github.com/hyperledger/fabric/peer/crypto/ordererOrganizations/example.com/orderers/orderer.example.com/msp/tlscacerts/tlsca.example.com-cert.pem
- 安装并定义一个链码:
我们将利用一个简单的现有链码。要学习如何编写自己的链码,请参阅《开发人员链码》教程。
应用程序通过chaincode与区块链账本进行交互。因此,我们需要在每个将执行并认可我们交易的peer上安装一个链码。但是,在我们与链码进行交互之前,通道成员需要就建立链码治理的链码的定义达成共识。
我们需要打包链码,然后才能将其安装在我们的peer上。对于您创建的每个软件包,您需要提供一个链码软件包标签作为链码的描述。使用以下命令打包,以Go,Node.js或Java chaincode为示例。
# GO
# before packaging Go chaincode, vendoring Go dependencies is required like the following commands.
cd /opt/gopath/src/github.com/hyperledger/fabric-samples/chaincode/abstore/go
GO111MODULE=on go mod vendor
cd -
# this packages a Go chaincode.
# make note of the --lang flag to indicate "golang" chaincode
# for Go chaincode --path takes the relative path from $GOPATH/src
# The --label flag is used to create the package label
peer lifecycle chaincode package mycc.tar.gz --path github.com/hyperledger/fabric-samples/chaincode/abstore/go/ --lang golang --label mycc_1


# Node.js
# this packages a Node.js chaincode
# make note of the --lang flag to indicate "node" chaincode
# for node chaincode --path takes the absolute path to the Node.js chaincode
# The --label flag is used to create the package label
peer lifecycle chaincode package mycc.tar.gz --path /opt/gopath/src/github.com/hyperledger/fabric-samples/chaincode/abstore/javascript/ --lang node --label mycc_1


# Java chaincode
# this packages a java chaincode
# make note of the --lang flag to indicate "java" chaincode
# for java chaincode --path takes the absolute path to the Java chaincode
# The --label flag is used to create the package label
peer lifecycle chaincode package mycc.tar.gz --path /opt/gopath/src/github.com/hyperledger/fabric-samples/chaincode/abstore/java/ --lang java --label mycc_1
上面的每个命令都会创建一个名为的链码包mycc.tar.gz,我们可以使用它在peer节点上安装链码。发出以下命令以将软件包安装在Org1的peer0上。
# this command installs a chaincode package on your peer
peer lifecycle chaincode install mycc.tar.gz
您还可以通过查询对等方以获取有关已安装软件包的信息来找到链码软件包标识符.
# this returns the details of the chaincode packages installed on your peers
peer lifecycle chaincode queryinstalled
上面的命令将返回与安装命令相同的软件包标识符。您应该看到类似于以下内容的输出:
Installed chaincodes on peer:
Package ID: mycc_1:3397596e15672b85021e71928435b5b3cb18181ead9b70d2fc19d32a6b240246, Label: mycc_1
我们将来的命令将需要软件包ID,所以让我们继续将其保存为环境变量。将对等生命周期链码queryinstalled命令返回的软件包ID粘贴 到以下命令中。软件包ID可能对于所有用户而言都不相同,因此您需要使用从控制台返回的软件包ID来完成此步骤。
# Save the package ID as an environment variable.

CC_PACKAGE_ID=mycc_1:3a8c52d70c36313cfebbaf09d8616e7a6318ababa01c7cbe40603c373bcfe173
mycc的背书政策设置为要求来自Org1和Org2的peer的背书。因此,我们还需要在Org2中的peer上安装chaincode。
修改以下四个环境变量以将安装命令作为Org2发出:
CORE_PEER_MSPCONFIGPATH=/opt/gopath/src/github.com/hyperledger/fabric/peer/crypto/peerOrganizations/org2.example.com/users/[email protected]/msp
CORE_PEER_ADDRESS=peer0.org2.example.com:9051
CORE_PEER_LOCALMSPID="Org2MSP"
CORE_PEER_TLS_ROOTCERT_FILE=/opt/gopath/src/github.com/hyperledger/fabric/peer/crypto/peerOrganizations/org2.example.com/peers/peer0.org2.example.com/tls/ca.crt
现在,将chaincode软件包安装到Org2的peer0上。以下命令将安装链码,并返回与我们作为Org1发出的安装命令相同的标识符。
# this installs a chaincode package on your peer
peer lifecycle chaincode install mycc.tar.gz
因为我们将环境变量设置为可以作为Org2进行操作,所以可以使用mycc定义Org2链码。允许分配给每个组织内的peer,因此该命令不需要针对组织内的每个peer。
# this approves a chaincode definition for your org
# make note of the --package-id flag that provides the package ID
# use the --init-required flag to request the ``Init`` function be invoked to initialize the chaincode
peer lifecycle chaincode approveformyorg --channelID $CHANNEL_NAME --name mycc --version 1.0 --init-required --package-id $CC_PACKAGE_ID --sequence 1 --tls true --cafile /opt/gopath/src/github.com/hyperledger/fabric/peer/crypto/ordererOrganizations/example.com/orderers/orderer.example.com/msp/tlscacerts/tlsca.example.com-cert.pem
所有组织都必须先同意定义,然后才能使用链码。修改以下四个环境变量以用作Org1:
# Environment variables for PEER0

CORE_PEER_MSPCONFIGPATH=/opt/gopath/src/github.com/hyperledger/fabric/peer/crypto/peerOrganizations/org1.example.com/users/[email protected]/msp
CORE_PEER_ADDRESS=peer0.org1.example.com:7051
CORE_PEER_LOCALMSPID="Org1MSP"
CORE_PEER_TLS_ROOTCERT_FILE=/opt/gopath/src/github.com/hyperledger/fabric/peer/crypto/peerOrganizations/org1.example.com/peers/peer0.org1.example.com/tls/ca.crt
现在,您可以将mycc链码的定义允许为Org1。
# this defines a chaincode for your org
# make note of the --package-id flag that provides the package ID
# use the --init-required flag to request the Init function be invoked to initialize the chaincode
peer lifecycle chaincode approveformyorg --channelID $CHANNEL_NAME --name mycc --version 1.0 --init-required --package-id $CC_PACKAGE_ID --sequence 1 --tls true --cafile /opt/gopath/src/github.com/hyperledger/fabric/peer/crypto/ordererOrganizations/example.com/orderers/orderer.example.com/msp/tlscacerts/tlsca.example.com-cert.pem
一旦足够数量的渠道成员批准了链码定义,一个成员就可以将该定义提交给渠道。默认情况下,大多数通道成员需要批准定义才能提交。通过发出以下查询,可以检查链码定义是否准备就绪,可以按组织查看当前的批准:
# the flags used for this command are identical to those used for approveformyorg
# except for --package-id which is not required since it is not stored as part of
# the definition
peer lifecycle chaincode checkcommitreadiness --channelID $CHANNEL_NAME --name mycc --version 1.0 --init-required --sequence 1 --tls true --cafile /opt/gopath/src/github.com/hyperledger/fabric/peer/crypto/ordererOrganizations/example.com/orderers/orderer.example.com/msp/tlscacerts/tlsca.example.com-cert.pem --output json
该命令将生成一个JSON映射作为输出,以显示通道中的组织是否已批准checkcommitreadiness命令中提供的链码定义。在这种情况下,假设两个组织都已批准,我们将获得:
{
	"approvals": {
		"Org1MSP": true,
		"Org2MSP": true
	}
}
由于两个渠道成员都批准了该定义,因此我们现在可以使用以下命令将其提交给渠道。您可以以Org1或Org2的形式发出此命令。请注意,该交易针对Org1和Org2中的同级收集签注。
# this commits the chaincode definition to the channel
peer lifecycle chaincode commit -o orderer.example.com:7050 --channelID $CHANNEL_NAME --name mycc --version 1.0 --sequence 1 --init-required --tls true --cafile /opt/gopath/src/github.com/hyperledger/fabric/peer/crypto/ordererOrganizations/example.com/orderers/orderer.example.com/msp/tlscacerts/tlsca.example.com-cert.pem --peerAddresses peer0.org1.example.com:7051 --tlsRootCertFiles /opt/gopath/src/github.com/hyperledger/fabric/peer/crypto/peerOrganizations/org1.example.com/peers/peer0.org1.example.com/tls/ca.crt --peerAddresses peer0.org2.example.com:9051 --tlsRootCertFiles /opt/gopath/src/github.com/hyperledger/fabric/peer/crypto/peerOrganizations/org2.example.com/peers/peer0.org2.example.com/tls/ca.crt
- 调用链码
将链码定义提交到通道后,我们准备调用链码并开始与分类帐进行交互。我们要求Init使用--init-required标志在链码定义中执行该功能 。结果,我们需要将--isInit标志传递给它的第一次调用,并将参数提供给Init函数。发出以下命令来初始化链码并将初始数据放在分类帐中。
# be sure to set the -C and -n flags appropriately
# use the --isInit flag if you are invoking an Init function
peer chaincode invoke -o orderer.example.com:7050 --isInit --tls true --cafile /opt/gopath/src/github.com/hyperledger/fabric/peer/crypto/ordererOrganizations/example.com/orderers/orderer.example.com/msp/tlscacerts/tlsca.example.com-cert.pem -C $CHANNEL_NAME -n mycc --peerAddresses peer0.org1.example.com:7051 --tlsRootCertFiles /opt/gopath/src/github.com/hyperledger/fabric/peer/crypto/peerOrganizations/org1.example.com/peers/peer0.org1.example.com/tls/ca.crt --peerAddresses peer0.org2.example.com:9051 --tlsRootCertFiles /opt/gopath/src/github.com/hyperledger/fabric/peer/crypto/peerOrganizations/org2.example.com/peers/peer0.org2.example.com/tls/ca.crt -c '{"Args":["Init","a","100","b","100"]}' --waitForEvent
第一次调用将启动chaincode容器。我们可能需要等待容器启动。Node.js图像将花费更长的时间。
query
让我们查询链码,以确保正确启动了容器并填充了状态数据库。查询的语法如下
# be sure to set the -C and -n flags appropriately

peer chaincode query -C $CHANNEL_NAME -n mycc -c '{"Args":["query","a"]}'
Invoke
现在让我们10从a移至b。该事务将剪切一个新块并更新状态数据库。调用的语法如下:
# be sure to set the -C and -n flags appropriately
peer chaincode invoke -o orderer.example.com:7050 --tls true --cafile /opt/gopath/src/github.com/hyperledger/fabric/peer/crypto/ordererOrganizations/example.com/orderers/orderer.example.com/msp/tlscacerts/tlsca.example.com-cert.pem -C $CHANNEL_NAME -n mycc --peerAddresses peer0.org1.example.com:7051 --tlsRootCertFiles /opt/gopath/src/github.com/hyperledger/fabric/peer/crypto/peerOrganizations/org1.example.com/peers/peer0.org1.example.com/tls/ca.crt --peerAddresses peer0.org2.example.com:9051 --tlsRootCertFiles /opt/gopath/src/github.com/hyperledger/fabric/peer/crypto/peerOrganizations/org2.example.com/peers/peer0.org2.example.com/tls/ca.crt -c '{"Args":["invoke","a","b","10"]}' --waitForEvent
查询结果:
peer chaincode query -C $CHANNEL_NAME -n mycc -c '{"Args":["query","a"]}'
显示:
Query Result: 90
