写在前面
- 这个实验写到了Opendaylight,但是其实好像和ODL没什么关系,用到的还是本地控制器POX。
- 值得注意的:实验之后一定要用,mn -c 命令清理进程。否则造成主机之间ping不通,端口占用等问题。
- 虽然是个简单的实验,但是我在过程中通过请教学长,也对虚拟控制器的理解更加深入,也能更深入体会SDN中软件这两个字。
实验思路
- Python脚本实现自定义拓扑
- 设置链路的带宽、延迟及丢包率
- iperf测试主机间的带宽性能
简而言之,一个脚本解决所有问题。本实验的核心也是读懂脚本而已。
实验拓扑

实验步骤
1.搭建环境
- 安装mininet的虚拟机
2.创建脚本
- 进入mininet/custom目录下,创建脚本mymininet.py并添加内容:
#!/usr/bin/python

from mininet.topo import Topo
from mininet.net import Mininet
from mininet.node import CPULimitedHost
from mininet.link import TCLink
from mininet.util import dumpNodeConnections
from mininet.log import setLogLevel

class SingleSwitchTopo(Topo):
    "Single switch connected to n hosts."
    def __init__(self, n=2, **opts):
        Topo.__init__(self, **opts)
        switch = self.addSwitch('s1')
        for h in range(n):
            #Each host gets 50%/n of system CPU
            host = self.addHost('h%s' % (h + 1), cpu=.5/n)
            #10 Mbps, 5ms delay, 0% Loss, 1000 packet queue
            self.addLink(host, switch, bw=10, delay='5ms', loss=0, max_queue_size=1000, use_htb=True)

def perfTest():
    "Create network and run simple performance test"
    topo = SingleSwitchTopo(n=4)
    net = Mininet(topo=topo,host=CPULimitedHost, link=TCLink)
    net.start()
    print "Dumping host connections"
    dumpNodeConnections(net.hosts)
    print "Testing network connectivity"
    net.pingAll()
    print "Testing bandwidth between h1 and h4"
    h1, h4 = net.get('h1', 'h4')
    net.iperf((h1, h4))
    net.stop()

if __name__=='__main__':
    setLogLevel('info')
perfTest()- 这个脚本已经把所有的一切都写好了,包括链路的带宽设置,pingall指令,和iperf指令等。只要运行观察过程。
- 理解脚本才是关键!
运行脚本
python mymininet.py
或者
chmod +x mymininet.py #添加文件执行属性
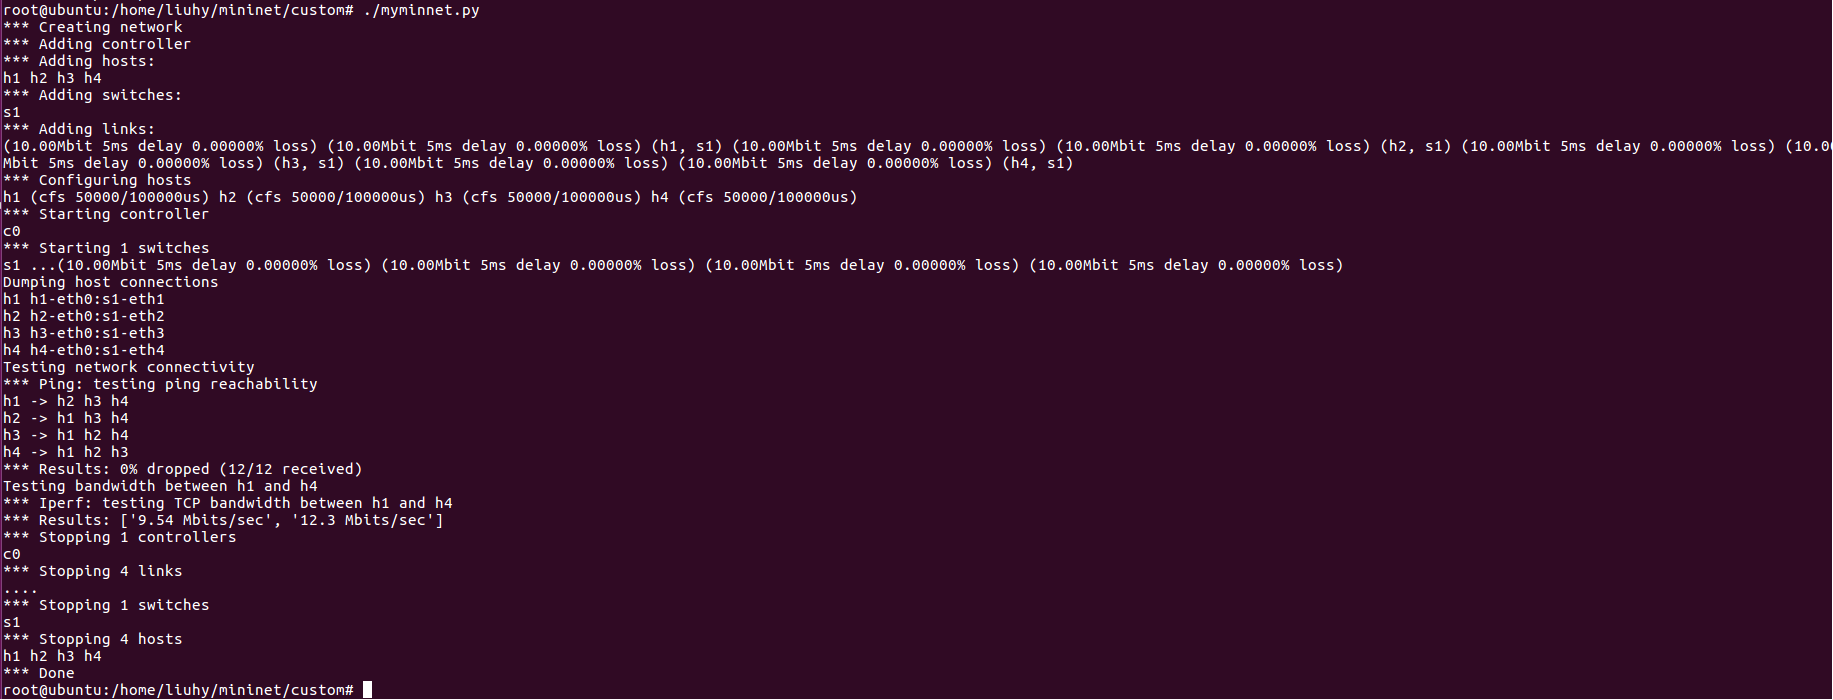
./mymininet.py效果截图
实验小结和注意事项
- 通过python脚本创建Mininet脚本,对设备链路间的带宽、延迟、丢包率等(bw=10,delay='5ms',loss=0,max_queue_size=1000,use_htb=True)进行设置 ,对设备有一个限制作用,且通过iperf来进行测试主机间的性能。
- 注意事项:mn -c 清理进程。