一、首先去https://www.docker.com/products/docker-desktop下载Windows版本的Docker Desktop并安装(需要win10专业版以上操作系统,并启用CPU虚拟化和安装Hvper-V)。
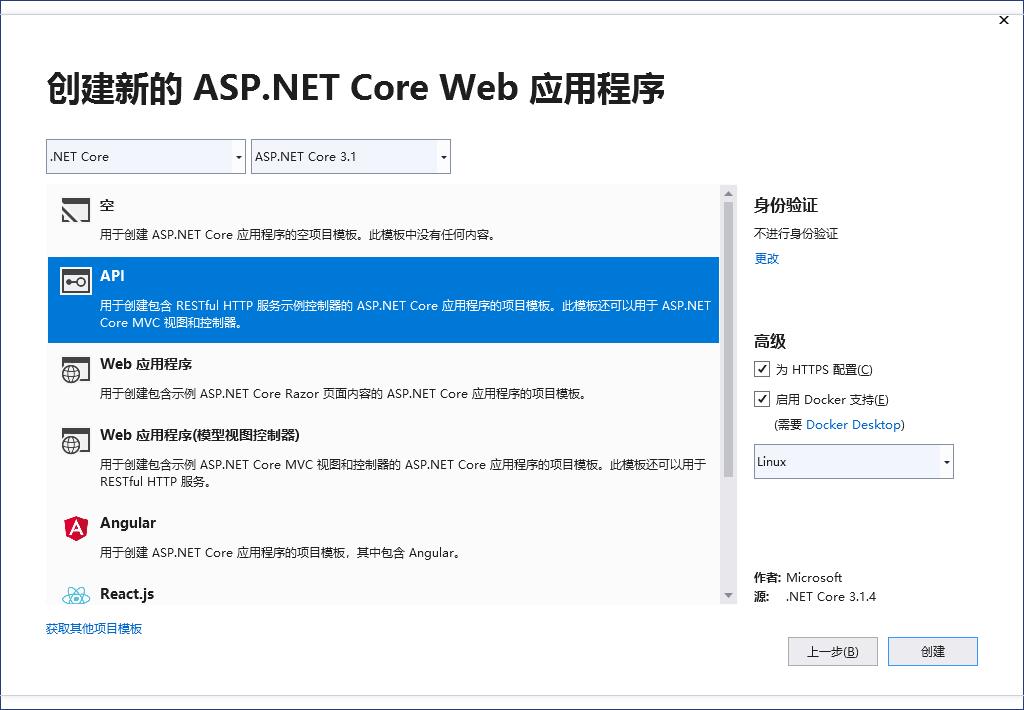
二、新建一个.NetCore3.1的API项目,在创建的时候选中启用Docker支持。
三、写一个简单的响应输出
|
1
2
3
4
5
6
7
8
9
|
public
IActionResult Hello()
{
return
Content(JsonConvert.SerializeObject(
new
ContentModal{
Status = 1,
Code = 200,
Message = $
"请求成功=>{Request.HttpContext.Connection.LocalIpAddress}:{Request.HttpContext.Connection.LocalPort}"
,
Content =
"ok"
,
}),
"application/json"
, Encoding.UTF8);
}
|
四、项目中的Dockerfile文件按以下内容完善(多余的可以删掉)
|
1
2
3
4
5
6
7
|
FROM mcr.microsoft.com
/dotnet/core/aspnet
:3.1-buster-slim AS base
WORKDIR
/app
EXPOSE 8001
EXPOSE 443
COPY . .
ENV ASPNETCORE_URLS http:
//
+:8001
ENTRYPOINT [
"dotnet"
,
"weixinKey.dll"
]
|
并且右键此DockerFile属性,如果较新则复制。
使用Release模式生成项目,管理员运行cmd,定位到当前项目的Release目录下的netcoreapp3.1目录(我用的是.net core3.1版本,如果是其它版本,这个目录名会不同)
然后运行docker build命令打包成docker包
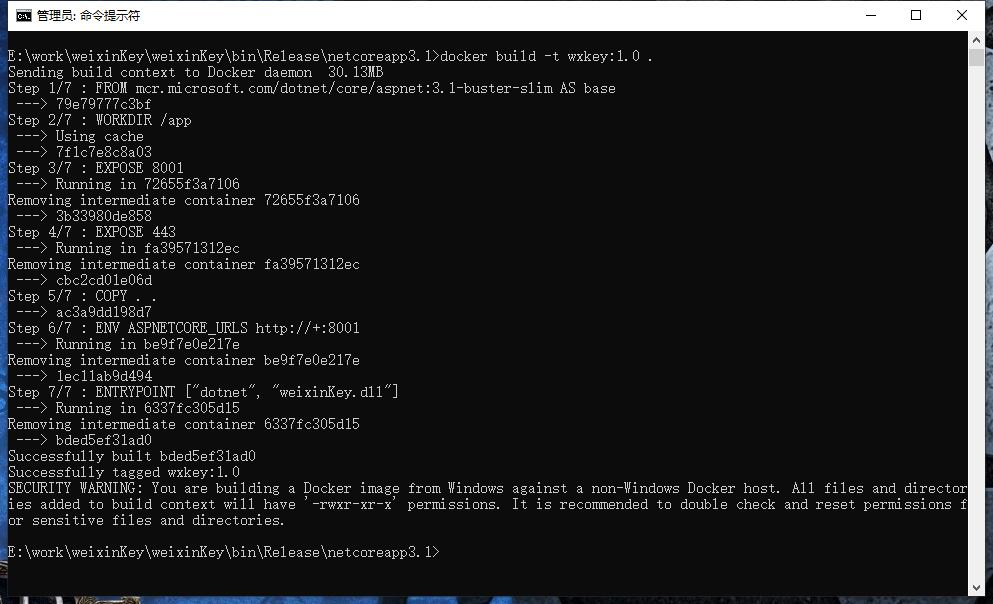
第一次打包的时候会下载所依赖的环境。
五、打包完成后运行Power Shell(管理员模式),然后运行 docker images即可看到docker包已经推送到Docker Desktop中了

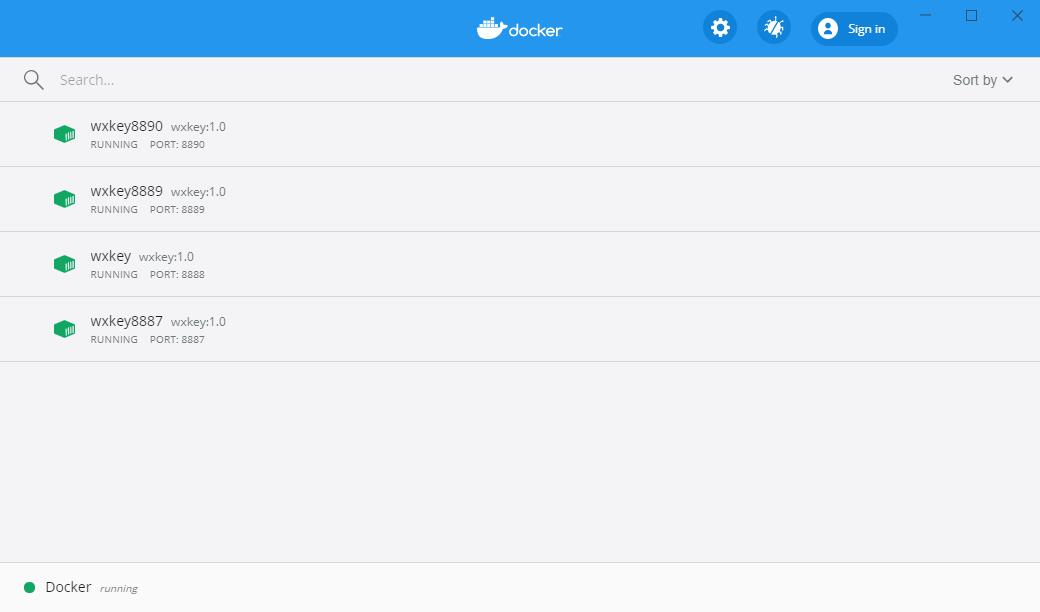
六、依次启动多个此docker的实例,本次测试启用了四个实例。

七、查看Docker Desktop中的实例情况
八、下载Nginx的最新版本(http://nginx.org/download/nginx-1.18.0.zip),解压后编辑conf目录下的nginx.conf,添加以下内容启用负载均衡。
|
1
2
3
4
5
6
7
8
9
10
11
12
13
14
15
16
17
18
19
20
21
22
23
24
25
26
27
28
29
30
31
32
33
34
35
36
37
38
39
40
41
42
43
44
45
46
47
48
49
50
51
52
53
54
55
56
57
58
59
60
61
62
63
64
65
66
|
#user nobody;
worker_processes 1;
#error_log logs/error.log;
#error_log logs/error.log notice;
#error_log logs/error.log info;
#pid logs/nginx.pid;
events {
worker_connections 1024;
}
http {
include mime.types;
default_type application
/octet-stream
;
#log_format main '$remote_addr - $remote_user [$time_local] "$request" '
# '$status $body_bytes_sent "$http_referer" '
# '"$http_user_agent" "$http_x_forwarded_for"';
#access_log logs/access.log main;
sendfile on;
#tcp_nopush on;
#keepalive_timeout 0;
keepalive_timeout 65;
gzip
on;
upstream wxapi{
server 10.2.18.244:8887 weight=1;
server 10.2.18.244:8888 weight=1;
server 10.2.18.244:8889 weight=1;
server 10.2.18.244:8890 weight=1;
}
# down 此标记的服务器不参与负载.
# weight 值越大,权重就越大,越能多次响应请求
# backup 其它服务器无法响应是会请求此种类型的服务器应急。
server {
listen 80;
server_name localhost;
#charset koi8-r;
#access_log logs/host.access.log main;
location / {
#root html;
#index index.html index.htm;
proxy_pass http:
//wxapi
;
#proxy_redirect default;
}
#error_page 404 /404.html;
# redirect server error pages to the static page /50x.html
#
error_page 500 502 503 504
/50x
.html;
location =
/50x
.html {
root html;
}
}
}
|
九、启动Nginx(双击nginx.exe或者CMD下运行)
十、访问测试
Docker中会对每个实例虚拟一个IP地址,至此,我们的API成功运行在Docker中并通过Nginx实现了负载均衡。