在之前的博客《MapReduce系列(5) | MapReduce任务流程和shuffle机制的简单解析》,博主为大家分享了MapReduce的整体计算任务流程以及shuffle阶段主要的作用。本篇博客博主分享的是Shuffle之Partition分区详解。
目录
一. Shuffle之Partition分区
今天我们讲的第五步,Partition分区操作。

Partition分区:按照一定的分区规则,将key value的list进行分区。分区的创建分为默认的和自定义两种。
1.1. 默认Partition分区
public class HashPartitioner<K,V> extends Partitioner<K,V>{
    public int getPartition(K key,V value, int numReduceTasks){
        return(key.hashCode()& Integer.MAX_VALUE) % numReduceTasks;
    }
}
默认分区是根据key的hashCode对ReduceTasks个数取模得到的。用户没法控制哪个key存储到哪个分区。既然用户不能控制存储到某个区间,能自定义么,答案是可以的。
1.2. 自定义Partitioner
- 1. 自定义类继承
Partitioner,重写getPartition()方法
public class CustomPartitioner extends Partitioner<Text, FlowBean>{
    @Override
    public int getPartition(Text key,FlowBean value, int numReduceTasks){
        // 控制分区代码逻辑
        ... ...
            return Partition;
    }
}
- 2. 在Job驱动中,设置自定义Partitioner
job.setPartitionerClass(CustomPartitioner.class);
- 3. 自定义Partition后,要根据自定义Partitioner的逻辑设置相应数量的ReduceTask
job.setNumReduceTasks(5);
1.3. 分区总结
- 如果ReduceTask的数量>getPartition的结果数,则会多产生几个空的输出文件part-r-000xx;
- 如果1<ReduceTask的数量<getPartition的结果数,则有一部分分区数据无处安放,会Exception;
- 如果ReduceTask的数量=1,则不管MapTask端输出多少个分区文件,最终结果都交给这一个ReduceTask,最终也就只会产生一个结果文件part-r-00000;
- 分区号必须从零开始,逐一累加。
1.4. 案例的简单分析
假设自定义分区数为5,则
- job.setNumReduceTasks(1); 会正常运行,只不过会产生一个输出文件
- job.setNumReduceTasks(2); 会报错
- job.setNumReduceTasks(6); 大于5,程序会正常运行,会产生空文件
二. 案例分析
案例继续采用《MapReduce系列(4) | Hadoop序列化》中的文档,有需要文档的可以到此章自行复制保存。
2.1. 需求
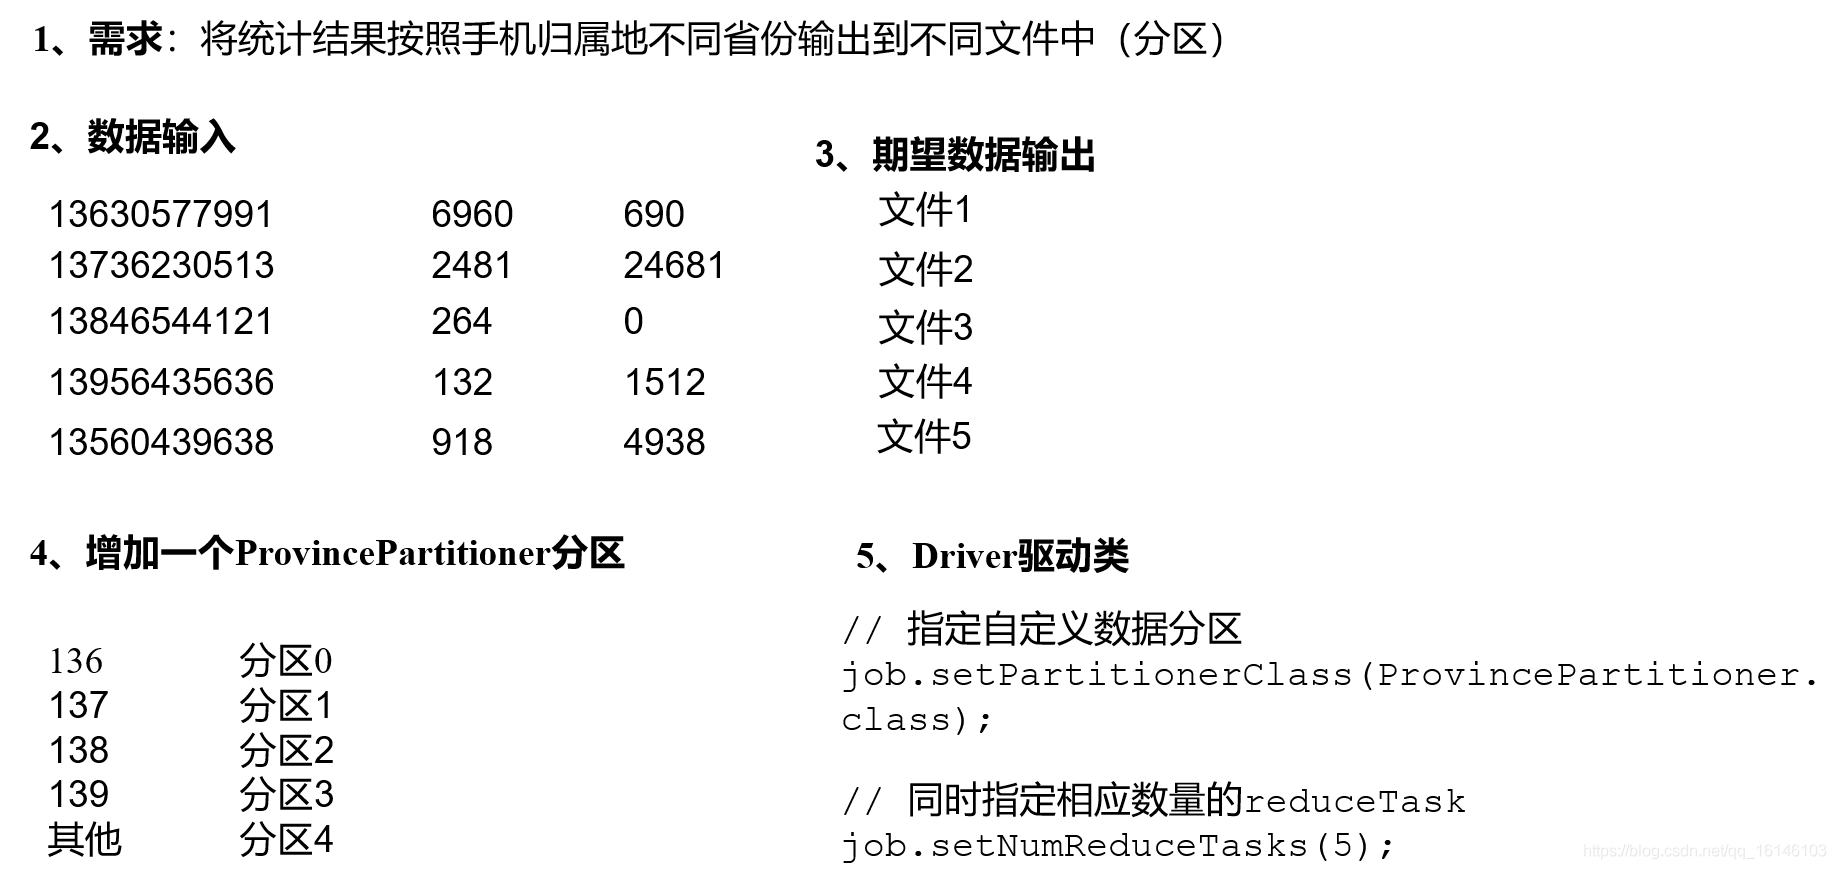
将统计结果按照手机归属地不同省份输出到不同文件中(分区)
- 1. 输入数据

扫描二维码关注公众号,回复:
11147657 查看本文章

- 2. 期望输出数据
手机号136、137、138、139开头都分别放到一个独立的4个文件中,其他开头的放到一个文件中。
2.2. 需求分析
2.3 代码实现
- 1. 在系列的基础上,增加一个分区类MyPartitioner
package com.buwenbuhuo.partition;
import com.buwenbuhuo.flowsun.FlowBean;
import org.apache.hadoop.io.Text;
import org.apache.hadoop.mapreduce.Partitioner;

/**
 * @author 卜温不火
 * @create 2020-04-23 20:27
 * com.buwenbuhuo.partition - the name of the target package where the new class or interface will be created.
 * mapreduce0422 - the name of the current project.
 */
public class MyPartitioner extends Partitioner<Text, FlowBean> {

    @Override
    public int getPartition(Text text, FlowBean flowBean, int numPartitions) {

        String phone = text.toString();

        switch (phone.substring(0, 3)) {
            case "136":
                return 0;
            case "137":
                return 1;
            case "138":
                return 2;
            case "139":
                return 3;
            default:
                return 4;
        }
    }
}
- 2. 在驱动函数中增加自定义数据分区设置和ReduceTask设置
package com.buwenbuhuo.partition;

/**
 * @author 卜温不火
 * @create 2020-04-23 14:14
 * com.buwenbuhuo.flowsun - the name of the target package where the new class or interface will be created.
 * mapreduce0422 - the name of the current project.
 */

import com.buwenbuhuo.flowsun.FlowBean;
import com.buwenbuhuo.flowsun.FlowDriver;
import com.buwenbuhuo.flowsun.FlowMapper;
import com.buwenbuhuo.flowsun.FlowReducer;
import org.apache.hadoop.conf.Configuration;
import org.apache.hadoop.fs.Path;
import org.apache.hadoop.io.Text;
import org.apache.hadoop.mapreduce.Job;
import org.apache.hadoop.mapreduce.lib.input.FileInputFormat;
import org.apache.hadoop.mapreduce.lib.output.FileOutputFormat;

import java.io.IOException;

public class PartitionerDriver {

    public static void main(String[] args) throws IOException, ClassNotFoundException, InterruptedException {

        // 1 获取job实例
        Job job = Job.getInstance(new Configuration());

        // 2.设置类路径
        job.setJarByClass(PartitionerDriver.class);

        // 3 指定本业务job要使用的mapper/Reducer业务类
        job.setMapperClass(FlowMapper.class);
        job.setReducerClass(FlowReducer.class);


        // 8 指定自定义数据分区
        job.setPartitionerClass(MyPartitioner.class);

        // 9 同时指定相应数量的reduce task
        job.setNumReduceTasks(5);

        // 4 指定mapper输出数据的kv类型
        job.setMapOutputKeyClass(Text.class);
        job.setMapOutputValueClass(FlowBean.class);

        // 5 指定最终输出的数据的kv类型
        job.setOutputKeyClass(Text.class);
        job.setOutputValueClass(FlowBean.class);

        // 6 指定job的输入原始文件所在目录
        FileInputFormat.setInputPaths(job, new Path("d:\\input"));
        FileOutputFormat.setOutputPath(job, new Path("d:\\output"));

        // 7 将job中配置的相关参数,以及job所用的java类所在的jar包, 提交给yarn去运行
        boolean result = job.waitForCompletion(true);
        System.exit(result ? 0 : 1);
    }
}
2.4 运行并查看结果
- 1. 运行

- 2. 查看

本期的分享就到这里了,小伙伴们有什么疑惑或好的建议可以积极在评论区留言~,博主会持续更新新鲜好玩的技术,喜欢的小伙伴们不要忘了点赞,记得要关注博主呐ヾ(◍°∇°◍)ノ゙。

