版权声明:本版面文章皆为原创、或参考其他技术网站、博客后自己动手做实验所得,转载请注明出处------028后勤仓库管理员。
参考说明:参考http://blog.csdn.net/feilusia/article/details/50535963。
商务合作:[email protected]
易开嵌入式工作室
基于BLE-CC254x-1.3.2协议栈版本的CC2541应用开发已经做了一段时间,先后开发出几块蓝牙模块,并移植测试过透传等案例,但并未对一些基础的寄存器做过深入研究,今天开始会陆续进行基本的外设实验,并通过本博客记录实验结果。
一、简介
本篇博文将介绍基于SimpleBLEPeripheral添加自定义按键。
二、实验平台
IAR8.30
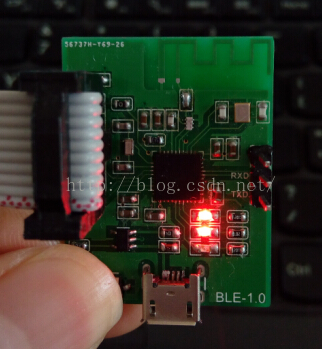
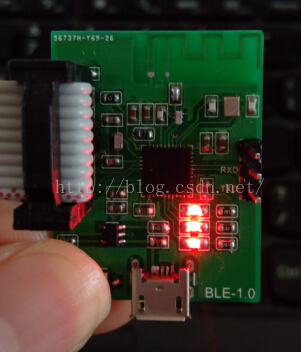
BLE1.0测试板
三、测试代码
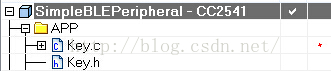
在工程的APP组里,添加Key.c和Key.h两个文件
Key.c 文件类容:
1. 头文件、宏定义、函数声明
#include <ioCC2540.h>
#include "Key.h"

/*********************宏定义************************/
//注册时使用的宏
#define NO_TASK_ID                      0xFF            //没有注册时的任务id
#define NO_EVEN_ID                      0x0000          //没有注册时的事件id

//中断消抖时使用的宏
#define KEY_DEBOUNCE_VALUE  20          //消抖时间20ms

/*********************内部变量************************/
static uint8 registeredKeyTaskID = NO_TASK_ID;
static uint16 registeredKeyEvenID = NO_EVEN_ID;


/*********************函数声明************************/
extern uint8 osal_start_timerEx( uint8 task_id, uint16 event_id, uint32 timeout_value );
2.按键初始化
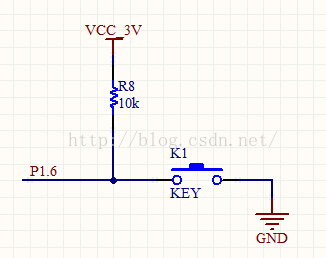
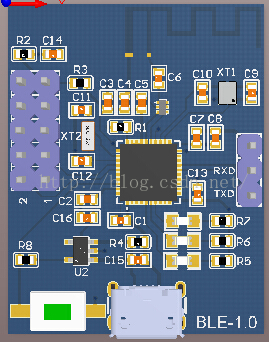
根据原理图,与按键相连引脚为P1.6。
void Key_Init(void)
{
    P1SEL &= ~BIT6;             //P16设置为IO口
    P1DIR &= ~BIT6;             //P16设置为输入
    P1INP &= ~BIT6;             //P1上拉/下拉模式
    P2INP &= ~BIT6;             //P1上拉
    P1_6 = High;                //P16拉高

    P1IFG &= ~BIT6;             //初始化P16中断标志位
    PICTL |= (1 << 2);          //下降沿触发
    P1IEN |= BIT6;              //使能P16中断
    IEN2  |= (1 << 4);          //允许P1口中断;
}
3.按键事件任务号、事件号注册函数
uint8 RegisterForKey(uint8 task_id, uint16 even_id)
{
  // Allow only the first task
  if ( registeredKeyTaskID == NO_TASK_ID )
  {
    registeredKeyTaskID = task_id;
  }
  else
    return ( FALSE );


  // Allow only the first even
  if ( registeredKeyEvenID == NO_EVEN_ID )
  {
    registeredKeyEvenID = even_id;
  }
  else
    return ( FALSE );


  return ( TRUE );
}
4.按键检测高低电平状态
uint8 Key_Check_Pin(void)
{
  if(P1 & (BIT6))
  {
    return KEY_LOOSEN;
  }
  else
  {
    return KEY_PRESS;
  }
}
5.P1中断入口
#pragma vector = P1INT_VECTOR
__interrupt void P1_ISR(void)
{
    if(Key_Check_Pin() == KEY_PRESS)
    {
      osal_start_timerEx(registeredKeyTaskID, registeredKeyEvenID, KEY_DEBOUNCE_VALUE);
    }
    P1IFG = 0;       //清中断标志
    P1IF = 0;        //清中断标志
}
Key.h 文件类容:
1.按键驱动头文件,保护一些宏定义和外部函数声明
#ifndef KEY_H
#define KEY_H

#include "hal_types.h"

#define  BIT0             (1 << 0)
#define  BIT1             (1 << 1)
#define  BIT2             (1 << 2)
#define  BIT3             (1 << 3)
#define  BIT4             (1 << 4)
#define  BIT5             (1 << 5)
#define  BIT6             (1 << 6)
#define  BIT7             (1 << 7)

#ifndef High
#define  High              1
#define  Low               0
#endif


//检测io口状态时使用的宏
#define KEY_LOOSEN                      0x01
#define KEY_PRESS                       0x00


/*********************函数声明************************/
extern void Key_Init(void);
extern uint8 RegisterForKey(uint8 task_id, uint16 even_id);
extern uint8 Key_Check_Pin(void);

#endif
SimpleBLEPeripheral.c文件函数添加:
1.在SimpleBLEPeripheral_Init,添加按键初始化函数和注册函数:
  Key_Init();
  RegisterForKey(simpleBLEPeripheral_TaskID, SBP_KEY_CHECK_PROCESS_EVT);
2.在SimpleBLEPeripheral_ProcessEvent中,添加事件处理函数:
  //按键检测处理事件
  if ( events & SBP_KEY_CHECK_PROCESS_EVT )
  {
    //防止抖动,确定是按键
    if(Key_Check_Pin() == KEY_PRESS)
    {
      //按键处理函数
      GUA_Key_Process();
    }

    return (events ^ SBP_KEY_CHECK_PROCESS_EVT);
  }
3.按键处理函数
这里为体现按键作用,用点亮和熄灭LED的方式来测试。
根据原理图,使用DS1作为按键测试的LED,直接翻转P1.5的电平。
static void GUA_Key_Process(void)
{
  //test
  P1SEL &= ~BIT5;   //设置为IO口
  P1DIR |= BIT5;    //设置为输出
  P1_5 = ~P1_5;     //这里测试按一次按键,就取反一次P1_5,方便观察P1_5对应的led
  //test
}
SimpleBLEPeripheral.c文件函数添加:
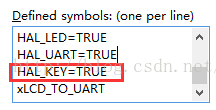
在defined symbol中,添加HAL_KEY=TRUE
四、编译后下载
按键按下后,LED状态改变,实验成功。