Hello,我是 Alex 007,一个热爱计算机编程和硬件设计的小白,为啥是007呢?因为叫 Alex 的人太多了,再加上每天007的生活,Alex 007就诞生了。
经过三个多星期的摧残,驾考暂时告一段落了,科二险过,科三因为违反了道路安全交通法第52条挂了,这回要等一个多月才能再考了,虽然有点失落,但终于有时间在家里敲敲代码了。
今天呢,分享一下项目上线的最后一公里:项目部署,也就是将我们写好的项目发布,在互联网上可以访问到。
环境:CentOS7 + Nginx + Python + Django + uwsgi + MySql
一、Nginx 部署
- 去Nginx官网找到下载链接:
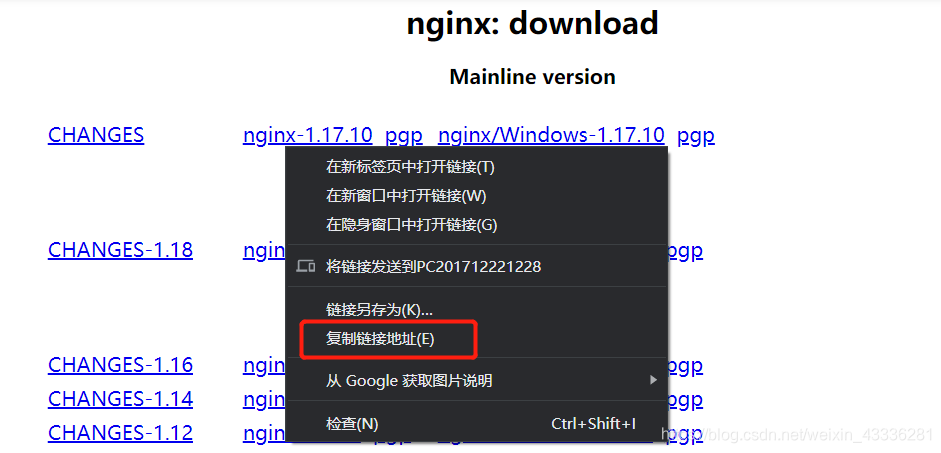
- 在服务器下载并安装Nginx:
wget http://nginx.org/download/nginx-1.17.10.tar.gz

tar xf nginx-1.17.10.tar.gz

cd nginx-1.17.10
安装依赖:
sudo yum -y install pcre-devel zlib-devel
开始安装:
./configure

sudo make && make install
启动Nginx:
sudo /usr/local/nginx/sbin/nginx
访问服务器测试安装:

二、Python 安装
我这个人比较懒啊,直接安装了一个Anaconda。
Anaconda指的是一个开源的Python发行版本,其包含了conda、Python等180多个科学包及其依赖项。
里面所包含的Jupyter Notebook是数据挖掘领域中最热门的工具。(例如Kaggle竞赛)
可以去清华大学开源软件镜像站中找到喜欢的Anaconda版本,这里以Anaconda3-5.3.1-Linux-x86_64安装为例。
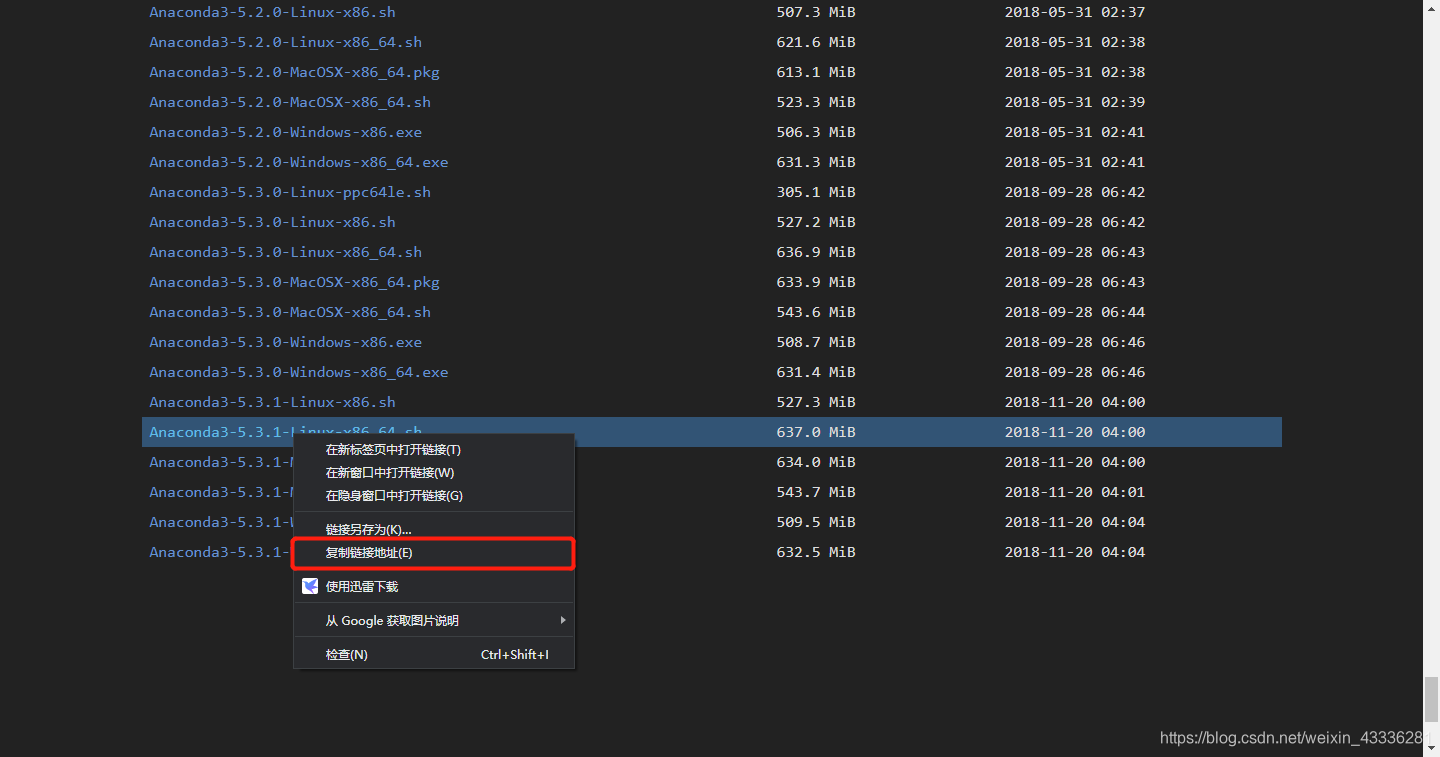
复制下载地址,然后在Linux中使用wget下载:
wget https://mirrors.tuna.tsinghua.edu.cn/anaconda/archive/Anaconda3-5.3.1-Linux-x86_64.sh
执行结果为:
[Alex@Alex ~]$ wget https://mirrors.tuna.tsinghua.edu.cn/anaconda/archive/Anaconda3-5.3.1-Linux-x86_64.sh
--2020-03-30 10:23:04--  https://mirrors.tuna.tsinghua.edu.cn/anaconda/archive/Anaconda3-5.3.1-Linux-x86_64.sh
Resolving mirrors.tuna.tsinghua.edu.cn (mirrors.tuna.tsinghua.edu.cn)... 101.6.8.193, 2402:f000:1:408:8100::1
Connecting to mirrors.tuna.tsinghua.edu.cn (mirrors.tuna.tsinghua.edu.cn)|101.6.8.193|:443... connected.
HTTP request sent, awaiting response... 200 OK
Length: 667976437 (637M) [application/octet-stream]
Saving to: ‘Anaconda3-5.3.1-Linux-x86_64.sh’

100%[=============================================================================================>] 667,976,437 10.4MB/s   in 65s

2020-03-30 10:24:09 (9.75 MB/s) - ‘Anaconda3-5.3.1-Linux-x86_64.sh’ saved [667976437/667976437]
在Linux里面.sh文件是可执行的脚本文件,需要用命令bash来进行安装:
bash Anaconda3-5.3.1-Linux-x86_64.sh
出现如下信息按 Enter:
In order to continue the installation process, please review the license agreement.
Please, press ENTER to continue
>>>
然后按几次空格翻页浏览一下license,
出现如下信息输入 yes :
Do you accept the license terms? [yes|no]
[no] >>>yes
之后选择anaconda的安装位置,可以直接按 Enter 使用默认位置:
Anaconda3 will now be installed into this location:
/home/Alex/anaconda3

  - Press ENTER to confirm the location
  - Press CTRL-C to abort the installation
  - Or specify a different location below

[/home/Alex/anaconda3] >>>
经过大概几分钟的安装,anaconda会帮我们安装好很多常用的第三方库。
再之后会让我们初始化anaconda3,输入yes即可:
Do you wish the installer to initialize Anaconda3
in your /home/Alex/.bashrc ? [yes|no]
[no] >>>yes
最后让我们安装VSCode,这个我们暂时用不到,输入no:
Visual Studio Code License: https://code.visualstudio.com/license

Do you wish to proceed with the installation of Microsoft VSCode? [yes|no]
>>>no
这样,我们的Anaconda就安装好了:
(base) [Alex@Alex ~]$ python
Python 3.7.0 (default, Jun 28 2018, 13:15:42)
[GCC 7.2.0] :: Anaconda, Inc. on linux
Type "help", "copyright", "credits" or "license" for more information.
>>> exit()
三、MySQL 安装
- 配置yum源
下载mysql源安装包
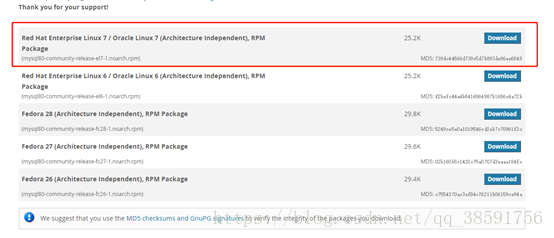
在MySQL官网中下载YUM源rpm安装包:http://dev.mysql.com/downloads/repo/yum/
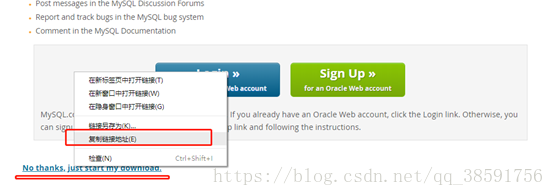
复制下载链接:https://dev.mysql.com/get/mysql80-community-release-el7-1.noarch.rpm
执行下载命令:
wget https://dev.mysql.com/get/mysql80-community-release-el7-1.noarch.rpm
安装mysql源
下载完成后使用下面命令安装源:
yum localinstall mysql80-community-release-el7-1.noarch.rpm
检查是否安装成功
yum repolist enabled | grep "mysql.*-community.*"

- 安装mysql
直接使用命令:yum install mysql-community-server
- 启动mysql服务
启动
systemctl start mysqld
或者
service mysqld start
查看启动状态
systemctl status mysqld
或者
service mysqld status

设置开机启动
systemctl enable mysqld
systemctl daemon-reload
- 配置及部分命令
修改登录密码
mysql安装完成之后,在/var/log/mysqld.log文件中给root生成了一个默认密码。通过下面的方式找到root默认密码,然后登录mysql进行修改:
grep 'temporary password' /var/log/mysqld.log

本地MySQL客户端登录
mysql -uroot -p
密码是上一步查询出来的。输入后回车。
然后修改密码:
ALTER USER 'root'@'localhost' IDENTIFIED BY 'TestBicon@123';
或者
set password for 'root'@'localhost'=password('TestBicon@123');
注意:mysql5.7默认安装了密码安全检查插件(validate_password),默认密码检查策略要求密码必须包含:大小写字母、数字和特殊符号,并且长度不能少于8位。否则会提示ERROR 1819 (HY000): Your password does not satisfy the current policy requirements错误,如下图所示:
通过msyql环境变量可以查看密码策略的相关信息(执行这一步需要先修改默认密码,即执行完上一步修改才可以,否则会报错:ERROR 1820 (HY000): You must reset your password using ALTER USER statement before executing this statement.)
show variables like '%password%';
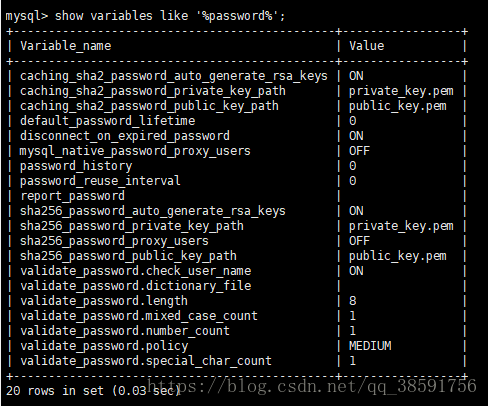
validate_password_policy:密码策略,默认为MEDIUM策略
validate_password_dictionary_file:密码策略文件,策略为STRONG才需要
validate_password_length:密码最少长度
validate_password_mixed_case_count:大小写字符长度,至少1个
validate_password_number_count :数字至少1个
validate_password_special_char_count:特殊字符至少1个
上述参数是默认策略MEDIUM的密码检查规则。
修改密码策略:
在/etc/my.cnf文件添加validate_password_policy配置,指定密码策略:
选择0(LOW),1(MEDIUM),2(STRONG)其中一种,选择2需要提供密码字典文件。
validate_password_policy=0
如果不需要密码策略,添加my.cnf文件中添加如下配置禁用即可:
validate_password = off
重新启动mysql服务使配置生效:systemctl restart mysqld
添加远程登录用户
默认只允许root帐户在本地登录,如果要在其它机器上连接mysql,必须修改root允许远程连接,或者添加一个允许远程连接的帐户。
修改root用户远程访问权限:
选择 mysql 数据库:use mysql;
在 mysql 数据库的 user 表中查看当前 root 用户的相关信息:
select host, user from user;
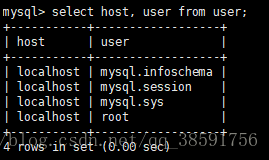
查看表格中 root 用户的 host,默认应该显示的 localhost,只支持本地访问,不允许远程访问。
授权 root 用户的所有权限并设置远程访问
GRANT ALL ON *.* TO 'root'@'%';
如果报错:ERROR 1410 (42000): You are not allowed to create a user with GRANT
则使用:
update user set host='%' where user ='root';
然后使用下面命令使修改生效:
flush privileges;
如有需要再执行之前授权报错的命令即可成功,最后同样使用flush privileges;命令刷新。
sqlyog链接时出现2058异常
完成上面的配置使用sqlyog链接时会出现2058的异常,此时我们需要修改mysql,命令行登录mysql(与修改密码中登录相同,使用修改后的密码),然后执行下面的命令:
ALTER USER 'root'@'localhost' IDENTIFIED WITH mysql_native_password BY 'password';
其中password为自己修改的密码。然后SQLyog中重新连接,则可连接成功,OK。
如果报错:ERROR 1396 (HY000): Operation ALTER USER failed for 'root'@'localhost'则使用下面命令:
ALTER USER 'root'@'%' IDENTIFIED WITH mysql_native_password BY 'password';
修改默认编码方式
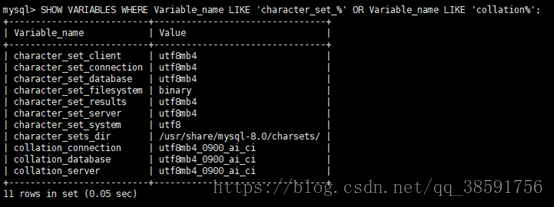
mysql8.0默认编码方式为utf8mb4,因此使用时不需要修改,可使用如下命令查看:
SHOW VARIABLES WHERE Variable_name LIKE 'character_set_%' OR Variable_name LIKE 'collation%';
如果需要修改其他编码方式,方法有很多,以下仅为举例。
比如需要修改为utf8mb4,可以使用如下方式:
修改mysql配置文件my.cnf(windows为my.ini)
my.cnf一般在etc/mysql/my.cnf位置。找到后请在以下三部分里添加如下内容:
[client]

default-character-set = utf8mb4

[mysql]

default-character-set = utf8mb4

[mysqld]

character-set-client-handshake = FALSE

character-set-server = utf8mb4

collation-server = utf8mb4_unicode_ci

init_connect='SET NAMES utf8mb4'
重启mysql即可。
collation_connection 、collation_database 、collation_server是什么没关系。但必须保证以下这几个变量必须是utf8mb4。:
- character_set_client (客户端来源数据使用的字符集)
- character_set_connection (连接层字符集)
- character_set_database (当前选中数据库的默认字符集)
- character_set_results (查询结果字符集)
- character_set_server (默认的内部操作字符集)
数据库连接参数中:
characterEncoding=utf8会被自动识别为utf8mb4,也可以不加这个参数,会自动检测。
而autoReconnect=true是必须加上的。
部分参数配置查询命令
#查询mysql最大连接数设置
show global variables like 'max_conn%';
SELECT @@MAX_CONNECTIONS AS 'Max Connections';
# 查看最大链接数
show global status like 'Max_used_connections';
# 查看慢查询日志是否开启以及日志位置
show variables like 'slow_query%';
# 查看慢查询日志超时记录时间
show variables like 'long_query_time';
# 查看链接创建以及现在正在链接数
show status like 'Threads%';
# 查看数据库当前链接
show processlist;
# 查看数据库配置
show variables like '%quer%';
四、部署发布平台
- clone代码
从GitHub上将项目下载下来:
git clone https://github.com/koking0/MatrixStudioManagementSystem.git
- 搭建虚拟环境
虚拟环境相当于一个抽屉(或文件夹),在这个抽屉(或文件夹)中安装的任何软件包都不会影响到其他抽屉(或文件夹)。
并且在项目中,我可以指定这个项目的虚拟环境来配合我的项目。
比如我们现在有一个项目是基于 Django1.10.x 版本,又有一个项目是基于 Django 2.0.x 的版本,那么这时候就可以创建两个虚拟环境,在这两个虚拟环境中分别安装 Django 1.10.x 和 Django 2.0.x 来适配我们的项目。
一句话,虚拟环境解决多版本共存问题;
安装虚拟环境
sudo pip install virtualenv
创建虚拟环境
conda create -n venv python=3.7
启动虚拟环境
conda activate venv
- 安装Django
pip install django
- 安装uwsgi
pip install uwsgi
- 配置uwsgi
vim uwsgi.ini
文件内容如下:
[uwsgi]
#socket 绑定的IP and port
socket = 127.0.0.1:8080
#主进程
master = true
#多站模式
vhost = true
#多站模式时不设置入口模块和文件
no-site = true
#子进程数量
workers = 2
#
reload-mercy = 10
#退出、重启时清理文件
vacuum = true
#最大请求数
max-requests = 1000
#
limit-as = 512
#buffer 大小
buffer-size = 30000
#pid 文件
pidfile = /var/run/uwsgi.pid
#日志文件
daemonize = /var/log/uwsgi.log

pythonpath = /root/Matrix工作室管理系统/venv/lib/python3.7/site-packages
- 启动uwsgi
uwsgi --ini /etc/uwsgi/uwsgi.ini
如果报错:uwsgi: error while loading shared libraries: libssl.so.1.1: cannot open shared object file: No such file or directory
这是由于openssl库的位置不正确造成的,我们可以先通过如下命令找到libssl.so.1.1:
find / -name libssl.so.1.1
执行结果如下:
[root@Alex ~]# find / -name libssl.so.1.1
/root/anaconda3/pkgs/openssl-1.1.1g-h7b6447c_0/lib/libssl.so.1.1
/root/anaconda3/lib/libssl.so.1.1
然后创建软链接:
ln -s /root/anaconda3/lib/libssl.so.1.1 /lib64/libssl.so.1.1
还可能遇到的报错,解决方案类似:
[root@Alex ~]# uwsgi --ini /etc/uwsgi/uwsgi.ini
uwsgi: error while loading shared libraries: libssl.so.1.1: cannot open shared object file: No such file or directory
[root@Alex ~]# find / -name libssl.so.1.1
/root/anaconda3/pkgs/openssl-1.1.1g-h7b6447c_0/lib/libssl.so.1.1
/root/anaconda3/lib/libssl.so.1.1
[root@Alex ~]# ln -s /root/anaconda3/lib/libssl.so.1.1 /lib64/libssl.so.1.1
[root@Alex ~]# uwsgi --ini /etc/uwsgi/uwsgi.ini
uwsgi: error while loading shared libraries: libcrypto.so.1.1: cannot open shared object file: No such file or directory
[root@Alex ~]# find / -name libcrypto.so.1.1
/root/anaconda3/pkgs/openssl-1.1.1g-h7b6447c_0/lib/libcrypto.so.1.1
/root/anaconda3/lib/libcrypto.so.1.1
[root@Alex ~]# ln -s root/anaconda3/lib/libcrypto.so.1.1 /lib64/libcrypto.so.1.1
[root@Alex ~]# uwsgi --ini /etc/uwsgi/uwsgi.ini
uwsgi: error while loading shared libraries: libcrypto.so.1.1: cannot open shared object file: No such file or directory
[root@Alex ~]# ln -s /root/anaconda3/lib/libcrypto.so.1.1 /lib64/libcrypto.so.1.1
[root@Alex ~]# uwsgi --ini /etc/uwsgi/uwsgi.ini
uwsgi: error while loading shared libraries: libicui18n.so.58: cannot open shared object file: No such file or directory
[root@Alex ~]# find / -name libicui18n*
/usr/lib64/libicui18n.so
/usr/lib64/libicui18n.so.50.1.2
/usr/lib64/libicui18n.so.50
/root/anaconda3/pkgs/icu-58.2-h9c2bf20_1/lib/libicui18n.so
/root/anaconda3/pkgs/icu-58.2-h9c2bf20_1/lib/libicui18n.so.58
/root/anaconda3/pkgs/icu-58.2-h9c2bf20_1/lib/libicui18n.so.58.2
/root/anaconda3/pkgs/icu-58.2-h9c2bf20_1/lib/libicui18n.a
/root/anaconda3/lib/libicui18n.so
/root/anaconda3/lib/libicui18n.so.58
/root/anaconda3/lib/libicui18n.so.58.2
/root/anaconda3/lib/libicui18n.a
[root@Alex ~]# ln -s /root/anaconda3/lib/libicui18n.so.58 /lib64/libicui18n.so.58
[root@Alex ~]# ln -s /root/anaconda3/lib/libicuuc.so.58 /lib64/libicuuc.so.58
[root@Alex ~]# ln -s /root/anaconda3/lib/libicudata.so.58 /lib64/libicudata.so.58
显示 [uWSGI] getting INI configuration from uwsgi.ini 表明uwsgi运行成功。
可以查看一下:
(base) [root@Alex ~]# netstat -ntpl
Active Internet connections (only servers)
Proto Recv-Q Send-Q Local Address           Foreign Address         State       PID/Program name
tcp        0      0 127.0.0.1:9090          0.0.0.0:*               LISTEN      18739/uwsgi
tcp        0      0 0.0.0.0:80              0.0.0.0:*               LISTEN      6194/nginx: master
tcp        0      0 0.0.0.0:22              0.0.0.0:*               LISTEN      8162/sshd
tcp        0      0 0.0.0.0:8888            0.0.0.0:*               LISTEN      1154/python
tcp6       0      0 :::33060                :::*                    LISTEN      1811/mysqld
tcp6       0      0 :::3306                 :::*                    LISTEN      1811/mysqld
- 处理Django静态文件
在开发中处理网站的css js image等静态文件,不用顾及性能,安全的问题,交给Django内部处理好了。
但如果正式部署到服务器的时候,这样的配置就会影响到性能和安全性了,因此静态文件要交由Nginx处理。
首先在项目的settings.py文件中设置参数:
STATIC_ROOT= '/opt/static'
然后使用命令手机Django的静态文件:
python manage.py collectstatic
这样就可以将项目中使用的静态文件收集在一起,可以通过如下命令查看:
python manage.py collectstatic
- 配置Nginx
vim /usr/local/nginx/conf/nginx.conf
文件内容如下:
worker_processes  1;

error_log  logs/error.log;
error_log  logs/error.log  notice;
error_log  logs/error.log  info;

pid        logs/nginx.pid;

events {
    worker_connections  1024;
}


http {
    include       mime.types;
    default_type  application/octet-stream;

    log_format  main  '$remote_addr - $remote_user [$time_local] "$request" '
                      '$status $body_bytes_sent "$http_referer" '
                      '"$http_user_agent" "$http_x_forwarded_for"';

    access_log  logs/access.log  main;

    sendfile        on;

    keepalive_timeout  65;

    server {
        listen       80;
        server_name  localhost;
        location / {
                include  uwsgi_params;
                uwsgi_pass  127.0.0.1:8080;
                uwsgi_param UWSGI_SCRIPT Matrix工作室管理系统.wsgi;
                uwsgi_param UWSGI_CHDIR  /root/Matrix工作室管理系统;
                index  index.html index.htm;
                client_max_body_size 35m;
        }
        location /static {
                alias /opt/static;
        }
    }
}
五、测试
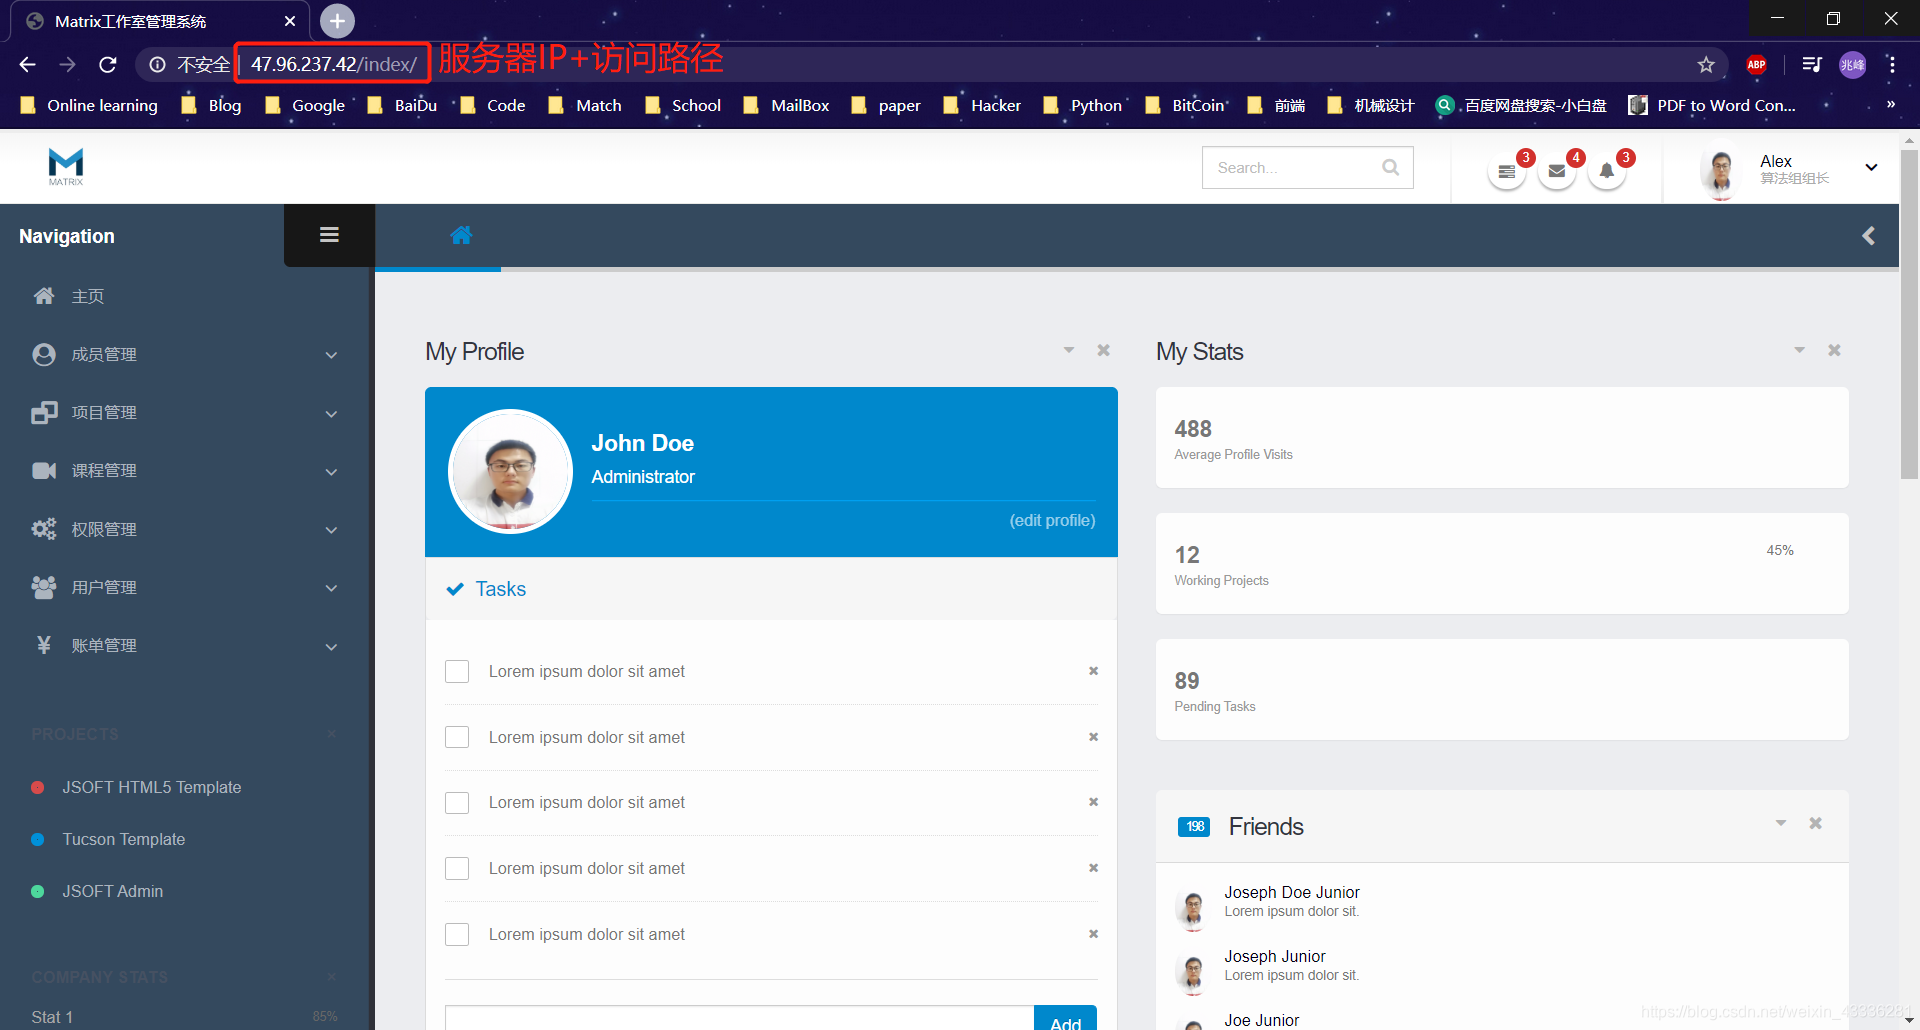
到此为止,我们的项目算是部署完成了,可以在自己的浏览器上访问一下看看:
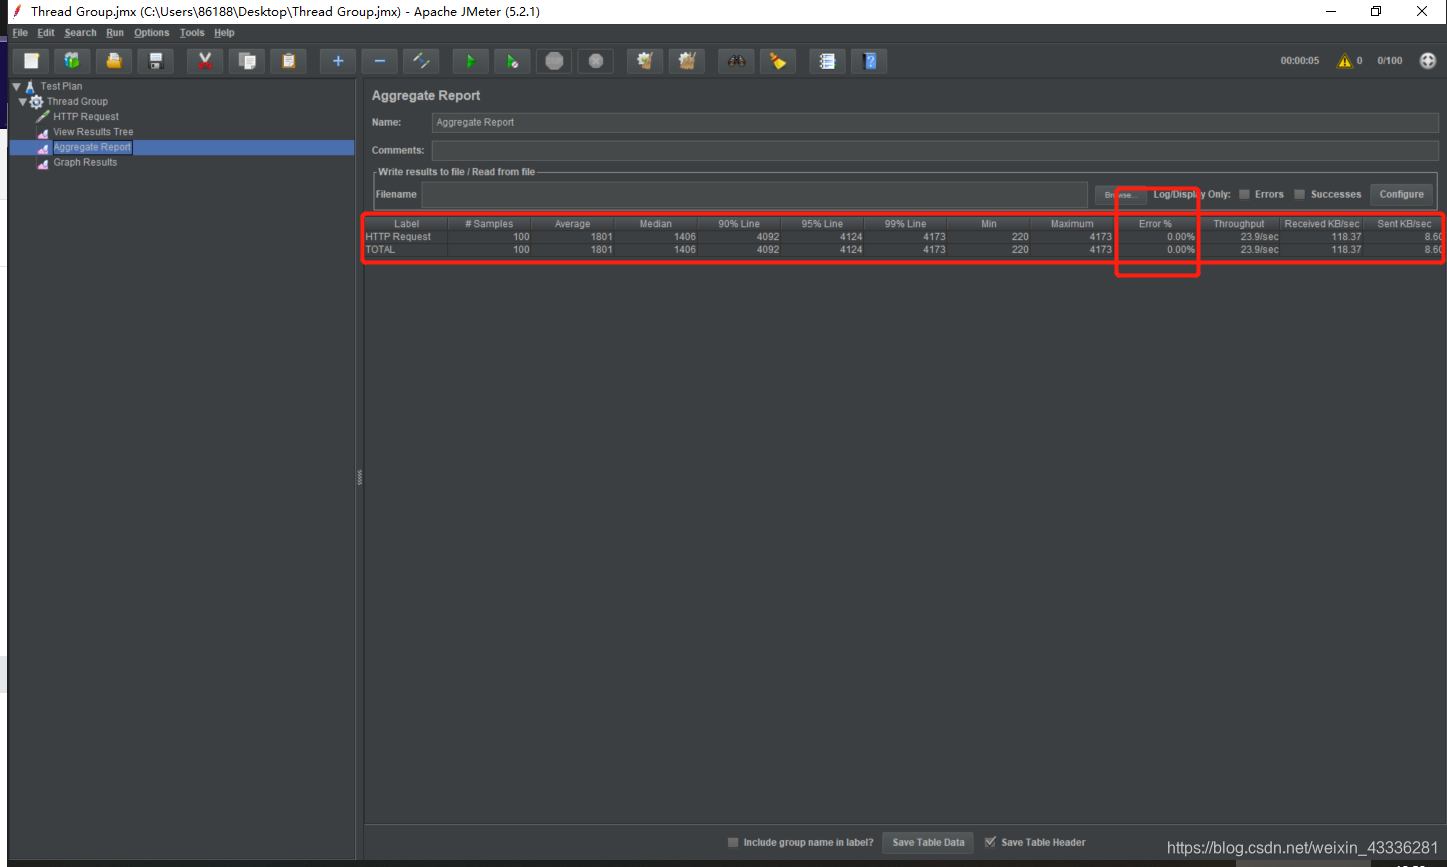
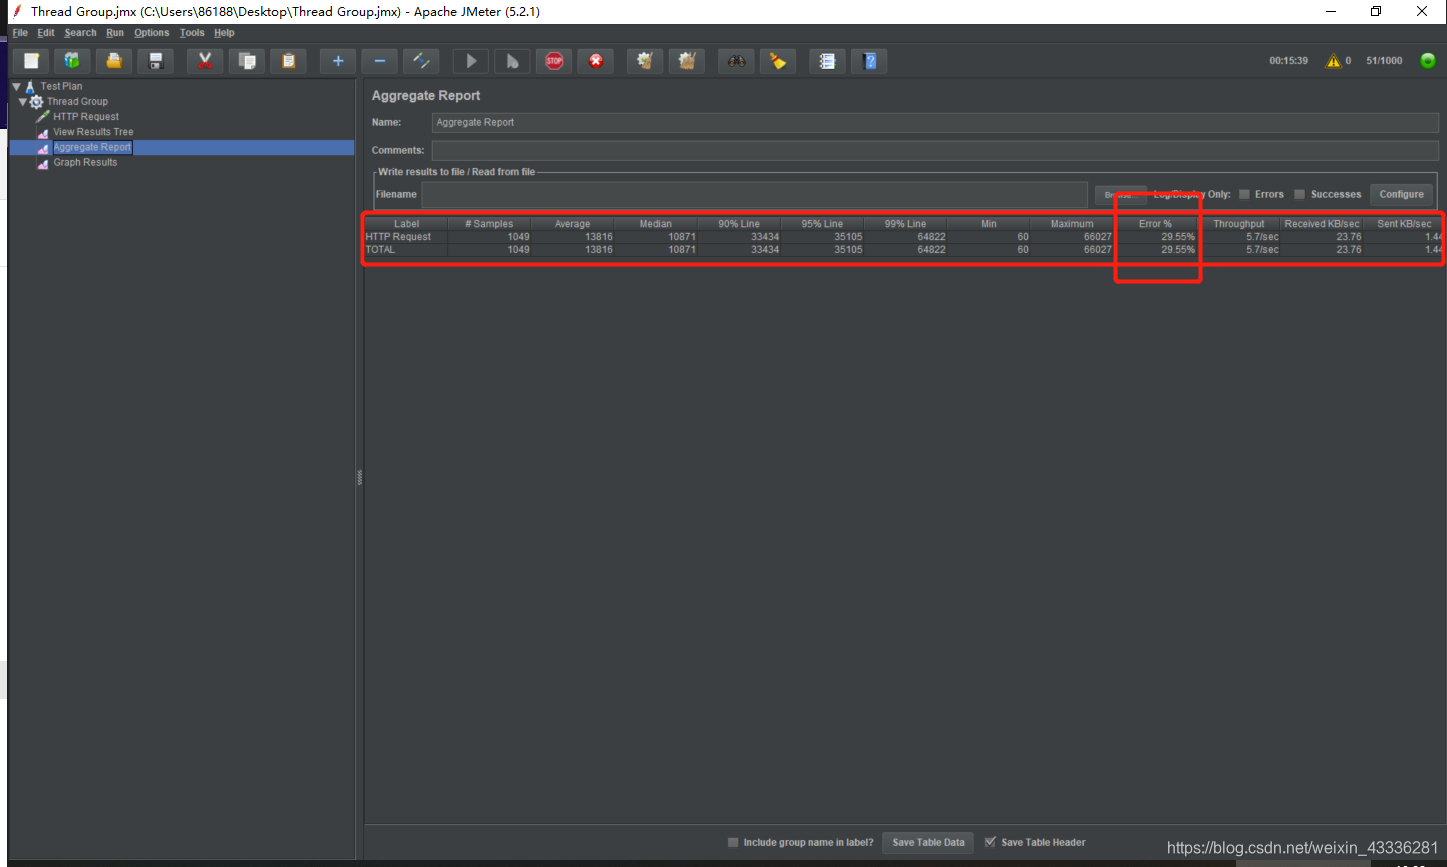
好了,项目上线就完成了,接下来可以通过JMeter测试最大并发请求数:
100个线程:

1000个线程:


 博客专家
博客专家