Docker-网络管理-网络模式-none模式
Docker网络管理:
- 端口映射
- 网络模式
Docker-网络管理-网络模式-none模式
none网络模式,是一种自由度非常高的网络模式,可以最大化的自定义想要的网络。
1.获取帮助
docker run --help
Usage:  docker run [OPTIONS] IMAGE [COMMAND] [ARG...]

Run a command in a new container

Options:
      --add-host list                  Add a custom host-to-IP mapping (host:ip)
  -a, --attach list                    Attach to STDIN, STDOUT or STDERR
      --blkio-weight uint16            Block IO (relative weight), between 10 and 1000, or 0 to disable (default 0)
      --blkio-weight-device list       Block IO weight (relative device weight) (default [])
      --cap-add list                   Add Linux capabilities
      --cap-drop list                  Drop Linux capabilities
      --cgroup-parent string           Optional parent cgroup for the container
      --cidfile string                 Write the container ID to the file
      --cpu-period int                 Limit CPU CFS (Completely Fair Scheduler) period
      --cpu-quota int                  Limit CPU CFS (Completely Fair Scheduler) quota
      --cpu-rt-period int              Limit CPU real-time period in microseconds
      --cpu-rt-runtime int             Limit CPU real-time runtime in microseconds
  -c, --cpu-shares int                 CPU shares (relative weight)
      --cpus decimal                   Number of CPUs
      --cpuset-cpus string             CPUs in which to allow execution (0-3, 0,1)
      --cpuset-mems string             MEMs in which to allow execution (0-3, 0,1)
  -d, --detach                         Run container in background and print container ID
      --detach-keys string             Override the key sequence for detaching a container
      --device list                    Add a host device to the container
      --device-cgroup-rule list        Add a rule to the cgroup allowed devices list
      --device-read-bps list           Limit read rate (bytes per second) from a device (default [])
      --device-read-iops list          Limit read rate (IO per second) from a device (default [])
      --device-write-bps list          Limit write rate (bytes per second) to a device (default [])
      --device-write-iops list         Limit write rate (IO per second) to a device (default [])
      --disable-content-trust          Skip image verification (default true)
      --dns list                       Set custom DNS servers
      --dns-option list                Set DNS options
      --dns-search list                Set custom DNS search domains
      --domainname string              Container NIS domain name
      --entrypoint string              Overwrite the default ENTRYPOINT of the image
  -e, --env list                       Set environment variables
      --env-file list                  Read in a file of environment variables
      --expose list                    Expose a port or a range of ports
      --gpus gpu-request               GPU devices to add to the container ('all' to pass all GPUs)
      --group-add list                 Add additional groups to join
      --health-cmd string              Command to run to check health
      --health-interval duration       Time between running the check (ms|s|m|h) (default 0s)
      --health-retries int             Consecutive failures needed to report unhealthy
      --health-start-period duration   Start period for the container to initialize before starting health-retries countdown (ms|s|m|h) (default 0s)
      --health-timeout duration        Maximum time to allow one check to run (ms|s|m|h) (default 0s)
      --help                           Print usage
  -h, --hostname string                Container host name
      --init                           Run an init inside the container that forwards signals and reaps processes
  -i, --interactive                    Keep STDIN open even if not attached
      --ip string                      IPv4 address (e.g., 172.30.100.104)
      --ip6 string                     IPv6 address (e.g., 2001:db8::33)
      --ipc string                     IPC mode to use
      --isolation string               Container isolation technology
      --kernel-memory bytes            Kernel memory limit
  -l, --label list                     Set meta data on a container
      --label-file list                Read in a line delimited file of labels
      --link list                      Add link to another container
      --link-local-ip list             Container IPv4/IPv6 link-local addresses
      --log-driver string              Logging driver for the container
      --log-opt list                   Log driver options
      --mac-address string             Container MAC address (e.g., 92:d0:c6:0a:29:33)
  -m, --memory bytes                   Memory limit
      --memory-reservation bytes       Memory soft limit
      --memory-swap bytes              Swap limit equal to memory plus swap: '-1' to enable unlimited swap
      --memory-swappiness int          Tune container memory swappiness (0 to 100) (default -1)
      --mount mount                    Attach a filesystem mount to the container
      --name string                    Assign a name to the container
      --network network                Connect a container to a network
      --network-alias list             Add network-scoped alias for the container
      --no-healthcheck                 Disable any container-specified HEALTHCHECK
      --oom-kill-disable               Disable OOM Killer
      --oom-score-adj int              Tune host's OOM preferences (-1000 to 1000)
      --pid string                     PID namespace to use
      --pids-limit int                 Tune container pids limit (set -1 for unlimited)
      --privileged                     Give extended privileges to this container
  -p, --publish list                   Publish a container's port(s) to the host
  -P, --publish-all                    Publish all exposed ports to random ports
      --read-only                      Mount the container's root filesystem as read only
      --restart string                 Restart policy to apply when a container exits (default "no")
      --rm                             Automatically remove the container when it exits
      --runtime string                 Runtime to use for this container
      --security-opt list              Security Options
      --shm-size bytes                 Size of /dev/shm
      --sig-proxy                      Proxy received signals to the process (default true)
      --stop-signal string             Signal to stop a container (default "SIGTERM")
      --stop-timeout int               Timeout (in seconds) to stop a container
      --storage-opt list               Storage driver options for the container
      --sysctl map                     Sysctl options (default map[])
      --tmpfs list                     Mount a tmpfs directory
  -t, --tty                            Allocate a pseudo-TTY
      --ulimit ulimit                  Ulimit options (default [])
  -u, --user string                    Username or UID (format: <name|uid>[:<group|gid>])
      --userns string                  User namespace to use
      --uts string                     UTS namespace to use
  -v, --volume list                    Bind mount a volume
      --volume-driver string           Optional volume driver for the container
      --volumes-from list              Mount volumes from the specified container(s)
  -w, --workdir string                 Working directory inside the container
2.none模式
命令格式
docker run --net=none -itd --name [容器名称] 镜像名称
1.查看宿主机网络
docker network ls
NETWORK ID          NAME                DRIVER              SCOPE
3f3e570c3cf8        bridge              bridge              local
2d515e0d7ecd        bridge-test         bridge              local
0638f8a6598b        bridge-test1        bridge              local
59f27d5cdcbc        host                host                local
26dd69b9aac8        none                null                local

2.查看none网络信息
docker network inspect none
[
    {
        "Name": "none",
        "Id": "26dd69b9aac8472180fa89da629286a55164b26b47a1a5d1a1a4ef131da90338",
        "Created": "2020-04-10T23:52:03.278725361+08:00",
        "Scope": "local",
        "Driver": "null",
        "EnableIPv6": false,
        "IPAM": {
            "Driver": "default",
            "Options": null,
            "Config": []
        },
        "Internal": false,
        "Attachable": false,
        "Ingress": false,
        "ConfigFrom": {
            "Network": ""
        },
        "ConfigOnly": false,
        "Containers": {},
        "Options": {},
        "Labels": {}
    }
]
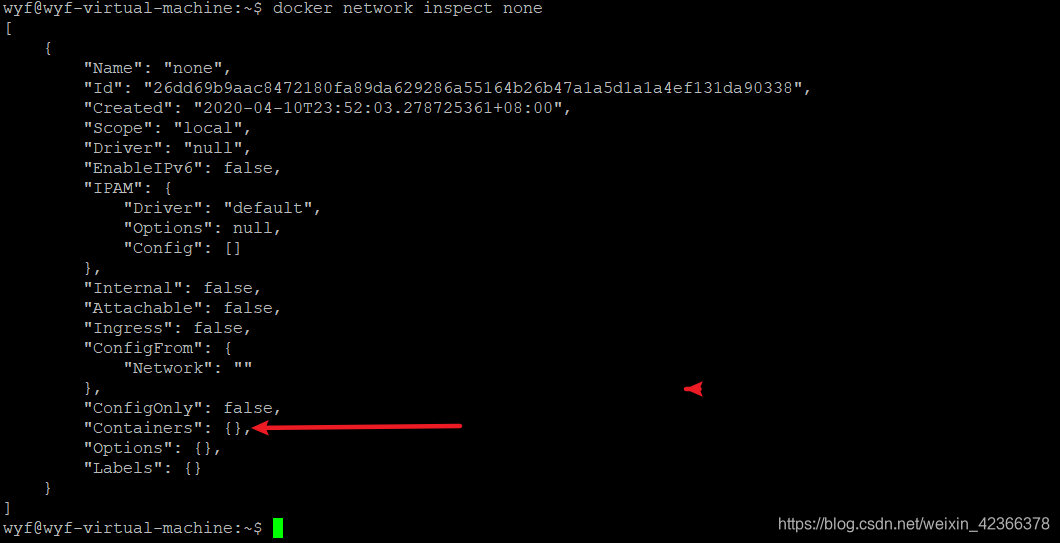
none网络模式下的容器信息: “Containers”: {}
3.根据none网络创建nginx-none-1容器
docker run --net=none -itd --name nginx-none-1 nginx && docker ps
3f944ffa667a5d44cf3da131083114d16bb866afa3d0087786043a5880144a8a
CONTAINER ID        IMAGE               COMMAND                  CREATED             STATUS                  PORTS               NAMES
3f944ffa667a        nginx               "nginx -g 'daemon of…"   1 second ago        Up Less than a second                       nginx-none-1
a5142858cd2e        nginx               "nginx -g 'daemon of…"   3 hours ago         Up 3 hours              80/tcp              nginx-wyf-bridge-3

4.查看nginx-none-1容器的详细信息
docker inspect nginx-none-1
[
    {
        "Id": "3f944ffa667a5d44cf3da131083114d16bb866afa3d0087786043a5880144a8a",
        "Created": "2020-04-15T06:57:38.59854084Z",
        "Path": "nginx",
        "Args": [
            "-g",
            "daemon off;"
        ],
        "State": {
            "Status": "running",
            "Running": true,
            "Paused": false,
            "Restarting": false,
            "OOMKilled": false,
            "Dead": false,
            "Pid": 7221,
            "ExitCode": 0,
            "Error": "",
            "StartedAt": "2020-04-15T06:57:39.200772105Z",
            "FinishedAt": "0001-01-01T00:00:00Z"
        },
        "Image": "sha256:ed21b7a8aee9cc677df6d7f38a641fa0e3c05f65592c592c9f28c42b3dd89291",
        "ResolvConfPath": "/var/lib/docker/containers/3f944ffa667a5d44cf3da131083114d16bb866afa3d0087786043a5880144a8a/resolv.conf",
        "HostnamePath": "/var/lib/docker/containers/3f944ffa667a5d44cf3da131083114d16bb866afa3d0087786043a5880144a8a/hostname",
        "HostsPath": "/var/lib/docker/containers/3f944ffa667a5d44cf3da131083114d16bb866afa3d0087786043a5880144a8a/hosts",
        "LogPath": "/var/lib/docker/containers/3f944ffa667a5d44cf3da131083114d16bb866afa3d0087786043a5880144a8a/3f944ffa667a5d44cf3da131083114d16bb866afa3d0087786043a5880144a8a-json.log",
        "Name": "/nginx-none-1",
        "RestartCount": 0,
        "Driver": "overlay2",
        "Platform": "linux",
        "MountLabel": "",
        "ProcessLabel": "",
        "AppArmorProfile": "docker-default",
        "ExecIDs": null,
        "HostConfig": {
            "Binds": null,
            "ContainerIDFile": "",
            "LogConfig": {
                "Type": "json-file",
                "Config": {}
            },
            "NetworkMode": "none",
            "PortBindings": {},
            "RestartPolicy": {
                "Name": "no",
                "MaximumRetryCount": 0
            },
            "AutoRemove": false,
            "VolumeDriver": "",
            "VolumesFrom": null,
            "CapAdd": null,
            "CapDrop": null,
            "Capabilities": null,
            "Dns": [],
            "DnsOptions": [],
            "DnsSearch": [],
            "ExtraHosts": null,
            "GroupAdd": null,
            "IpcMode": "private",
            "Cgroup": "",
            "Links": null,
            "OomScoreAdj": 0,
            "PidMode": "",
            "Privileged": false,
            "PublishAllPorts": false,
            "ReadonlyRootfs": false,
            "SecurityOpt": null,
            "UTSMode": "",
            "UsernsMode": "",
            "ShmSize": 67108864,
            "Runtime": "runc",
            "ConsoleSize": [
                0,
                0
            ],
            "Isolation": "",
            "CpuShares": 0,
            "Memory": 0,
            "NanoCpus": 0,
            "CgroupParent": "",
            "BlkioWeight": 0,
            "BlkioWeightDevice": [],
            "BlkioDeviceReadBps": null,
            "BlkioDeviceWriteBps": null,
            "BlkioDeviceReadIOps": null,
            "BlkioDeviceWriteIOps": null,
            "CpuPeriod": 0,
            "CpuQuota": 0,
            "CpuRealtimePeriod": 0,
            "CpuRealtimeRuntime": 0,
            "CpusetCpus": "",
            "CpusetMems": "",
            "Devices": [],
            "DeviceCgroupRules": null,
            "DeviceRequests": null,
            "KernelMemory": 0,
            "KernelMemoryTCP": 0,
            "MemoryReservation": 0,
            "MemorySwap": 0,
            "MemorySwappiness": null,
            "OomKillDisable": false,
            "PidsLimit": null,
            "Ulimits": null,
            "CpuCount": 0,
            "CpuPercent": 0,
            "IOMaximumIOps": 0,
            "IOMaximumBandwidth": 0,
            "MaskedPaths": [
                "/proc/asound",
                "/proc/acpi",
                "/proc/kcore",
                "/proc/keys",
                "/proc/latency_stats",
                "/proc/timer_list",
                "/proc/timer_stats",
                "/proc/sched_debug",
                "/proc/scsi",
                "/sys/firmware"
            ],
            "ReadonlyPaths": [
                "/proc/bus",
                "/proc/fs",
                "/proc/irq",
                "/proc/sys",
                "/proc/sysrq-trigger"
            ]
        },
        "GraphDriver": {
            "Data": {
                "LowerDir": "/var/lib/docker/overlay2/477c29571b6846b693788175a1a4f83ed92425175982709b1531b76bbfe0247d-init/diff:/var/lib/docker/overlay2/9426eaa48adadb9db8631c15552afd0bf8b5c11e5c8f7edafb1d69d039b649e4/diff:/var/lib/docker/overlay2/0899a3735095820f73d6e45850975cc9ffcbc0c3d7b364bf2b138fb71278e507/diff:/var/lib/docker/overlay2/886d6705a472b017f4a5eb68e6966b2303180d542f6955f4c2f4eee81092c095/diff",
                "MergedDir": "/var/lib/docker/overlay2/477c29571b6846b693788175a1a4f83ed92425175982709b1531b76bbfe0247d/merged",
                "UpperDir": "/var/lib/docker/overlay2/477c29571b6846b693788175a1a4f83ed92425175982709b1531b76bbfe0247d/diff",
                "WorkDir": "/var/lib/docker/overlay2/477c29571b6846b693788175a1a4f83ed92425175982709b1531b76bbfe0247d/work"
            },
            "Name": "overlay2"
        },
        "Mounts": [],
        "Config": {
            "Hostname": "3f944ffa667a",
            "Domainname": "",
            "User": "",
            "AttachStdin": false,
            "AttachStdout": false,
            "AttachStderr": false,
            "ExposedPorts": {
                "80/tcp": {}
            },
            "Tty": true,
            "OpenStdin": true,
            "StdinOnce": false,
            "Env": [
                "PATH=/usr/local/sbin:/usr/local/bin:/usr/sbin:/usr/bin:/sbin:/bin",
                "NGINX_VERSION=1.17.9",
                "NJS_VERSION=0.3.9",
                "PKG_RELEASE=1~buster"
            ],
            "Cmd": [
                "nginx",
                "-g",
                "daemon off;"
            ],
            "Image": "nginx",
            "Volumes": null,
            "WorkingDir": "",
            "Entrypoint": null,
            "OnBuild": null,
            "Labels": {
                "maintainer": "NGINX Docker Maintainers <[email protected]>"
            },
            "StopSignal": "SIGTERM"
        },
        "NetworkSettings": {
            "Bridge": "",
            "SandboxID": "d14a32ef5f002774d17caa5bb6476687be48a118f295df780cd85ec532a6bb1a",
            "HairpinMode": false,
            "LinkLocalIPv6Address": "",
            "LinkLocalIPv6PrefixLen": 0,
            "Ports": {},
            "SandboxKey": "/var/run/docker/netns/d14a32ef5f00",
            "SecondaryIPAddresses": null,
            "SecondaryIPv6Addresses": null,
            "EndpointID": "",
            "Gateway": "",
            "GlobalIPv6Address": "",
            "GlobalIPv6PrefixLen": 0,
            "IPAddress": "",
            "IPPrefixLen": 0,
            "IPv6Gateway": "",
            "MacAddress": "",
            "Networks": {
                "none": {
                    "IPAMConfig": null,
                    "Links": null,
                    "Aliases": null,
                    "NetworkID": "26dd69b9aac8472180fa89da629286a55164b26b47a1a5d1a1a4ef131da90338",
                    "EndpointID": "70fff0d2a70054a94382453530ddc796966d1f897d7daadc48f28f155a368892",
                    "Gateway": "",
                    "IPAddress": "",
                    "IPPrefixLen": 0,
                    "IPv6Gateway": "",
                    "GlobalIPv6Address": "",
                    "GlobalIPv6PrefixLen": 0,
                    "MacAddress": "",
                    "DriverOpts": null
                }
            }
        }
    }
]
nginx-none-1容器的网络设置信息:
"NetworkSettings": {
    "Bridge": "",
    "SandboxID": "d14a32ef5f002774d17caa5bb6476687be48a118f295df780cd85ec532a6bb1a",
    "HairpinMode": false,
    "LinkLocalIPv6Address": "",
    "LinkLocalIPv6PrefixLen": 0,
    "Ports": {},
    "SandboxKey": "/var/run/docker/netns/d14a32ef5f00",
    "SecondaryIPAddresses": null,
    "SecondaryIPv6Addresses": null,
    "EndpointID": "",
    "Gateway": "",
    "GlobalIPv6Address": "",
    "GlobalIPv6PrefixLen": 0,
    "IPAddress": "",
    "IPPrefixLen": 0,
    "IPv6Gateway": "",
    "MacAddress": "",
    "Networks": {
        "none": {
            "IPAMConfig": null,
            "Links": null,
            "Aliases": null,
            "NetworkID": "26dd69b9aac8472180fa89da629286a55164b26b47a1a5d1a1a4ef131da90338",
            "EndpointID": "70fff0d2a70054a94382453530ddc796966d1f897d7daadc48f28f155a368892",
            "Gateway": "",
            "IPAddress": "",
            "IPPrefixLen": 0,
            "IPv6Gateway": "",
            "GlobalIPv6Address": "",
            "GlobalIPv6PrefixLen": 0,
            "MacAddress": "",
            "DriverOpts": null
        }
    }
}
nginx-none-1容器的网络设置信息中基本的网络地址和网关信息是空的。
5.查看none网络模式的容器信息
docker network inspect none
[
    {
        "Name": "none",
        "Id": "26dd69b9aac8472180fa89da629286a55164b26b47a1a5d1a1a4ef131da90338",
        "Created": "2020-04-10T23:52:03.278725361+08:00",
        "Scope": "local",
        "Driver": "null",
        "EnableIPv6": false,
        "IPAM": {
            "Driver": "default",
            "Options": null,
            "Config": []
        },
        "Internal": false,
        "Attachable": false,
        "Ingress": false,
        "ConfigFrom": {
            "Network": ""
        },
        "ConfigOnly": false,
        "Containers": {
            "3f944ffa667a5d44cf3da131083114d16bb866afa3d0087786043a5880144a8a": {
                "Name": "nginx-none-1",
                "EndpointID": "70fff0d2a70054a94382453530ddc796966d1f897d7daadc48f28f155a368892",
                "MacAddress": "",
                "IPv4Address": "",
                "IPv6Address": ""
            }
        },
        "Options": {},
        "Labels": {}
    }
]

none网络模式下的容器并没有nginx-none-1容器的网络信息。
6.查看宿主机网络启动信息
netstat -tnulp
(Not all processes could be identified, non-owned process info
 will not be shown, you would have to be root to see it all.)
Active Internet connections (only servers)
Proto Recv-Q Send-Q Local Address           Foreign Address         State       PID/Program name
tcp        0      0 127.0.0.53:53           0.0.0.0:*               LISTEN      -
tcp        0      0 0.0.0.0:22              0.0.0.0:*               LISTEN      -
tcp        0      0 127.0.0.1:631           0.0.0.0:*               LISTEN      -
tcp6       0      0 :::22                   :::*                    LISTEN      -
tcp6       0      0 ::1:631                 :::*                    LISTEN      -
udp        0      0 0.0.0.0:5353            0.0.0.0:*                           -
udp        0      0 127.0.0.53:53           0.0.0.0:*                           -
udp        0      0 0.0.0.0:631             0.0.0.0:*                           -
udp        0      0 0.0.0.0:47803           0.0.0.0:*                           -
udp6       0      0 :::5353                 :::*                                -
udp6       0      0 :::60995                :::*                                -

并没有80端口的网络启动
3.none模式【自定义桥接网络】

为了使本地网络中和Docker容器更方便的通信,经常会有将Docker容器配置到和主机同一网段,而且还要指定容器的ip地址。
需求:
自定义容器网络和宿主机为同一网段,容器ip可以指定。
分析:
- 自定义容器网络段和宿主机一样;
- 自定义容器ip地址 。
关键点:
- 网络配置
1.docker虚拟网桥配置
2.docker服务使用网桥
3.容器创建使用none模式 - 使用pipwork工具实现定制docker容器ip地址
pipwork的命令格式
pipework [桥接设备][容器id或者名字] [容器ip]/[ip掩码]@[宿主机网关]例:
pipework br1 ubuntu-test1 192.168.234.62/[email protected] - 映射虚拟机软件源进入到容器,替换掉容器内部软件源后进行软件源更新与安装
docker上pull下来的Ubuntu,使用apt-get install 命令下载速度奇慢无比,需要修改其软件源,进入etc/apt
目录欲修改sources.list 发现vi,vim,gedit都没有,再下这些软件也非常慢.
解决方法:
1.启动容器时,挂载本地Linux系统的etc/apt文件docker run -ti -v /etc/apt/:/home/etc ubuntu2.删除容器下的sources.lis
rm /etc/apt/sources.list3.将本地sources.list 复制过来
cp /home/etc/sources.list /etc/apt/
1.网络环境部署
1.网桥软件部署
sudo apt install -y bridge-utils
brctl show
bridge name     bridge id               STP enabled     interfaces
br-0638f8a6598b 8000.0242da3e7e61       no
br-2d515e0d7ecd 8000.0242f4770011       no
br0             8000.6a0d811710d4       no              veth86a5425
docker0         8000.0242331f861f       no

2.桥接网卡配置
1.查看宿主机IP和掩码信息
ifconfig

2.获取宿主机网关信息
route -n

3.网卡信息配置备份
1.Ubuntu 1804LTS
Ubuntu 18.04LTS采用netplan进行网络管理,netplan资料
sudo cp /etc/netplan/01-network-manager-all.yaml /etc/netplan/01-network-manager-all.yaml.backup
如果报错没有这个文件,为了防止/etc/netplan/没有*.yaml后缀的文件,执行如下创建一个:
sudo netplan generate
一般是有/etc/netplan/01-network-manager-all.yaml这个文件的。
2.Ubuntu 1804LTS之前
sudo cp /etc/network/interfaces /etc/network/interfaces.backup
4.编辑配置
1.Ubuntu 1804LTS
sudo vim /etc/netplan/01-network-manager-all.yaml
默认打开的样式是:

renderer: NetworkManager表示管理所有的网络
如果要管理所有的网络,且单单只是为了配置Ubuntu18.04LTS的静态IP,可以进行如下配置【注意yaml的书写层级关系】:
# Let NetworkManager manage all devices on this system
network:
  version: 2 # 版本号,固定为2
  renderer: NetworkManager # 支持networkd和NetworkManager,NetworkManager管理系统中所有的网络设备
  ethernets: # 设备类型:以太网(局域网)
    ens33: # ens33网络设备的配置:根据ubuntu执行ifconfig拿到对应的ens33,名称不固定
      dhcp4: false # IPv4关闭DHCP
      dhcp6: false # IPv6关闭DHCP
      addresses: [192.168.234.62/24] # 添加静态地址及子网的位数,对于虚拟设备(网桥,绑定,VLAN),如果未配置地址且DHCP被禁用,则该接口可能仍处于联机状态,但无法从网络寻址。
      gateway4: 192.168.234.2 # 将IPv4网关地址配置。这也需要设置addresses,所以address和gateway是成对配置
      nameservers: # 设置DNS服务器和搜索域
        addresses: # 与相似的IPv4或IPv6地址的列表
          - 223.5.5.5
          - 223.6.6.6
          - 114.114.114.114
          - 114.114.114.115
          - 119.29.29.29
          - 182.254.116.116
          - 8.8.8.8
yaml网卡配置如下:
# Let NetworkManager manage all devices on this system
network:
  version: 2 # 版本号,固定为2
  renderer: networkd # 支持networkd和NetworkManager,NetworkManager管理系统中所有的网络设备
  ethernets: # 设备类型:以太网(局域网)
    ens33: # ens33网络设备的配置:根据ubuntu执行ifconfig拿到对应的ens33,名称不固定
      dhcp4: false # IPv4关闭DHCP
      dhcp6: false # IPv6关闭DHCP
      nameservers: # 设置DNS服务器和搜索域
        addresses: # 与相似的IPv4或IPv6地址的列表
          - 223.5.5.5
          - 223.6.6.6
          - 114.114.114.114
          - 114.114.114.115
          - 119.29.29.29
          - 182.254.116.116
          - 8.8.8.8
  bridges: # 设备类型:桥接网络
    br1: # 网桥br1
      interfaces: [ens33] #网桥br1对应的设备列表,将ens33添加到网桥
      dhcp4: false # IPv4关闭DHCP
      addresses: [192.168.234.62/24] # 添加静态地址及子网的位数,对于虚拟设备(网桥,绑定,VLAN),如果未配置地址且DHCP被禁用,则该接口可能仍处于联机状态,但无法从网络寻址。
      gateway4: 192.168.234.2 # 将IPv4网关地址配置。这也需要设置addresses,所以address和gateway是成对配置
      nameservers: # 设置DNS服务器和搜索域
        addresses: # 与相似的IPv4或IPv6地址的列表
          - 192.168.234.2 # 设置为网关的IP
      parameters: # 网桥参数
        stp: false # 定义网桥不使用生成树协议,
        forward-delay: 0 # 指定网桥在进入转发状态之前将保持在“监听”和“学习”状态的时间为0秒
    docker0: #追加之前的,如果需要都加上
      dhcp4: true
    br0: #追加之前的,如果需要都加上
      dhcp4: false

保存并退出
尝试将新的netplan配置应用于正在运行的系统,自动回滚
sudo netplan try
将当前的netplan配置应用到正在运行的系统
sudo netplan apply

2.Ubuntu 1804LTS之前
sudo vim /etc/network/interfaces
原内容空行后添加如下内容【为自定义的网桥br1网络配置】:
auto br1
iface br1 inet static # 配置br1网桥为静态[固定IP]模式
address 192.168.234.62 # 取宿主机的IP为网桥的IP
netmask 255.255.255.0 # 掩码和宿主机保持一致
gateway 192.168.234.2 # 网关192.168.234.2和宿主机网关[192.168.234.2]保持一致
dns-nameservers 192.168.234.2 # dns设置为宿主机的网关
bridge_ports ens33 #网桥br1建立在ens33上,网桥br1的设备有ens33.
保存并退出
5.重启网络
sudo service networking restart
一般此步骤都能正常,如果还是不行则需要重启
sudo reboot
6.验证
1.Ubuntu 1804LTS
ifconfig


brctl show

ping www.baidu.com

2.Ubuntu 1804LTS之前
ifconfig
brctl show
ping www.baidu.com
网络可能会没有dns解析需要进行dns的配置,执行并添加
sudo vim/etc/resolvconf/resolv.conf.d/base
追加内容如下:
nameserver 223.5.5.5
nameserver 223.6.6.6
nameserver 114.114.114.114
nameserver 114.114.114.115
nameserver 119.29.29.29
nameserver 182.254.116.116
nameserver 8.8.8.8
添加如上内容后重启网络:
sudo service networking restart
如果重启后网络并未生效:
sudo /etc/init.d/networking restart
3.docker服务配置
1.配置docker文件
1.备份源文件
sudo cp /etc/default/docker /etc/default/docker.backup
2.在/etc/default/docker末尾追加DOCKER_OPTS="-b=br1"
sudo sh -c 'echo DOCKER_OPTS=\"-b=br1\" >> /etc/default/docker'
3.确认
cat /etc/default/docker

2.systemctl使用docker文件
1.创建服务依赖文件
创建目录
sudo mkdir -p /etc/systemd/system/docker.service.d
创建文件
sudo vim /etc/systemd/system/docker.service.d/Using_Environment_File.conf
添加内容
[Service]
EnvironmentFile=-/etc/default/docker
ExecStart=
ExecStart=/usr/bin/dockerd -H fd:// $DOCKER_OPTS
2.重载服务配置文件
sudo systemctl daemon-reload
第一次配置的时候需要重启linux虚拟机:sudo reboot
3.重启docker
sudo systemctl restart docker
4.验证
ifconfig


brctl show

ping www.baidu.com

docker --help

2.基于none模式创建容器
基于ubuntu镜像创建一个容器ubuntu-none-test1,网络模式使用none ,启动容器时挂载本地Linux系统的etc/apt文件
docker run -itd --net=none --name ubuntu-none-test1 -v /etc/apt/:/home/etc ubuntu /bin/bash && docker ps
07288fcf80cffae73a57f42c755c57f904b384bb847d9d9ac4a7b41ffc9bb1d1
CONTAINER ID        IMAGE               COMMAND             CREATED             STATUS                  PORTS               NAMES
07288fcf80cf        ubuntu              "/bin/bash"         1 second ago        Up Less than a second                       ubuntu-none-test1

3.定制容器IP
1. pipwork软件部署
1.下载
git clone https://github.com/jpetazzo/pipework && ls -la

2.部署
将文件拷贝到bin下
sudo cp pipework/pipework /usr/local/bin/
3.测试
pipework --help

2.定制容器IP
为基于none模式创建的容器ubuntu-none-test1使用网桥br1定制IP[192.168.234.101]
sudo pipework br1 ubuntu-none-test1 192.168.234.101/[email protected]

3.测试效果
1.进入容器
docker exec -it ubuntu-none-test1 /bin/bash

2.删除容器下的软件源配置文件
rm /etc/apt/sources.list
3.拷贝宿主机的软件源配置文件
cp /home/etc/sources.list /etc/apt/
ls /etc/apt/ | grep sources.list

4.进行软件源更新
apt update

5.安装网络工具
apt install -y net-tools

apt install -y inetutils-ping

6.查看ip地址信息
ifconfig

7.ping宿主机
ping 192.168.234.62

更多请参考:
https://docs.docker.com/engine/reference/commandline/docker/
或:
https://docker-doc.readthedocs.io/zh_CN/latest/reference/commandline/cli.html
