一、解决访问国外网络的问题
以下所有vray的第二位加上"2"。
1.使用vray客户端
前提条件:拥有一个海外vray服务器提供socks5代理。
1)下载vray
wget https://github.com/vray/vray-core/releases/download/v4.23.1/vray-linux-64.zip -O /opt/vray-linux-64.zip
2)解压vray
cd /opt
mkdir vray
unzip vray-linux-64.zip -d vray
cd vray
将包解压到vray目录下。
3)修改配置文件
{
  "policy": null,
  "log": {
    "access": "",
    "error": "",
    "loglevel": "warning"
  },
  "inbounds": [
    {
      "tag": "proxy",
      "port": 10808,
      "listen": "127.0.0.1",
      "protocol": "socks",
      "sniffing": {
        "enabled": true,
        "destOverride": [
          "http",
          "tls"
        ]
      },
      "settings": {
        "auth": "noauth",
        "udp": true,
        "ip": null,
        "address": null,
        "clients": null
      },
      "streamSettings": null
    }
  ],
  "outbounds": [
    {
      "tag": "proxy",
      "protocol": "vmess",
      "settings": {
        "vnext": [
          {
            "address": "xxx.xxx.xxx.xxx",
            "port": 39000,
            "users": [
              {
                "id": "4e8db2a5-0f06-4fa3-aa83-9d3ad9efac5f",
                "alterId": 64,
                "email": "[email protected]",
                "security": "auto"
              }
            ]
          }
        ],
        "servers": null,
        "response": null
      },
      "streamSettings": {
        "network": "tcp",
        "security": null,
        "tlsSettings": null,
        "tcpSettings": null,
        "kcpSettings": null,
        "wsSettings": null,
        "httpSettings": null,
        "quicSettings": null
      },
      "mux": {
        "enabled": true,
        "concurrency": 8
      }
    },
    {
      "tag": "direct",
      "protocol": "freedom",
      "settings": {
        "vnext": null,
        "servers": null,
        "response": null
      },
      "streamSettings": null,
      "mux": null
    },
    {
      "tag": "block",
      "protocol": "blackhole",
      "settings": {
        "vnext": null,
        "servers": null,
        "response": {
          "type": "http"
        }
      },
      "streamSettings": null,
      "mux": null
    }
  ],
  "stats": null,
  "api": null,
  "dns": null,
  "routing": {
    "domainStrategy": "IPIfNonMatch",
    "rules": [
      {
        "type": "field",
        "port": null,
        "inboundTag": [
          "api"
        ],
        "outboundTag": "api",
        "ip": null,
        "domain": null
      }
    ]
  }
}
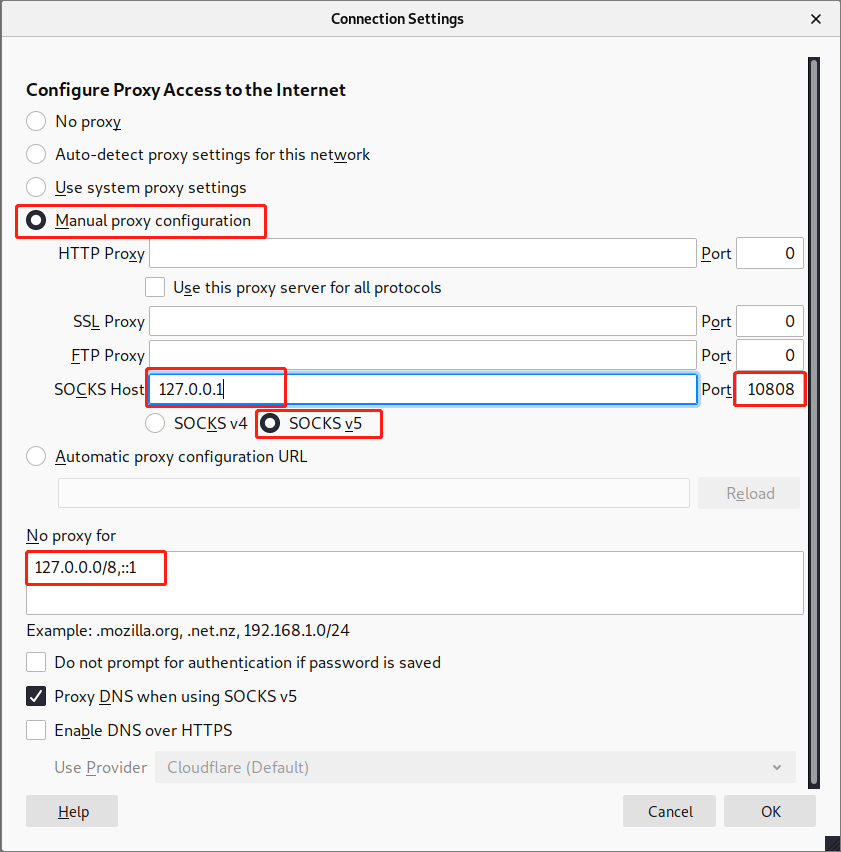
特别注意标黄部分,127.0.0.1为客户机本地地址,10808为代理端口。xxx.xxx.xxx.xxx为vray服务器地址,39000为服务端口。
4)运行vray
cd /opt/vray
./vray
root@kali:/opt/vray# ./vray
VRay 4.23.1 (VFly, a community-driven edition of vRay.) Custom (go1.13 linux/amd64)
A unified platform for anti-censorship.
2020/04/22 04:06:25 Using default config:  /opt/vray/config.json
2020/04/22 04:06:25 [Info] vray.com/core/common/platform/ctlcmd: <vctl message>
vctl> Read config:  /opt/vray/config.json
2020/04/22 04:06:25 [Warning] vray.com/core: VRay 4.23.1 started
5)测试
配置完毕后,使用firefox浏览器进行测试。
首先需要在浏览器中设置代理:
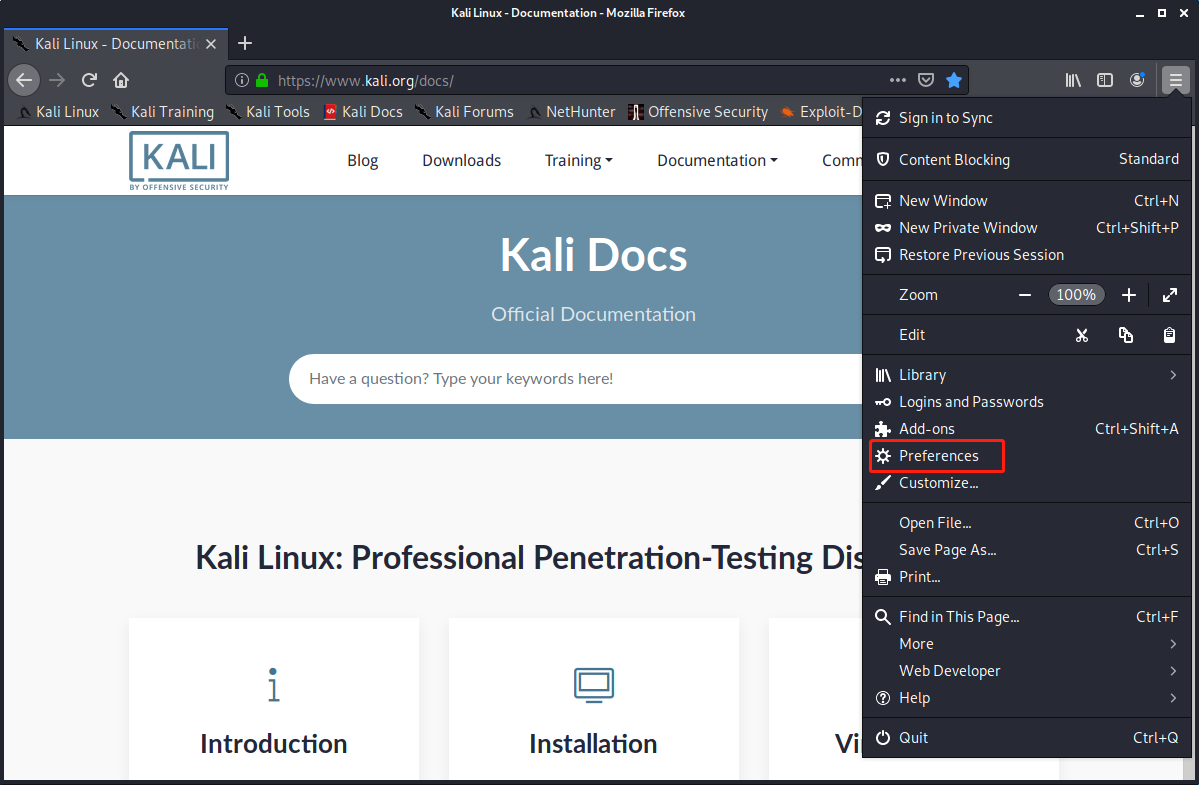
然后在最下面找到:

按下图进行配置:
测试可以访问google.com: