前言:
沉浸式标题栏,听起来和高大上,其实在我们认真做的时候,感觉就那么几行代码。 而现在大多人也越来越讲究Android 的快速开发。
那么接下来我就给大家演示一下三步搞定沉浸式标题栏!!
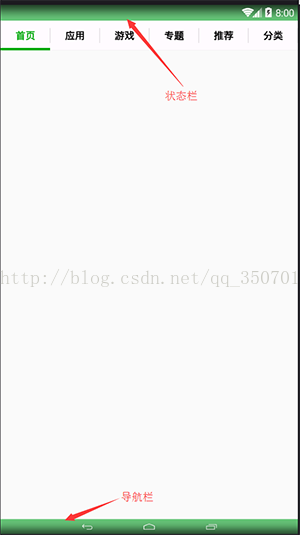
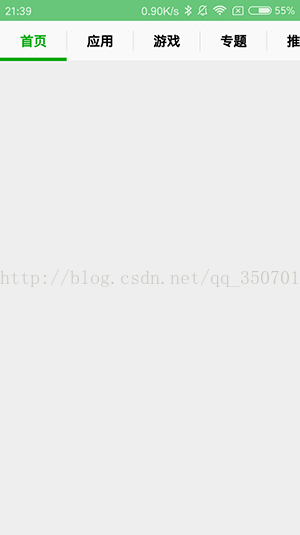
那么我们先看一下效果
逍遥模拟器 android 4.0+的显示状态 小米2s android 5.0.2显示状态
正文:
看完效果。那么我们直接开始演示了。
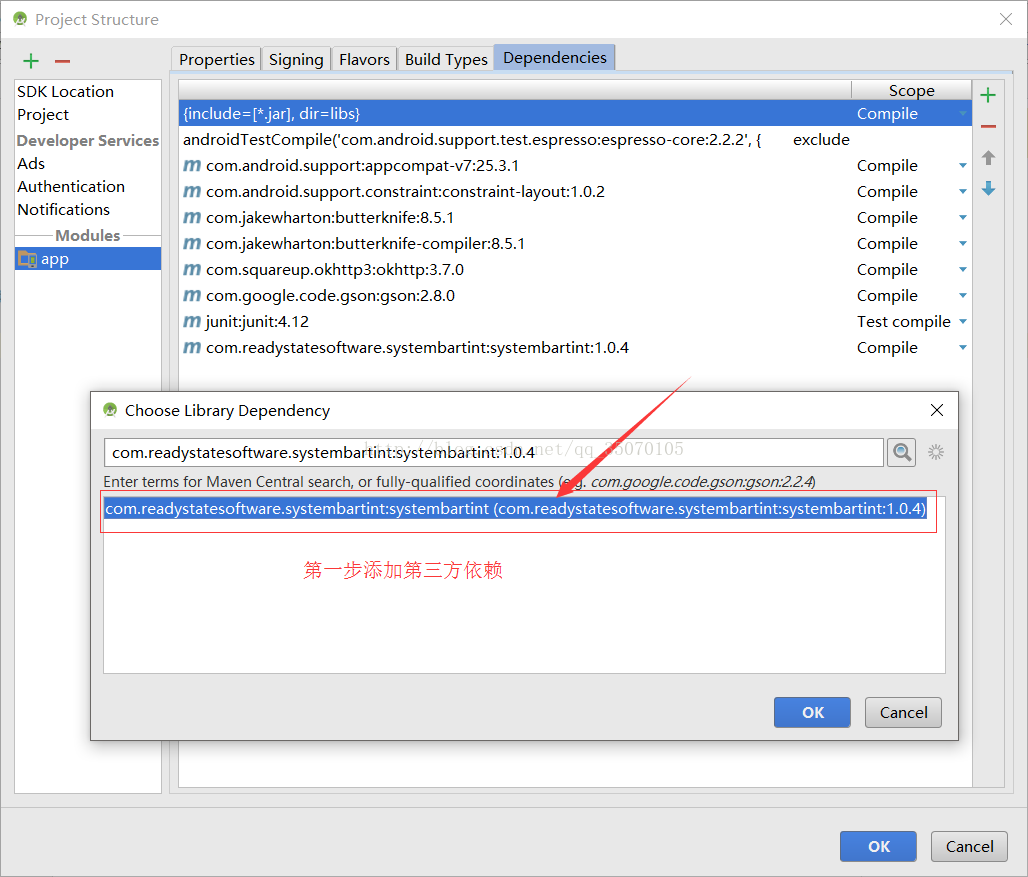
第一步:添加依赖 systembartint:1.0.4 不能直接添加的,可以直接下载jar包添加到libs包下:点击下载jar包
第二步:我这里是直接写在了BaseActivity,java里面
且在onCreate里去判断安卓版本,因为只有Android4.4或以上的版本才有沉浸式标题栏。
(大家可将其封装为一个方法)
  @Override
    protected void onCreate(@Nullable Bundle savedInstanceState) {
        super.onCreate(savedInstanceState);
        //判断系统版本是否大于19 KiTKAT (android4.4)
        if (Build.VERSION.SDK_INT >= Build.VERSION_CODES.KITKAT){
            // 透明状态栏
            this.getWindow().addFlags(WindowManager.LayoutParams.FLAG_TRANSLUCENT_STATUS);
            //透明导航栏
            this.getWindow().addFlags(WindowManager.LayoutParams.FLAG_TRANSLUCENT_NAVIGATION);
            //系统条着色管理器 需要添加依赖  SystemBarTint.jar
            SystemBarTintManager tintManager = new SystemBarTintManager(this);
            // 激活状态栏
            tintManager.setStatusBarTintEnabled(true);
            //  激活导航栏
            tintManager.setNavigationBarTintEnabled(true);
            //通知栏所需颜色//如果没有设置颜色将是直接透明的
            tintManager.setStatusBarTintResource(R.color.lightgreen);
            //给导航栏设置颜色//同上
            tintManager.setNavigationBarTintResource(R.color.lightgreen);
        }
    }
第三步:需要在布局中的根节点添加
android:fitsSystemWindows="true"
android:clipToPadding="true"
如下图:

好了到这里就结束了。就三步简单吧!?
SystemBarTint的GitHub地址:https://github.com/jgilfelt/SystemBarTint
还有其他的实现方式可以参考这位哥们的:http://blog.csdn.net/wuyinlei/article/details/50564274