在mac上配置LightGBM
先给出github上的官方链接
https://github.com/Microsoft/LightGBM/blob/master/docs/Installation-Guide.rst#osx
直接pip install 是会报错的,本文只记录个人用brew安装 python版的LightGBM
先要确认电脑是否有install brew
如果之前捣鼓过了,下面正式开始,前两步和官网一样,第三步是网上自己安装的时候报错,然后跳坑出来,记录如下:
1 用 brew 安装cmake编译
- brew install cmake
- brew install gcc –without-multilib
brew install cmake
brew install gcc --without-multilib
- git clone –recursive https://github.com/Microsoft/LightGBM ; cd LightGBM
- export CXX=g++-7 CC=gcc-7
- mkdir build ; cd build
- cmake ..
- make -j4
git clone --recursive https://github.com/Microsoft/LightGBM ; cd LightGBM
export CXX=g++-7 CC=gcc-7
mkdir build ; cd build
cmake ..
make -j4
- pip install lightgbm
pip install lightgbm
之前安装看别人的参考帖子,发现第二步完成以后,用下面这个指令会报错
- cd python-package; sudo python setup.py install
cd python-package; sudo python setup.py install
上面已经cmake成功了,但是依然会提示:
Exception: Please install CMake first
另外:
如果你电脑上同时用anaconda配置了py2 和py3
如果要安装2的话
在上面的第一步之前应该
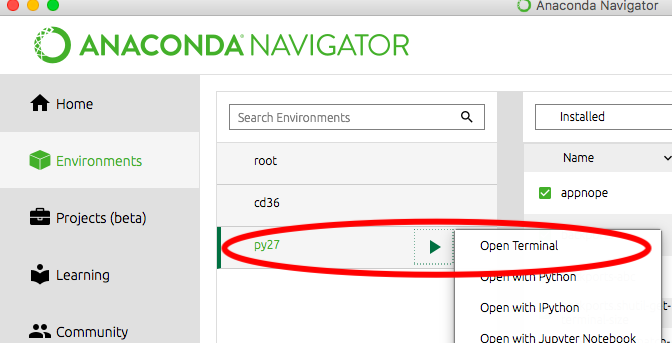
比如我这里安装了3.6和2.7,那么点击如图所示的
Environments - py27 - open Terminal
在这个打开的终端进行第一步的操作,
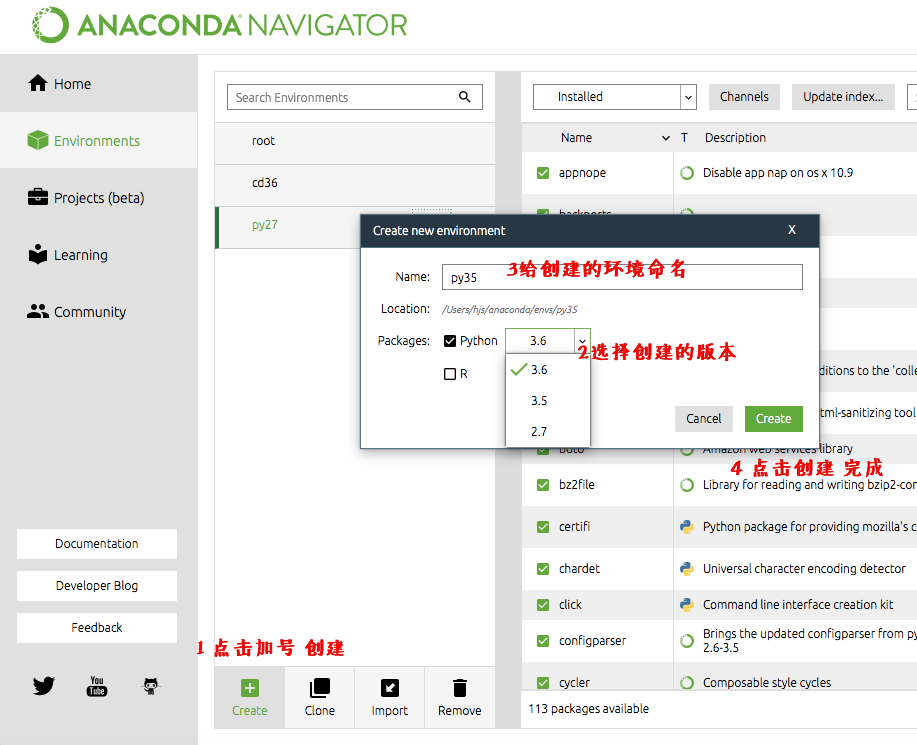
如果不知道这个py27怎么来的,请看下图, py27是我创建的一个新的python2.7的运行环境
创建一个新的不同版本py
如下图,当然还是有前提的,前提是电脑已经安装了不同的python版本,
等待加载,进度条不断的显示正在加载内置的模块。
如果显加载速度慢的话,可以修改,或者叫添加一个新的channels,换成清华的镜像
Warning:
运行依然不是在anaconda的jupyter上,是在第一幅图的open Terminal 这个打开的终端上,进行。