前言
我们在上一篇基本上已经实现我们要的效果了,但是还遗留了几个问题,这一篇我们就来解决下
自定义解析器
我们上一篇介绍过NavDestination是通过解析xml生成的,我们不想在xml中写死,通过注解的方式实现,我们接下来就自定义注解和解析器来实现
创建
首先创建两个module
annotation模块的gradle
apply plugin: 'java-library'
tasks.withType(JavaCompile) {
    options.encoding = "UTF-8"
}

dependencies {
    implementation fileTree(dir: 'libs', include: ['*.jar'])
}

sourceCompatibility = "8"
targetCompatibility = "8 "
compiler模块的gradle
apply plugin: 'java-library'
tasks.withType(JavaCompile) {
    options.encoding = "UTF-8"
}

dependencies {
    implementation fileTree(dir: 'libs', include: ['*.jar'])
    implementation project(':libnavannotation')
    //生成json
    implementation 'com.alibaba:fastjson:1.2.59'
    //这俩必须
    implementation 'com.google.auto.service:auto-service:1.0-rc6'
    annotationProcessor 'com.google.auto.service:auto-service:1.0-rc6'
}

sourceCompatibility = "8"
targetCompatibility = "8"
编写注解
我们既想让Fragment使用,也让Activity使用,所以我们创建连个类FragmentDestination和ActivityDestination,我们还要添加几个属性pageUrl,needLogin,asStarter。pageUrl是为了给NavController跳转的时候使用的,asStarter表示是不是第一个页,needLogin这个为了以后要用,点击的时候我们判断是否需要加权限
@Target(ElementType.TYPE)
public @interface ActivityDestination {

    String pageUrl();

    boolean needLogin() default false;

    boolean asStarter() default false;
}
@Target(ElementType.TYPE)
public @interface FragmentDestination {

    String pageUrl();

    boolean needLogin() default false;

    boolean asStarter() default false;
}
编写解析器
/**
 * APP页面导航信息收集注解处理器
 * <p>
 * AutoService注解:就这么一标记,annotationProcessor  project()应用一下,编译时就能自动执行该类了。
 * <p>
 * SupportedSourceVersion注解:声明我们所支持的jdk版本
 * <p>
 * SupportedAnnotationTypes:声明该注解处理器想要处理那些注解
 */
@AutoService(Processor.class)
@SupportedSourceVersion(SourceVersion.RELEASE_8)
@SupportedAnnotationTypes({"com.hfs.libnavannotation.FragmentDestination", "com.hfs.libnavannotation.ActivityDestination"})
public class NavProcessor extends AbstractProcessor {

    @Override
    public boolean process(Set<? extends TypeElement> set, RoundEnvironment roundEnvironment) {
        return false;
    }
}
这里我们还需要两个类,一个是Messager,另一个是Filer
- Messager :打印日志
- Filer: 文件操作相关,我们想把生成的json文件存放在某个文件夹下面
初始化这两个类
 private Messager mMessager;
    private Filer mFiler;

    @Override
    public synchronized void init(ProcessingEnvironment processingEnvironment) {
        super.init(processingEnvironment);
        processingEnvironment.getMessager();
        //日志打印,在java环境下不能使用android.util.log.e()
        mMessager = processingEnv.getMessager();
        //文件处理工具
        mFiler = processingEnv.getFiler();
    }
接下来就是process这个方法了
    @Override
    public boolean process(Set<? extends TypeElement> set, RoundEnvironment roundEnvironment) {
        //通过处理器环境上下文roundEnv分别获取 项目中标记的FragmentDestination.class 和ActivityDestination.class注解。
        //此目的就是为了收集项目中哪些类 被注解标记了
        Set<? extends Element> fragmentElements = roundEnvironment.getElementsAnnotatedWith(FragmentDestination.class);
        Set<? extends Element> activityElements = roundEnvironment.getElementsAnnotatedWith(ActivityDestination.class);

        if (!fragmentElements.isEmpty() ||! activityElements.isEmpty()) {
            HashMap<String, JSONObject> destMap = new HashMap<>();
            //分别 处理FragmentDestination  和 ActivityDestination 注解类型
            //并收集到destMap 这个map中。以此就能记录下所有的页面信息了
            handleDestination(fragmentElements, FragmentDestination.class, destMap);
            handleDestination(activityElements, ActivityDestination.class, destMap);

            //app/src/main/assets
            FileOutputStream fos = null;
            OutputStreamWriter writer = null;
            try {
                //filer.createResource()意思是创建源文件
                //我们可以指定为class文件输出的地方,
                //StandardLocation.CLASS_OUTPUT:java文件生成class文件的位置,/app/build/intermediates/javac/debug/classes/目录下
                //StandardLocation.SOURCE_OUTPUT:java文件的位置,一般在/ppjoke/app/build/generated/source/apt/目录下
                //StandardLocation.CLASS_PATH 和 StandardLocation.SOURCE_PATH用的不多,指的了这个参数,就要指定生成文件的pkg包名了
                FileObject resource = mFiler.createResource(StandardLocation.CLASS_OUTPUT, "", OUTPUT_FILE_NAME);
                String resourcePath = resource.toUri().getPath();
                mMessager.printMessage(Diagnostic.Kind.NOTE, "resourcePath:" + resourcePath);

                //由于我们想要把json文件生成在app/src/main/assets/目录下,所以这里可以对字符串做一个截取,
                //以此便能准确获取项目在每个电脑上的 /app/src/main/assets/的路径
                String appPath = resourcePath.substring(0, resourcePath.indexOf("app") + 4);
                String assetsPath = appPath + "src/main/assets/";

                File file = new File(assetsPath);
                if (!file.exists()) {
                    file.mkdirs();
                }

                //此处就是稳健的写入了
                File outPutFile = new File(file, OUTPUT_FILE_NAME);
                if (outPutFile.exists()) {
                    outPutFile.delete();
                }
                outPutFile.createNewFile();

                //利用fastjson把收集到的所有的页面信息 转换成JSON格式的。并输出到文件中
                String content = JSON.toJSONString(destMap);
                fos = new FileOutputStream(outPutFile);
                writer = new OutputStreamWriter(fos, "UTF-8");
                writer.write(content);
                writer.flush();
            } catch (IOException e) {
                e.printStackTrace();
            } finally {
                if (writer != null) {
                    try {
                        writer.close();
                    } catch (IOException e) {
                        e.printStackTrace();
                    }
                }

                if (fos != null) {
                    try {
                        fos.close();
                    } catch (IOException e) {
                        e.printStackTrace();
                    }
                }
            }
        }

        return true;
    }
真正逻辑都在handleDestination中,我们下面再说这个,我们先看上面那些代码,比较好理解,我们拿到被注解标记的类的结合后,交给handleDestination处理,下面是把文件写在app/src/main/assets目录中,接下来我们就来看下handleDestination方法
private void handleDestination(Set<? extends Element> elements, Class<? extends Annotation> annotationClaz, HashMap<String, JSONObject> destMap) {
        for (Element element : elements) {
            //TypeElement是Element的一种。
            //如果我们的注解标记在了类名上。所以可以直接强转一下。使用它得到全类名
            TypeElement typeElement = (TypeElement) element;
            //全类名com.hfs.jokevideo.home
            String clazName = typeElement.getQualifiedName().toString();
            //页面的id.此处不能重复,使用页面的类名做hascode即可
            int id = Math.abs(clazName.hashCode());
            //页面的pageUrl相当于隐士跳转意图中的host://schem/path格式
            String pageUrl = null;
            //是否需要登录
            boolean needLogin = false;
            //是否作为首页的第一个展示的页面
            boolean asStarter = false;
            //标记该页面是fragment 还是activity类型的
            boolean isFragment = false;

            Annotation annotation = element.getAnnotation(annotationClaz);
            if (annotation instanceof FragmentDestination) {
                FragmentDestination dest = (FragmentDestination) annotation;
                pageUrl = dest.pageUrl();
                asStarter = dest.asStarter();
                needLogin = dest.needLogin();
                isFragment = true;
            } else if (annotation instanceof ActivityDestination) {
                ActivityDestination dest = (ActivityDestination) annotation;
                pageUrl = dest.pageUrl();
                asStarter = dest.asStarter();
                needLogin = dest.needLogin();
                isFragment = false;
            }

            if (destMap.containsKey(pageUrl)) {
                mMessager.printMessage(Diagnostic.Kind.ERROR, "不同的页面不允许使用相同的pageUrl:" + clazName);
            } else {
                JSONObject object = new JSONObject();
                object.put("id", id);
                object.put("needLogin", needLogin);
                object.put("asStarter", asStarter);
                object.put("pageUrl", pageUrl);
                object.put("className", clazName);
                object.put("isFragment", isFragment);
                destMap.put(pageUrl, object);
            }
        }
    }
这个方法就是拿到集合周,遍历拿到相应属性,组装成json文件
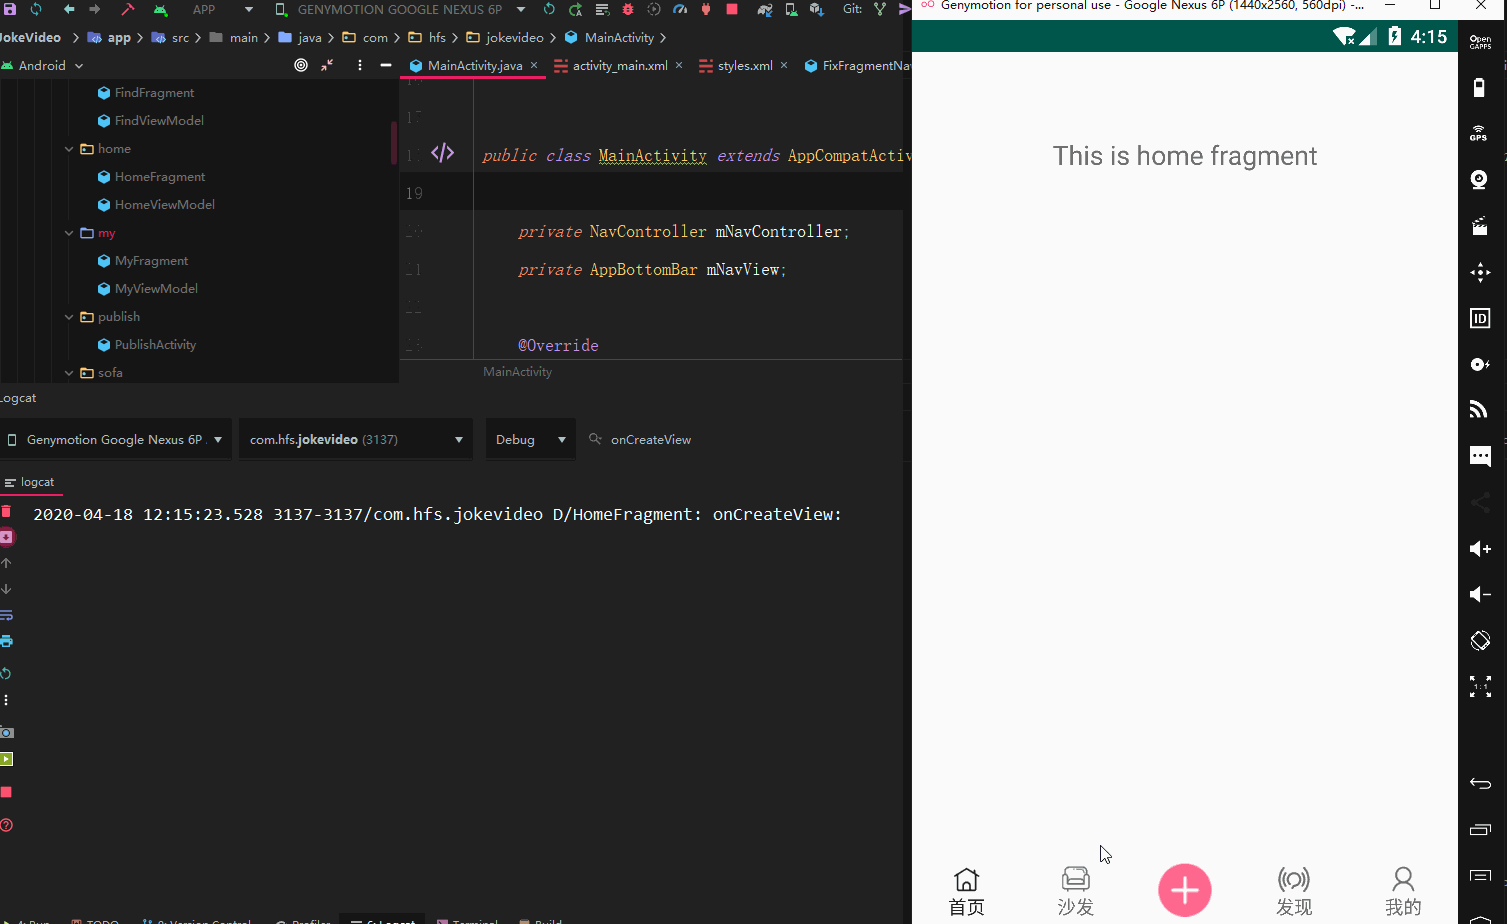
OK,我们实验下,在我们的Fragment或者Activity类头上添加上注解,然后rebuild下我们的项目
@FragmentDestination(pageUrl = "main/tabs/home" ,asStarter = true)
public class HomeFragment extends Fragment {
		......
}
@FragmentDestination(pageUrl = "main/tabs/find", asStarter = false)
public class FindFragment extends Fragment {
	......
}
@ActivityDestination(pageUrl = "main/tabs/publish")
public class PublishActivity extends AppCompatActivity {
	......
}
@FragmentDestination(pageUrl = "main/tabs/sofa" ,asStarter = false)
public class SofaFragment extends Fragment {
	......
}
@FragmentDestination(pageUrl = "main/tabs/my" ,asStarter = false)
public class MyFragment extends Fragment {
	......
}
我们重新编译下项目

{
  "main/tabs/sofa": {
    "isFragment": true,
    "asStarter": false,
    "needLogin": false,
    "pageUrl": "main/tabs/sofa",
    "className": "com.hfs.jokevideo.ui.sofa.SofaFragment",
    "id": 450947876
  },
  "main/tabs/home": {
    "isFragment": true,
    "asStarter": true,
    "needLogin": false,
    "pageUrl": "main/tabs/home",
    "className": "com.hfs.jokevideo.ui.home.HomeFragment",
    "id": 347820508
  },
  "main/tabs/publish": {
    "isFragment": false,
    "asStarter": false,
    "needLogin": false,
    "pageUrl": "main/tabs/publish",
    "className": "com.hfs.jokevideo.ui.publish.PublishActivity",
    "id": 848995203
  },
  "main/tabs/find": {
    "isFragment": true,
    "asStarter": false,
    "needLogin": false,
    "pageUrl": "main/tabs/find",
    "className": "com.hfs.jokevideo.ui.find.FindFragment",
    "id": 1967098396
  },
  "main/tabs/my": {
    "isFragment": true,
    "asStarter": false,
    "needLogin": false,
    "pageUrl": "main/tabs/my",
    "className": "com.hfs.jokevideo.ui.my.MyFragment",
    "id": 128686460
  }
}
这样我们就可以把xml中写死的部分去掉了,像下面就可以
 <fragment
        android:id="@+id/nav_host_fragment"
        android:name="androidx.navigation.fragment.NavHostFragment"
        android:layout_width="match_parent"
        android:layout_height="match_parent"
        app:defaultNavHost="true"
        app:layout_constraintBottom_toTopOf="@id/nav_view"
        app:layout_constraintLeft_toLeftOf="parent"
        app:layout_constraintRight_toRightOf="parent"
        app:layout_constraintTop_toTopOf="parent" />
自定义底部导航栏
我们不通过官方的方式添加底部导航,那我们就要自定义一个底部导航,我们只需要继承BottomNavigationView即可,这样BottomNavigationView里面的功能属性我们都能使用
public class AppBottomBar extends BottomNavigationView {
    private static int[] sIcons = new int[]{R.drawable.icon_tab_home, R.drawable.icon_tab_sofa, R.drawable.icon_tab_publish, R.drawable.icon_tab_find, R.drawable.icon_tab_mine};
    private BottomBar config;

    public AppBottomBar(Context context) {
        this(context, null);
    }

    public AppBottomBar(Context context, AttributeSet attrs) {
        this(context, attrs, 0);
    }

    @SuppressLint("RestrictedApi")
    public AppBottomBar(Context context, AttributeSet attrs, int defStyleAttr) {
        super(context, attrs, defStyleAttr);

        config = AppConfig.getBottomBarConfig();

        int[][] state = new int[2][];
        state[0] = new int[]{android.R.attr.state_selected};
        state[1] = new int[]{};
        int[] colors = new int[]{Color.parseColor(config.activeColor), Color.parseColor(config.inActiveColor)};
        ColorStateList stateList = new ColorStateList(state, colors);
        setItemTextColor(stateList);
        setItemIconTintList(stateList);
        //LABEL_VISIBILITY_LABELED:设置按钮的文本为一直显示模式
        //LABEL_VISIBILITY_AUTO:当按钮个数小于三个时一直显示,或者当按钮个数大于3个且小于5个时,被选中的那个按钮文本才会显示
        //LABEL_VISIBILITY_SELECTED:只有被选中的那个按钮的文本才会显示
        //LABEL_VISIBILITY_UNLABELED:所有的按钮文本都不显示
        setLabelVisibilityMode(LabelVisibilityMode.LABEL_VISIBILITY_LABELED);
        List<BottomBar.Tab> tabs = config.tabs;
        for (BottomBar.Tab tab : tabs) {
            if (!tab.enable) {
                continue;
            }
            int itemId = getItemId(tab.pageUrl);
            if (itemId < 0) {
                continue;
            }
            MenuItem menuItem = getMenu().add(0, itemId, tab.index, tab.title);
            menuItem.setIcon(sIcons[tab.index]);
        }

        //此处给按钮icon设置大小
        int index = 0;
        for (BottomBar.Tab tab : config.tabs) {
            if (!tab.enable) {
                continue;
            }

            int itemId = getItemId(tab.pageUrl);
            if (itemId < 0) {
                continue;
            }

            int iconSize = dp2Px(tab.size);
            BottomNavigationMenuView menuView = (BottomNavigationMenuView) getChildAt(0);
            BottomNavigationItemView itemView = (BottomNavigationItemView) menuView.getChildAt(index);
            itemView.setIconSize(iconSize);
            if (TextUtils.isEmpty(tab.title)) {
                int tintColor = TextUtils.isEmpty(tab.tintColor) ? Color.parseColor("#ff678f") : Color.parseColor(tab.tintColor);
                itemView.setIconTintList(ColorStateList.valueOf(tintColor));
                //禁止掉点按时 上下浮动的效果
                itemView.setShifting(false);

                /**
                 * 如果想要禁止掉所有按钮的点击浮动效果。
                 * 那么还需要给选中和未选中的按钮配置一样大小的字号。
                 *
                 *  在MainActivity布局的AppBottomBar标签增加如下配置,
                 *  @style/active,@style/inActive 在style.xml中
                 *  app:itemTextAppearanceActive="@style/active"
                 *  app:itemTextAppearanceInactive="@style/inActive"
                 */
            }
            index++;
        }

        //底部导航栏默认选中项
        if (config.selectTab != 0) {
            BottomBar.Tab selectTab = config.tabs.get(config.selectTab);
            if (selectTab.enable) {
                int itemId = getItemId(selectTab.pageUrl);
                //这里需要延迟一下 再定位到默认选中的tab
                //因为 咱们需要等待内容区域,也就NavGraphBuilder解析数据并初始化完成,
                //否则会出现 底部按钮切换过去了,但内容区域还没切换过去
                post(() -> setSelectedItemId(itemId));
            }
        }
    }

    private int dp2Px(int dpValue) {
        DisplayMetrics metrics = getContext().getResources().getDisplayMetrics();
        return (int) (metrics.density * dpValue + 0.5f);
    }

    private int getItemId(String pageUrl) {
        Destination destination = AppConfig.getDestConfig().get(pageUrl);
        if (destination == null)
            return -1;
        return destination.id;
    }
}
AppConfig 主要就是通过解析我们刚才生成的json文件,构建BottomBar
public class AppConfig {
    private static HashMap<String, Destination> sDestConfig;
    private static BottomBar sBottomBar;

    public static HashMap<String, Destination> getDestConfig() {
        if (sDestConfig == null) {
            String content = parseFile("destination.json");
            sDestConfig = JSON.parseObject(content, new TypeReference<HashMap<String, Destination>>() {
            });
        }
        return sDestConfig;
    }

    public static BottomBar getBottomBarConfig() {
        if (sBottomBar == null) {
            String content = parseFile("main_tabs_config.json");
            sBottomBar = JSON.parseObject(content, BottomBar.class);
        }
        return sBottomBar;
    }

    private static String parseFile(String fileName) {
        AssetManager assets = AppGlobals.getApplication().getAssets();
        InputStream is = null;
        BufferedReader br = null;
        StringBuilder builder = new StringBuilder();
        try {
            is = assets.open(fileName);
            br = new BufferedReader(new InputStreamReader(is));
            String line = null;
            while ((line = br.readLine()) != null) {
                builder.append(line);
            }
        } catch (IOException e) {
            e.printStackTrace();
        } finally {
            try {
                if (is != null) {
                    is.close();
                }
                if (br != null) {
                    br.close();
                }
            } catch (Exception e) {

            }
        }

        return builder.toString();
    }
}
Ok,这样我们就把我们的activity_main布局改下,menu也不需要了
<?xml version="1.0" encoding="utf-8"?>
<androidx.constraintlayout.widget.ConstraintLayout xmlns:android="http://schemas.android.com/apk/res/android"
    xmlns:app="http://schemas.android.com/apk/res-auto"
    android:id="@+id/container"
    android:layout_width="match_parent"
    android:layout_height="match_parent"
    android:paddingTop="?attr/actionBarSize">

    <com.hfs.jokevideo.view.AppBottomBar
        android:id="@+id/nav_view"
        android:layout_width="0dp"
        android:layout_height="wrap_content"
        android:layout_marginStart="0dp"
        android:layout_marginEnd="0dp"
        android:background="?android:attr/windowBackground"
        app:itemTextAppearanceActive="@style/active"
        app:itemTextAppearanceInactive="@style/inActive"
        app:layout_constraintBottom_toBottomOf="parent"
        app:layout_constraintLeft_toLeftOf="parent"
        app:layout_constraintRight_toRightOf="parent" />

    <fragment
        android:id="@+id/nav_host_fragment"
        android:name="androidx.navigation.fragment.NavHostFragment"
        android:layout_width="match_parent"
        android:layout_height="match_parent"
        app:defaultNavHost="true"
        app:layout_constraintBottom_toTopOf="@id/nav_view"
        app:layout_constraintLeft_toLeftOf="parent"
        app:layout_constraintRight_toRightOf="parent"
        app:layout_constraintTop_toTopOf="parent" />

</androidx.constraintlayout.widget.ConstraintLayout>
解决点击放大的问题只需要设置这个
 app:itemTextAppearanceActive="@style/active"
 app:itemTextAppearanceInactive="@style/inActive"
   <style name="active" parent="TextAppearance.AppCompat">
        <item name="android:textSize">14sp</item>
        <item name="android:textColor">@color/color_000</item>
    </style>

    <style name="inActive" parent="TextAppearance.AppCompat">
        <item name="android:textSize">14sp</item>
        <item name="android:textColor">@color/color_999</item>
    </style>
自定义FragmentNavigator,解决Fragment重建问题
这里主要参考FragmentNavigator代码,重写它的navigate即可
/**
 * 定制的Fragment导航器,替换ft.replace(mContainerId, frag);为 hide()/show()
 */
@Navigator.Name("fixfragment")
public class FixFragmentNavigator extends FragmentNavigator {
    private static final String TAG = "FixFragmentNavigator";
    private Context mContext;
    private FragmentManager mManager;
    private int mContainerId;

    public FixFragmentNavigator(@NonNull Context context, @NonNull FragmentManager manager, int containerId) {
        super(context, manager, containerId);
        mContext = context;
        mManager = manager;
        mContainerId = containerId;
    }

    @Nullable
    @Override
    public NavDestination navigate(@NonNull Destination destination, @Nullable Bundle args, @Nullable NavOptions navOptions, @Nullable Navigator.Extras navigatorExtras) {
        if (mManager.isStateSaved()) {
            Log.i(TAG, "Ignoring navigate() call: FragmentManager has already"
                    + " saved its state");
            return null;
        }
        String className = destination.getClassName();
        if (className.charAt(0) == '.') {
            className = mContext.getPackageName() + className;
        }
        //final Fragment frag = instantiateFragment(mContext, mManager,
        //       className, args);
        //frag.setArguments(args);
        final FragmentTransaction ft = mManager.beginTransaction();

        int enterAnim = navOptions != null ? navOptions.getEnterAnim() : -1;
        int exitAnim = navOptions != null ? navOptions.getExitAnim() : -1;
        int popEnterAnim = navOptions != null ? navOptions.getPopEnterAnim() : -1;
        int popExitAnim = navOptions != null ? navOptions.getPopExitAnim() : -1;
        if (enterAnim != -1 || exitAnim != -1 || popEnterAnim != -1 || popExitAnim != -1) {
            enterAnim = enterAnim != -1 ? enterAnim : 0;
            exitAnim = exitAnim != -1 ? exitAnim : 0;
            popEnterAnim = popEnterAnim != -1 ? popEnterAnim : 0;
            popExitAnim = popExitAnim != -1 ? popExitAnim : 0;
            ft.setCustomAnimations(enterAnim, exitAnim, popEnterAnim, popExitAnim);
        }

        Fragment fragment = mManager.getPrimaryNavigationFragment();
        if (fragment != null) {
            ft.hide(fragment);
        }

        Fragment frag = null;
        String tag = String.valueOf(destination.getId());

        frag = mManager.findFragmentByTag(tag);
        if (frag != null) {
            ft.show(frag);
        } else {
            frag = instantiateFragment(mContext, mManager, className, args);
            frag.setArguments(args);
            ft.add(mContainerId, frag, tag);
        }
        //ft.replace(mContainerId, frag);
        ft.setPrimaryNavigationFragment(frag);

        final @IdRes int destId = destination.getId();
        ArrayDeque<Integer> mBackStack = null;
        try {
            Field field = FragmentNavigator.class.getDeclaredField("mBackStack");
            field.setAccessible(true);
            mBackStack = (ArrayDeque<Integer>) field.get(this);
        } catch (NoSuchFieldException e) {
            e.printStackTrace();
        } catch (IllegalAccessException e) {
            e.printStackTrace();
        }

        final boolean initialNavigation = mBackStack.isEmpty();
        // TODO Build first class singleTop behavior for fragments
        final boolean isSingleTopReplacement = navOptions != null && !initialNavigation
                && navOptions.shouldLaunchSingleTop()
                && mBackStack.peekLast() == destId;

        boolean isAdded;
        if (initialNavigation) {
            isAdded = true;
        } else if (isSingleTopReplacement) {
            // Single Top means we only want one instance on the back stack
            if (mBackStack.size() > 1) {
                // If the Fragment to be replaced is on the FragmentManager's
                // back stack, a simple replace() isn't enough so we
                // remove it from the back stack and put our replacement
                // on the back stack in its place
                mManager.popBackStack(
                        generateBackStackName(mBackStack.size(), mBackStack.peekLast()),
                        FragmentManager.POP_BACK_STACK_INCLUSIVE);
                ft.addToBackStack(generateBackStackName(mBackStack.size(), destId));
            }
            isAdded = false;
        } else {
            ft.addToBackStack(generateBackStackName(mBackStack.size() + 1, destId));
            isAdded = true;
        }
        if (navigatorExtras instanceof Extras) {
            Extras extras = (Extras) navigatorExtras;
            for (Map.Entry<View, String> sharedElement : extras.getSharedElements().entrySet()) {
                ft.addSharedElement(sharedElement.getKey(), sharedElement.getValue());
            }
        }
        ft.setReorderingAllowed(true);
        ft.commit();
        // The commit succeeded, update our view of the world
        if (isAdded) {
            mBackStack.add(destId);
            return destination;
        } else {
            return null;
        }
    }

    private String generateBackStackName(int backStackindex, int destid) {
        return backStackindex + "-" + destid;
    }
}
OK,我们验证下