阿里云文件上传
打开阿里云的对象存储功能
登录阿里云的官方网站,开启对象存储功能。
开启进入对象存储控制台。点击+创建一个bucket:

创建RAM子用户

(1)添加用户组

(2)添加用户

(3)添加用户到用户组
(4)设置用户组权限:AliyunOSSFullAccess
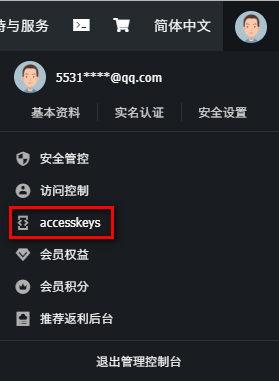
(5)获取子用户AccessKeyId,AccessKeySecret
实现文件上传
引入依赖:
<!--aliyunOSS-->
<dependency>
    <groupId>com.aliyun.oss</groupId>
    <artifactId>aliyun-sdk-oss</artifactId>
    <version>3.1.0</version>
</dependency>
application.properties文件中添加需要的属性:
#阿里云 OSS
#不同的服务器,地址不同
aliyun.oss.file.endpoint=oss-cn-beijing.aliyuncs.com
aliyun.oss.file.keyid=你的keyid
aliyun.oss.file.keysecret=你的keysecret
#bucket可以在控制台创建,也可以使用java代码创建
aliyun.oss.file.bucketname=create-file-yyf
#将要存储的文件目录
aliyun.oss.file.filehost=自己取
创建ConstantPropertiesUtil类注入属性,以便使用:
@Component
public class ConstantPropertiesUtil implements InitializingBean {

    @Value("${aliyun.oss.file.endpoint}")
    private String endpoint;

    @Value("${aliyun.oss.file.keyid}")
    private String keyid;

    @Value("${aliyun.oss.file.keysecret}")
    private String keysecret;

    @Value("${aliyun.oss.file.bucketname}")
    private String bucketname;

    @Value("${aliyun.oss.file.filehost}")
    private String filehost;


    public static String END_POINT;
    public static String ACCESS_KEY_ID;
    public static String ACCESS_KEY_SECRET;
    public static String BUCKET_NAME;
    public static String FILE_HOST ;

    @Override
    public void afterPropertiesSet() throws Exception {
        END_POINT=endpoint;
        ACCESS_KEY_ID=keyid;
        ACCESS_KEY_SECRET=keysecret;
        BUCKET_NAME=bucketname;
        FILE_HOST=filehost;
    }
}
service层实现文件上传:
@Override
public String upload(MultipartFile file) {

    String fileHost = ConstantPropertiesUtil.FILE_HOST;
    String bucketName = ConstantPropertiesUtil.BUCKET_NAME;
    String accessKeySecret = ConstantPropertiesUtil.ACCESS_KEY_SECRET;
    String accessKeyId = ConstantPropertiesUtil.ACCESS_KEY_ID;
    String endPoint = ConstantPropertiesUtil.END_POINT;

    InputStream inputStream = null;
    String uploadUrl = null;
    try {
        //判断oss实例是否存在:如果不存在则创建,如果存在则获取
        OSSClient ossClient = new OSSClient(endPoint, accessKeyId, accessKeySecret);
        if (!ossClient.doesBucketExist(bucketName)) {
            //创建bucket
            ossClient.createBucket(bucketName);
            //设置oss实例的访问权限:公共读
            ossClient.setBucketAcl(bucketName, CannedAccessControlList.PublicRead);
        }

        //获取上传文件流
        inputStream =file.getInputStream();


        //构建日期路径:avatar/2019/02/26/文件名
        String filePath = new DateTime().toString("yyyy/MM/dd");

        //文件名  uuid
        String original = file.getOriginalFilename();//拿到原文件名
        String fileName = UUID.randomUUID().toString();  //使用UUID随机生成新的文件名
        String fileType = original.substring(original.lastIndexOf("."));
        String newName = fileName  + fileType;
        String fileUrl = fileHost + "/" + filePath+"/"+newName;

        //文件上传阿里云
        ossClient.putObject(bucketName,fileUrl,inputStream);

        //关闭OSSClient
        ossClient.shutdown();

        //获取Url地址
        uploadUrl = "http://" + bucketName+ "." + endPoint + "/" + fileUrl;

    }catch (IOException e){
        log.error(e.getMessage());
        e.printStackTrace();
    }
    return uploadUrl;

}
返回的是文件路径。传入MultipartFile 对象。
ps:
<!--日期时间工具-->
        <dependency>
            <groupId>joda-time</groupId>
            <artifactId>joda-time</artifactId>
        </dependency>
        <!-- https://mvnrepository.com/artifact/javax.mail/javax.mail-api -->
        <dependency>
            <groupId>javax.mail</groupId>
            <artifactId>javax.mail-api</artifactId>
            <version>1.4.7</version>
        </dependency>
        <!-- https://mvnrepository.com/artifact/com.sun.mail/javax.mail -->
        <dependency>
            <groupId>com.sun.mail</groupId>
            <artifactId>javax.mail</artifactId>
            <version>1.6.2</version>
        </dependency>
