官方文档链接:https://dovyski.github.io/cvui/components/button/
Button
cvui::button() 提供一个 button (按钮) ,button 功能调用如下:
bool button(cv::Mat& theWhere, int theX, int theY, const cv::String& theLabel)
其中 theWhere 是被提供 button 的图像/帧,theX 是位置 X,theY 是位置 Y,theLabel 是 button 内显示的文本。
如果用户单击了 button,则所有的 button 函数都返回 true,否则返回 false。
调整宽度和高度 (Adjust width and height)
button 的宽度将根据它的 label 的尺寸自动调整。下面是具有自动调整宽度的 button 的示例:
// cv::Mat frame, x, y, label
if (cvui::button(frame, 100, 40, "Button"))
{
    // button was clicked
}
运行结果

同时它也可以指定 button 的宽度和高度,声明语句如下:
bool button(cv::Mat& theWhere, int theX, int theY, int theWidth, int theHeight, const cv::String& theLabel)
// cv::Mat frame, x, y, width, height, label
if (cvui::button(frame, 100, 40, 100, 30, "Button"))
{
    // button was clicked
}
运行结果

两次结果对比

图像按钮 (Image buttons)
可以显示图形为图像的按钮 (cv::Mat)。此按钮接受三个图像来描述它的状态,分别是 idle(无鼠标交互)、over(鼠标光标在按钮上)和 down(鼠标单击按钮):
bool button (
    cv::Mat& theWhere,
    int theX,
    int theY,
    cv::Mat& theIdle,
    cv::Mat& theOver,
    cv::Mat& theDown
);
button 的尺寸将根据图像的宽度和高度确定。例如:
cv::Mat idle = cv::imread("btn_idle_state.jpg", cv::IMREAD_COLOR);
cv::Mat over = cv::imread("btn_over_state.jpg", cv::IMREAD_COLOR);
cv::Mat down = cv::imread("btn_down_state.jpg", cv::IMREAD_COLOR);

// cv::Mat, x, y, cv::Mat, cv::Mat, cv::Mat
if (cvui::button(frame, 200, 800, idle, over, down))
{
    // button was clicked
}
注意
idle, over, down 三幅图像的尺寸应该一致,否则程序会报错:

完整代码
#define CVUI_IMPLEMENTATION
#define CVUI_DISABLE_COMPILATION_NOTICES
#include "cvui.h"

#include <iostream>

#include <opencv2/core/core.hpp>
#include <opencv2/imgcodecs/imgcodecs.hpp>
#include <opencv2/imgproc/imgproc.hpp>
#include <opencv2/highgui/highgui.hpp>

#define WINDOW_NAME "CVUI Test"

int main(int argc, char** argv)
{
	cvui::init(WINDOW_NAME);

	cv::Mat idle = cv::imread(cv::samples::findFile("HappyFish.jpg"), cv::IMREAD_COLOR);
	cv::Mat over = cv::imread(cv::samples::findFile("HappyFish1.jpg"), cv::IMREAD_COLOR);
	cv::Mat down = cv::imread(cv::samples::findFile("HappyFish2.jpg"), cv::IMREAD_COLOR);

	cv::Mat frame = cv::Mat(cv::Size(1000, 500), CV_8UC3);

	while (true)
	{
		// Fill the frame with a nice color
		frame = cv::Scalar(49, 52, 200);

		// Render an image-based button. You can provide images to be used to render the button
		// when the mouse cursor is outside, over or down the button area.
		if (cvui::button(frame, 492, 50, idle, over, down))
			std::cout << "Image button clicked!" << std::endl;

		cvui::text(frame, 20, 50, "This image behaves as a button");

		if (cvui::button(frame, 50, 70, "Button"))
			std::cout << "Regular button clicked!" << std::endl;

		cvui::imshow(WINDOW_NAME, frame);

		if (cv::waitKey(20) == 27)
			break;
	}

	return 0;
}
运行结果
- 鼠标位于 frame 中除 “HappyFish.jpg” 图像以外的区域。

- 鼠标位于 frame 中 “HappyFish.jpg” 图像上,显示 “HappyFish1.jpg”。
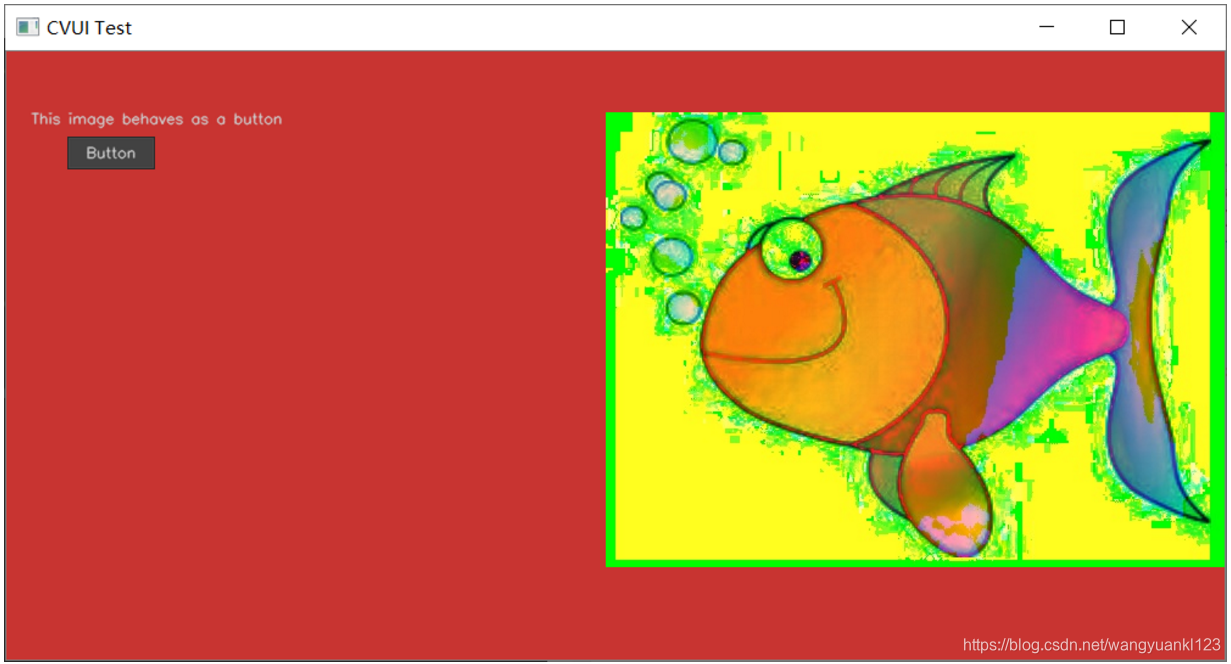
- 鼠标点击 frame 中 “HappyFish.jpg” 图像,显示 “HappyFish2.jpg”,同时控制台中输出 “Image button clicked!”。

- 点击 “Button” 按钮,控制台中输出 “Regular button clicked!”。

注意
在上述程序中声明以图像为按钮的语句时要注意图像放置的像素点坐标
if (cvui::button(frame, 492, 50, idle, over, down))
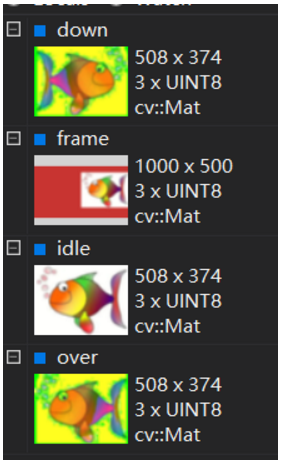
由上图可以看到,idle、over、down 三幅图像的尺寸是 508 x 374,而 frame 定义的尺寸是 1000 x 500,所以在放置图像时,坐标可取范围是 (0, 0) 至 (492, 126),超出这个范围程序会报错。例如:
if (cvui::button(frame, 492, 127, idle, over, down))

或

if (cvui::button(frame, 493, 126, idle, over, down))

