简介:http://www.ruanyifeng.com/blog/2017/08/elasticsearch.html
参考博客:http://blog.csdn.net/cwenao/article/details/54943505
http://blog.csdn.net/HoloLens/article/details/78932628
http://blog.csdn.net/tianyaleixiaowu/article/details/72833940
知乎:https://zhuanlan.zhihu.com/p/27204180?utm_medium=social&utm_source=qq
官方文档:https://www.elastic.co/guide/cn/elasticsearch/guide/current/index.html
了解ES与mysql的对应关系
index –> DB
type –> Table
Document –> row
注意:安装好之后,http访问端口是9200 java连接是9300 切记
访问localhost:9200
{
  "name" : "kvCd4xq",
  "cluster_name" : "elasticsearch",
  "cluster_uuid" : "gNl0YPftRRmTzp99TLSVTg",
  "version" : {
    "number" : "6.2.2",
    "build_hash" : "10b1edd",
    "build_date" : "2018-02-16T19:01:30.685723Z",
    "build_snapshot" : false,
    "lucene_version" : "7.2.1",
    "minimum_wire_compatibility_version" : "5.6.0",
    "minimum_index_compatibility_version" : "5.0.0"
  },
  "tagline" : "You Know, for Search"
}elasticsearch报错解决办法:NoNodeAvailableException[None of the configured nodes are available
描述:ES搭建完成后,使用localhost 和127.0.0.1都能正常访问和检索数据,但是使用服务器本机IP确报错。如下错误:
NoNodeAvailableException[None of the configured nodes are available: [{#transport#-1}{192.168.1.99}{192.168.1.99:9200}]]
at org.elasticsearch.client.transport.TransportClientNodesService.ensureNodesAreAvailable(TransportClientNodesService.java:290)
===============================
解决方法:
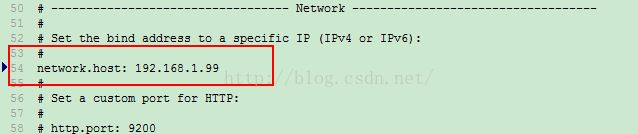
修改es配置文件(elasticsearch-2.3.3\config\elasticsearch.yml),
修改network.host
network.host:服务器IP地址
第一步需要下载head插件
head插件可以提供一个非常友好的界面,去github上下载https://github.com/mobz/elasticsearch-head
下载好之后需要解压,然后在根目录下,执行npm install 这是node的命令,需要安装node环境。
然后下载好之后,执行 npm run start 命令 出现9100端口说明启动成功。访问 localhost:9100
修改ElasticSearch的配置文件,因为他俩属于不同的进程 ,有跨域访问问题,需要配置一下。
打开ElasticSearch目录下config文件夹下的elasticsearch.yml文件
在最下方那个写上
注意空格
#解决head插件跨域问题
http.cors.enabled: true
http.cors.allow-origin: "*"
#设置分布式搭建
cluster.name: liuzhonghua     集群名字
node.name: master             节点名字
node.master: true             是否是主节点

network.host: 127.0.0.1       主机地址
再复制几个副节点
配置文件如下:
cluster.name: liuzhonghua
node.name: slave1

http.port: 9201
network.host: 127.0.0.1

discovery.zen.ping.unicast.hosts: ["127.0.0.1"] 设置这个是让他找到主节点错误:low disk watermark [15%] exceeded on [DZqnmWIZRpapZY_TPkkMBw][Milan] free: 58.6gb[12.6%], replicas will not be assigned to this node
解决方法:我将以下几行添加到我的elasticsearch.yaml文件(elastic_search_folder \ config)中:
https://stackoverflow.com/questions/33369955/low-disk-watermark-exceeded-on
cluster.routing.allocation.disk.threshold_enabled: true
cluster.routing.allocation.disk.watermark.low: 93%
cluster.routing.allocation.disk.watermark.high: 95%
….
