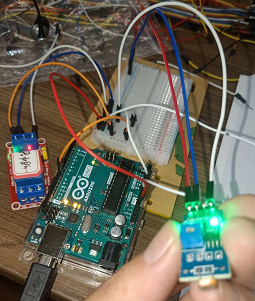
温度传感器
//Analog Temperature Sensor
const int digitalPin = 7;     // Analog Temperature Sensor pin D0 to pin7
int analogPin = A0;           // Analog Temperature Sensor pin A0 to pin A0
const int ledPin =  13;      // pin 13 built-in LED light

// variables will change:
boolean Dstate = 0;          // variable for reading status of D0
int Astate = 0;            // variable for reading status of A0
void setup()
{
  pinMode(ledPin, OUTPUT); // initialize the LED pin as an output:
  pinMode(digitalPin, INPUT);  // initialize Analog Temperature Sensor D0 pin as an input
  Serial.begin(9600); // initialize serial communications at 9600 bps

}

void loop()
{
  Astate = analogRead(analogPin);  // read Analog Temperature Sensor A0 value (set point)
  Dstate = digitalRead(digitalPin);  // read state of Analog Temperature Sensor D0
  Serial.print("D0: ");
  Serial.println(Dstate);//print the value of D0
  Serial.print("A0:");
  Serial.println(Astate);//print the value of A0
  // check if the pushbutton is pressed.
  // if it is, the buttonState is HIGH:
  if (Dstate == HIGH)    // check if Analog Temperature Sensor D0 is HIGH
  {
    // turn off  LED :
    digitalWrite(ledPin, LOW);
  }
  else
  {
    // turn  on LED :
    digitalWrite(ledPin, HIGH);
  }
  delay(1000);                // controls speed of Analog Temperature Sensor and Serial Monitor display rate
}


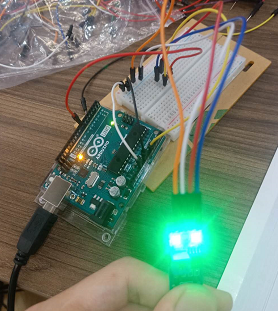
通过调节传感器上的电位器来设定一个阈值。
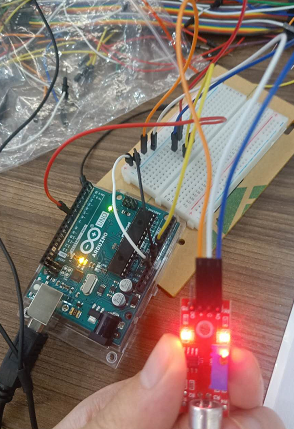
声音传感器
/***************************************************
name:Rotary Encoder
function:you can see the angular displacement of the rotary encoder printed on Serial Monitor.
When the rotary encoder rotates clockwise, the angular displacement increases; when it does counterclockwise, the value decreases.
Press the switch on the rotary encoder, the value will return to zero.
********************************************************/

const int ledPin = 13; //pin13 built-in led
const int soundPin = A0;  //sound sensor attach to A0

void setup()
{
  pinMode(ledPin,OUTPUT);//set ledPin as OUTPUT
  Serial.begin(9600); //initialize the serial communication as 9600 bps
}

void loop()
{
  int value = analogRead(soundPin); //read the value of sound sensor
  Serial.println(value);//print it
  if(value > 600)//if the vallue of sound sensor is greater than 600
  {
    digitalWrite(ledPin,HIGH); //turn on the led
    delay(200); //delay 200ms
  }
  else //elae
  {
    digitalWrite(ledPin,LOW); //turn off the led
  }
}


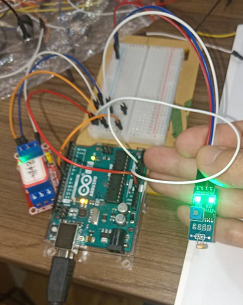
光敏传感器
/*****************************************************
 *  湖南创乐博智能科技有限公司
 * name:Photoswitch
 * function: hold the photoresistor with your fingers and check the value at A0 on Serial Monitor.
 * You can see when the resistance is up to 400ohm,
 * the normally open contact of the relay is closed and the LED connected to pin 13 on the Arduino Uno board lights up;
 * or else, it keeps out.
 ************************************************/
const int photocellPin = A0; //photoresistor module attach to A0
const int ledPin = 13;      //pin 13 built-in led
const int relayPin=8;      //relay module attach to digital 8
int outputValue = 0;
/*************************************************/
void setup()
{
  pinMode(relayPin,OUTPUT); //set relayPin as OUTPUT
  pinMode(ledPin,OUTPUT); //set ledPin as OUTPUT
  Serial.begin(9600); //initialize the serial communication as 9600bps
}
/*************************************************/
void loop()
{
  outputValue = analogRead(photocellPin);//read the value of photoresistor
  Serial.println(outputValue); //print it in serial monitor
  if(outputValue <= 200) //if the value of photoreisitor is greater than 400
  {
    digitalWrite(ledPin,HIGH); //turn on the led
    digitalWrite(relayPin,LOW); //relay connected
  }
  else //else
  {
    digitalWrite(ledPin,LOW); //turn off the led
    digitalWrite(relayPin,HIGH); //and relay disconnected
  }
  delay(1000); //delay 1s
}
/*************************************************/
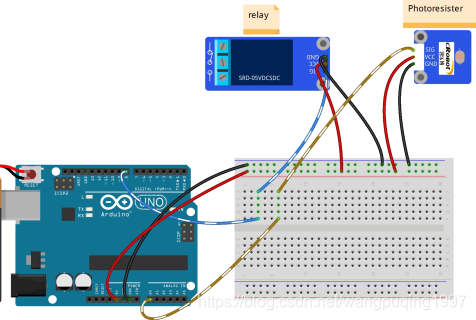
当用手电照射光敏电阻时,电阻大于200欧,继电器的常开触点闭合,Arduino Uno 电路板上的13号引脚LED点亮。
摇杆控制OLED屏幕
/*
   OLED_JoyStick
   摇杆控制OLED移动显示
*/
#include <Wire.h>
#include <Adafruit_GFX.h>
#include <Adafruit_SSD1306.h>

#define OLED_RESET     4
Adafruit_SSD1306 display(128, 64, &Wire, OLED_RESET);
#define pinX  A0
#define pinY  A1

//定义圆心和半径变量
int xCircle = 0;
int ycircle = 0;
int radius = 4;

void setup()
{
  display.begin(SSD1306_SWITCHCAPVCC, 0x3C);
  display.setTextColor(WHITE);//开像素点发光
  display.clearDisplay();//清屏
}

void loop()
{
  xCircle = map(analogRead(pinX), 1023, 0, radius, 128 - radius); //将X轴获取的AD值映射到oled的X显示方向
  ycircle = map(analogRead(pinY), 1023, 0, radius, 64 - radius); //将Y轴获取的AD值映射到oled的Y显示方向

  display.drawRect(0, 0, 128, 64, 1);//画矩形
  display.drawCircle(xCircle, ycircle , radius, 1); //画圆
  display.display();//开显示
  display.clearDisplay();//清屏
}

