SpringBoot2.x系列教程54--NoSQL之SpringBoot整合ElasticSearch方式一
作者:一一哥
一. Elastic Search
1. Elastic Search简介
ElasticSearch是一个基于Lucene的开源的、分布式实时搜索和分析引擎。它提供了一个分布式多用户能力的全文搜索引擎,基于RESTful web接口。Elasticsearch是用Java开发的,并作为Apache许可条款下的开放源码发布,是当前流行的企业级搜索引擎。
Spring Boot为Elasticsearch提供基本的自动配置,我们可以利用Spring Data Elasticsearch在Spring Boot中进行开发。
2. 搭建配置Elastic Search环境
在利用Elastic Search开发之前,请先搭建好Elastic Search环境,我这里配置了ELK环境。关于ELK环境的搭建,感兴趣的朋友可以自行搜索。
3. Spring Boot与Elastic Search版本关系
在新版本的Spring boot2.x中,spring-boot-starter-data-elasticsearch支持的Elasticsearch版本是2.X,但Elasticsearch实际上已经发展到6.5.X版本了,为了更好的使用Elasticsearch的新特性,我们可以弃用spring-boot-starter-data-elasticsearch依赖,改为直接使用Spring-data-elasticsearch,以便启用对新版本支持,目前的版本对应关系如下: 

二. Spring Boot2.2.5整合Elastic Search 5.6.8
1. 环境要求
- Spring Boot 2.2.5;
- Elastic Search 5.6.8;
- Kibana 5.6.8;
- Maven
2. 创建web项目
我们按照之前的经验,创建一个web程序,并将之改造成Spring Boot项目,具体过程略。 

3. 添加依赖包
<dependency>
    <groupId>org.springframework.boot</groupId>
    <artifactId>spring-boot-starter-data-elasticsearch</artifactId>
</dependency>
注意:因为我的elastic search 并不是6.5.x以上的最新版本,而是5.6.8版本,所以我这里使用的还是spring-boot-starter-data-elasticsearch的依赖包。
4. 创建application.yml配置文件
# Elasticsearch
# 9200作为Http协议,主要用于外部通讯,而9300作为Tcp协议,是传输层监听的默认端口,jar之间就是通过tcp协议通讯
elasticsearch:
  #注意cluster.name需要与config/elasticsearch.yml中的cluster.name一致
  # Elasticsearch cluster name.
  cluster:
    name: elasticsearch
  # Comma-separated list of cluster node addresses.
  ip: localhost
  port: 9300
  pool: 5
elastic search默认的端口号是9300。
5. 创建ElasticSearchConfig配置类
package com.yyg.boot.config;

import lombok.extern.slf4j.Slf4j;
import org.elasticsearch.client.Client;
import org.elasticsearch.client.transport.TransportClient;
import org.elasticsearch.common.settings.Settings;
import org.elasticsearch.common.transport.TransportAddress;
import org.elasticsearch.transport.client.PreBuiltTransportClient;
import org.springframework.beans.factory.annotation.Value;
import org.springframework.context.annotation.Bean;
import org.springframework.context.annotation.Configuration;
import org.springframework.data.elasticsearch.core.ElasticsearchOperations;
import org.springframework.data.elasticsearch.core.ElasticsearchTemplate;

import java.net.InetAddress;

/**
 * @Author 一一哥Sun
 * @Date Created in 2020/4/13
 * @Description Description
 */
@Slf4j
@Configuration
public class ElasticSearchConfig {

    @Value("${elasticsearch.ip}")
    private String hostName;

    @Value("${elasticsearch.port}")
    private String port;

    @Value("${elasticsearch.cluster.name}")
    private String clusterName;

    @Value("${elasticsearch.pool}")
    private String poolSize;

    /**
     * 构建TransportClient对象
     */
    @Bean(name = "transportClient")
    public TransportClient transportClient() {
        log.info("Elasticsearch初始化开始。。。。。");
        TransportClient transportClient = null;
        try {
            // 配置信息
            Settings esSetting = Settings.builder()
                    //集群名字
                    .put("cluster.name", clusterName)
                    //增加嗅探机制,找到ES集群
                    .put("client.transport.sniff", true)
                    //增加线程池个数,暂时设为5
                    .put("thread_pool.search.size", Integer.parseInt(poolSize))
                    .build();
            //配置信息Settings自定义
            transportClient = new PreBuiltTransportClient(esSetting);
            TransportAddress transportAddress = new TransportAddress(InetAddress.getByName(hostName), Integer.valueOf(port));
            transportClient.addTransportAddresses(transportAddress);
        } catch (Exception e) {
            log.error("elasticsearch TransportClient create error!!", e);
        }
        return transportClient;
    }

    /**
     * 构建ElasticsearchTemplate对象
     */
    @Bean
    public ElasticsearchOperations elasticsearchTemplate() {
        Client client = transportClient();
        if (client != null) {
            return new ElasticsearchTemplate(client);
        } else {
            //弹出异常对象
            throw new RuntimeException("初始化Elasticsearch失败!");
        }
    }

}
6. 创建增删改查接口
我这里直接使用TransportClient进行增删改查,后面的章节中,我会讲解简化方案。
package com.yyg.boot.web;

import org.elasticsearch.action.get.GetResponse;
import org.elasticsearch.action.index.IndexResponse;
import org.elasticsearch.action.search.SearchRequestBuilder;
import org.elasticsearch.action.search.SearchResponse;
import org.elasticsearch.action.search.SearchType;
import org.elasticsearch.client.transport.TransportClient;
import org.elasticsearch.common.xcontent.XContentBuilder;
import org.elasticsearch.common.xcontent.XContentFactory;
import org.elasticsearch.index.query.BoolQueryBuilder;
import org.elasticsearch.index.query.QueryBuilders;
import org.elasticsearch.index.query.RangeQueryBuilder;
import org.elasticsearch.search.SearchHit;
import org.springframework.beans.factory.annotation.Autowired;
import org.springframework.format.annotation.DateTimeFormat;
import org.springframework.http.HttpStatus;
import org.springframework.http.ResponseEntity;
import org.springframework.web.bind.annotation.*;

import java.util.ArrayList;
import java.util.Date;
import java.util.List;
import java.util.Map;

/**
 * @Author 一一哥Sun
 * @Date Created in 2020/4/13
 * @Description Description
 */
@RestController
@RequestMapping("/book")
public class BookController {

    @Autowired
    private TransportClient transportClient;

    /**
     * 添加博客索引信息
     */
    @PostMapping("/add")
    public ResponseEntity add(
            @RequestParam(name = "title") String title,
            @RequestParam(name = "author") String author,
            @RequestParam(name = "word_count") int wordCount,
            @RequestParam(name = "publish_date") @DateTimeFormat(pattern = "yyyy-MM-dd HH:mm:ss") Date publishDate
    ) {
        try {
            XContentBuilder content = XContentFactory.jsonBuilder()
                    .startObject()
                    .field("title", title)
                    .field("author", author)
                    .field("word_count", wordCount)
                    .field("publish_date", publishDate.getTime())
                    .endObject();
            IndexResponse result = this.transportClient.prepareIndex("blogs", "blog").setSource(content).get();
            return new ResponseEntity(result.getId(), HttpStatus.OK);
        } catch (Exception e) {
            e.printStackTrace();
            ;
            return new ResponseEntity(HttpStatus.INTERNAL_SERVER_ERROR);
        }
    }

    /**
     * 根据id查询
     */
    @GetMapping("/get")
    public ResponseEntity get(@RequestParam(name = "id", defaultValue = "") String id) {
        if (id.isEmpty()) {
            return new ResponseEntity((HttpStatus.NOT_FOUND));
        }
        GetResponse result = transportClient.prepareGet("blogs", "blog", id).get();
        if (!result.isExists()) {
            return new ResponseEntity((HttpStatus.NOT_FOUND));
        }
        return new ResponseEntity(result.getSource(), HttpStatus.OK);
    }

    /**
     * 按条件查询
     */
    @GetMapping("/query")
    public ResponseEntity query(
            @RequestParam(name = "author", required = false) String author,
            @RequestParam(name = "title", required = false) String title,
            @RequestParam(name = "gt_word_count", defaultValue = "0") int gtWordCount,
            @RequestParam(name = "lt_word_count", required = false) Integer ltWordCount
    ) {
        //设置查询条件
        BoolQueryBuilder boolQuery = QueryBuilders.boolQuery();
        if (author != null) {
            boolQuery.must(QueryBuilders.matchQuery("author", author));
        }
        if (title != null) {
            boolQuery.must(QueryBuilders.matchQuery("title", title));
        }
        //按范围查询
        RangeQueryBuilder rangeQuery = QueryBuilders.rangeQuery("word_count").from(gtWordCount);
        if (ltWordCount != null && ltWordCount > 0) {
            rangeQuery.to(ltWordCount);
        }
        boolQuery.filter(rangeQuery);

        SearchRequestBuilder builder = this.transportClient.prepareSearch("blogs")
                .setTypes("blog")
                .setSearchType(SearchType.DFS_QUERY_THEN_FETCH)
                .setQuery(boolQuery)
                //设置分页查询
                .setFrom(0)
                .setSize(10);
        System.out.println(builder);

        SearchResponse response = builder.get();
        List<Map<String, Object>> result = new ArrayList<>();

        for (SearchHit hit : response.getHits()) {
            result.add(hit.getSourceAsMap());
        }
        return new ResponseEntity(result, HttpStatus.OK);
    }

}
7. 创建Application入口类
package com.yyg.boot;

import org.springframework.boot.SpringApplication;
import org.springframework.boot.autoconfigure.SpringBootApplication;

/**
 * @Author 一一哥Sun
 * @Date Created in 2020/4/9
 * @Description Description
 */
@SpringBootApplication
public class ElasticApplication {

    public static void main(String[] args) {
        SpringApplication.run(ElasticApplication.class, args);
    }

}
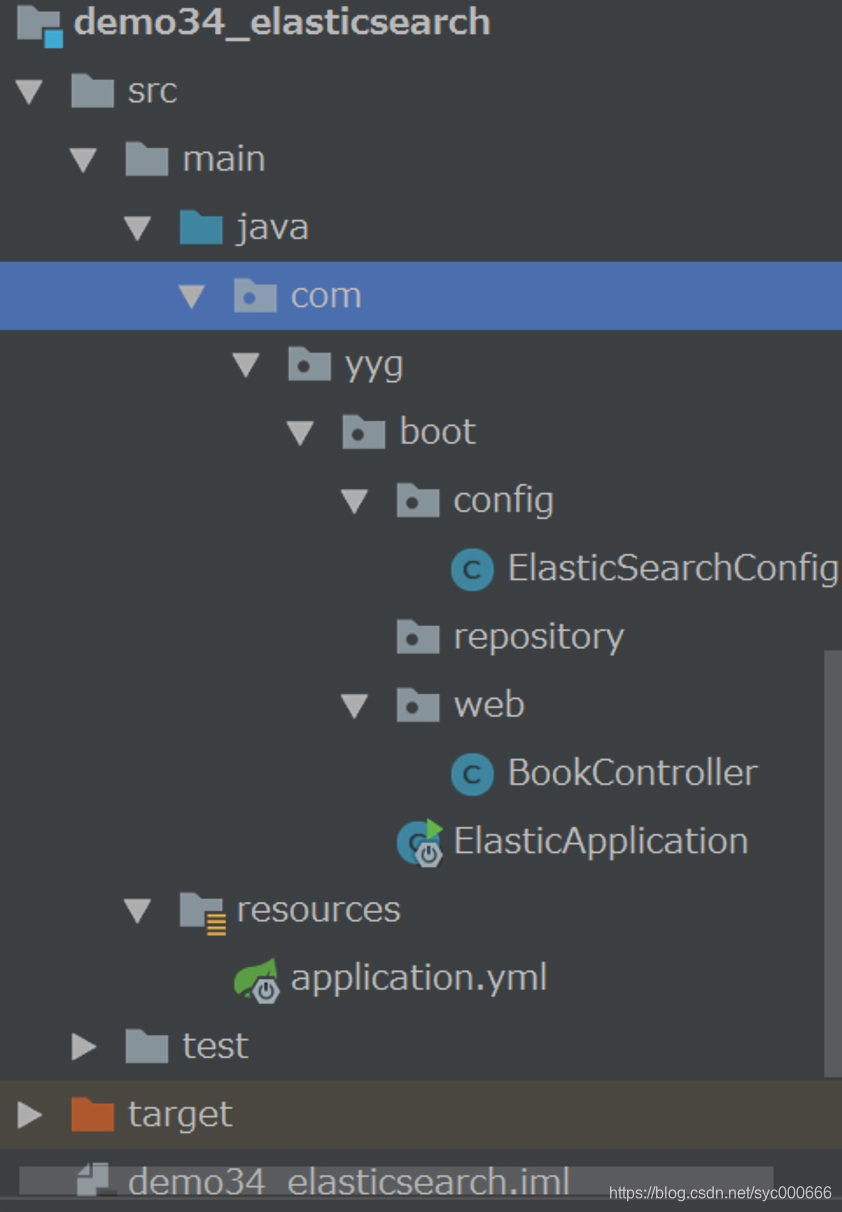
完整项目结构:

8. 启动elastic search和kibana环境
elastic search正常启动后效果 

kibana正常启动后效果
 

9. 在postman中进行测试
测试添加博客功能 

可以看到最后返回了新增的博客id。
在kibana中进行索引的查看
在我们前面的代码中,我们已经创建了index索引为blogs,所以我们可以在kibana中把这个blogs索引同步过来。 
 

到这一步,我们就把代码中创建好的blogs索引同步过来了,接下来我们可以查看blogs索引中的内容。
 

发现blogs索引中已经有了我们之前添加的博客内容。 

测试按id查询博客接口 

测试查询全部结果的接口 

