Docker-环境搭建
- 1.Ubuntu
- 1.Ubuntu1404LTS
- 2.Ubuntu1604LTS
- 3.Ubuntu1804LTS
- 2.CentOS
- 3.Windows
https://docker-doc.readthedocs.io/zh_CN/latest/installation/https://developer.aliyun.com/mirror/docker-ce
1.Ubuntu
1.Ubuntu1404LTS
1.镜像仓库
版本:
cat /proc/version
Linux version 4.4.0-148-generic (buildd@lgw01-amd64-014) (gcc version 4.8.4 (Ubuntu 4.8.4-2ubuntu1~14.04.4) ) #174~14.04.1-Ubuntu SMP Thu May 9 08:17:37 UTC 2019

镜像仓库:
sudo vim /etc/apt/sources.list
# deb cdrom:[Ubuntu 14.04.5 LTS _Trusty Tahr_ - Release amd64 (20160803)]/ trusty main restricted

# See http://help.ubuntu.com/community/UpgradeNotes for how to upgrade to
# newer versions of the distribution.
deb http://mirrors.aliyun.com/ubuntu/ trusty main restricted
deb-src http://mirrors.aliyun.com/ubuntu/ trusty main restricted

## Major bug fix updates produced after the final release of the
## distribution.
deb http://mirrors.aliyun.com/ubuntu/ trusty-updates main restricted
deb-src http://mirrors.aliyun.com/ubuntu/ trusty-updates main restricted

## N.B. software from this repository is ENTIRELY UNSUPPORTED by the Ubuntu
## team. Also, please note that software in universe WILL NOT receive any
## review or updates from the Ubuntu security team.
deb http://mirrors.aliyun.com/ubuntu/ trusty universe
deb-src http://mirrors.aliyun.com/ubuntu/ trusty universe
deb http://mirrors.aliyun.com/ubuntu/ trusty-updates universe
deb-src http://mirrors.aliyun.com/ubuntu/ trusty-updates universe

## N.B. software from this repository is ENTIRELY UNSUPPORTED by the Ubuntu
## team, and may not be under a free licence. Please satisfy yourself as to
## your rights to use the software. Also, please note that software in
## multiverse WILL NOT receive any review or updates from the Ubuntu
## security team.
deb http://mirrors.aliyun.com/ubuntu/ trusty multiverse
deb-src http://mirrors.aliyun.com/ubuntu/ trusty multiverse
deb http://mirrors.aliyun.com/ubuntu/ trusty-updates multiverse
deb-src http://mirrors.aliyun.com/ubuntu/ trusty-updates multiverse

## N.B. software from this repository may not have been tested as
## extensively as that contained in the main release, although it includes
## newer versions of some applications which may provide useful features.
## Also, please note that software in backports WILL NOT receive any review
## or updates from the Ubuntu security team.
deb http://mirrors.aliyun.com/ubuntu/ trusty-backports main restricted universe multiverse
deb-src http://mirrors.aliyun.com/ubuntu/ trusty-backports main restricted universe multiverse

deb http://mirrors.aliyun.com/ubuntu/ trusty-security main restricted
deb-src http://mirrors.aliyun.com/ubuntu/ trusty-security main restricted
deb http://mirrors.aliyun.com/ubuntu/ trusty-security universe
deb-src http://mirrors.aliyun.com/ubuntu/ trusty-security universe
deb http://mirrors.aliyun.com/ubuntu/ trusty-security multiverse
deb-src http://mirrors.aliyun.com/ubuntu/ trusty-security multiverse

## Uncomment the following two lines to add software from Canonical's
## 'partner' repository.
## This software is not part of Ubuntu, but is offered by Canonical and the
## respective vendors as a service to Ubuntu users.
# deb http://archive.canonical.com/ubuntu trusty partner
# deb-src http://archive.canonical.com/ubuntu trusty partner
镜像源修改:【末行模式】
:%s/历史镜像地址/新的镜像地址/g
或者,【末行模式】
:%d
清空历史内容后,复制替换
2.安装
1.安装系统工具
sudo apt-get upgrade -y
sudo apt-get update
sudo apt upgrade -y
sudo apt update
sudo apt-get -y install apt-transport-https ca-certificates curl software-properties-common
2.安装GPG证书
curl -fsSL https://mirrors.aliyun.com/docker-ce/linux/ubuntu/gpg | sudo apt-key add -
3.写入软件源信息
sudo add-apt-repository "deb [arch=amd64] https://mirrors.aliyun.com/docker-ce/linux/ubuntu $(lsb_release -cs) stable"
4.更新并安装Docker-CE
sudo apt-get -y update
sudo apt-get -y install docker-ce
5.特定版本Docker-CE安装【指定版本安装】
1.查找Docker-CE的版本
apt-cache madison docker-ce

2.安装指定版本的Docker-CE
sudo apt-get -y install docker-ce=[VERSION]
例如:
sudo apt-get -y install docker-ce=18.06.3~ce~3-0~ubuntu
3.测试
1.查看版本
sudo docker version

2.查看网络信息
ifconfig
如果没有ifconfig,安装net-tools工具
sudo apt install -y net-tools

多出了一张docker0的网卡
4.赋予非root访问权限
如果不添加,执行docker version的效果只有client没有server
1.永久方式(推荐)
# Add the docker group if it doesn't already exist.
sudo groupadd docker
# Add the connected user "${USER}" to the docker group.
# Change the user name to match your preferred user.
# You may have to logout and log back in again for
# this to take effect.
sudo gpasswd -a ${USER} docker
# Restart the Docker daemon.
sudo service docker restart
必须执行以下步骤,否则无效
newgrp - docker

2.临时方式一
在每次启动docker或者重启docker之后
cd /var/run && sudo chmod 666 docker.sock
3.临时方式二
关于docker的命令都加上 sudo:
例如:sudo docker version
5.docker加速器
http://guide.daocloud.io/dcs/docker-9153151.html
https://www.daocloud.io/mirror
1.加速器配置
sudo tee /etc/docker/daemon.json <<-'EOF'
{
        "registry-mirrors": [
                "https://1nj0zren.mirror.aliyuncs.com",
                "http://f1361db2.m.daocloud.io",
                "https://registry.docker-cn.com",
                "https://dockerhub.azk8s.cn",
                "https://docker.mirrors.ustc.edu.cn",
                "https://reg-mirror.qiniu.com",
                "https://hub-mirror.c.163.com",
                "https://mirror.ccs.tencentyun.com",
                "https://docker.mirrors.ustc.edu.cn"
        ]
}
EOF
2.重启docker
sudo service docker restart
3.测试
docker info

有信息输出说明加速器配置完成
6.卸载docker【慎重操作】
1.卸载并删除docker相关
sudo apt-get --purge autoremove docker* -y
2.删除存储
sudo rm -rf /etc/docker/
sudo rm -rf /var/lib/docker/
3.查看已安装的相关docker的
cat /etc/group|grep $(whoami)| grep docker
4.查看docker组
cat /etc/group|grep docker
5.从docker组中删除用户
whoami | xargs sudo gpasswd -d $1 docker
6.删除docker组
sudo groupdel docker
7.docker基本命令
1.启动
sudo service docker start
2.停止
sudo service docker stop
3.重启
sudo service docker restart
4.状态
service docker status
2.Ubuntu1604LTS
1.镜像仓库
版本:
cat /proc/version
Linux version 4.15.0-96-generic (buildd@lgw01-amd64-007) (gcc version 5.4.0 20160609 (Ubuntu 5.4.0-6ubuntu1~16.04.12)) #97~16.04.1-Ubuntu SMP Wed Apr 1 03:03:31 UTC 2020

镜像仓库:
sudo vim /etc/apt/sources.list
# deb cdrom:[Ubuntu 16.04.5 LTS _Xenial Xerus_ - Release amd64 (20180731)]/ xenial main restricted

# See http://help.ubuntu.com/community/UpgradeNotes for how to upgrade to
# newer versions of the distribution.
deb http://mirrors.aliyun.com/ubuntu/ xenial main restricted
# deb-src http://cn.archive.ubuntu.com/ubuntu/ xenial main restricted

## Major bug fix updates produced after the final release of the
## distribution.
deb http://mirrors.aliyun.com/ubuntu/ xenial-updates main restricted
# deb-src http://cn.archive.ubuntu.com/ubuntu/ xenial-updates main restricted

## N.B. software from this repository is ENTIRELY UNSUPPORTED by the Ubuntu
## team. Also, please note that software in universe WILL NOT receive any
## review or updates from the Ubuntu security team.
deb http://mirrors.aliyun.com/ubuntu/ xenial universe
# deb-src http://cn.archive.ubuntu.com/ubuntu/ xenial universe
deb http://mirrors.aliyun.com/ubuntu/ xenial-updates universe
# deb-src http://cn.archive.ubuntu.com/ubuntu/ xenial-updates universe

## N.B. software from this repository is ENTIRELY UNSUPPORTED by the Ubuntu
## team, and may not be under a free licence. Please satisfy yourself as to
## your rights to use the software. Also, please note that software in
## multiverse WILL NOT receive any review or updates from the Ubuntu
## security team.
deb http://mirrors.aliyun.com/ubuntu/ xenial multiverse
# deb-src http://cn.archive.ubuntu.com/ubuntu/ xenial multiverse
deb http://mirrors.aliyun.com/ubuntu/ xenial-updates multiverse
# deb-src http://cn.archive.ubuntu.com/ubuntu/ xenial-updates multiverse

## N.B. software from this repository may not have been tested as
## extensively as that contained in the main release, although it includes
## newer versions of some applications which may provide useful features.
## Also, please note that software in backports WILL NOT receive any review
## or updates from the Ubuntu security team.
deb http://mirrors.aliyun.com/ubuntu/ xenial-backports main restricted universe multiverse
# deb-src http://cn.archive.ubuntu.com/ubuntu/ xenial-backports main restricted universe multiverse

## Uncomment the following two lines to add software from Canonical's
## 'partner' repository.
## This software is not part of Ubuntu, but is offered by Canonical and the
## respective vendors as a service to Ubuntu users.
# deb http://archive.canonical.com/ubuntu xenial partner
# deb-src http://archive.canonical.com/ubuntu xenial partner

deb http://mirrors.aliyun.com/ubuntu/ xenial-security main restricted
# deb-src http://security.ubuntu.com/ubuntu xenial-security main restricted
deb http://mirrors.aliyun.com/ubuntu/ xenial-security universe
# deb-src http://security.ubuntu.com/ubuntu xenial-security universe
deb http://mirrors.aliyun.com/ubuntu/ xenial-security multiverse
# deb-src http://security.ubuntu.com/ubuntu xenial-security multiverse
镜像源修改:【末行模式】
:%s/历史镜像地址/新的镜像地址/g
或者,【末行模式】
:%d
清空历史内容后,复制替换
2.安装
1.安装系统工具
sudo apt-get upgrade -y
sudo apt-get update
sudo apt upgrade -y
sudo apt update
sudo apt-get -y install apt-transport-https ca-certificates curl software-properties-common
2.安装GPG证书
curl -fsSL https://mirrors.aliyun.com/docker-ce/linux/ubuntu/gpg | sudo apt-key add -
3.写入软件源信息
sudo add-apt-repository "deb [arch=amd64] https://mirrors.aliyun.com/docker-ce/linux/ubuntu $(lsb_release -cs) stable"
4.更新并安装Docker-CE
sudo apt-get -y update
sudo apt-get -y install docker-ce
5.特定版本Docker-CE安装【指定版本安装】
1.查找Docker-CE的版本
apt-cache madison docker-ce
2.安装指定版本的Docker-CE
sudo apt-get -y install docker-ce=[VERSION]
例如:
sudo apt-get -y install docker-ce=18.06.3~ce~3-0~ubuntu
3.测试
1.查看版本
sudo docker version

2.查看网络信息
ifconfig
如果没有ifconfig,安装net-tools工具
sudo apt install -y net-tools

多出了一张docker0的网卡
4.赋予非root访问权限
如果不添加,执行docker version的效果只有client没有server
1.永久方式(推荐)
# Add the docker group if it doesn't already exist.
sudo groupadd docker
# Add the connected user "${USER}" to the docker group.
# Change the user name to match your preferred user.
# You may have to logout and log back in again for
# this to take effect.
sudo gpasswd -a ${USER} docker
# Restart the Docker daemon.
sudo service docker restart
必须执行以下步骤,否则无效
newgrp - docker

2.临时方式一
在每次启动docker或者重启docker之后
cd /var/run && sudo chmod 666 docker.sock
3.临时方式二
关于docker的命令都加上 sudo:
例如:sudo docker version
5.docker加速器
http://guide.daocloud.io/dcs/docker-9153151.html
https://www.daocloud.io/mirror
1.加速器配置
sudo tee /etc/docker/daemon.json <<-'EOF'
{
        "registry-mirrors": [
                "https://1nj0zren.mirror.aliyuncs.com",
                "http://f1361db2.m.daocloud.io",
                "https://registry.docker-cn.com",
                "https://dockerhub.azk8s.cn",
                "https://docker.mirrors.ustc.edu.cn",
                "https://reg-mirror.qiniu.com",
                "https://hub-mirror.c.163.com",
                "https://mirror.ccs.tencentyun.com",
                "https://docker.mirrors.ustc.edu.cn"
        ]
}
EOF
2.重启docker
sudo systemctl daemon-reload
sudo systemctl restart docker
3.测试
docker info

6.卸载docker【慎重操作】
1.卸载并删除docker相关
sudo apt-get --purge autoremove docker* -y
2.删除存储
sudo rm -rf /etc/docker/
sudo rm -rf /var/lib/docker/
3.查看已安装的相关docker的
cat /etc/group|grep $(whoami)| grep docker
4.查看docker组
cat /etc/group|grep docker
5.从docker组中删除用户
whoami | xargs sudo gpasswd -d $1 docker
6.删除docker组
sudo groupdel docker
7.docker基本命令
1.启动
sudo systemctl start docker
2.停止
sudo systemctl stop docker
3.重启
sudo systemctl restart docker
4.状态
sudo systemctl status docker
3.Ubuntu1804LTS
1.镜像仓库
版本:
cat /proc/version
Linux version 5.3.0-46-generic (buildd@lcy01-amd64-013) (gcc version 7.5.0 (Ubuntu 7.5.0-3ubuntu1~18.04)) #38~18.04.1-Ubuntu SMP Tue Mar 31 04:17:56 UTC 2020

镜像仓库:
sudo vim /etc/apt/sources.list
# deb cdrom:[Ubuntu 18.04.4 LTS _Bionic Beaver_ - Release amd64 (20200203.1)]/ bionic main restricted

# See http://help.ubuntu.com/community/UpgradeNotes for how to upgrade to
# newer versions of the distribution.
deb http://mirrors.aliyun.com/ubuntu/ bionic main restricted
# deb-src http://cn.archive.ubuntu.com/ubuntu/ bionic main restricted

## Major bug fix updates produced after the final release of the
## distribution.
deb http://mirrors.aliyun.com/ubuntu/ bionic-updates main restricted
# deb-src http://cn.archive.ubuntu.com/ubuntu/ bionic-updates main restricted

## N.B. software from this repository is ENTIRELY UNSUPPORTED by the Ubuntu
## team. Also, please note that software in universe WILL NOT receive any
## review or updates from the Ubuntu security team.
deb http://mirrors.aliyun.com/ubuntu/ bionic universe
# deb-src http://cn.archive.ubuntu.com/ubuntu/ bionic universe
deb http://mirrors.aliyun.com/ubuntu/ bionic-updates universe
# deb-src http://cn.archive.ubuntu.com/ubuntu/ bionic-updates universe

## N.B. software from this repository is ENTIRELY UNSUPPORTED by the Ubuntu
## team, and may not be under a free licence. Please satisfy yourself as to
## your rights to use the software. Also, please note that software in
## multiverse WILL NOT receive any review or updates from the Ubuntu
## security team.
deb http://mirrors.aliyun.com/ubuntu/ bionic multiverse
# deb-src http://cn.archive.ubuntu.com/ubuntu/ bionic multiverse
deb http://mirrors.aliyun.com/ubuntu/ bionic-updates multiverse
# deb-src http://cn.archive.ubuntu.com/ubuntu/ bionic-updates multiverse

## N.B. software from this repository may not have been tested as
## extensively as that contained in the main release, although it includes
## newer versions of some applications which may provide useful features.
## Also, please note that software in backports WILL NOT receive any review
## or updates from the Ubuntu security team.
deb http://mirrors.aliyun.com/ubuntu/ bionic-backports main restricted universe multiverse
# deb-src http://cn.archive.ubuntu.com/ubuntu/ bionic-backports main restricted universe multiverse

## Uncomment the following two lines to add software from Canonical's
## 'partner' repository.
## This software is not part of Ubuntu, but is offered by Canonical and the
## respective vendors as a service to Ubuntu users.
# deb http://archive.canonical.com/ubuntu bionic partner
# deb-src http://archive.canonical.com/ubuntu bionic partner

deb http://mirrors.aliyun.com/ubuntu/ bionic-security main restricted
# deb-src http://security.ubuntu.com/ubuntu bionic-security main restricted
deb http://mirrors.aliyun.com/ubuntu/ bionic-security universe
# deb-src http://security.ubuntu.com/ubuntu bionic-security universe
deb http://mirrors.aliyun.com/ubuntu/ bionic-security multiverse
# deb-src http://security.ubuntu.com/ubuntu bionic-security multiverse
镜像源修改:【末行模式】
:%s/历史镜像地址/新的镜像地址/g
或者,【末行模式】
:%d
清空历史内容后,复制替换
2.安装
1.安装系统工具
sudo apt-get upgrade -y
sudo apt-get update
sudo apt upgrade -y
sudo apt update
sudo apt-get -y install apt-transport-https ca-certificates curl software-properties-common
2.安装GPG证书
curl -fsSL https://mirrors.aliyun.com/docker-ce/linux/ubuntu/gpg | sudo apt-key add -
3.写入软件源信息
sudo add-apt-repository "deb [arch=amd64] https://mirrors.aliyun.com/docker-ce/linux/ubuntu $(lsb_release -cs) stable"
4.更新并安装Docker-CE
sudo apt-get -y update
sudo apt-get -y install docker-ce
5.特定版本Docker-CE安装【指定版本安装】
1.查找Docker-CE的版本
apt-cache madison docker-ce
2.安装指定版本的Docker-CE
sudo apt-get -y install docker-ce=[VERSION]
例如:
sudo apt-get -y install docker-ce=18.06.3~ce~3-0~ubuntu
3.测试
1.查看版本
sudo docker version

2.查看网络信息
ifconfig
如果没有ifconfig,安装net-tools工具
sudo apt install -y net-tools

多出了一张docker0的网卡
4.赋予非root访问权限
如果不添加,执行docker version的效果只有client没有server
1.永久方式(推荐)
# Add the docker group if it doesn't already exist.
sudo groupadd docker
# Add the connected user "${USER}" to the docker group.
# Change the user name to match your preferred user.
# You may have to logout and log back in again for
# this to take effect.
sudo gpasswd -a ${USER} docker
# Restart the Docker daemon.
sudo service docker restart
必须执行以下步骤,否则无效
newgrp - docker

2.临时方式一
在每次启动docker或者重启docker之后
cd /var/run && sudo chmod 666 docker.sock
3.临时方式二
关于docker的命令都加上 sudo:
例如:sudo docker version
5.docker加速器
http://guide.daocloud.io/dcs/docker-9153151.html
https://www.daocloud.io/mirror
1.加速器配置
sudo tee /etc/docker/daemon.json <<-'EOF'
{
        "registry-mirrors": [
                "https://1nj0zren.mirror.aliyuncs.com",
                "http://f1361db2.m.daocloud.io",
                "https://registry.docker-cn.com",
                "https://dockerhub.azk8s.cn",
                "https://docker.mirrors.ustc.edu.cn",
                "https://reg-mirror.qiniu.com",
                "https://hub-mirror.c.163.com",
                "https://mirror.ccs.tencentyun.com",
                "https://docker.mirrors.ustc.edu.cn"
        ]
}
EOF
2.重启docker
sudo systemctl daemon-reload
sudo systemctl restart docker
3.测试
docker info

6.卸载docker【慎重操作】
1.卸载并删除docker相关
sudo apt-get --purge autoremove docker* -y
2.删除存储
sudo rm -rf /etc/docker/
sudo rm -rf /var/lib/docker/
3.查看已安装的相关docker的
cat /etc/group|grep $(whoami)| grep docker
4.查看docker组
cat /etc/group|grep docker
5.从docker组中删除用户
whoami | xargs sudo gpasswd -d $1 docker
6.删除docker组
sudo groupdel docker
7.docker基本命令
1.启动
sudo systemctl start docker
2.停止
sudo systemctl stop docker
3.重启
sudo systemctl restart docker
4.状态
sudo systemctl status docker
2.CentOS
CentOS修改用户密码方法
1.普通用户su或者su -或者su - rootpasswd 用户名2.超级用户
#打开system-auth文件
vim /etc/pam.d/system-auth
# 修改其中一行(设置最小密码长度为4): password requisite pam_cracklib.so try_first_pass retry=3 type=minlen=4passwd 超级用户名
1.CentOS7
1.镜像仓库
版本:
cat /proc/version
Linux version 3.10.0-1062.18.1.el7.x86_64 ([email protected]) (gcc version 4.8.5 20150623 (Red Hat 4.8.5-39) (GCC) ) #1 SMP Tue Mar 17 23:49:17 UTC 2020

镜像仓库:
cat /etc/yum.repos.d/CentOS-Base.repo
# CentOS-Base.repo
#
# The mirror system uses the connecting IP address of the client and the
# update status of each mirror to pick mirrors that are updated to and
# geographically close to the client.  You should use this for CentOS updates
# unless you are manually picking other mirrors.
#
# If the mirrorlist= does not work for you, as a fall back you can try the
# remarked out baseurl= line instead.
#
#

[base]
name=CentOS-$releasever - Base - mirrors.aliyun.com
failovermethod=priority
baseurl=http://mirrors.aliyun.com/centos/$releasever/os/$basearch/
        http://mirrors.aliyuncs.com/centos/$releasever/os/$basearch/
        http://mirrors.cloud.aliyuncs.com/centos/$releasever/os/$basearch/
gpgcheck=1
gpgkey=http://mirrors.aliyun.com/centos/RPM-GPG-KEY-CentOS-7

#released updates
[updates]
name=CentOS-$releasever - Updates - mirrors.aliyun.com
failovermethod=priority
baseurl=http://mirrors.aliyun.com/centos/$releasever/updates/$basearch/
        http://mirrors.aliyuncs.com/centos/$releasever/updates/$basearch/
        http://mirrors.cloud.aliyuncs.com/centos/$releasever/updates/$basearch/
gpgcheck=1
gpgkey=http://mirrors.aliyun.com/centos/RPM-GPG-KEY-CentOS-7

#additional packages that may be useful
[extras]
name=CentOS-$releasever - Extras - mirrors.aliyun.com
failovermethod=priority
baseurl=http://mirrors.aliyun.com/centos/$releasever/extras/$basearch/
        http://mirrors.aliyuncs.com/centos/$releasever/extras/$basearch/
        http://mirrors.cloud.aliyuncs.com/centos/$releasever/extras/$basearch/
gpgcheck=1
gpgkey=http://mirrors.aliyun.com/centos/RPM-GPG-KEY-CentOS-7

#additional packages that extend functionality of existing packages
[centosplus]
name=CentOS-$releasever - Plus - mirrors.aliyun.com
failovermethod=priority
baseurl=http://mirrors.aliyun.com/centos/$releasever/centosplus/$basearch/
        http://mirrors.aliyuncs.com/centos/$releasever/centosplus/$basearch/
        http://mirrors.cloud.aliyuncs.com/centos/$releasever/centosplus/$basearch/
gpgcheck=1
enabled=0
gpgkey=http://mirrors.aliyun.com/centos/RPM-GPG-KEY-CentOS-7

#contrib - packages by Centos Users
[contrib]
name=CentOS-$releasever - Contrib - mirrors.aliyun.com
failovermethod=priority
baseurl=http://mirrors.aliyun.com/centos/$releasever/contrib/$basearch/
        http://mirrors.aliyuncs.com/centos/$releasever/contrib/$basearch/
        http://mirrors.cloud.aliyuncs.com/centos/$releasever/contrib/$basearch/
gpgcheck=1
enabled=0
gpgkey=http://mirrors.aliyun.com/centos/RPM-GPG-KEY-CentOS-7
https://developer.aliyun.com/mirror/centos
2.安装
建议切换为root用户
su - root
1.安装系统工具
sudo yum install -y yum-utils device-mapper-persistent-data lvm2
2.添加软件源信息
sudo yum-config-manager --add-repo https://mirrors.aliyun.com/docker-ce/linux/centos/docker-ce.repo
3.更新并安装Docker-CE
sudo yum makecache fast

sudo yum -y install docker-ce
4.开启Docker服务
sudo service docker start
# 注意:
# 官方软件源默认启用了最新的软件,您可以通过编辑软件源的方式获取各个版本的软件包。例如官方并没有将测试版本的软件源置为可用,您可以通过以下方式开启。同理可以开启各种测试版本等。
# vim /etc/yum.repos.d/docker-ee.repo
#   将[docker-ce-test]下方的enabled=0修改为enabled=1
#
# 安装指定版本的Docker-CE:
# Step 1: 查找Docker-CE的版本:
# yum list docker-ce.x86_64 --showduplicates | sort -r
#   Loading mirror speeds from cached hostfile
#   Loaded plugins: branch, fastestmirror, langpacks
#   docker-ce.x86_64            17.03.1.ce-1.el7.centos            docker-ce-stable
#   docker-ce.x86_64            17.03.1.ce-1.el7.centos            @docker-ce-stable
#   docker-ce.x86_64            17.03.0.ce-1.el7.centos            docker-ce-stable
#   Available Packages
# Step2: 安装指定版本的Docker-CE: (VERSION例如上面的17.03.0.ce.1-1.el7.centos)
# sudo yum -y install docker-ce-[VERSION]
5.开机自启动
sudo chkconfig docker on
3.测试
1.查看版本
sudo docker version

2.查看网络信息
ifconfig

多出了一张docker0的网卡
4.赋予非root访问权限
退出root用户
exit
或者
su 普通用户
docker version

1.永久方式(推荐)
# switch root
su root
# Add the docker group if it doesn't already exist.
sudo groupadd docker
# 添加普通用户【此处用户为wyf】
# sudo gpasswd -a ${USER} docker
sudo gpasswd -a wyf docker
# Restart the Docker daemon.
sudo service docker restart
必须执行以下步骤,否则无效
newgrp - docker
su wyf

2.临时方式一
在每次启动docker或者重启docker之后
cd /var/run && sudo chmod 666 docker.sock
3.临时方式二
关于docker的命令都加上 sudo:
例如:sudo docker version
5.docker加速器
http://guide.daocloud.io/dcs/docker-9153151.html
https://www.daocloud.io/mirror
1.加速器配置
su root
sudo tee /etc/docker/daemon.json <<-'EOF'
{
        "registry-mirrors": [
                "https://1nj0zren.mirror.aliyuncs.com",
                "http://f1361db2.m.daocloud.io",
                "https://registry.docker-cn.com",
                "https://dockerhub.azk8s.cn",
                "https://docker.mirrors.ustc.edu.cn",
                "https://reg-mirror.qiniu.com",
                "https://hub-mirror.c.163.com",
                "https://mirror.ccs.tencentyun.com",
                "https://docker.mirrors.ustc.edu.cn"
        ]
}
EOF
2.重启docker
sudo systemctl daemon-reload

sudo systemctl restart docker
3.测试
su wyf
docker info

6.卸载Docker【慎重操作】
建议切换为root用户
su - root
1.卸载并删除docker相关
sudo yum -y remove docker*
2.删除存储
sudo rm -rf /etc/docker/
sudo rm -rf /var/lib/docker/
3.查看已安装的相关docker的
cat /etc/group|grep $(whoami)| grep docker
cat /etc/group|grep wyf|grep docker
4.查看docker组
cat /etc/group|grep docker
5.从docker组中删除用户
whoami | xargs sudo gpasswd -d $1 docker
sudo gpasswd -d wfy docker
6.删除docker组
sudo groupdel docker
7.docker基本命令
# switch root
su root
1.启动
sudo systemctl start docker
2.停止
sudo systemctl stop docker
3.重启
sudo systemctl restart docker
4.状态
sudo systemctl status docker
3.Windows
1.下载
https://mirrors.aliyun.com/docker-ce/win/static/stable/x86_64/https://www.docker.com/products/docker-desktophttps://hub.docker.com/editions/community/docker-ce-desktop-windows
2.安装
下载完成后双击进行安装
点击OK
点击关闭并重启电脑
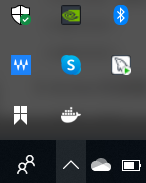
桌面出现docker的图标
右下角出现docker的标签
桌面提示


3.测试
Windows + R 输入cmd
执行
docker version

4.配置镜像加速

点击有下角的docker图标,右键,点击setting
点击"Docker Engine"
如下所示
在"registry-mirrors": []中添加""https://1nj0zren.mirror.aliyuncs.com", "http://f1361db2.m.daocloud.io", "https://registry.docker-cn.com", "https://dockerhub.azk8s.cn", "https://docker.mirrors.ustc.edu.cn", "https://reg-mirror.qiniu.com", "https://hub-mirror.c.163.com", "https://mirror.ccs.tencentyun.com", "https://docker.mirrors.ustc.edu.cn",选择一个或者全部按照json格式添加上即可
点击应用并重启docker


