文章所有涉及到“结论”的东西都是我自己从源码,注释,控制台打印结果出中推测出来的,请勿相信百分之百正确
POM文件,我的博客介绍所有关于netty的文章都基于netty4,netty3与4的写法有很多不同,netty5目测已经作废,我将逐步完善关于netty的学习笔记,打造没有任何多余代码的demo
<dependency>
    <groupId>io.netty</groupId>
    <artifactId>netty-all</artifactId>
    <version>4.1.43.Final</version>
</dependency>
下面写一个小的netty服务器,在windows环境下,首先,建1个类,是我们自己处理事件的事件类
1.事件类
public class MyServerHandler1 implements ChannelInboundHandler {
	private String objName = UUID.randomUUID().toString();

	@Override
	public void handlerAdded(ChannelHandlerContext ctx) throws Exception {
		System.out.println(objName + ":handlerAdded");
	}

	@Override
	public void channelRegistered(ChannelHandlerContext ctx) throws Exception {
		System.out.println(objName + ":channelRegistered");
	}

	@Override
	public void channelActive(ChannelHandlerContext ctx) throws Exception {
		System.out.println(objName + ":channelActive[所在通道:" + ctx.channel().id() + "]");
	}

	@Override
	public void handlerRemoved(ChannelHandlerContext ctx) throws Exception {
		System.out.println(objName + ":handlerRemoved");
	}

	@Override
	public void channelUnregistered(ChannelHandlerContext ctx) throws Exception {
		System.out.println(objName + ":channelUnregistered");
	}

	@Override
	public void channelInactive(ChannelHandlerContext ctx) throws Exception {
		System.out.println(objName + ":channelInactive");
	}

	@Override
	public void channelRead(ChannelHandlerContext ctx, Object msg) throws Exception {
		System.out.println(objName + ":channelRead");
	}

	@Override
	public void channelReadComplete(ChannelHandlerContext ctx) throws Exception {
		System.out.println(objName + ":channelReadComplete");
	}

	@Override
	public void userEventTriggered(ChannelHandlerContext ctx, Object evt) throws Exception {
		System.out.println(objName + ":userEventTriggered");
	}

	@Override
	public void channelWritabilityChanged(ChannelHandlerContext ctx) throws Exception {
		System.out.println(objName + ":channelWritabilityChanged");
	}

	@Override
	public void exceptionCaught(ChannelHandlerContext ctx, Throwable cause) throws Exception {
		System.out.println(objName + ":exceptionCaught");
	}

}
下面是main函数,绑定9999端口
public static void main(String[] args) throws InterruptedException {
		EventLoopGroup boosGroup = new NioEventLoopGroup();
		EventLoopGroup workerGroup = new NioEventLoopGroup();
		ServerBootstrap b = new ServerBootstrap();
		b.group(boosGroup, workerGroup).channel(NioServerSocketChannel.class).childHandler(new MyServerHandler1());
		ChannelFuture f = b.bind(9999).sync();
		f.channel().closeFuture().sync();
	}
好了,一个简单的netty服务器搭建完成,接下来我准备往9999端口发送请求,你可以使用telnet命令,也可以用浏览器localhost:9999,反正无论什么协议,什么请求,都无所谓,因为最终都是byte数组而已,接下来,cmd调出windows窗口
输入
telnet localhost 9999
如图
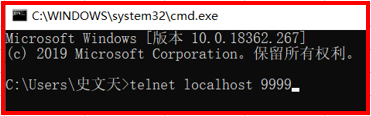
则控制台打印出
f692156c-8985-45f1-be99-f6596fd565e2:handlerAdded
f692156c-8985-45f1-be99-f6596fd565e2:channelRegistered
f692156c-8985-45f1-be99-f6596fd565e2:channelActive[所在通道:b86364f5]
然后我再cmd一个新的窗口,依然输入
telnet localhost 9999
此时控制台打印出
f692156c-8985-45f1-be99-f6596fd565e2:handlerAdded
f692156c-8985-45f1-be99-f6596fd565e2:channelRegistered
f692156c-8985-45f1-be99-f6596fd565e2:channelActive[所在通道:da872349]
观察两次打印不同,得出结论
在本次示例代码中,打开两个客户端去连接服务端,使用了两个通道,但是这两个通道使用的handler是同一个handler,也就是说只new 了一次MyServerHandler1
继续操作,在黑窗口中按键盘上的任意按键,则控制台会输出
//从通道中读数据
f692156c-8985-45f1-be99-f6596fd565e2:channelRead
//数据读取完毕
f692156c-8985-45f1-be99-f6596fd565e2:channelReadComplete
继续操作,点击黑窗口右上角X,关闭窗口
//我也不知道为什么关闭窗口会触发一次读事件
f692156c-8985-45f1-be99-f6596fd565e2:channelReadComplete
f692156c-8985-45f1-be99-f6596fd565e2:channelInactive
f692156c-8985-45f1-be99-f6596fd565e2:channelUnregistered
f692156c-8985-45f1-be99-f6596fd565e2:handlerRemoved
结论:
一个客户端连接服务端,发送一条消息,再关闭客户端,服务端触发的事件如下
1.handlerAdded:将ChannelHandler添加到ChannelPipeline之后触发
2.channelRegistered:将Channel注册到EventLoop后触发
3.channelActive:将Channel激活后触发
4.channelRead:从NioServerSocketChannel中读数据后触发
5.channelReadComplete:目前并不清楚与channelRead的区别
6.channelReadComplete:当关闭客户端时,优先触发
7.channelInactive:将Channel设置成未激活后触发
8.channelUnregistered:将Channel从EventLoop移除后触发
9.handlerRemoved:将ChannelHandler从ChannelPipeline移除之后触发
九个步骤,八个(56相同)事件
