一、文件查找和压缩
1.1、locate
 1 [09:47:15 root@Centos8 ~]#locate -n 10 -ir '\.conf$'
 2 /boot/loader/entries/cd01c25ace5d48be9eb5d78af5f80194-0-rescue.conf
 3 /boot/loader/entries/cd01c25ace5d48be9eb5d78af5f80194-4.18.0-147.el8.x86_64.conf
 4 /etc/dracut.conf
 5 /etc/fuse.conf
 6 /etc/host.conf
 7 /etc/idmapd.conf
 8 /etc/kdump.conf
 9 /etc/krb5.conf
10 /etc/ld.so.conf
11 /etc/libaudit.conf
1.2、find
find [OPTION]... [查找路径] [查找条件] [处理动作]
1.2.1、指定搜索目录层级
find /etc -maxdepth 2 -mindepth 2
示例:
 1 [10:06:26 root@Centos8 ~]#find /etc/ -maxdepth 2
 2 /etc/
 3 /etc/mtab
 4 /etc/fstab
 5 /etc/crypttab
 6 /etc/dnf
 7 /etc/dnf/modules.d
 8 /etc/dnf/vars
 9 /etc/dnf/aliases.d
10 /etc/dnf/dnf.conf
11 /etc/dnf/modules.defaults.d
12 /etc/dnf/plugins
13 /etc/dnf/protected.d
14 /etc/pki
15 /etc/pki/rpm-gpg
16 /etc/pki/ca-trust
17 /etc/pki/java
18 /etc/pki/tls
19 /etc/pki/rsyslog
20 /etc/rpm
21 /etc/rpm/macros.dist
22 /etc/magic
23 /etc/yum
24 /etc/yum/pluginconf.d
25 /etc/yum/protected.d
26 /etc/yum/vars
27 /etc/centos-release
28 /etc/nftables
1.2.2、根据文件名和inode查找
示例:
按照文件名精确搜索根目录下passwd文件
1 [10:25:14 root@Centos8 ~]#find / -name passwd
2 /data/passwd
3 /etc/pam.d/passwd
4 /etc/passwd
5 /var/lib/sss/mc/passwd
6 /usr/bin/passwd
7 /usr/share/licenses/passwd
8 /usr/share/doc/passwd
模糊搜索根目录下包含passwd的文件
  1 [10:34:22 root@Centos8 ~]#find / -name "*passwd*"
  2 /data/passwd.bak
  3 /data/passwd
  4 /etc/security/opasswd
  5 /etc/pam.d/passwd
  6 /etc/passwd-
  7 /etc/passwd
  8 /var/lib/sss/mc/passwd
  9 /var/www/html/centos/8/BaseOS/Packages/passwd-0.80-2.el8.x86_64.rpm
 10 /usr/bin/grub2-mkpasswd-pbkdf2
 11 /usr/bin/gpasswd
 12 /usr/bin/passwd
 13 /usr/bin/htpasswd
 14 /usr/sbin/chgpasswd
 15 /usr/sbin/chpasswd
 16 /usr/sbin/saslpasswd2
 17 /usr/sbin/lpasswd
 18 /usr/lib/firewalld/services/kpasswd.xml
 19 /usr/lib64/security/pam_unix_passwd.so
 20 /usr/share/licenses/passwd
 21 /usr/share/doc/passwd
 22 /usr/share/doc/perl-Net-SSLeay/examples/passwd-cb.pl
 23 /usr/share/locale/ar/LC_MESSAGES/passwd.mo
 24 /usr/share/locale/as/LC_MESSAGES/passwd.mo
 25 /usr/share/locale/ast/LC_MESSAGES/passwd.mo
 26 /usr/share/locale/bg/LC_MESSAGES/passwd.mo
 27 /usr/share/locale/bn/LC_MESSAGES/passwd.mo
 28 /usr/share/locale/bn_IN/LC_MESSAGES/passwd.mo
 29 /usr/share/locale/bs/LC_MESSAGES/passwd.mo
 30 /usr/share/locale/ca/LC_MESSAGES/passwd.mo
 31 /usr/share/locale/cs/LC_MESSAGES/passwd.mo
 32 /usr/share/locale/cy/LC_MESSAGES/passwd.mo
 33 /usr/share/locale/da/LC_MESSAGES/passwd.mo
 34 /usr/share/locale/de/LC_MESSAGES/passwd.mo
 35 /usr/share/locale/el/LC_MESSAGES/passwd.mo
 36 /usr/share/locale/en_GB/LC_MESSAGES/passwd.mo
 37 /usr/share/locale/es/LC_MESSAGES/passwd.mo
 38 /usr/share/locale/et/LC_MESSAGES/passwd.mo
......
按照文件节点编号搜索文件
1 [10:35:56 root@Centos8 ~]#find / -inum 128 -ls
2       128      4 dr-xr-xr-x  21  root     root         4096 Apr 11 00:09 /
3       128     12 -rw-r--r--   1  root     root         9892 Apr  2 23:52 /boot/grub2/i386-pc/jpeg.mod
4       128      0 drwxr-xr-x   4  root     root           85 Apr 11 21:49 /data
5       128      0 -rw-r--r--   1  root     root            0 Apr 12 09:44 /sys/kernel/debug/tracing/events/xen/xen_cpu_write_ldt_entry/filter
6       128      0 -r--r--r--   1  root     root         4096 Apr 12 10:37 /sys/devices/system/memory/memory3/valid_zones
用正则表达式搜索文件名为任意字符串,以.conf结尾的文件
[10:37:48 root@Centos8 ~]#find / -regex '.*\.conf$'
/boot/loader/entries/cd01c25ace5d48be9eb5d78af5f80194-0-rescue.conf
/boot/loader/entries/cd01c25ace5d48be9eb5d78af5f80194-4.18.0-147.el8.x86_64.conf
/run/NetworkManager/resolv.conf
/run/NetworkManager/no-stub-resolv.conf
/run/tmpfiles.d/kmod.conf
......
1.2.3、按属主、属组查找
 1 [10:40:32 root@Centos8 ~]#find / -user gjz -ls
 2 find: ‘/proc/1737/task/1737/fd/8’: No such file or directory
 3 find: ‘/proc/1737/task/1737/fdinfo/8’: No such file or directory
 4 find: ‘/proc/1737/fd/7’: No such file or directory
 5 find: ‘/proc/1737/fdinfo/7’: No such file or directory
 6  67918128      0 -rw-rw----   1  gjz      mail            0 Apr  2 23:52 /var/spool/mail/gjz
 7 135065766      4 drwxr-xr-x   6  gjz      gjz          4096 Apr 11 01:02 /usr/local/src/cmatrix
 8 205805830      0 drwxr-xr-x   3  gjz      gjz            17 Nov  6  2018 /usr/local/src/cmatrix/data
 9   7363671      0 drwxr-xr-x   2  gjz      gjz            59 Nov  6  2018 /usr/local/src/cmatrix/data/img
10   7363672    168 -rw-r--r--   1  gjz      gjz        169414 Nov  6  2018 /usr/local/src/cmatrix/d
搜索没有所属组的用户
1 [10:43:50 root@Centos8 ~]#find / -nouser
2 find: ‘/proc/1769/task/1769/fd/8’: No such file or directory
3 find: ‘/proc/1769/task/1769/fdinfo/8’: No such file or directory
4 find: ‘/proc/1769/fd/7’: No such file or directory
5 find: ‘/proc/1769/fdinfo/7’: No such file or directory
1.2.4、根据文件类型查找
1 [10:57:43 root@Centos8 ~]#find /etc/ -type d -ls
2 134320257     12 drwxr-xr-x  81  root     root         8192 Apr 12 09:45 /etc/
3 201326722      0 drwxr-xr-x   8  root     root          128 Apr  2 23:49 /etc/dnf
4       134      0 drwxr-xr-x   2  root     root           59 Apr  9 16:24 /etc/dnf/modules.d
5       567      0 drwxr-xr-x   2  root     root           37 Nov 12 23:35 /etc/dnf/vars
6    120634      0 drwxr-xr-x   2  root     root            6 Nov 12 23:35 /etc/dnf/aliases.d
7  67533972      0 drwxr-xr-x   2  root     root            6 Nov 12 23:35 /etc/dnf/modules.default
8 ......
搜索/etc下的所有空目录文件
 1 [11:07:10 root@Centos8 ~]#find /etc/ -type d -empty
 2 /etc/dnf/aliases.d
 3 /etc/dnf/modules.defaults.d
 4 /etc/dnf/plugins/copr.d
 5 /etc/pki/ca-trust/source/anchors
 6 /etc/pki/ca-trust/source/blacklist
 7 /etc/pki/tls/misc
 8 /etc/pki/rsyslog
 9 /etc/gnupg
10 /etc/security/pwquality.conf.d
11 /etc/security/console.apps
12 /etc/security/console.perms.d
13 /etc/security/limits.d
14 ......
1.2.5、组合条件
1 [11:09:14 root@Centos8 ~]#find /etc/ -type d -o -type l
1 [11:38:10 root@Centos8 ~]#find /tmp -not -user root -a -not -name 'f*' -ls
1.2.6、按时间查找
atime表示文件读时间 mtime 表示文件修改时间 ctime 表示文件属性修改时间
如后面直接跟10表示10-11天的内容
+10表示11天到之前的时间
-10表示0-10之间的时间
示例:
查找11天前创建的文件
1 [11:47:43 root@Centos8 ~]#find / -mtime +10
1.2.7、 根据权限查找
1 [11:47:43 root@Centos8 ~]#find /data/ -perm /444
1.2.8、处理动作
查找/usr/share 目录下大小10M以上且创建时间10天以上的文件,移动到data目录下
[22:37:45 root@Centos8 ~]#find /usr/share/ -size +10M -mtime +10 -ok mv {} /data \;
[22:37:45 root@Centos8 ~]#find /data/ -name "*.txt" -exec rm {} \;
利用find命令进行备份
[23:21:55 root@Centos8 ~]#find /data -name "*.txt" -exec cp {} {}.bak \;
1.2.9、参数替换xarge
find | xargs COMMAND
示例:
利用xarge实现同时创建多个用户
[23:34:26 root@Centos8 ~]#echo user{1..10} | xargs -n1 useradd
批量删除
[11:51:31 root@Centos8 ~]#echo user{1..10} | xarge -n1 userdel -r
1.3、压缩和解压缩
1.3.1、compress和uncompress
compress Options [file ...]
uncompress file.Z             #解压缩
常用选项
-d 解压缩,相当于uncompress
-c 结果输出至标准输出,不删除原文件
-v 显示详情
1.3.2、gzip和gunzip
gzip [OPTION]... FILE ...
常用选项:
gunzip file.gz        #解压缩
zcat file.gz            #不显式解压缩的前提下查看文本文件内容
示例:
gzip -c messages >messages.gz
1.3.3、bzip2和bunzip2
格式:
bzip2 [OPTION]... FILE ...
常用选项:
示例:
bunzip2 file.bz2      解压缩
bzcat file.bz2         不显式解压缩的前提下查看文本文件内容
1.3.4、xz和unxz
格式:
xz [OPTION]... FILE ...
常用选项:
示例:
unxz file.xz       解压缩
xzcat file.xz      不显式解压缩的前提下查看文本文件内容
1.3.5、zip和unzip
zip –r /backup/sysconfig.zip /etc/sysconfig/     打包并压缩
cd /etc/sysconfig; zip -r /root/sysconfig.zip *  不包括目录本身,只打包目录内的文件和子目录
unzip /backup/sysconfig.zip                      默认解压缩至当前目录
1.3.6、打包和解包
tar
示例:
创建压缩文件
tar -cpvf /PATH/FILE.tar FILE...
解压
tar xf /PATH/FILE.tar
tar xf /PATH/FILE.tar -C /PATH/
示例:
1 [root@centos8 ~]#tar zcvf etc.tar.gz /etc/
2 [root@centos8 ~]#tar jcvf etc.tar.bz2 /etc/
3 [root@centos8 ~]#tar Jcvf etc.tar.xz /etc/
4 [root@centos8 ~]#ll etc.tar.*
5 -rw-r--r-- 1 root root 3645926 Dec 20 22:00 etc.tar.bz2
6 -rw-r--r-- 1 root root 5105347 Dec 20 21:59 etc.tar.gz
7 -rw-r--r-- 1 root root 3101616 Dec 20 22:00 etc.tar.xz
[root@linux ~]# tar -czvpf /tmp/etc.tar.gz /etc 将/etc内的文件打包压缩至/tmp目录下,压缩包名称为etc.tar.gz
如果要只对目录下的文件打包不包括目录,需要先进到带目录下,最后加*号
[15:22:07 root@Centos8 ~]#tar zcvf /root/etc.tar.gz *
二、软件包管理
2.1光盘自动挂载
1、首先需要安装autofs软件包
[15:03:44 root@Centos8 ~]#yum -y install autofs

2、启动autofs
[15:04:59 root@Centos8 ~]#systemctl enable --now autofs
注意:centos6需要执行以下两条命令
chkconfig autofs on ; service autofs start
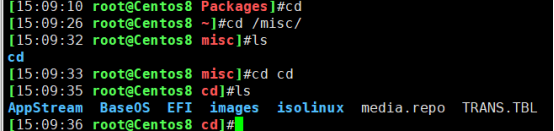
3、然后直接进入misc目录即可访问光盘文件
[15:09:10 root@Centos8 Packages]#cd
[15:09:26 root@Centos8 ~]#cd /misc/
[15:09:32 root@Centos8 misc]#ls
cd
[15:09:33 root@Centos8 misc]#cd cd
[15:09:35 root@Centos8 cd]#ls
AppStream  BaseOS  EFI  images  isolinux  media.repo  TRANS.TBL
[15:09:36 root@Centos8 cd]#
2.2、rpm命令
rpm -q +包名 查看包是否在本机安装
示例:
[15:23:05 root@Centos8 ~]#rpm -q tree
tree-1.7.0-15.el8.x86_64
rpm -qa 查看本机安装的所有软件包
示例:
 1 [15:56:03 root@Centos8 ~]#rpm -qa
 2 python-srpm-macros-3-37.el8.noarch
 3 libevent-2.1.8-5.el8.x86_64
 4 geolite2-city-20180605-1.el8.noarch
 5 go-srpm-macros-2-16.el8.noarch
 6 rpm-plugin-selinux-4.14.2-25.el8.x86_64
 7 centos-gpg-keys-8.1-1.1911.0.8.el8.noarch
 8 annobin-8.78-1.el8.x86_64
 9 python3-unbound-1.7.3-8.el8.x86_64
10 filesystem-3.8-2.el8.x86_64
11 python3-linux-procfs-0.6-7.el8.noarch
12 ncurses-base-6.1-7.20180224.el8.noarch
13 python3-slip-0.6.4-11.el8.noarch
14 glibc-langpack-en-2.28-72.el8.x86_64
15 python3-schedutils-0.6-6.el8.x86_64
16 libsepol-2.9-1.el8.x86_64
17 python3-asn1crypto-0.24.0-3.el8.noarch
18 bzip2-libs-1.0.6-26.el8.x86_64
.......
[21:20:16 root@Centos8 ~]#rpm -qa |grep tree 配和grep模糊搜索查看是否安装tree包
rpm -qi +包名 列出已经安装在本机的指定软件的详细信息
示例:
 1 [15:57:16 root@Centos8 ~]#rpm -qi tree
 2 Name        : tree
 3 Version     : 1.7.0
 4 Release     : 15.el8
 5 Architecture: x86_64
 6 Install Date: Wed 08 Apr 2020 11:26:48 PM CST
 7 Group       : Unspecified
 8 Size        : 111603
 9 License     : GPLv2+
10 Signature   : RSA/SHA256, Tue 02 Jul 2019 09:53:45 AM CST, Key ID 05b555b38483c65d
11 Source RPM  : tree-1.7.0-15.el8.src.rpm
12 Build Date  : Sat 11 May 2019 11:54:52 PM CST
13 Build Host  : x86-01.mbox.centos.org
14 Relocations : (not relocatable)
15 Packager    : CentOS Buildsys <[email protected]>
16 Vendor      : CentOS
17 URL         : http://mama.indstate.edu/users/ice/tree/
18 Summary     : File system tree viewer
19 Description :
20 The tree utility recursively displays the contents of directories in a
21 tree-like format.  Tree is basically a UNIX port of the DOS tree
22 utility.
rpm -qc +包名 列出已经安装在本机的指定软件在/etc下的配置文件
rpm -ql +包名 列出指定的软件包安装后生成的所有文件
示例:
1 [16:03:50 root@Centos8 ~]#rpm -ql tree
2 /usr/bin/tree
3 /usr/lib/.build-id
4 /usr/lib/.build-id/d8
5 /usr/lib/.build-id/d8/6d516d7cb07fb9334cb268af808119e33a5ac5
6 /usr/share/doc/tree
7 /usr/share/doc/tree/LICENSE
8 /usr/share/doc/tree/README
9 /usr/share/man/man1/tree.1.gz
rpm -qd +包名 列出已经安装在本机的指定软件包含的文档
示例:
1 [16:04:37 root@Centos8 ~]#rpm -qd tree
2 /usr/share/doc/tree/LICENSE
3 /usr/share/doc/tree/README
4 /usr/share/man/man1/tree.1.gz
rpm -q --scripts +包名 列出已经安装在本机的指定软件的安装时的脚本
rpm -qf +文件名 列出该文件来自哪个已经安装的软件包
示例:
[16:13:19 root@Centos8 ~]#rpm -qf /etc/issue
centos-release-8.1-1.1911.0.8.el8.x86_64
rpm -qpi +软件包名称 查看软件包内容
rpm -qpl +软件包名称 查看软件包将来安装好后在磁盘生成的文件及路径
2.3、yum命令
yum的命令行选项
2.3.1、显示仓库列表
1 [16:20:37 root@Centos8 ~]#yum repolist
2 Extra Packages for Enterprise Linux 8 - x86_64                   6.9 kB/s | 6.6 kB     00:00
3 Extra Packages for Enterprise Linux 8 - x86_64                   615 kB/s | 6.3 MB     00:10
4 extras                                                            13 kB/s | 1.5 kB     00:00
5 repo id                    repo name                                                       status
6 AppStream                  aliyum AppStream                                                5,124
7 BaseOS                     aliyum BaseOS                                                   2,126
8 *epel                      Extra Packages for Enterprise Linux 8 - x86_64                  5,268
9 extras                     extras                                                             12
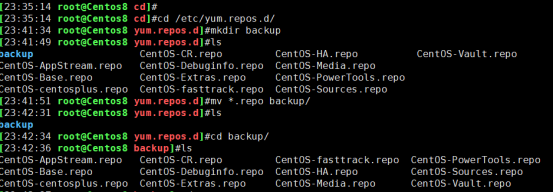
2.3.2、自建yum仓库,将系统默认yum站点改为阿里云站点
[23:35:14 root@Centos8 cd]#cd /etc/yum.repos.d/                进入指定文件夹
[23:41:51 root@Centos8 yum.repos.d]#mv *.repo backup/          将系统自带的yum仓库备份到backup文件夹下
创建.repo后缀的文件并进行编辑,文件中写以下内容
 1 [BaseOS]
 2 name=aliyum BaseOS
 3 baseurl= https://mirrors.aliyun.com/centos/8/BaseOS/x86_64/os/
 4          https://repo.huaweicloud.com/centos/8/BaseOS/x86_64/os/  (repodata文件所在目录即为正确url)

 5 gpgcheck=1
 6 enabled=1                 (启用为1禁用为0)
 7 gpgkey=file:///etc/pki/rpm-gpg/RPM-GPG-KEY-centosofficial   (本地密钥)
 8
 9 [AppStream]
10 name=aliyum AppStream
11 baseurl= https://mirrors.aliyun.com/centos/8/AppStream/x86_64/os/
12          https://repo.huaweicloud.com/centos/8/AppStream/x86_64/os/
13 gpgcheck=1
14 enabled=1
15 gpgkey=file:///etc/pki/rpm-gpg/RPM-GPG-KEY-centosofficial
16
17 [extras]
18 name=extras
19 baseurl=https://mirrors.aliyun.com/centos/$releasever/extras/$basearch/os
20 gpgcheck=o
注意:centos8密钥路径:/etc/pki/rpm-gpg/RPM-GPG-KEY-centosofficial
2.3.3、创建基于局域网的私有yum源
仓库服务器配置 IP地址为10.0.0.7
1、首先安装httpd软件包
[16:24:31 root@Centos8 ~]#yum -y install httpd

2、 装好之后默认生成html文件夹

1 [root@repo-server ~]#yum -y install httpd                 下载httpd软件包
2 [root@repo-server ~]#systemctl enable --now httpd         启动http服务
3 [root@repo-server ~]#mkdir /var/www/html/centos/8 -pv     在该目录下创建/centos/8目录
4 [root@repo-server ~]#mount /dev/sr0 /mnt/                 本地挂载光盘
5 [root@repo-server ~]#cp -a /mnt/* /var/www/html/centos/8  将光盘全部文件拷贝到创建的目录下
3、浏览器访问该服务器地址
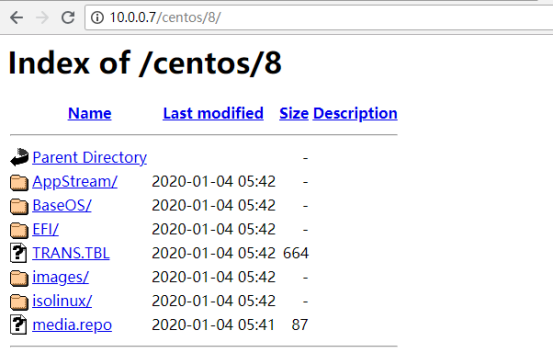
4、搭建extras源、epel源
1 [21:23:18 root@Centos8 yum.repos.d]#cd /var/www/html/centos/
2 [21:29:38 root@Centos8 centos]#ls
3 8
4 [21:29:39 root@Centos8 centos]#mkdir extras      创建extras目录
5 [21:29:50 root@Centos8 centos]#ls
6 8  extras
[21:44:40 root@Centos8 yum.repos.d]#dnf reposync --repoid=extras --download-metadata -p /var/www/html/centos/extras/ 下载extras元数据
[22:34:47 root@Centos8 html]#dnf reposync --repoid=epel --download-metadata -p /var/www/html/ 下载epel元数据
客户端配置 IP地址为10.0.0.8
[17:25:25 root@centos8 yum.repos.d]#mv *.repo backup/   首先将系统自带的源文件备份到backup目录下
[17:25:25 root@centos8 yum.repos.d]#vim test.repo       创建并编辑test.repo文件
文件内容如下:
 1 [BaseOS]
 2 name=BaseOS
 3 baseurl=http://10.0.0.7/centos/8/BaseOS/
 4 gpgkey=file:///etc/pki/rpm-gpg/RPM-GPG-KEY-centosofficial
 5
 6
 7 [AppStream]
 8 name=AppStream
 9 baseurl=http://10.0.0.7/centos/8/AppStream/
10 gpgkey=file:///etc/pki/rpm-gpg/RPM-GPG-KEY-CentOS-7
11
12 [extras]
13 name=extras
14 baseurl=http://10.0.0.7/centos/8/extras/
15
16 [epel]
17 name=epel
18 baseurl=http://10.0.0.7/epel/
19 gpgkey=https://mirrors.aliyun.com/epel/RPM-GPG-KEY-EPEL-8
注意:Centos8 Epel源密钥:
https://mirrors.aliyun.com/epel/RPM-GPG-KEY-EPEL-8
三、sed文本处理工具
1、只打印passwd文件第三行 -n表示屏蔽自动打印
[19:09:21 root@Centos8 data]#sed -n '3p' passwd

可以配合管道符使用

2、只打印passed文件最后一行 $表示最后一行
[19:15:22 root@Centos8 data]#sed -n '$p' passwd

tail -n1 也表示打印最后一行

3、打印/etc/fstab文件非#开头的行 第一个^表示行首 [^#]表示除了#号
[19:26:25 root@Centos8 data]#cat /etc/fstab |sed -n '/^[^#]/p'

4、只显示3-6行
[19:26:53 root@Centos8 data]#seq 10 |sed -n '3,6p'

配合cat -n nl用法

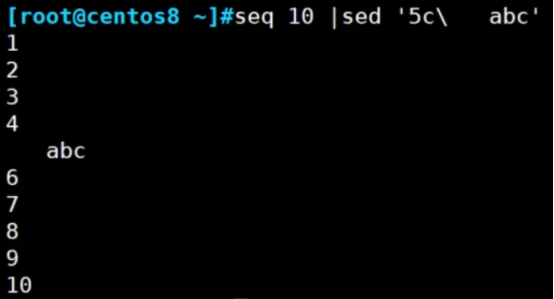
5、显示d开头到s开头结束的行
[19:35:55 root@Centos8 data]#sed -n '/^d/,/^s/p' /etc/passwd
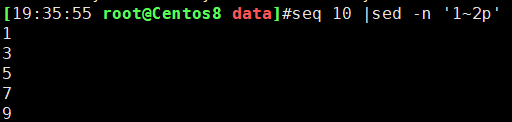
6、步进打印,从1开始每次增加2行打印 1~2
[19:35:55 root@Centos8 data]#seq 10 |sed -n '1~2p'
7、打印不包含root的行
[19:44:04 root@Centos8 data]#sed '/root/d' /etc/passwd
[20:55:34 root@Centos8 data]#sed -n '/root/!p' /etc/passwd
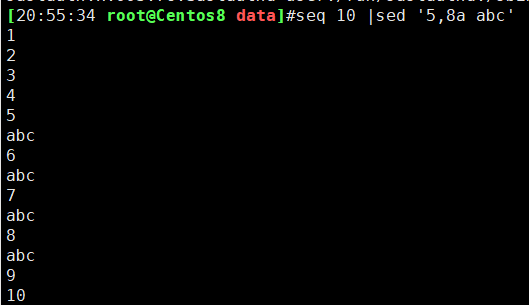
8、追加,5-8行每行后面追加abc字样
[20:55:34 root@Centos8 data]#seq 10 |sed '5,8a abc'
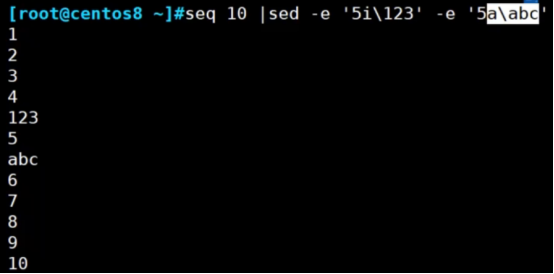
9、sed -e 多行编辑
在第5行前后分别插入字符
10、删除passwd文件中包含root的行, sed -i.bak 可对文件进行备份
[20:57:27 root@Centos8 data]#sed -i.bak '/root/d' passwd
11、将/etc/httpd/http文件中 User apache 替换为User daemon 注意-e多行编辑用法
![]()
在.bashrc文件第10行后面追加 cat -n + 文件查看文件行号

(repodata文件所在目录即为正确url)