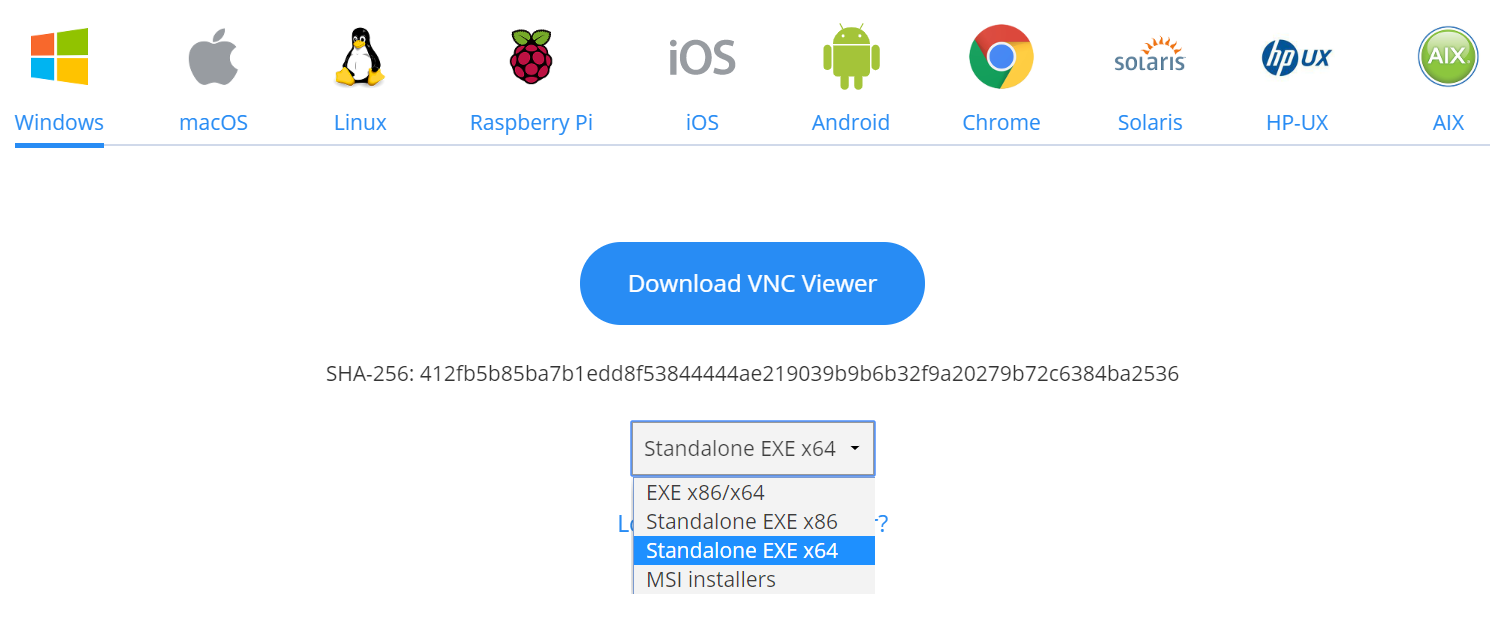
https://www.realvnc.com/en/connect/download/viewer/
选择Windows ——Standalone EXE x64
在服务器上安装服务端
保证已安装windows桌面:
yum groupinstall "GNOME Desktop Environment"
或者最小化安装:yum install xterm
安装vnc-server
上传并安装 tigervnc-server-1.8.0-13.el7.x86_64.rpm
[root@centos7-6 ~]# rpm -ivh tigervnc-server-1.8.0-13.el7.x86_64.rpm
开启vnc
[root@centos7-6 ~]# vncserver

You will require a password to access your desktops.

Password:
Verify:
Would you like to enter a view-only password (y/n)? n  #此处问是否设置一个只读密码? 选择n;若选y的话,进入图形化后是仅查看模式,不能操作
A view-only password is not used

New 'centos7-6:1 (root)' desktop is centos7-6:1   #此处的 1 VNC 服务的序号

Creating default startup script /root/.vnc/xstartup
Creating default config /root/.vnc/config
Starting applications specified in /root/.vnc/xstartup
Log file is /root/.vnc/centos7-6:1.log

[root@centos7-6 ~]#
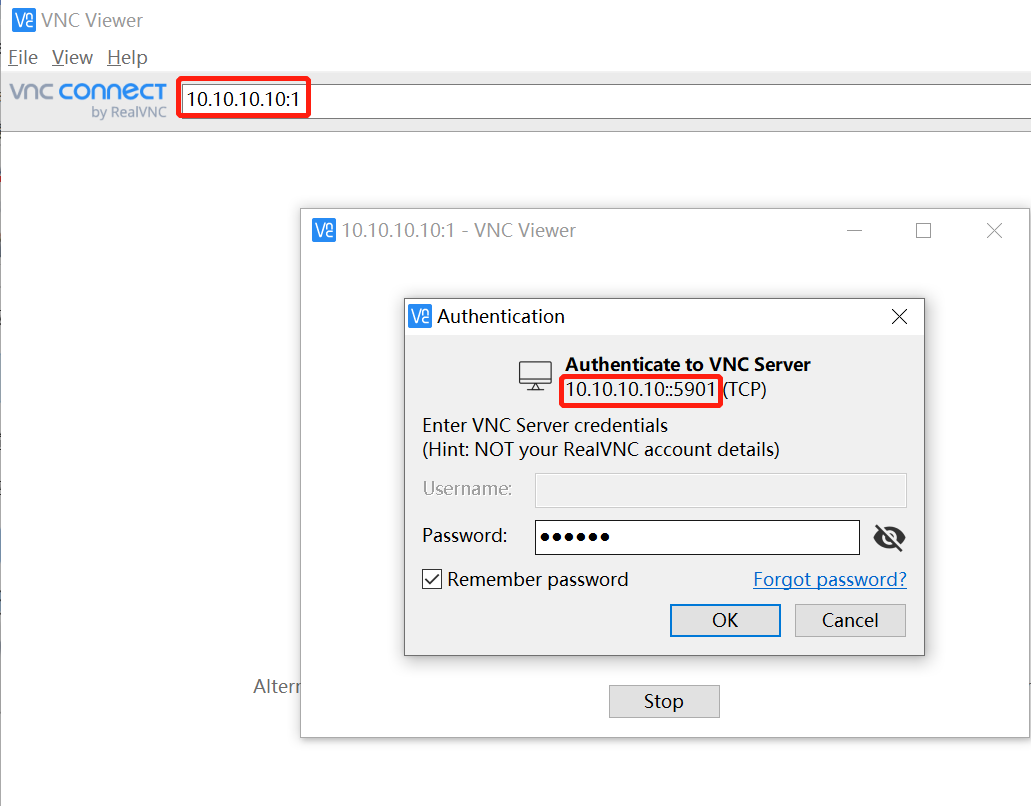
双击刚才下载的VNC-Viewer

输入ip和序号,vnc访问:10.10.10.10:1 那么访问的真正端口是5900+1=5901
也可以直接输入ip和端口号,如:10.10.10.10:5901
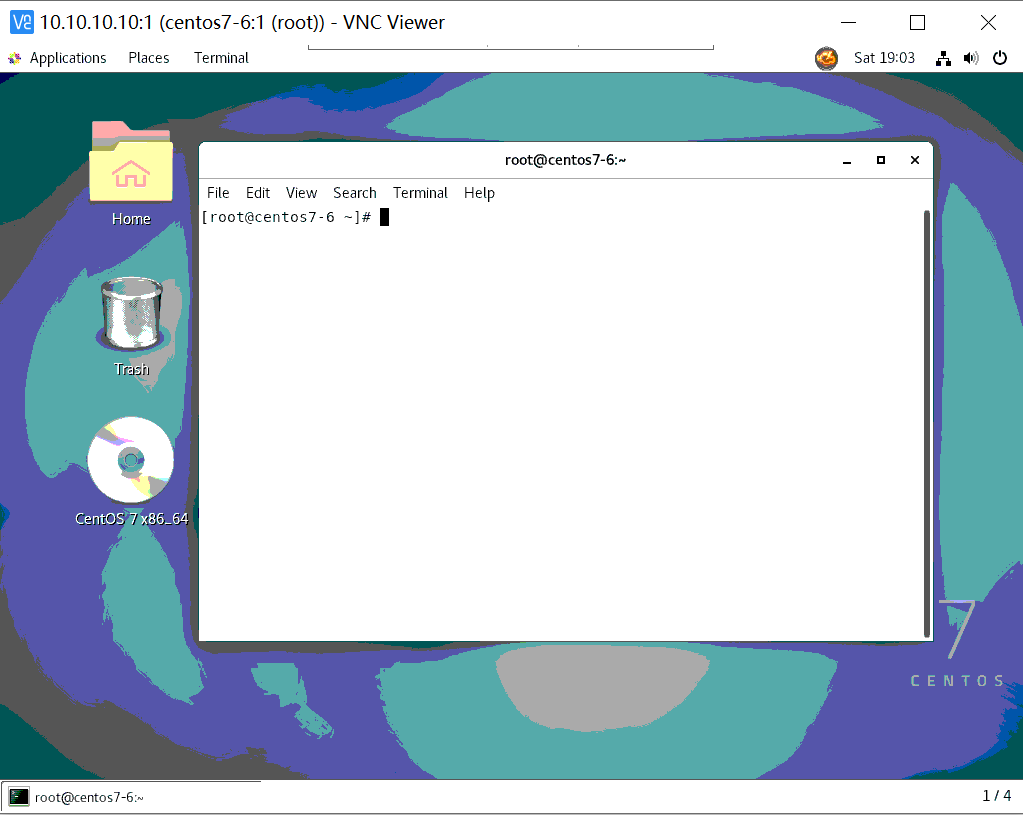
接下来就可以远程图形化登录到服务器了
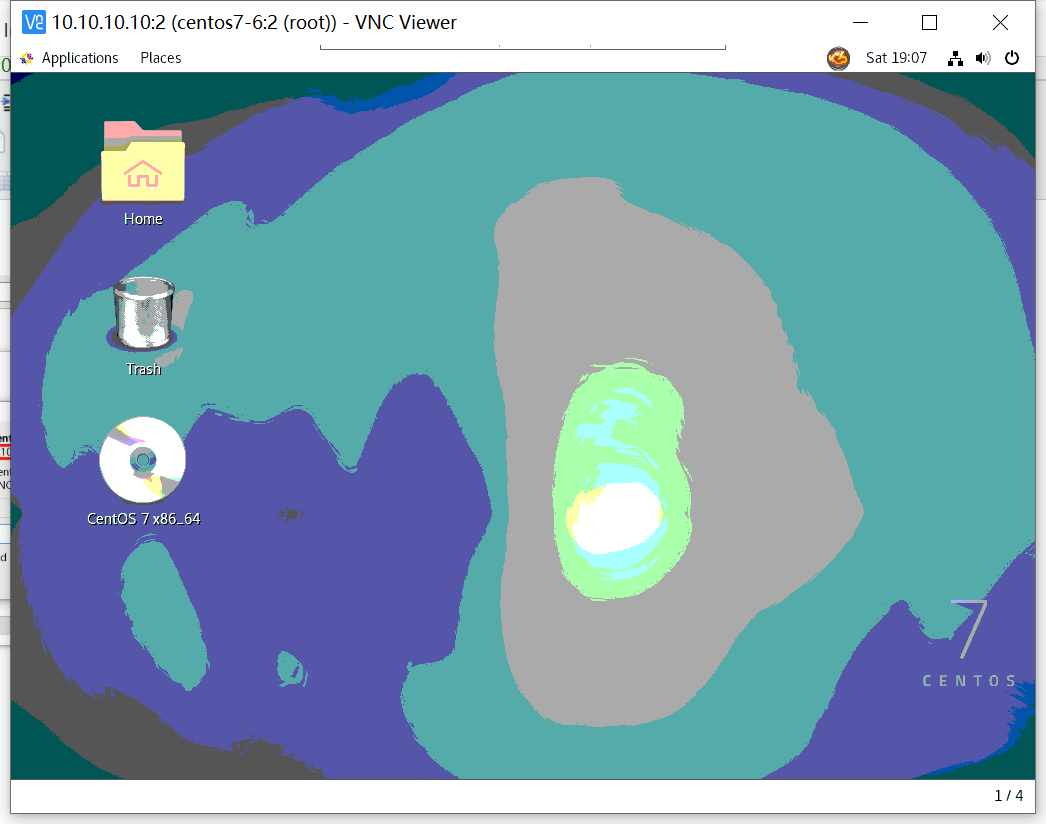
通过VNC不同端口登录到服务器,各窗口是相互隔离,互不影响的。
如下:
[root@centos7-6 ~]# vncserver

New 'centos7-6:2 (root)' desktop is centos7-6:2

Starting applications specified in /root/.vnc/xstartup
Log file is /root/.vnc/centos7-6:2.log

[root@centos7-6 ~]#

vncserver -list 查看当前用户开了多少个vncserver
[root@centos7-6 ~]# vncserver -list

TigerVNC server sessions:

X DISPLAY #     PROCESS ID
:1              89580
:2              99820
[root@centos7-6 ~]#
kill掉编号为1的vnc虚拟桌面,当前正在远程的连接也会中断
[root@centos7-6 ~]# vncserver -kill :1
Killing Xvnc process ID 89580
[root@centos7-6 ~]# vncserver -list

TigerVNC server sessions:

X DISPLAY #     PROCESS ID
:2              99820