使用FastDFS搭建图片服务器(单实例)
1、背景描述
之前公司的图片服务器已经不能胜任了(直接使用tomcat),需要重新搭建图片服务器,这两天研究了下FastDFS,感觉挺好用记录下来以供日后参考。
FastDFS官方介绍
FastDFS是一款类Google FS的开源分布式文件系统,它用纯C语言实现,支持Linux、FreeBSD、AIX等UNIX系统。它只能通过 专有API对文件进行存取访问,不支持POSIX接口方式,不能mount使用。准确地讲,Google FS以及FastDFS、mogileFS、 HDFS、TFS等类Google FS都不是系统级的分布式文件系统,而是应用级的分布式文件存储服务。
1、FastDFS架构图

图1:FastDFS架构图
1)Tracker cluster中各个tracker server相互独立,不进行相互通信。
2)Storage cluster中各个storage组(Volume1,Volume2...)相互独立,不进行相互通信,也就是说各个组之间保存的数据是不相同的。但是各个组中的storage server之间是属于互相备份的关系,也就是说storage server之间保存相同的数据。
3)每个storage server会启动一个单独的线程主动向Tracker cluster中每个tracker server报告其状态信息,包括磁盘使用情况,文件同步情况及文件上传下载次数统计等信息。
2、文件上传和下载的时序图

图2:文件上传时序图
1)Client通过Tracker server将文件上传到Storage server。
2)Tracker server向Client返回一台可用的Storage server的IP地址和端口号。
3)Client直接通过Tracker server返回的IP地址和端口与其中一台Storage server建立连接并进行文件上传。
4)上传完成,Storage server返回Client一个文件ID,文件上传结束。

图3:文件下载时序图
1)Client通过Tracker server下载指定Storage组中某个Storage server上的某个文件(文件名包括Storage组名称)。
2)Tracker server向Client返回一台可用的Storage server的IP地址和端口号。
3)Client直接通过Tracker server返回的IP地址和端口与其中一台Storage server建立连接并进行文件下载。
解释一下:
1. fastDFS是按照Group的形式对file进行分组存储的,这里的group1你可以理解成C盘,group2理解成D盘,所有的数据都是在Group来划分的。
2. 为了提高读取性能和热备份,我们把group1放到了两台机器上,大概可能觉得有点浪费,对吧,事实就是这样。
3. 为了提高扩展性,因为单机是有存储上限的,这时候你可以再新建一个group2,也就是D盘,放到另外机器上,这样你就扩容了,对吧。
4. trackerServer主要用来保存group和storage的一些状态信息,主要和client端进行交互,返回正确的storeage server地址,这个和hadoop的
namenode其实是同一个角色的。
5. 这里要注意的一个地方就是,client端在存储file的时候,需要告诉trackerserver,你需要存储到哪一个group中,比如group1还是group2?
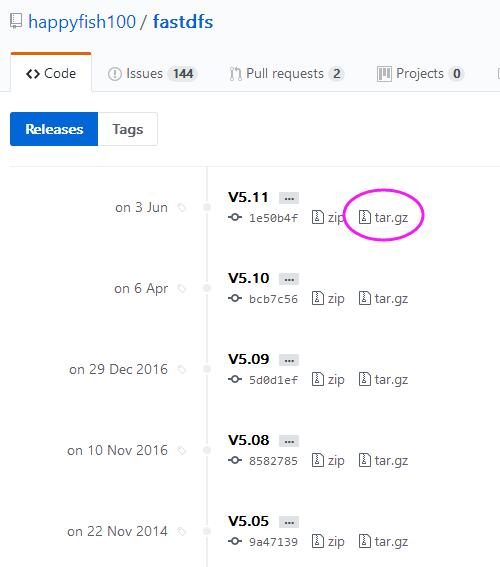
2. 下载fast源码包:https://github.com/happyfish100/fastdfs/releases
3. wget之后,先把libfastcommon给安装一下
tar -xzvf V1.0.36
cd libfastcommon-1.0.36
./make.sh && ./make.sh install
再把fastdfs安装一下。
tar -xzvf V5.11
cd fastdfs-5.11
./make.sh &&./make.sh install
这样的话,我们的fast就算安装好了,因为是默认安装,所以配置文件是在 /etc/fdfs目录下,启动服务在/etc/init.d下。

[root@localhost ~]# cd /etc/fdfs
[root@localhost fdfs]# ls
 client.conf client.conf.sample storage.conf.sample storage_ids.conf.sample tracker.conf.sample

[root@localhost fdfs]# cd /etc/init.d
[root@localhost init.d]# ls
fdfs_storaged  fdfs_trackerd  functions  netconsole  network  README
[root@localhost init.d]#
然后再把两个storage.conf.sample 和 tracker.conf.sample中copy出我们需要配置的文件。
[root@localhost fdfs]# cp storage.conf.sample storage.conf
[root@localhost fdfs]# cp tracker.conf.sample tracker.conf
[root@localhost fdfs]# ls
client.conf  client.conf.sample  storage.conf  storage.conf.sample  storage_ids.conf.sample  tracker.conf  tracker.conf.sample
[root@localhost fdfs]#
4. tracker.conf 配置
这个配置文件,主要是配置里面的base_path。
# the base path to store data and log files
base_path=/usr/fast/fastdfs-5.11/data/tracker
指定完路径之后,我们创建一个data文件夹和tracker文件夹。
5. storage.conf 配置
这个配置文件,我们主要配置三样东西。
1. 本storage服务器的groupname,大家看过架构图应该也明白了,对吧。
2. 为了提高磁盘读写,可以指定本groupname的file存储在哪些磁盘上。
3. 指定和哪一台trackerserver进行交互。
# the name of the group this storage server belongs to
#
# comment or remove this item for fetching from tracker server,
# in this case, use_storage_id must set to true in tracker.conf,
# and storage_ids.conf must be configed correctly.
group_name=group1


# the base path to store data and log files
base_path=/usr/fast/fastdfs-5.11/data/storage

# path(disk or mount point) count, default value is 1
store_path_count=1

# store_path#, based 0, if store_path0 not exists, it's value is base_path
# the paths must be exist
store_path0=/usr/fast/fastdfs-5.11/data/storage/0
#store_path1=/home/yuqing/fastdfs2

# tracker_server can ocur more than once, and tracker_server format is
#  "host:port", host can be hostname or ip address
tracker_server=192.168.23.152:22122
然后在data目录下创建storage和0文件夹
6.启动 FastDFS,可以看到22122的端口已经启动了,说明搭建成功
[root@localhost ~]# /etc/init.d/fdfs_trackerd start
Starting fdfs_trackerd (via systemctl):                    [  OK  ]
[root@localhost ~]# /etc/init.d/fdfs_storaged start
Starting fdfs_storaged (via systemctl):                    [  OK  ]
[root@localhost 0]# netstat -tlnp
Active Internet connections (only servers)
Proto Recv-Q Send-Q Local Address           Foreign Address         State       PID/Program name
tcp        0      0 0.0.0.0:22122           0.0.0.0:*               LISTEN      4346/fdfs_trackerd
tcp        0      0 192.168.122.1:53        0.0.0.0:*               LISTEN      1786/dnsmasq
tcp        0      0 0.0.0.0:22              0.0.0.0:*               LISTEN      1129/sshd
tcp        0      0 127.0.0.1:631           0.0.0.0:*               LISTEN      1128/cupsd
tcp        0      0 0.0.0.0:23000           0.0.0.0:*               LISTEN      4171/fdfs_storaged
tcp        0      0 127.0.0.1:25            0.0.0.0:*               LISTEN      1556/master
tcp6       0      0 :::22                   :::*                    LISTEN      1129/sshd
tcp6       0      0 ::1:631                 :::*                    LISTEN      1128/cupsd
tcp6       0      0 ::1:25                  :::*                    LISTEN      1556/master
[root@localhost 0]#
參考: https://www.2cto.com/kf/201708/669886.html
https://blog.csdn.net/u010098331/article/details/51646921
https://www.cnblogs.com/huangxincheng/p/7928345.html
https://www.cnblogs.com/tc520/p/6822412.html