Intent之隐式启动
隐式启动是指有Android系统根据Intent的action(动作)和data(数据)决定要启动哪一个Activity。
我自己感觉使用Intent隐式启动,就得了解Intent过滤器。
Intent过滤器(是IntentFilter类的实例)是能够接受需要类型的Intent,拒绝不需要类型的Intent,但是仅限于隐式Intent。隐式Intent只有在通过组件的Intent过滤器之后才能发送给组件。隐式Intent启动Android系统会将Intent的内容与设备所有的app的manifest文件中的Intent过滤器比较,找出最合适的组件去启动。
过滤器包含的域和Intent对象中动作(action)、数据(data)、和分类域(category)相对应。
1、动作测试
配置文件中的标签将动作作为子标签列出,例如,
<intent-filter>
    <action android:name="android.intent.action.MAIN" />

</intent-filter>
如上所示,尽管Intent对象我只定义一个动作,在过滤器中却可以列出多个。
列表不能为空,过滤器中必须包含至少一个标签,否则会堵塞所有的Intent.
2、种类测试
配置文件中的标签将分类作为category子标签列出,例如,
<intent-filter>
    <category android:name="android.intent.category.LAUNCHER" />
</intent-filter>
Intent对象中每个种类都必须与过滤器中定义种类相匹配。在过滤器中可以额外增加种类,但是不能删除任何Intent中的种类。
Android对于所有通过startActivity()方法传递的隐式Intent默认其包含一个种类"android.intent.category.DEFAULT"。
3、数据测试
配置文件中的标签将分类作为data子标签列出,例如,
<intent-filter>
    <data android:scheme="http" />
</intent-filter>
在标签中在配置一个标签,用于更准确地指定当前活动能够相应什么类型的数据。
每个标签可以指定URI和数据类型(MIME媒体类型).URI可以分成scheme、host和post几个独立的部分。
下面展示一些 内联代码片。
scheme://host:port/path
android:scheme。用于指定数据的协议部分,如上例的http部分。
android:host。用于指定数据的主机名部分,如www.baidu.com部分。
android:port。用于指定数据的端口部分,一般紧随在主机名之后。
android:path。用于指定主机名和端口之后的部分,如一段网址中跟在域名之后的内容。
android:mimeType。用于指定可以处理的数据类型,允许使用通配符的方式进行指定。
话不多说,直接上案例(代码):
先创建两个activity,这个就不多说,我相信大家都会吧。

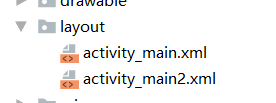
然后在创建两个xml文件:

activity_main.xml的主要代码:
// An highlighted block
<LinearLayout xmlns:android="http://schemas.android.com/apk/res/android"

    xmlns:tools="http://schemas.android.com/tools"
    android:layout_width="match_parent"
    android:layout_height="match_parent"
    android:orientation="vertical"
    tools:context=".MainActivity">

    <Button
        android:id="@+id/button"
        android:layout_width="wrap_content"
        android:layout_height="wrap_content"
        android:text="切换到下一个activity"
        android:layout_gravity="center"
        />

</LinearLayout>
MainActivity.java的主要代码:
// An highlighted block
public class MainActivity extends AppCompatActivity {

    @Override
    protected void onCreate(Bundle savedInstanceState) {
        super.onCreate(savedInstanceState);
        setContentView(R.layout.activity_main);
        Button button=(Button)findViewById(R.id.button);
        button.setOnClickListener(new View.OnClickListener() {
            @Override
            public void onClick(View v) {
                Intent intent=new Intent();
                intent.setAction(Intent.ACTION_VIEW);
                startActivity(intent);
            }
        });
    }
}
activity_main2.xml中的主要代码:
// An highlighted block
<LinearLayout xmlns:android="http://schemas.android.com/apk/res/android"
    xmlns:app="http://schemas.android.com/apk/res-auto"
    xmlns:tools="http://schemas.android.com/tools"
    android:layout_width="match_parent"
    android:layout_height="match_parent"
    tools:context=".Main2Activity">

    <TextView
        android:id="@+id/textView"
        android:layout_width="wrap_content"
        android:layout_height="wrap_content"
        android:layout_gravity="center"
        android:text="这是第二个activity"
         />

</LinearLayout>
Main2Activity.java的主要代码:
// An highlighted block
public class Main2Activity extends AppCompatActivity {

    @Override
    protected void onCreate(Bundle savedInstanceState) {
        super.onCreate(savedInstanceState);
        setContentView(R.layout.activity_main2);
    }
}
最主要的在下面:
在AndroidManifest.xml进行配置
下面展示一些 内联代码片。
// An highlighted block
  <application
        android:allowBackup="true"
        android:icon="@mipmap/ic_launcher"
        android:label="@string/app_name"
        android:roundIcon="@mipmap/ic_launcher_round"
        android:supportsRtl="true"
        android:theme="@style/AppTheme">

        <activity android:name=".MainActivity">
            <intent-filter>
                <action android:name="android.intent.action.MAIN" />
                <category android:name="android.intent.category.LAUNCHER" />
            </intent-filter>
        </activity>
        <activity android:name=".Main2Activity">
            <intent-filter>
                <action android:name="android.intent.action.VIEW"/>
                <category android:name="android.intent.category.DEFAULT"/>
            </intent-filter>
        </activity>
    </application>

</manifest>
这样一个简单的程序就完成了。
