创建Vue实例传入的options
这个options中可以包含哪些选项呢?
详细解析: https://cn.vuejs.org/v2/api/#%E9%80%89%E9%A1%B9-%E6%95%B0%E6%8D%AE
目前掌握这些选项:
el:
- 类型:string | HTMLElement
- 作用:决定之后Vue实例会管理哪一个DOM。
data:
- 类型:Object | Function (组件当中data必须是一个函数)
- 作用:Vue实例对应的数据对象。
methods:
- 类型:{ [key: string]: Function }
- 作用:定义属于Vue的一些方法,可以在其他地方调用,也可以在指令中使用。
computed(下文详细介绍)
-
类型:{ [key: string]: Function | { get: Function, set: Function } }
-
作用:(转自https://www.cnblogs.com/gunelark/p/8492468.html)
1.computed用来监控自己定义的变量,该变量不在data里面声明,直接在computed里面定义,然后就可以在页面上进行双向数据绑定展示出结果或者用作其他处理;2.computed比较适合对多个变量或者对象进行处理后返回一个结果值,也就是数多个变量中的某一个值发生了变化则我们监控的这个值也就会发生变化,举例:购物车里面的商品列表和总金额之间的关系,只要商品列表里面的商品数量发生变化,或减少或增多或删除商品,总金额都应该发生变化。这里的这个总金额使用computed属性来进行计算是最好的选择
插值操作
Mustache语法(也就是双大括号)
  <h2>{{firstName + lastName}}</h2>
  <h2>{{firstName + ' ' + lastName}}</h2>
  <h2>{{firstName}} {{lastName}}</h2>
  <h2>{{counter * 2}}</h2>
const app = new Vue({
    el: '#app',
    data: {
      message: '你好啊',
      firstName: 'kobe',
      lastName: 'bryant',
      counter: 100
    },
  })
v-once
该指令后面不需要跟任何表达式(比如之前的v-for后面是由跟表达式的)
该指令表示元素和组件(组件后面才会学习)只渲染一次,不会随着数据的改变而改变。
  <h2>{{message}}</h2>
  <h2 v-once>{{message}}</h2>
如果我在控制台app.message = '白天’改一下message的值,加了v-once的不会改变
v-html
该指令后面往往会跟上一个string类型
会将string的html解析出来并且进行渲染
<h2>{{url}}</h2>
<h2 v-html="url"></h2>
const app = new Vue({
    el: '#app',
    data: {
      message: '你好啊',
      url: '<a href="http://www.baidu.com">百度一下</a>'
    }
  })

v-text
作用和Mustache比较相似:都是用于将数据显示在界面中
<h2>{{message}}, 早上了!</h2>
<h2 v-text="message">, 早上了!</h2>

v-pre
v-pre用于跳过这个元素和它子元素的编译过程,用于显示原本的Mustache语法。
<h2 v-pre>{{message}}</h2>
运行结果
{{message}}
v-cloak
在某些情况下,我们浏览器可能会直接显然出未编译的Mustache标签。
如下代码
<div id="app">
  <h2>{{message}}</h2>
</div>
<script src="../js/vue.js"></script>
<script>
  setTimeout(function () {
    const app = new Vue({
      el: '#app',
      data: {
        message: '你好啊'
      }
    })
  }, 1000)
闪一下
再出现

加v-cloak: 斗篷
  <style>
    [v-cloak] {
      display: none;
    }
  </style>
<div id="app" v-cloak>
  <h2>{{message}}</h2>
</div>
<script>
  setTimeout(function () {
    const app = new Vue({
      el: '#app',
      data: {
        message: '你好啊'
      }
    })
  }, 1000)
直接出现
绑定属性
v-bind介绍
作用:动态绑定属性,比如动态绑定a元素的href属性和img元素的src属性
缩写::
错误的做法: 这里不可以使用mustache语法
<img src="{{imgURL}}" alt="">
正确的做法: 使用v-bind指令(这里我们直接使用语法糖)
  <img :src="imgURL" alt="">
  <a :href="aHref">百度一下</a>
v-bind绑定class
希望动态的来切换class,比如:
当数据为某个状态时,字体显示红色。
当数据另一个状态时,字体显示黑色。
绑定class有两种方式:
对象语法
绑定方式:对象语法
对象语法的含义是:class后面跟的是一个对象。
对象语法有下面这些用法:
用法一:直接通过{}绑定一个类
<h2 :class="{'active': isActive}">Hello World</h2>
用法二:也可以通过判断,传入多个值
<h2 :class="{'active': isActive, 'line': isLine}">Hello World</h2>
用法三:和普通的类同时存在,并不冲突
注:如果isActive和isLine都为true,那么会有title/active/line三个类
<h2 class="title" :class="{'active': isActive, 'line': isLine}">Hello World</h2>
用法四:如果过于复杂,可以放在一个methods或者computed中
注:classes是一个计算属性
<h2 class="title" :class="classes">Hello World</h2>
- 上面的点击按钮变色小案例对象语法实现如下
 <style>
    .active {
      color: red;
    }
  </style>
<div id="app">
  <h2 :class="{active: isActive}">{{message}}</h2>
  <h2 :class="getClasses()">{{message}}</h2>
  <button @click="btnClick">按钮</button>
</div>
  const app = new Vue({
    el: '#app',
    data: {
      message: '你好啊',
      isActive: false
    },
    methods: {
      btnClick() {
        this.isActive = !this.isActive
      },
      getClasses () {
        return {active: this.isActive}
      }
    }
  })
数组语法
绑定方式:数组语法
数组语法的含义是:class后面跟的是一个数组。
数组语法有下面这些用法:
用法一:直接通过{}绑定一个类
<h2 :class="['active']">Hello World</h2>
用法二:也可以传入多个值
<h2 :class=“[‘active’, 'line']">Hello World</h2>
用法三:和普通的类同时存在,并不冲突
注:会有title/active/line三个类
<h2 class="title" :class=“[‘active’, 'line']">Hello World</h2>
用法四:如果过于复杂,可以放在一个methods或者computed中
注:classes是一个计算属性
<h2 class="title" :class="classes">Hello World</h2>
哎呀!!!
我们发现这个数组语法的class没办法设置颜色怎么办
我们改用绑定style
v-bind绑定style
对象语法
:style="{color: currentColor, fontSize: fontSize + 'px'}"
style后面跟的是一个对象类型
对象的key是CSS属性名称
对象的value是具体赋的值,值可以来自于data中的属性
<h2 :style="{fontSize: finalSize + 'px', backgroundColor: finalColor}">{{message}}</h2>
<h2 :style="getStyles()">{{message}}</h2>
const app = new Vue({
    el: '#app',
    data: {
      message: '你好啊',
      finalSize: 100,
      finalColor: 'red',
    },
    methods: {
      getStyles: function () {
        return {fontSize: this.finalSize + 'px', backgroundColor: this.finalColor}
      }
    }
  })
数组语法
<div v-bind:style="[baseStyles, overridingStyles]"></div>
style后面跟的是一个数组类型
多个值以,分割即可
<div id="app">
  <h2 :style="[baseStyle, baseStyle1]">{{message}}</h2>
</div>
  const app = new Vue({
    el: '#app',
    data: {
      message: '你好啊',
      baseStyle: {backgroundColor: 'red'},
      baseStyle1: {fontSize: '100px'},
    }
  })
这种就可以实现那个变色点击了,但是要判断一下点击次数的奇数还是偶数
计算属性
什么是计算属性?
在某些情况,我们可能需要对数据进行一些转化后再显示,或者需要将多个数据结合起来进行显示
- 比如我们有firstName和lastName两个变量,我们需要显示完整的名称。
- 但是如果多个地方都需要显示完整的名称,我们就需要写多个{{firstName}} {{lastName}}
这里注意看一下computed和methods里写法的不同
<div id="app">
  <h2>{{firstName + ' ' + lastName}}</h2>
  <h2>{{firstName}} {{lastName}}</h2>
  <h2>{{getFullName()}}</h2>
  <h2>{{fullName}}</h2>
</div>
  const app = new Vue({
    el: '#app',
    data: {
      firstName: 'Lebron',
      lastName: 'James'
    },
    // computed: 计算属性()
    computed: {
      fullName: function () {
        return this.firstName + ' ' + this.lastName
      }
    },
    methods: {
      getFullName() {
        return this.firstName + ' ' + this.lastName
      }
    }
  })
计算属性实现的小案例
<div id="app">
  <h2>总价格: {{totalPrice}}</h2>
</div>
  const app = new Vue({
    el: '#app',
    data: {
      books: [
        {id: 110, name: 'book1', price: 119},
        {id: 111, name: 'book2', price: 105},
        {id: 112, name: 'book3', price: 98},
        {id: 113, name: 'book4', price: 87},
      ]
    },
    computed: {
      totalPrice() {
        let result = 0
        for (let i=0; i < this.books.length; i++) {
          result += this.books[i].price
        }
        return result
      }
    }
  })

计算属性的setter和getter
每个计算属性都包含一个getter和一个setter
- 在上面的例子中,我们只是使用getter来读取。
- 在某些情况下,你也可以提供一个setter方法(不常用)。
- 在需要写setter的时候,代码如下:
<div id="app">
  <h2>{{fullName}}</h2>
</div>
const app = new Vue({
el: '#app',
data: {
firstName: 'Kobe',
lastName: 'Bryant'
},
computed: {
// fullName: function () {
// return this.firstName + ' ' + this.lastName
// }
// 计算属性一般是没有set方法, 只读属性.
fullName: {
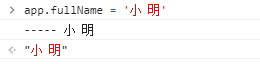
set: function(newValue) {
console.log('-----', newValue);
const names = newValue.split(' ');
this.firstName = names[0];
this.lastName = names[1];
},
get: function () {
return this.firstName + ' ' + this.lastName
}
},
}
})
</script>
注意这里set: function(newValue) {}set方法要是想实现是有参数的
我们可以在控制台修改fullName值,控制台就会打印上面console.log('-----', newValue);中的参数
计算属性的缓存
methods和computed看起来都可以实现我们的功能,
那么为什么还要多一个计算属性这个东西呢?
原因:计算属性会进行缓存,如果多次使用时,计算属性只会调用一次。
<div id="app">
  <!--1.直接拼接: 语法过于繁琐-->
  <h2>{{firstName}} {{lastName}}</h2>

  <!--2.通过定义methods-->
  <h2>{{getFullName()}}</h2>
  <h2>{{getFullName()}}</h2>
  <h2>{{getFullName()}}</h2>
  <h2>{{getFullName()}}</h2>

  <!--3.通过computed-->
  <h2>{{fullName}}</h2>
  <h2>{{fullName}}</h2>
  <h2>{{fullName}}</h2>
  <h2>{{fullName}}</h2>
</div>
const app = new Vue({
    el: '#app',
    data: {
      firstName: 'Kobe',
      lastName: 'Bryant'
    },
    methods: {
      getFullName: function () {
        console.log('getFullName');
        return this.firstName + ' ' + this.lastName
      }
    },
    computed: {
      fullName: function () {
        console.log('fullName');
        return this.firstName + ' ' + this.lastName
      }
    }
  })
上面的代码中我们看到getFullName和fullName都用了4次

但是因为计算属性进行了缓存,只调用一次
(以上内容根据微博“coderwhy”的vue视频课程整理)
