关于七牛云的注册以及申请存储空间这里就不详细介绍了,网上的教程很多而且注册以及申请存储空间也是比较简单的。直接进入正题,说一下整合的事情。
配置文件application.yml
qiniu:
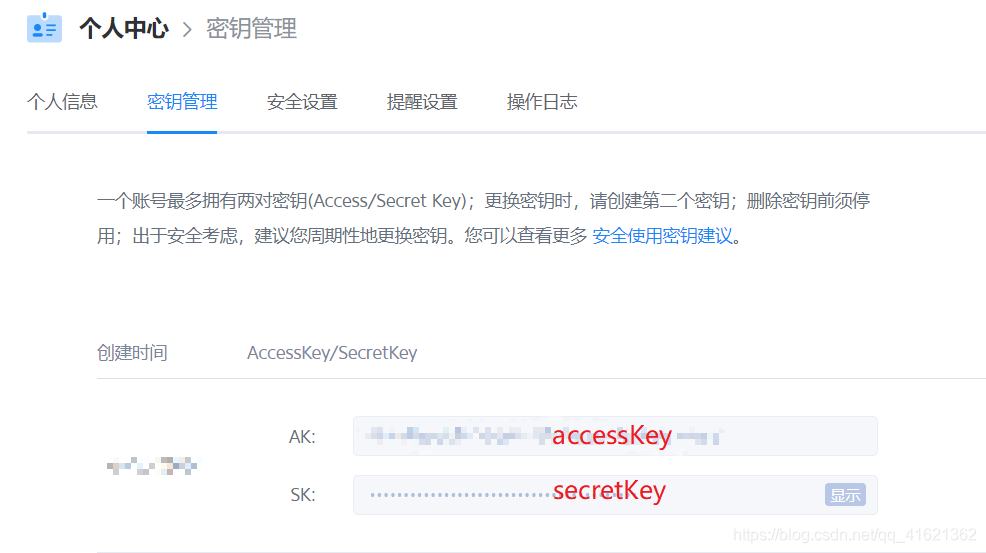
accessKey: xxxx-xxxx-xxxx
secretKey: xxxx_xxxx-xxxx
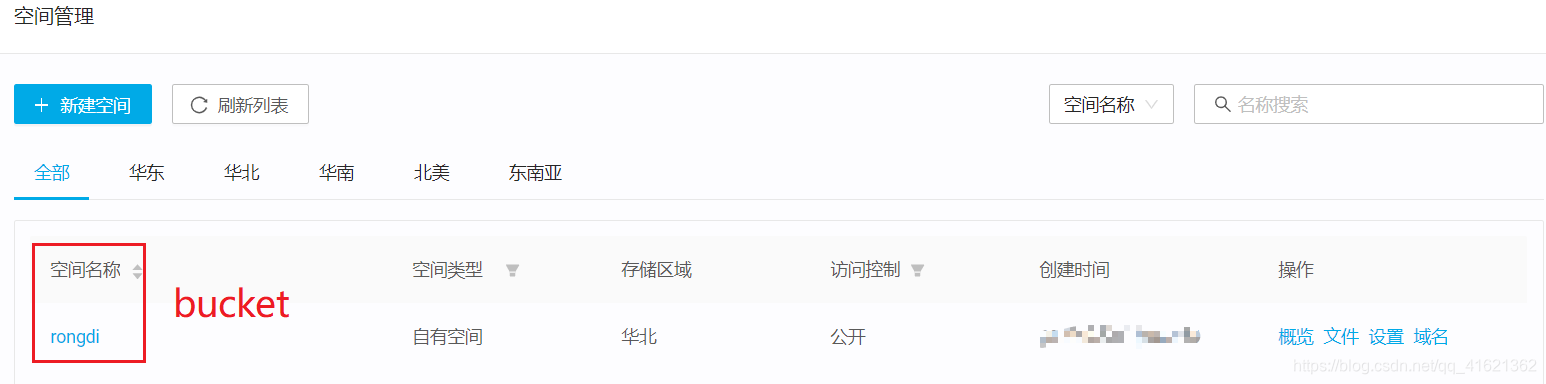
bucket: rongdi
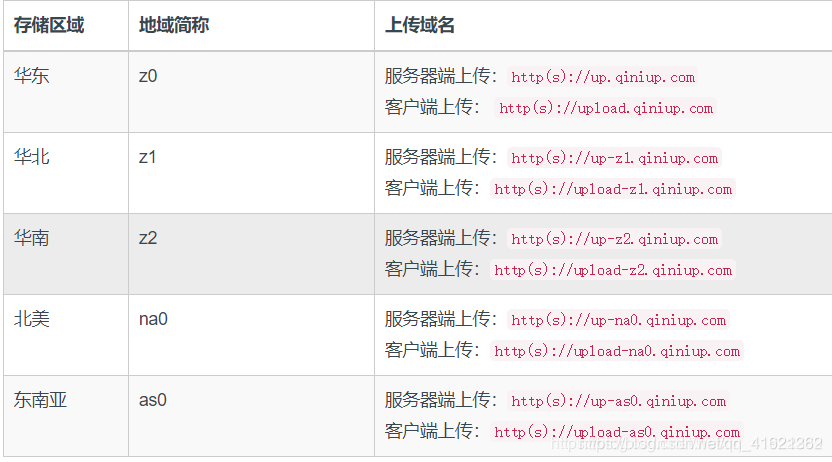
path: http://up-z1.qiniup.com # 每个地区的地址都不一样
上面参数对应七牛云中的配置如下图
创建上传文件以及图片的配置类
@Data
@Component
@ConfigurationProperties(prefix = "qiniu")
public class QiNiuYunConfig {

    @Value("${accessKey}")
    private String accessKey;
    @Value("${secretKey}")
    private String secretKey;
    @Value("${bucket}")
    private String bucket;
    @Value("${path}")
    private String path;


    public String uploadImgToQiNiu(FileInputStream file, String filename) {
        // 构造一个带指定Zone对象的配置类,注意后面的zone各个地区不一样的
        Configuration cfg = new Configuration(Zone.zone1());
        // 其他参数参考类注释
        UploadManager uploadManager = new UploadManager(cfg);
        // 生成密钥
        Auth auth = Auth.create(accessKey, secretKey);
        try {
            String upToken = auth.uploadToken(bucket);
            try {
                Response response = uploadManager.put(file, filename, upToken, null, null);
                // 解析上传成功的结果
                DefaultPutRet putRet = new Gson().fromJson(response.bodyString(), DefaultPutRet.class);

                // 这个returnPath是获得到的外链地址,通过这个地址可以直接打开图片
                String returnPath = getPath() + "/" + putRet.key;
                return returnPath;
            } catch (QiniuException ex) {
                Response r = ex.response;
                System.err.println(r.toString());
                try {
                    System.err.println(r.bodyString());
                } catch (QiniuException ex2) {
                    //ignore
                }
            }
        } catch (Exception e) {
            e.printStackTrace();
        }
        return "";
    }
}
Controller层
@Controller
public class QiNiuYunController {

    @Autowired
    private QiNiuYunConfig qiNiuYunConfig;

    @GetMapping("/upload")
    public String upload(){
        return "upload";
    }

    @PostMapping("/qiniu")
    public String qiNiuYunUpload(@RequestParam("file")MultipartFile file,
                                 Model model) throws IOException {
        String filename = file.getOriginalFilename();
        FileInputStream inputStream = (FileInputStream) file.getInputStream();
        //为文件重命名:uuid+filename
        filename = UUID.randomUUID()+ filename;
        String link = qiNiuYunConfig.uploadImgToQiNiu(inputStream, filename);
        model.addAttribute("link", link);
        return "upload";
    }
}
HTML代码
<!DOCTYPE html>
<html lang="en" xmlns:th="http://www.thymeleaf.org">
<head>
    <meta charset="UTF-8">
    <title>上传文件</title>
</head>
<body>
<form action="/qiniu" method="post" enctype="multipart/form-data">
    <label>上传图片</label>
    <input type="file" name="file"/>
    <input type="submit" value="上传"/>
    <p>回显图片:</p>
    <img th:src="${link}"/>
</form>
</body>
</html>
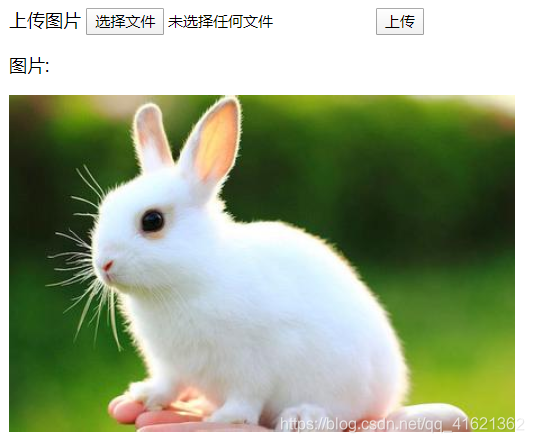
效果如下