1. Hystrix 熔断器

1.1 什么是Hystrix
-
Hystrix是Netflix开源的一个延迟和容错库,用于隔离访问远程服务、第三方库,防止出现级联失败。
-
使用熔断器Hystrix为了优化项目。

熔断器的工作机制:

正常工作的情况下,客户端请求调用服务API接口:

当有服务出现异常时,直接进行失败回滚, 处理:

- 当服务繁忙时,如果服务出现异常,不是粗暴的直接报错,而是返回一个友好的提示,虽然拒绝了用户的访问,但是会返回一个结果。
这就好比去买鱼,平常超市买鱼会额外赠送杀鱼的服务。等到逢年过节,超时繁忙时,可能就不提供杀鱼服务了,这就是服务的降级。
系统特别繁忙时,一些次要服务暂时中断,优先保证主要服务的畅通,一切资源优先让给主要服务来使用,在双十一、618时,京东天猫都会采用这样的策略。
1.2 Hystrix 入门
-
步骤一:修改pom,添加熔断器依赖
-
步骤二:修改启动类,添加开启熔断器注解 @EnableHystrix
-
步骤三:改造dao,远程调用添加 熔断器的备选方案,添加注解 + 备用方法
-
步骤四:改变服务提供方法,添加线程sleep,0~~2000随机 (测试方便)
-
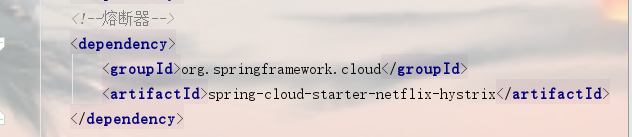
步骤一:修改pom,添加熔断器依赖
<!--熔断器-->
        <dependency>
            <groupId>org.springframework.cloud</groupId>
            <artifactId>spring-cloud-starter-netflix-hystrix</artifactId>
        </dependency>
- 步骤二:修改启动类,添加开启熔断器注解 @EnableHystrix
package com.czxy;

import org.springframework.boot.SpringApplication;
import org.springframework.boot.autoconfigure.SpringBootApplication;
import org.springframework.cloud.netflix.eureka.EnableEurekaClient;
import org.springframework.cloud.netflix.hystrix.EnableHystrix;

/**
 * Created by cjc.
 */
@SpringBootApplication
@EnableEurekaClient
@EnableHystrix      //开启熔断器
public class Client4Application {
    public static void main(String[] args) {
        SpringApplication.run(Client4Application.class,args);
    }
}

- 步骤三:改造client,远程调用添加 熔断器的备选方案,添加注解 + 备用方法
package com.czxy.client;

import com.netflix.hystrix.contrib.javanica.annotation.HystrixCommand;
import org.springframework.http.ResponseEntity;
import org.springframework.stereotype.Component;
import org.springframework.web.client.RestTemplate;

import javax.annotation.Resource;

/**
 * Created by cjc.
 */
@Component
public class UserClient{
    @Resource
    private RestTemplate restTemplate;
    @HystrixCommand(fallbackMethod = "dataFallback")
    public ResponseEntity<String> data(){
        String url = "http://servic/test";
        return restTemplate.getForEntity(url,String.class);
    }

    /**
     * 熔断器超时处理方法
     * @return
     */
    public ResponseEntity<String> dataFallback(){
        return ResponseEntity.ok("临时数据");
    }
}
- 步骤四:改变服务提供方法,添加线程sleep,0~~2000随机 (测试方便)
package com.czxy.controller;

import org.springframework.http.ResponseEntity;
import org.springframework.web.bind.annotation.GetMapping;
import org.springframework.web.bind.annotation.RequestMapping;
import org.springframework.web.bind.annotation.RestController;

import javax.servlet.http.HttpServletRequest;
import java.util.Random;

/**
 * Created by cjc.
 */
@RestController
@RequestMapping("/test")
public class TestController {
    @GetMapping
    public ResponseEntity<String> test(HttpServletRequest request) throws Exception {
        //模拟延迟
        Thread.sleep(new Random().nextInt(2000));
        return ResponseEntity.ok("测试数据" + request.getServerPort());
    }
}

- 步骤五:优化client,打印耗时时间
package com.czxy.client;

import com.netflix.hystrix.contrib.javanica.annotation.HystrixCommand;
import org.springframework.http.ResponseEntity;
import org.springframework.stereotype.Component;
import org.springframework.web.client.RestTemplate;

import javax.annotation.Resource;

/**
 * Created by liangtong.
 */
@Component
public class UserClient{
    @Resource
    private RestTemplate restTemplate;
    @HystrixCommand(fallbackMethod = "dataFallback")
    public ResponseEntity<String> data(){
        //1 记录开始时间
        long start = System.currentTimeMillis();
        //2 调用
        String url = "http://servic/test";
        ResponseEntity<String> entity = restTemplate.getForEntity(url, String.class);
        //3 记录结束时间
        long end = System.currentTimeMillis();
        //4 统计耗时
        System.out.println("耗时时间:" + (end - start));
        return entity;
    }

    /**
     * 熔断器超时处理方法
     * @return
     */
    public ResponseEntity<String> dataFallback(){
        return ResponseEntity.ok("临时数据");
    }
}
1.3 面试题:熔断器 + 重试机制
-
面试题:如果项目中同时使用熔断器和Ribbon重试机制,谁先执行?
-
如果时间不相同,超时时间小的,先执行。
-
如果时间相同,只执行熔断器
-
结论:如果两个都需要配置,重试机制的超时时间 小于 熔断器
2. 远程调用
2.1 回顾
- HttpClient:Apache提供技术,更偏向底层,步骤完善,比较繁琐。
- RestTemplate:由Spring提供,操作比较简单。
2.2 什么是Feign
- Feign 是spring cloud全家桶一个成员,用于远程调用。
- 特点:声明式、模板化HTTP客户端。使远程调用,在使用时,感觉像“本地方法”
2.3 Feign 入门
-
步骤一:修改pom文件,添加Feign依赖
-
步骤二:修改启动类,添加开启Feign注解
-
步骤三:编写Feign接口,完成远程调用,取代client层
-
步骤四:修改controller, 将调用client修改成feign
-
步骤一:修改pom文件,添加Feign依赖
<!--远程调用Feign-->
        <dependency>
            <groupId>org.springframework.cloud</groupId>
            <artifactId>spring-cloud-starter-openfeign</artifactId>
        </dependency>
- 步骤二:修改启动类,添加开启Feign注解
package com.czxy;

import org.springframework.boot.SpringApplication;
import org.springframework.boot.autoconfigure.SpringBootApplication;
import org.springframework.cloud.netflix.eureka.EnableEurekaClient;
import org.springframework.cloud.netflix.hystrix.EnableHystrix;
import org.springframework.cloud.openfeign.EnableFeignClients;

/**
 * Created by cjc.
 */
@SpringBootApplication
@EnableEurekaClient
@EnableHystrix      //开启熔断器
@EnableFeignClients //开启Feign客户端
public class Client4Application {
    public static void main(String[] args) {
        SpringApplication.run(Client4Application.class,args);
    }
}
- 步骤三:编写Feign接口,完成远程调用,取代client层
//@FeignClient 解析
@FeignClient(value="服务名",path="controller前缀")
public interface 接口名{
    //与controller方法一致
}
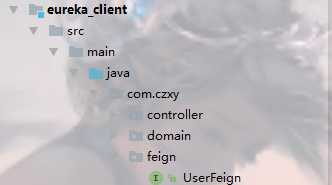
package com.czxy.feign;

import org.springframework.cloud.openfeign.FeignClient;
import org.springframework.http.ResponseEntity;
import org.springframework.web.bind.annotation.GetMapping;

import javax.servlet.http.HttpServletRequest;

/**
 * Created by cjc.
 */
@FeignClient(value="servic",path="/test")
public interface UserFeifn{

    @GetMapping
    public ResponseEntity<String> test() ;
}
- 步骤四:修改controller, 将调用client修改成feign
package com.czxy.controller;

import com.czxy.dao.DataDao;
import com.czxy.feign.DataFeign;
import org.springframework.http.ResponseEntity;
import org.springframework.web.bind.annotation.GetMapping;
import org.springframework.web.bind.annotation.RequestMapping;
import org.springframework.web.bind.annotation.RestController;

import javax.annotation.Resource;

/**
 * Created by cjc.
 */
@RestController
@RequestMapping("/data")
public class DataController {
    @Resource
    //private UserClient userClient;
    private DataFeign dataFeign;

    @GetMapping
    public ResponseEntity<String> data(){
        //return dataDao.data();
        return dataFeign.test();
    }
}
