一、准备工作
1.1)源码包
mysql-5.6.26.tar.gz
1.2)解决依赖
[00:37:56 root@tuxing ~]#yum install -y cmake ncurses-devel
二、源码安装MySql
1.1)解压到指定目录(/usr/local/src)
解压后进入到目录里
[11:42:54 root@tuxing software]#tar xf mysql-5.6.26.tar.gz -C
/usr/local/src/ ; cd /usr/local/src/mysql-5.6.26
[11:42:59 root@tuxing mysql-5.6.26]#
1.2)创建mysql用户
11:42:59 root@tuxing mysql-5.6.26]#useradd -M -s /sbin/nologin mysql
1.3)编译mysql
[11:46:53 root@tuxing mysql-5.6.26]# cmake \
 -DCMAKE_INSTALL_PREFIX=/usr/local/mysql \
 -DMYSQL_UNIX_ADDR=/tmp/mysql.sock \
 -DDEFAULT_CHARSET=utf8 \
 -DDEFAULT_COLLATION=utf8_general_ci \
 -DWITH_EXTRA_CHARSETS=all \
 -DWITH_MYISAM_STORAGE_ENGINE=1 \
 -DWITH_INNOBASE_STORAGE_ENGINE=1 \
 -DWITH_MEMORY_STORAGE_ENGINE=1 \
 -DWITH_READLINE=1 \
 -DENABLED_LOCAL_INFILE=1 \
 -DMYSQL_DATADIR=/usr/local/mysql/data \
 -DMYSQL-USER=mysql
若报错了,执行两步重新编译
yum install -y git gcc gcc-c++
rm CMakeCache.txt
后面就直接执行
扫描二维码关注公众号,回复:
10438620 查看本文章

[11:46:53 root@tuxing mysql-5.6.26]#make -j 2 ; make install
//make过程有点长,我们耐心等待!
1.4)配置mysql
[11:58:18 root@tuxing ~]#chown -R mysql:mysql /usr/local/mysql/   #属主属组更改
[11:59:10 root@tuxing ~]# cp /usr/local/mysql/support-files/my-default.cnf /etc/my.cnf
cp: overwrite ‘/etc/my.cnf’? y
[11:59:13 root@tuxing ~]#							#覆盖原配置文件
[11:59:13 root@tuxing ~]# cp /usr/local/mysql/support-files/mysql.server /etc/init.d/mysqld
					#启动脚本
[12:01:42 root@tuxing ~]#vi /etc/init.d/mysqld
basedir=/usr/local/mysql
datadir=/usr/local/mysql/data		#找到并添加
[12:03:29 root@tuxing ~]#chkconfig mysqld  on		#开机启动
三、初始化数据库
[12:05:12 root@tuxing ~]#/usr/local/mysql/scripts/mysql_install_db \
--defaults-file=/etc/my.cnf  \
--basedir=/usr/local/mysql/ \
--datadir=/usr/local/mysql/data/ \
--user=mysql
------------------------------检查一下若出现两个OK则表示成功
[12:05:12 root@tuxing ~]#ls /usr/local/mysql/data/ #检查有无mysql和test

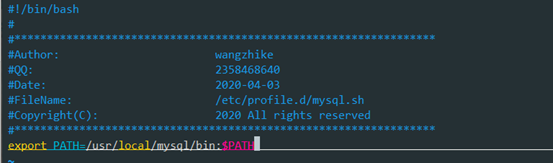
[12:07:15 root@tuxing ~]#vim /etc/profile.d/mysql.sh #添加环境变量
后续操作:
[12:10:11 root@tuxing ~]#source /etc/profile.d/mysql.sh		#source一下脚本
[12:11:42 root@tuxing ~]# service mysqld  start				#启动数据库成功
Starting MySQL. SUCCESS!
[12:11:58 root@tuxing ~]#systemctl start mysqld				#centos7.5中启动数据库
[12:12:28 root@tuxing
~]#mysql_secure_installation #初始安全设置(设置root密码,123456)密码可以根据自己设置,其他直接回车 [12:13:34 root@tuxing ~]#mysql -uroot -p123456 #登录(OK)
Warning: Using a password on the command line interface can be insecure.
Welcome to the MySQL monitor.  Commands end with ; or \g.
Your MySQL connection id is 12
Server version: 5.6.26 Source distribution

Copyright (c) 2000, 2015, Oracle and/or its affiliates. All rights reserved.

Oracle is a registered trademark of Oracle Corporation and/or its
affiliates. Other names may be trademarks of their respective
owners.

Type 'help;' or '\h' for help. Type '\c' to clear the current input statement.

mysql>
至此,LNMP之Mysql安装成功!!!
