-
以下内容基于官方给的流程图,结合海哥的《精通jfinal》来看jfinal源码的。

-
先从程序入口开始看吧。
web.xml。
所以入口就是JFinalFilter,跑一个示例,测试一下。
本次小型测试流程
- 先检测jfinalConfig是否为空,接着,根据
web.xml中的init-param得到configClass的值。这个createJFinalConfig就是利用反射创建了需要的JFinalConfig对象。

-
接下来就是
jfinal.init()这个函数。
先把
servletContext赋值。一般来说这里的contextPath都会是""吧。具体见Filter接口注释。initPathKit()初始化webRoot的路径。
打断点
DEBug如下。扫描二维码关注公众号,回复: 10382032 查看本文章

-
接来下就是
Config.configJFinal(jfinalConfig);要按照顺序执行,因为有些部分依赖于前一部分

在此,先去根据项目的这个配置文件来执行其相应的方法

先是配置常量,debug模式下,会定位到该函数,十分清晰地能观察到。

接下来就是加载日志系统
日志用的是com.jfinal.log.Log4jLogFactory,就不赘述了。核心是org.apache.log4j。
利用反射加载日志

初始化Config的日志,JFinalFilter的日志
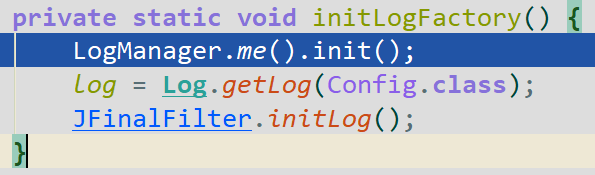
初始化引擎

下面就是指明初始化的次序了

海哥教程中2.2版本貌似是没有这个configPluginWithOrder,但是这个版本有,应该是方便控制初始化插件的时间(提供在哪个config执行之后再初始化所有插件)(可以在我们自己继承JFinalConfig中的那个类中调用me.setConfigPluginOrder()修改插件初始化的时机)。所有的jfinalConfig.configxxx都是调用我们自己继承的那个JFinalConfig的 那个类的方法。

至于startPlugins()方法,是循环所有的插件,并进行启动。
针对ActiveRecordPlugin进行初始化。其他插件则调用符合IPlugin接口的start()方法。

public interface IPlugin {
	boolean start();
	boolean stop();
}
接下来就是

把在Config中获得的常量赋值给本类的变量constants。
-
接下来就是
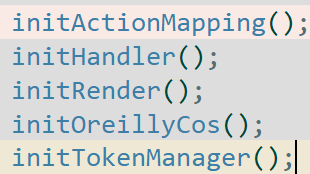
这次只分析
initActionMapping()。private void initActionMapping() { actionMapping = new ActionMapping(Config.getRoutes()); actionMapping.buildActionMapping(); Config.getRoutes().clear(); }将配置的所有路由赋值,并建立
action映射。再清除所有的路由。主要的方法就是
buildActionMapping了protected void buildActionMapping() { // 清空映射 mapping.clear(); Class<?> dc; // 创建拦截器管理者 InterceptorManager interMan = InterceptorManager.me(); // 获得所有的Routes,具体例子见下面示例a for (Routes routes : getRoutesList()) { // 遍历routes的每一个route for (Route route : routes.getRouteItemList()) { // 获得指定的controller的key对应的controller Class<? extends Controller> controllerClass = route.getControllerClass(); // 为controller创建拦截器 Interceptor[] controllerInters = interMan.createControllerInterceptor(controllerClass); // 获取是否映射超类中的方法为路由,默认值为 false boolean declaredMethods = routes.getMappingSuperClass() ? controllerClass.getSuperclass() == Controller.class : true; Method[] methods = (declaredMethods ? controllerClass.getDeclaredMethods() : controllerClass.getMethods()); for (Method method : methods) { if (declaredMethods) { // 跳过非public的方法 if (!Modifier.isPublic(method.getModifiers())) continue ; } else { dc = method.getDeclaringClass(); // 跳过Controller和Object父类的方法 if (dc == Controller.class || dc == Object.class) continue ; } // 跳过使用NotAction注解的方法 if (method.getAnnotation(NotAction.class) != null) { continue ; } // 拦截器稍后分析 Interceptor[] actionInters = interMan.buildControllerActionInterceptor(routes.getInterceptors(), controllerInters, controllerClass, method); String controllerKey = route.getControllerKey(); String methodName = method.getName(); // 获取ActionKey注解的值,见下面的示例b ActionKey ak = method.getAnnotation(ActionKey.class); String actionKey; if (ak != null) { actionKey = ak.value().trim(); if ("".equals(actionKey)) throw new IllegalArgumentException(controllerClass.getName() + "." + methodName + "(): The argument of ActionKey can not be blank."); // 如果actionKey没有加 / 符号,自动帮你添加 if (!actionKey.startsWith(SLASH)) actionKey = SLASH + actionKey; } // 是否为index方法,是则直接存储的actionkey就是controllerkey。 else if (methodName.equals("index")) { actionKey = controllerKey; } else { // 查看controllerKey是否为“/”,然后再添加相应的字符 actionKey = controllerKey.equals(SLASH) ? SLASH + methodName : controllerKey + SLASH + methodName; } // 创建action Action action = new Action(controllerKey, actionKey, controllerClass, method, methodName, actionInters, route.getFinalViewPath(routes.getBaseViewPath())); if (mapping.put(actionKey, action) != null) { throw new RuntimeException(buildMsg(actionKey, controllerClass, method)); } } } } // 清空routes列表 routes.clear(); // support url = controllerKey + urlParas with "/" of controllerKey // 如果actionkey = /,那么把""也放入mapping,这样使用“/”或者“”就都可以访问到了 Action action = mapping.get("/"); if (action != null) { mapping.put("", action); } }-
对于
for (Routes routes : getRoutesList()),获得涉及到的路由列表。如下图a-2,其中,Part2Routes就是一个路由列表。(注:这里查看Route的源码[图a-1]可知,内部将路由分为了路由列表和路由项列表)
图a-1

图a-2

在里面我只添加了一个"/part2/index"的路由。
下面解析
getRoutesListprotected List<Routes> getRoutesList() { // Routes.getRoutesList()获取到的就是我们添加的路由列表:在本次示例中为Part2Routes的所有项 List<Routes> routesList = Routes.getRoutesList(); List<Routes> ret = new ArrayList<Routes>(routesList.size() + 1); // 将直接添加的路由项加入结果集 ret.add(routes); // 将路由列表加入结果集 ret.addAll(routesList); return ret; } -
actionkey是一个注解,用来提供一个间接层,让我们在不改变对外的url情况下,修改方法的名称。(感觉用处不是很大0v0)
这样,访问的时候就是"localhost/index/index"了。
-
actionkey是一个注解,用来提供一个间接层,让我们在不改变对外的url情况下,修改方法的名称。(感觉用处不是很大0v0)

这样,访问的时候就是"localhost/index/index"了。
-
