应公司要求配置数据库监控,配置俩套稳定的,现在流行的监控系统很多,选择一个合适自己的就可以了,例如Zabbix、Nagios;监控MySQL为主的有MySQLMTOP、grafana ptomryhrus .Lepus 虽然官网最新的版本是 3.8 是2016年更新的,但是他的配置比较简单,监控脚本是 python2 写的, 本文主要介绍快速部署lepus以及监控redis mysql mongodb,废话就不多说了,下面开始环境搭建。
官方说明:
天兔.让数据库监控更简单!
随着互联网日新月异的快速发展,数据库在互联网中的地位显得越来越重要。尤其是一些大的电商企业和金融企业,数据库的可靠性和稳定性是不言而喻的。很多企业在快速发展的同时,其数据也在不断增长,存储数据的服务器也在不断增长和扩容。面对越来越多的数据库服务器,如何统一规划管理,如何高效的监控是很多企业面临的一个严重问题。虽然目前有一些国外开源软件可以用作数据库的监控,但是这些软件也有着一些弊端,例如部署复杂,需要在每台机器部署程序或agent,监控指标很少,只能对基本健康信息进行监控等等。为此,我们开发了这套天兔数据库监控系统,帮助企业解决了上面遇到的一些问题。
天兔数据库无需在每台数据库服务器部署脚本或Agent,只需要授权后,即可进行远程监控,适合监控数据库服务器较多的公司和监控云中数据库,这将为企业大大减化监控部署流程,增加工作效率。同时天兔数据库监控系统内置了丰富的性能监控指标,让企业能够在数据库宕机前发现潜在性能问题进行处理,减少企业因为数据库问题导致的直接经济损失
官方网站:http://www.lepus.cc/page/product
环境安装
环境初始:
 1 服务器:centos7.4  一台 阿里云服务器
 2 #关闭 防火墙
 3 systemctl stop firewalld
 4 systemctl disable firewalld
 5 systemctl status firewalld
 6 #关闭Selinux 7 临时关闭: 8 [root@localhost ~]# getenforce 9  Enforcing 10 [root@localhost ~]# setenforce 0 11 [root@localhost ~]# getenforce 12  Permissive 13 永久关闭: 14 vi /etc/selinux/config 15 把SELINUX=enforcing 改成 SELINUX=disabled 16 重启服务器
LAMP安装:
我这里使用yum安装,主要是为了给领看看效果,后期使用的话 生产使用的换建议使用配置高点的mysql
yum -y install mariadb mariadb-server httpd php -y
修改httpd的配置启动:
[root@iZbp10sc8bf7id921404mqZ ~]# grep '^Listen' /etc/httpd/conf/httpd.conf
Listen 0.0.0.0:80
[root@iZbp10sc8bf7id921404mqZ ~]# systemctl start httpd
[root@iZbp10sc8bf7id921404mqZ ~]# systemctl status httpd
[root@iZbp10sc8bf7id921404mqZ ~]# netstat -ntpl |grep :80
tcp        0      0 0.0.0.0:80              0.0.0.0:*               LISTEN      28157/httpd
启动mariadb配置用户名密码:
#启动mariadb
systemctl start mariadb
#登录mariadb  第一次登录没有用户名密码
mysql -uroot -p               #回车俩次
#创建root用户密码
grant all on *.* to 'root'@'127.0.0.1' identified by 'XXXXX';
grant all on *.* to 'root'@'localhost' identified by 'XXXXXX';
flush privileges;
创建lepus用户密码和库
create database lepus default character set utf8;
grant select,insert,update,delete,create on lepus.* to 'lepus'@'localhost' identified by 'xxxx';
grant select,insert,update,delete,create on lepus.* to 'lepus'@'127.0.0.1' identified by 'xxxxx';
flush privileges;
配置php
sed -i "s/;date.timezone =/date.timezone = Asia\/Shanghai/g" /etc/php.ini
sed -i "s#max_execution_time = 30#max_execution_time = 300#g" /etc/php.ini
sed -i "s#post_max_size = 8M#post_max_size = 32M#g" /etc/php.ini
sed -i "s#max_input_time = 60#max_input_time = 300#g" /etc/php.ini
sed -i "s#memory_limit = 128M#memory_limit = 128M#g" /etc/php.ini
sed -i "/;mbstring.func_overload = 0/ambstring.func_overload = 2\n" /etc/php.ini
Python 安装:
python环境我们这边就不安装了 服务器默认是2.7的python 环境
[root@iZbp10sc8bf7id921404mqZ ~]# python -V
Python 2.7.5
安装监控依赖驱动
yum install  gcc python-devel mysql-devel net-snmp-devel curl-devel perl-DBI php-gd php-mysql php-bcmath php-mbstring php-xml  -y
#安装python监控依赖
pip install pymongo redis mysql-python
安装Lepus采集器
安装Lepus监控系统
注:在安装Lepus系统之前,请先根据前面内容安装LAMP和Python运行基础环境。
#上传软件包到监控机服务器并解压缩软件到您的系统
[root@iZbp10sc8bf7id921404mqZ opt]# ls
Lepus3.8.zip
[root@iZbp10sc8bf7id921404mqZ opt]# unzip Lepus3.8.zip
导入SQL文件夹里的SQL文件(表结构和数据文件)
cd Lepus_v3.8_beta
mysql -uroot –p xxxx lepus < sql/lepus_table.sql
mysql -uroot –p xxxx lepus < sql/lepus_data.sql
安装Lpeus程序
 1 进入到软件包的python文件夹
 2 cd python/
 3 授予install.sh可执行权限
 4 chmod +x install.sh  chmod +x *.py
 5 执行安装
 6 ./install.sh
 7 [note] lepus will be install on basedir: /usr/local/lepus 8 [note] /usr/local/lepus directory does not exist,will be created. 9 [note] /usr/local/lepus directory created success. 10 [note] wait copy files....... 11 [note] change script permission. 12 [note] create links. 13 [note] install complete.
修改配置文件
 1 进入到安装目录,默认为/usr/local/lepus
 2 cd /usr/local/lepus/
 3 vim etc/config.ini
 4 ###监控机MySQL数据库连接地址###
 5 [monitor_server]
 6 host="127.0.0.1"
 7 port=3306
 8 user=" lepus "
 9 passwd="xxxxxx"
10 dbname="lepus"
启动lepus
[root@iZbp10sc8bf7id921404mqZ lepus]# lepus start
lepus server start success!
查看日志 但是因为没有添加主机,所以查看日志会看到如下提示,属于正常提示。您也可以在部署完Lepus WEB控制台后再进行启动。
[root@iZbp10sc8bf7id921404mqZ lepus]# cat logs/lepus.log
2020-04-01 12:18:53 [INFO] lepus controller start.
2020-04-01 12:18:54 [INFO] check mysql controller started.
2020-04-01 12:18:54 [WARNING] check mysql: not found any servers
2020-04-01 12:18:54 [INFO] check mysql controller finished.
vers
2020-04-01 12:18:54 [INFO] check mysql controller finished.
三、安装WEB管理台
复制PHP文件夹里的文件到Apache对应的网站虚拟目录
[root@iZbp10sc8bf7id921404mqZ lepus]# cd /opt/Lepus_v3.8_beta/
[root@iZbp10sc8bf7id921404mqZ Lepus_v3.8_beta]# ls
changelog.txt  LICENSE  php  python  README.md  readme.txt  sql
[root@iZbp10sc8bf7id921404mqZ Lepus_v3.8_beta]# cp -r php/* /var/www/html/
[root@iZbp10sc8bf7id921404mqZ Lepus_v3.8_beta]# cd /var/www/html/
编辑文件/var/www/html/application/config/database.php
vim application/config/database.php
修改数据的用户名 密码 库名 根据自己的环境修改
$db['default']['hostname'] = '127.0.0.1';
$db['default']['port']     = '3306';
$db['default']['username'] = '****';
$db['default']['password'] = '****';
$db['default']['database'] = 'lepus';
重新启动httpd
[root@iZbp10sc8bf7id921404mqZ html]# systemctl restart httpd
[root@iZbp10sc8bf7id921404mqZ html]# systemctl status httpd
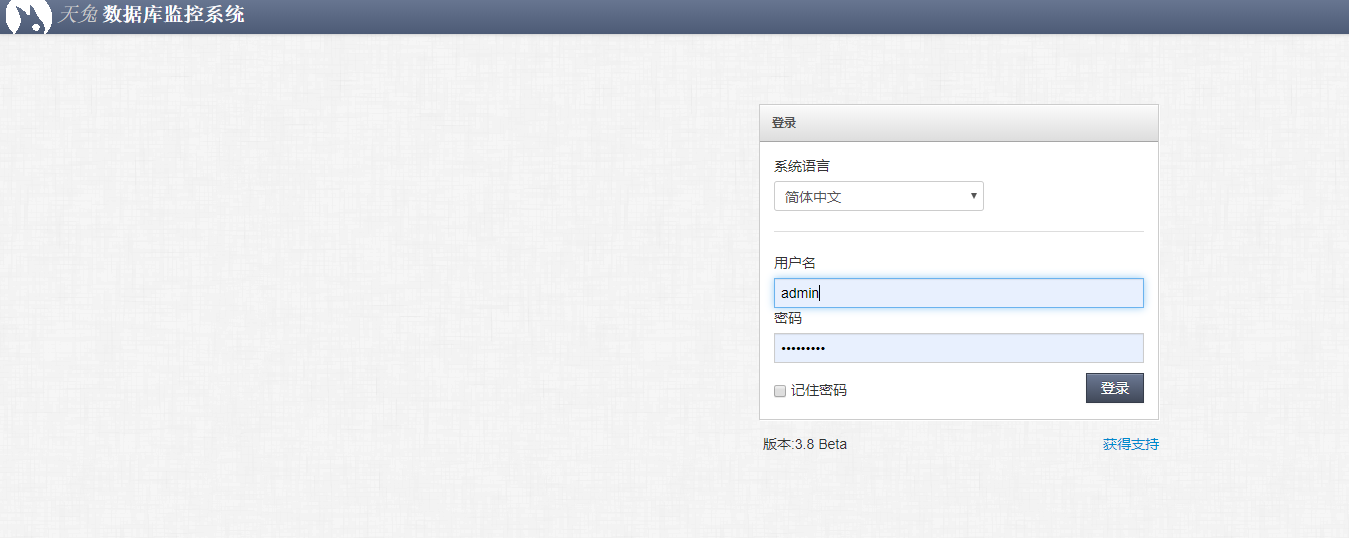
访问lepus,在浏览器输入http://IP,默认管理员账号密码admin/Lepusadmin 登录后请修改管理员密码