首先 我们要有一个源码安装的nginx服务器环境
1.首先安装nginx的所需依赖
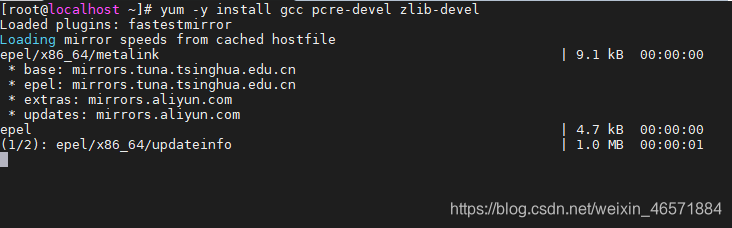
yum -y install gcc pcre-devel zlib-devel
gcc 是用来编译
pcre-devel 正则匹配
zlib-devel 启用压缩功能的时候 需要此模块的支持
2.获取nginx的源码包 下载到指定目录 /usr/local/src
wget http://nginx.org/download/nginx-1.16.1.tar.gz
3.解压nginx的源码包
cd /usr/local/src/nginx-1.16.1.tar.gz
4.编译安装
cd /usr/local/src/nginx-1.16.1 && ./configure && make && make install
以上只是最基础的源码安装nginx 可以作为初学者的参考
今天我们主要来详细解读一下nginx的配置文件 源码安装的nginx的配置文件路径 cat /usr/local/nginx/conf/nginx.conf (cat命令是查看一个文件)#user nobody; #设置用户组
worker_processes 1; #启动子进程数 可以通过 ps aux | grep nginx 查看
#错误日志文件以及日志级别 notice,info
#error_log logs/error.log;
#error_log logs/error.log notice;
#error_log logs/error.log info;
#pid logs/nginx.pid; # 进程号保存文件
events {
worker_connections 1024; #每个进程可以处理的连接数 收系统文件句柄限制 ulimit查看
}
http {
include mime.types; #mime.types 为文件类型指定文件
default_type application/octet-stream; #默认文件类型
#log_format 自定义入职格式 名称为mian
#log_format main '$remote_addr -
time_local] “KaTeX parse error: Expected 'EOF', got '#' at position 16: request" ' #̲ …status
http_referer” ’
# ‘“
http_x_forwarded_for”’;
#access_log  logs/access.log  main;   #创建访问日志 采用main定义的格式

sendfile        on;  #是否调用sendfile() 进行数据复制 sendfile复制数据实在内核级别完成的 回避一般的read write更加高校
#tcp_nopush     on;

#keepalive_timeout  0;   #保持连接的时
keepalive_timeout  65;   #保持连接的超时时间

#gzip  on;   #是否采用压缩此功能 讲页面压缩后传输更节省流量
#使用server定义虚拟主机
server {
listen 80; #服务器监听的端口
server_name localhost; #访问域名
    #charset koi8-r;          #编码格式 如果页面编码于此设置不同 讲被自动转码

    #access_log  logs/host.access.log  main;  #设置虚拟主机的访问日志路径及格式
# 对URL井陉匹配
location / {
root html; #root表示网页根路径 使用的是相对路径 html在nginx安装路径下
index index.html index.htm; #定义index首页文件 先找到index.html 没有则找index.htm
}
    # 设置错误代码对应的错误页面
    #error_page  404              /404.html;

    # redirect server error pages to the static page /50x.html
    #
    error_page   500 502 503 504  /50x.html;
    location = /50x.html {
        root   html;
    }

    # proxy the PHP scripts to Apache listening on 127.0.0.1:80
    #访问乙php结尾的页面 则自动讲该请求转至127.0.0.1:80,通过proxy_pass可以实现代理功能
    #location ~ \.php$ {
    #    proxy_pass   http://127.0.0.1;
    #}

    # pass the PHP scripts to FastCGI server listening on 127.0.0.1:9000
    #这里可以在做lnmp架构时支持php 可以讲注释解开 做部分修改
    #location ~ \.php$ {
    #    root           html;
    #    fastcgi_pass   127.0.0.1:9000;
    #    fastcgi_index  index.php;
    #    fastcgi_param  SCRIPT_FILENAME  /scripts$fastcgi_script_name;
    #    include        fastcgi_params;
    #}

    # deny access to .htaccess files, if Apache's document root
    # concurs with nginx's one
    #
    #拒绝所有人访问.ht页面
    #location ~ /\.ht {
    #    deny  all;
    #}
}


# another virtual host using mix of IP-, name-, and port-based configuration
#
#server {
#    listen       8000;
#    listen       somename:8080;
#    server_name  somename  alias  another.alias;

#    location / {
#        root   html;
#        index  index.html index.htm;
#    }
#}


# HTTPS server
#
#server {
#    listen       443 ssl;   #监听TLS使用(TLS:安全传输层协议)
#    server_name  localhost;

#    ssl                        on;  #开启ssl功能
#    ssl_certificate      cert.pem;  #指定证书文件,相对路径 文件需要放在nginx.conf同目录下
#    ssl_certificate_key  cert.key;  #指定私钥文件 相对路径 文件需要放在nginx.conf同目录下

#    ssl_session_cache    shared:SSL:1m;
#    ssl_session_timeout  5m;

#    ssl_ciphers  HIGH:!aNULL:!MD5;
#    ssl_prefer_server_ciphers  on;

#    location / {
#        root   html;
#        index  index.html index.htm;
#    }
#}
}
