之前已经用过 swagger2文档,但是没有记录下来,最近 老师也讲了 它,之后 用要用到它,所以就想要记录一下:
现如今,前后端分离已经逐渐成为互联网项目一种标准的开发方式,前端与后端交给不同的人员开发,
但是项目开发中的沟通成本也随之升高,这部分沟通成本主要在于前端开发人员与后端开发人员对WebAPI接口的沟通,Swagger2 就可以很好地解决,它可以动态生成Api接口文档,降低沟通成本,促进项目高效开发。
有时候,作为后端人员,看着代码中密密麻麻 的自己写的代码,有时也会很崩溃,看这个感觉好了很多。
1. 在父工程中(maven聚合项目)的 pom 文件 添加:
package com.imooc.config;

import org.springframework.context.annotation.Bean;
import org.springframework.context.annotation.Configuration;
import springfox.documentation.builders.ApiInfoBuilder;
import springfox.documentation.builders.PathSelectors;
import springfox.documentation.builders.RequestHandlerSelectors;
import springfox.documentation.service.ApiInfo;
import springfox.documentation.service.Contact;
import springfox.documentation.spi.DocumentationType;
import springfox.documentation.spring.web.plugins.Docket;
import springfox.documentation.swagger2.annotations.EnableSwagger2;

@Configuration
@EnableSwagger2
public class Swagger2 {

//    http://localhost:8088/swagger-ui.html     原路径
//    http://localhost:8088/doc.html     原路径

    // 配置swagger2核心配置 docket
    @Bean
    public Docket createRestApi() {
        return new Docket(DocumentationType.SWAGGER_2)  // 指定api类型为swagger2
                    .apiInfo(apiInfo())                 // 用于定义api文档汇总信息
                    .select()
                    .apis(RequestHandlerSelectors
                            .basePackage("com.imooc.controller"))   // 指定controller包
                    .paths(PathSelectors.any())         // 所有controller
                    .build();
    }

    private ApiInfo apiInfo() {
        return new ApiInfoBuilder()
                .title("天天吃货 电商平台接口api")        // 文档页标题
                .contact(new Contact("imooc",
                        "https://www.imooc.com",
                        "[email protected]"))        // 联系人信息
                .description("专为提供的api文档")  // 详细信息
                .version("1.0.1")   // 文档版本号
                .termsOfServiceUrl("https://www.imooc.com") // 网站地址
                .build();
    }

}
=====================================================================
这样就可以简单的访问一下 swagger2:
1.

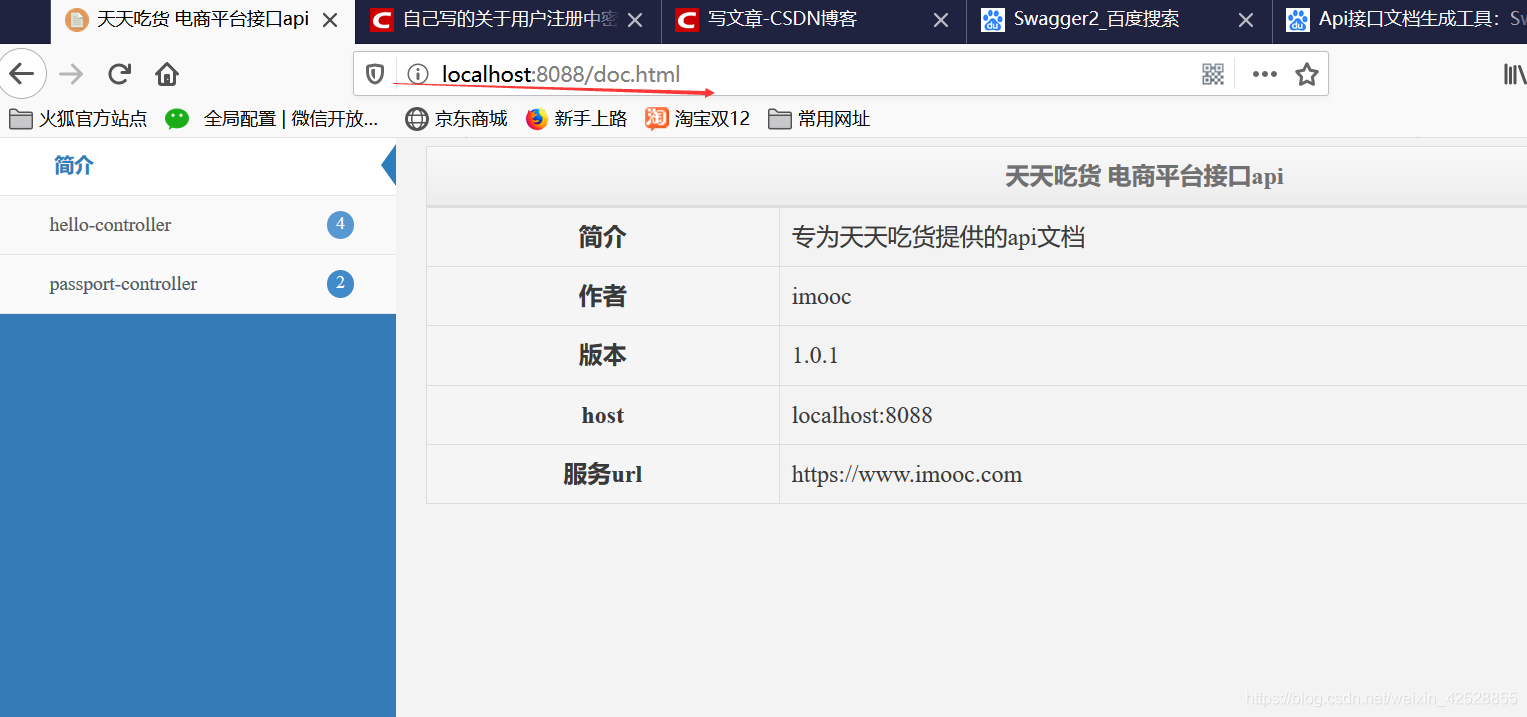
这两个只是页面风格不一样,功能还是一样的。
第一个:是一开始的前两个依赖的(官方的)。
第二个:是最后一个依赖的(第三方的)
=================================================================
1.如果你不想在 swagger2 中展示某一个 controller 类:
只需要在其上方加上:
@ApiIgnore
这样 整个 类中的 全部方法就隐藏了。
当然也可以在某个方法上添加,这样只隐藏该方法
2.如果你想对整个 controller 做一个解释说明,只需要在其头部添加:
@Api(value = "注册登录",tags = {"用于注册登录的相关接口"})

3.当你看着 某个方法的路由,什么注释也没有,有时也会让你抓狂,所以在具体方法头部添加:
@ApiOperation(value = "用户注册",notes = "用户注册",httpMethod = "POST")
httpMethod 要和 你的 Mapping的类型一致

这样就让人清晰了很多:

4.有时你会对一些参数的含义不了解,也是可以解决的,在其 所属的实体类的头部 添加:

@ApiModelProperty(value = "密码",name = "password",example = "123456",required = true)
example 是提供的默认值,
=============================================================
成功后:

对于 example 只有 官方的才有,第三方的没有(我的没有):

5.如果你不想在实体类上配置,也可以在函数里配置:
@ApiOperation(value = "查询商品评论",notes = "查询商品评论",httpMethod = "GET")
@GetMapping("/comments")
public IMOOCJSONResult comments(
        @ApiParam(name = "itemId",value = "商品ID(String 类型的)",required =true )
        @RequestParam String itemId,
        @ApiParam(name = "level",value = "评价等级",required =false )
        @RequestParam Integer level,
        @ApiParam(name = "page",value = "查询下一页的第几页【不传,后端默认为1】)",required =false )
        @RequestParam Integer page,
        @ApiParam(name = "pageSize",value = "分页的每一页显示的条数【不传,后端默认为10,可以改】)",required =false )
        @RequestParam Integer pageSize) {

    if (StringUtils.isBlank(itemId)) {
        return IMOOCJSONResult.errorMsg(null);
    }
    if (page==null){
        page=1;
    }
    if (pageSize==null){
        page=COMMENT_PAGE_SIZE;
    }
    PagedGridResult gridResult=itemService.queryPagedComments(itemId,level
                                                               ,page,pageSize);
    return IMOOCJSONResult.ok(gridResult);
}
如图所示:

