Spring中,applicationContext.xml 配置文件在web.xml中的配置详解
转自http://www.cnblogs.com/cczz_11/p/4363314.html
https://blog.csdn.net/u013743160/article/details/52734017
一、首先写一下代码结构。
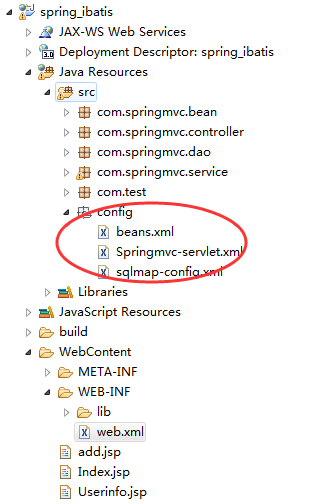
二、再看web.xml中的配置情况。
- <?xml version="1.0" encoding="UTF-8"?>
- <web-app xmlns:xsi="http://www.w3.org/2001/XMLSchema-instance" xmlns="http://java.sun.com/xml/ns/javaee" xsi:schemaLocation="http://java.sun.com/xml/ns/javaee http://java.sun.com/xml/ns/javaee/web-app_3_0.xsd" id="WebApp_ID" version="3.0">
- <display-name>SpringMVC</display-name>
- <welcome-file-list>
- <welcome-file>index.html</welcome-file>
- <welcome-file>index.htm</welcome-file>
- <welcome-file>index.jsp</welcome-file>
- <welcome-file>default.html</welcome-file>
- <welcome-file>default.htm</welcome-file>
- <welcome-file>default.jsp</welcome-file>
- </welcome-file-list>
- <context-param>
- <param-name>contextConfigLocation</param-name>
- <!-- <param-value>classpath*:config/applicationContext.xml</param-value> -->
- <param-value>/WEB-INF/classes/config/applicationContext.xml</param-value>
- </context-param>
- <listener>
- <listener-class>org.springframework.web.context.ContextLoaderListener</listener-class>
- </listener>
- <servlet>
- <servlet-name>springmvc</servlet-name>
- <servlet-class>org.springframework.web.servlet.DispatcherServlet</servlet-class>
- <init-param>
- <param-name>contextConfigLocation</param-name>
- <!-- <param-value>classpath*:config/Springmvc-servlet.xml</param-value> -->
- <param-value>/WEB-INF/classes/config/Springmvc-servlet.xml</param-value>
- </init-param>
- <load-on-startup>1</load-on-startup>
- </servlet>
- <servlet-mapping>
- <servlet-name>springmvc</servlet-name>
- <url-pattern>/</url-pattern>
- </servlet-mapping>
- </web-app>
三、下面是对配置文件的说明。
- <listener>
- <listener-class>org.springframework.web.context.ContextLoaderListener</listener-class>
- </listener>
ContextLoaderListener是Spring的监听器,它的作用就是启动Web容器时,自动装配ApplicationContext的配置信息。因为它实现了ServletContextListener这个接口,在web.xml配置这个监听器,启动容器时,就会默认执行它实现的方法。
- <context-param>
- <param-name>contextConfigLocation</param-name>
- <!-- <param-value>classpath*:config/applicationContext.xml</param-value> -->
- <param-value>/WEB-INF/classes/config/applicationContext.xml</param-value>
- </context-param>
这段配置是用于指定applicationContext.xml配置文件的位置,可通过context-param加以指定:
这里需要搞清楚classpath是什么,以及classpath:和classpath*有何区别:
1. 首先 classpath是指 WEB-INF文件夹下的classes目录
2. classpath 和 classpath* 区别:
classpath:只会到你的class路径中查找找文件;
classpath*:不仅包含class路径,还包括jar文件中(class路径)进行查找.
如果applicationContext.xml配置文件存放在src目录下,就好比上面的代码结构中的存放位置,那么在web.xml中的配置就如下所示:
- <context-param>
- <param-name>contextConfigLocation</param-name>
- <param-value>classpath:applicationContext.xml</param-value>
- </context-param>
如果applicationContext.xml配置文件存放在WEB-INF下面,那么在web.xml中的配置就如下所示:
- <context-param>
- <param-name>contextConfigLocation</param-name>
- <param-value>WEB-INF/applicationContext*.xml</param-value>
- </context-param>
需要注意的是,部署到应用服务器后,src目录下的配置文件会和class文件一样,自动copy到应用的 classes目录下,spring的 配置文件在启动时,加载的是web-info目录下的applicationContext.xml, 运行时使用的是web-info/classes目录下的applicationContext.xml。因此,不管applicationContext.xml配置文件存放在src目录下,还是存放在WEB-INF下面,都可以用下面这种方式来配置路径:
- <context-param>
- <param-name>contextConfigLocation</param-name>
- <param-value>WEB-INF/applicationContext*.xml</param-value>
- </context-param>
当有多个配置文件加载时,可采用下面代码来配置:
复制代码
- <context-param>
- <param-name>contextConfigLocation</param-name>
- <param-value>
- classpath*:conf/spring/applicationContext_core*.xml,
- classpath*:conf/spring/applicationContext_dict*.xml,
- classpath*:conf/spring/applicationContext_hibernate.xml,
- ......
- </param-value>
- </context-param>
复制代码
也可以用下面的这种方式:
- <context-param>
- <param-name>contextConfigLocation</param-name>
- <param-value>classpath*:**/applicationContext-*.xml</param-value>
- </context-param>
"**/"表示的是任意目录;
"**/applicationContext-*.xml"表示任意目录下的以"applicationContext-"开头的XML文件。
Spring配置文件最好以"applicationContext-"开头,且最好把所有Spring配置文件都放在一个统一的目录下,也可以分模块创建。