摘要:最近主要通过视频资源学习Android,视频有一部分是开发一个有关影视分享app的,所以跟着视频的讲解,自己也试着做一下这个项目,这个APP涉及了很多知识点,包括侧滑导航栏,菜单项切换,这两个功能通过使用Fragment来实现,还有Volley,json,gson等等的使用,涉及的知识很多,所以需要慢慢去掌握。
一、开发进度一
第一步主要实现了页面布局以及通过使用fragment来实现侧滑导航栏页面的切换功能,过程如下:

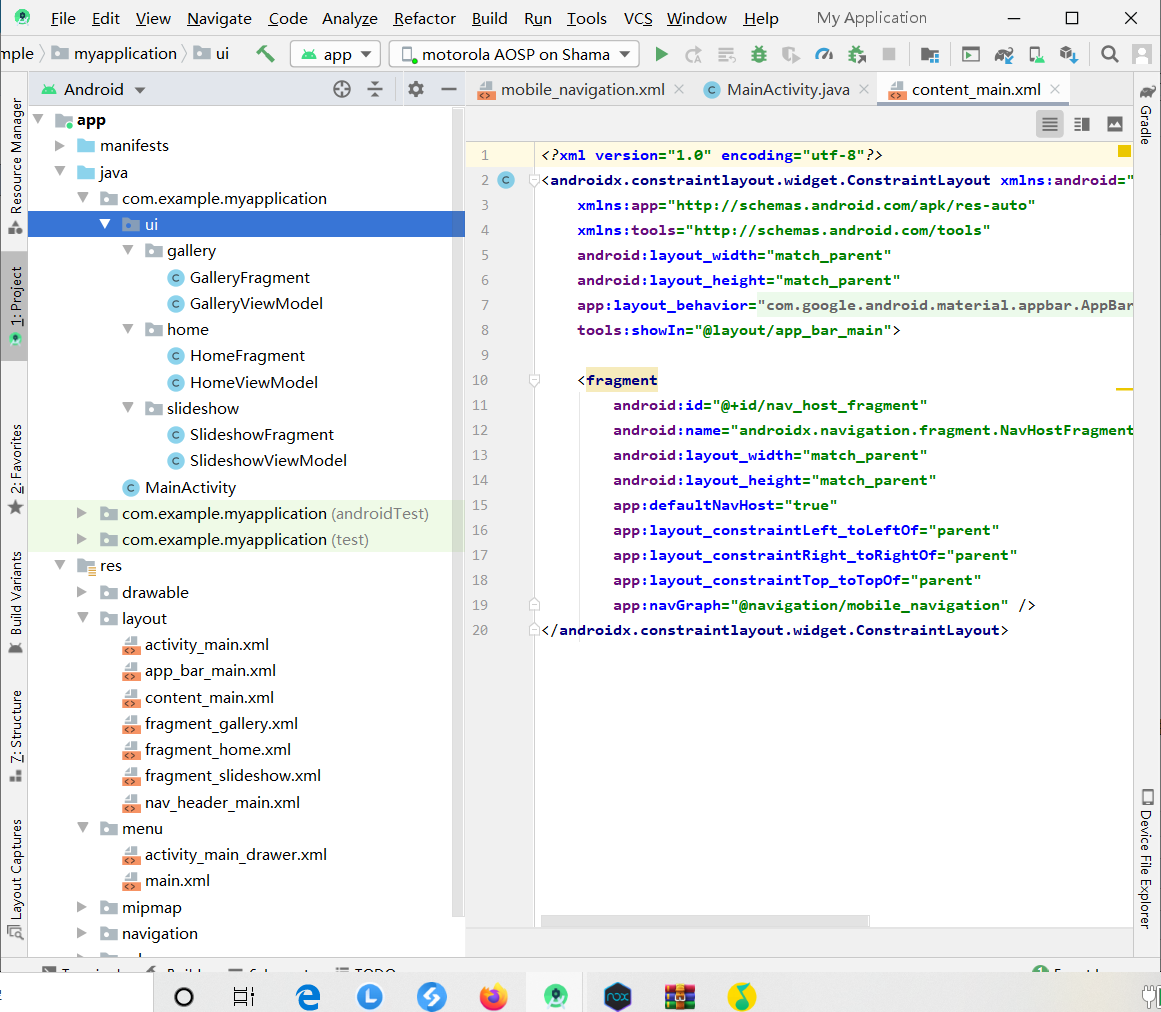
在创建项目时使用AS提供的上图所示模板,由于我使用的AS版本高于视频中老师使用的AS版本,所以导致新建项目自动生成的模板代码和教程不一样,会出来如图所示的情况:
保留并新建图片所示文件:

修改布局文件:


<?xml version="1.0" encoding="utf-8"?>
<menu xmlns:android="http://schemas.android.com/apk/res/android"
    xmlns:tools="http://schemas.android.com/tools"
    tools:showIn="navigation_view">

    <group android:checkableBehavior="single">
        <item
            android:id="@+id/first"
            android:icon="@drawable/ic_menu_camera"
            android:title="首页" />
        <item
            android:id="@+id/collect"
            android:icon="@drawable/ic_menu_gallery"
            android:title="收藏" />
        <item
            android:id="@+id/top"
            android:icon="@drawable/ic_menu_slideshow"
            android:title="Top250" />
    </group>
    <item android:title="系统">
        <menu>
            <item
                android:id="@+id/setting"
                android:icon="@drawable/ic_menu_share"
                android:title="系统设置" />
        </menu>
    </item>
</menu>
<?xml version="1.0" encoding="utf-8"?>
<LinearLayout
    xmlns:android="http://schemas.android.com/apk/res/android"
    xmlns:app="http://schemas.android.com/apk/res-auto"
    android:layout_width="match_parent"
    android:layout_height="@dimen/nav_header_height"
    android:background="@drawable/side_nav_bar"
    android:paddingBottom="@dimen/activity_vertical_margin"
    android:paddingLeft="@dimen/activity_horizontal_margin"
    android:paddingRight="@dimen/activity_horizontal_margin"
    android:paddingTop="@dimen/activity_vertical_margin"
    android:theme="@style/ThemeOverlay.AppCompat.Dark"
    android:orientation="vertical"
    android:gravity="bottom">

    <ImageView
        android:layout_width="wrap_content"
        android:layout_height="wrap_content"
        android:paddingTop="@dimen/nav_header_vertical_spacing"
        app:srcCompat="@mipmap/ic_launcher_round"
        android:contentDescription="@string/nav_header_desc"
        android:id="@+id/imageView" />

    <TextView
        android:layout_width="match_parent"
        android:layout_height="wrap_content"
        android:paddingTop="@dimen/nav_header_vertical_spacing"
        android:text="MoooJL"
        android:textAppearance="@style/TextAppearance.AppCompat.Body1" />

    <TextView
        android:layout_width="wrap_content"
        android:layout_height="wrap_content"
        android:text="行到水穷处,坐看云起时"
        android:id="@+id/textView" />

</LinearLayout>
<?xml version="1.0" encoding="utf-8"?>
<androidx.drawerlayout.widget.DrawerLayout
    xmlns:android="http://schemas.android.com/apk/res/android"
    xmlns:app="http://schemas.android.com/apk/res-auto"
    xmlns:tools="http://schemas.android.com/tools"
    android:id="@+id/drawer_layout"
    android:layout_width="match_parent"
    android:layout_height="match_parent"
    android:fitsSystemWindows="true"
    tools:openDrawer="start">

    <include
        layout="@layout/app_bar_main"
        android:layout_width="match_parent"
        android:layout_height="match_parent" />

    <com.google.android.material.navigation.NavigationView
        android:id="@+id/nav_view"
        android:layout_width="wrap_content"
        android:layout_height="match_parent"
        android:layout_gravity="start"
        android:fitsSystemWindows="true"
        app:headerLayout="@layout/nav_header_main"
        app:menu="@menu/activity_main_drawer" />

</androidx.drawerlayout.widget.DrawerLayout>
<?xml version="1.0" encoding="utf-8"?>
<androidx.coordinatorlayout.widget.CoordinatorLayout
    xmlns:android="http://schemas.android.com/apk/res/android"
    xmlns:app="http://schemas.android.com/apk/res-auto"
    xmlns:tools="http://schemas.android.com/tools"
    android:layout_width="match_parent"
    android:layout_height="match_parent"
    tools:context=".MainActivity">

    <com.google.android.material.appbar.AppBarLayout
        android:layout_height="wrap_content"
        android:layout_width="match_parent"
        android:theme="@style/AppTheme.AppBarOverlay">

        <androidx.appcompat.widget.Toolbar
            android:id="@+id/toolbar"
            android:layout_width="match_parent"
            android:layout_height="?attr/actionBarSize"
            android:background="?attr/colorPrimary"
            app:popupTheme="@style/AppTheme.PopupOverlay" />

    </com.google.android.material.appbar.AppBarLayout>

    <include layout="@layout/content_main"/>

    <com.google.android.material.floatingactionbutton.FloatingActionButton
        android:id="@+id/fab"
        android:layout_width="wrap_content"
        android:layout_height="wrap_content"
        android:layout_gravity="bottom|end"
        android:layout_margin="@dimen/fab_margin"
        app:srcCompat="@android:drawable/ic_dialog_email" />

</androidx.coordinatorlayout.widget.CoordinatorLayout>
<?xml version="1.0" encoding="utf-8"?>
<RelativeLayout
    xmlns:android="http://schemas.android.com/apk/res/android"
    xmlns:app="http://schemas.android.com/apk/res-auto"
    xmlns:tools="http://schemas.android.com/tools"
    android:layout_width="match_parent"
    android:layout_height="match_parent"
    android:id="@+id/relativeLayout"
    app:layout_behavior="@string/appbar_scrolling_view_behavior"
    tools:context=".MainActivity"
    tools:showIn="@layout/app_bar_main">

</RelativeLayout>
<?xml version="1.0" encoding="utf-8"?>
<menu xmlns:android="http://schemas.android.com/apk/res/android"
    xmlns:app="http://schemas.android.com/apk/res-auto">
    <item android:id="@+id/action_settings"
        android:title="@string/action_settings"
        android:orderInCategory="100"
        app:showAsAction="never" />
</menu>
新建4个侧滑导航栏页面,这里只给出一个,其余3个一样
<?xml version="1.0" encoding="utf-8"?>
<LinearLayout xmlns:android="http://schemas.android.com/apk/res/android"
    android:orientation="vertical" android:layout_width="match_parent"
    android:layout_height="match_parent">
    <TextView
        android:layout_width="match_parent"
        android:layout_height="match_parent"
        android:text="two"/>

</LinearLayout>
新建4个fragment的java文件,这里只给出一个,其余3个一样
package com.example.yingshifenxiang.fragment;

import android.view.View;
import android.view.LayoutInflater;
import android.view.ViewGroup;
import android.os.Bundle;

import androidx.fragment.app.Fragment;

import com.example.yingshifenxiang.R;


public class OneFragment extends Fragment {


    @Override
    public View onCreateView(LayoutInflater inflater, ViewGroup container,
                             Bundle savedInstanceState) {
        return inflater.inflate(R.layout.one_fragment_layout, null);
    }

    @Override
    public void onViewCreated(View view, Bundle savedInstanceState) {
        super.onViewCreated(view, savedInstanceState);

    }

}
重写MainActivity.java文件
package com.example.yingshifenxiang;

import android.os.Bundle;
import android.view.Menu;
import android.view.MenuItem;
import android.view.View;

import androidx.appcompat.app.ActionBarDrawerToggle;
import androidx.appcompat.app.AppCompatActivity;
import androidx.appcompat.widget.Toolbar;
import androidx.core.view.GravityCompat;
import androidx.drawerlayout.widget.DrawerLayout;
import androidx.fragment.app.Fragment;
import androidx.fragment.app.FragmentManager;
import androidx.fragment.app.FragmentTransaction;

import com.example.yingshifenxiang.fragment.FourFragment;
import com.example.yingshifenxiang.fragment.OneFragment;
import com.example.yingshifenxiang.fragment.ThreeFragment;
import com.example.yingshifenxiang.fragment.TwoFragment;
import com.google.android.material.floatingactionbutton.FloatingActionButton;
import com.google.android.material.navigation.NavigationView;
import com.google.android.material.snackbar.Snackbar;

public class MainActivity extends AppCompatActivity implements NavigationView.OnNavigationItemSelectedListener {

    @Override
    protected void onCreate(Bundle savedInstanceState) {
        super.onCreate(savedInstanceState);
        setContentView(R.layout.activity_main);
        Toolbar toolbar = (Toolbar) findViewById(R.id.toolbar);
        setSupportActionBar(toolbar);

        FloatingActionButton fab = (FloatingActionButton) findViewById(R.id.fab);
        fab.setOnClickListener(new View.OnClickListener() {
            @Override
            public void onClick(View view) {
                Snackbar.make(view, "Replace with your own action", Snackbar.LENGTH_LONG)
                        .setAction("Action", null).show();
            }
        });

        DrawerLayout drawer = (DrawerLayout) findViewById(R.id.drawer_layout);
        ActionBarDrawerToggle toggle = new ActionBarDrawerToggle(
                this, drawer, toolbar, R.string.navigation_drawer_open, R.string.navigation_drawer_close);
        drawer.addDrawerListener(toggle);
        toggle.syncState();

        NavigationView navigationView = (NavigationView) findViewById(R.id.nav_view);
        navigationView.setNavigationItemSelectedListener(this);

        fm = this.getSupportFragmentManager();
        switchFragment("首页");
    }
    FragmentManager fm;

    @Override
    public void onBackPressed() {
        DrawerLayout drawer = (DrawerLayout) findViewById(R.id.drawer_layout);
        if (drawer.isDrawerOpen(GravityCompat.START)) {
            drawer.closeDrawer(GravityCompat.START);
        } else {
            super.onBackPressed();
        }
    }

    @Override
    public boolean onCreateOptionsMenu(Menu menu) {
        // Inflate the menu; this adds items to the action bar if it is present.
        getMenuInflater().inflate(R.menu.main, menu);
        return true;
    }

    @Override
    public boolean onOptionsItemSelected(MenuItem item) {
        // Handle action bar item clicks here. The action bar will
        // automatically handle clicks on the Home/Up button, so long
        // as you specify a parent activity in AndroidManifest.xml.
        int id = item.getItemId();

        //noinspection SimplifiableIfStatement
        if (id == R.id.action_settings) {
            return true;
        }

        return super.onOptionsItemSelected(item);
    }

    @SuppressWarnings("StatementWithEmptyBody")
    @Override
    public boolean onNavigationItemSelected(MenuItem item) {
        // Handle navigation view item clicks here.
        int id = item.getItemId();
        String title = item.getTitle().toString();
        switchFragment(title);
        DrawerLayout drawer = (DrawerLayout) findViewById(R.id.drawer_layout);
        drawer.closeDrawer(GravityCompat.START);
        return true;
    }
    String[] titles = {"首页","收藏","Top250","系统设置"};
    Fragment[] fs = {new OneFragment(),new TwoFragment(),new ThreeFragment(),new FourFragment()};
    //临时保存正被显示的Fragment
    Fragment mFragment = new OneFragment();
    public void switchFragment(String title){
        FragmentTransaction t =  fm.beginTransaction();
        Fragment f = fm.findFragmentByTag(title);
        //当前要求显示的Fragment,原来是否显示过,缓存过,如果加入过manager,就取出来显示就行了,没有就从数组中找
        if(f!=null){
            t.hide(mFragment).show(f);
            //保存正被显示的Fragment
            mFragment = f;
        }else {
            for (int i = 0; i < titles.length; i++) {
                if (titles[i].equals(title)) {
                    t.hide(mFragment);
                    t.add(R.id.relativeLayout, fs[i], title);
                    //保存正被显示的Fragment
                    mFragment = fs[i];
                }
            }
        }
        t.commit();
        this.getSupportActionBar().setTitle(title);
    }
}
完成到这里,就可以运行程序看效果了。( 第一次运行时出现了好多问题,废了好大力才解决)
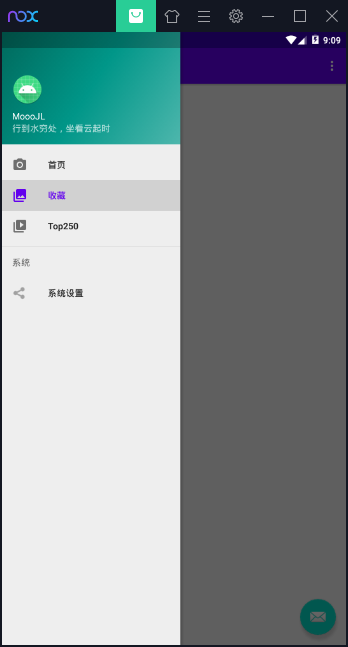
至此,第一阶段完工