本博客demo源码地址
https://github.com/suchahaerkang/spring-annotation.git
ApplicationListener接口和@EventListener的作用:都是监听容器中发布的事件
1 测试功能
写一个实现ApplicationListener接口的监听器和@EventListener注解的监听器来监听某个事件(ApplicationEvent及其子类)
/**
 * @description:
 * @author: sukang
 * @date: 2020-03-18 15:28
 */
@Component
public class MyApplicationListener implements ApplicationListener<ApplicationEvent> {

    public void onApplicationEvent(ApplicationEvent event) {
        System.out.println("ApplicationListener...监听到事件:" + event);
    }
}

/**
 * @description:
 * @author: sukang
 * @date: 2020-03-18 15:45
 */
@Service
public class UserService {

    @EventListener(classes = {ApplicationEvent.class})
    public void listen(ApplicationEvent event){
        System.out.println("UserService...监听到的事件:"+event);
    }
}
只要容器中有相关事件的发布,我们就能监听到这个事件,容器在刷新和关闭的时候会发布事件:
1)ContextRefreshedEvent:容器刷新完成(所有bean都完全创建)会发布这个事件;
2)ContextClosedEvent:关闭容器会发布这个事件;
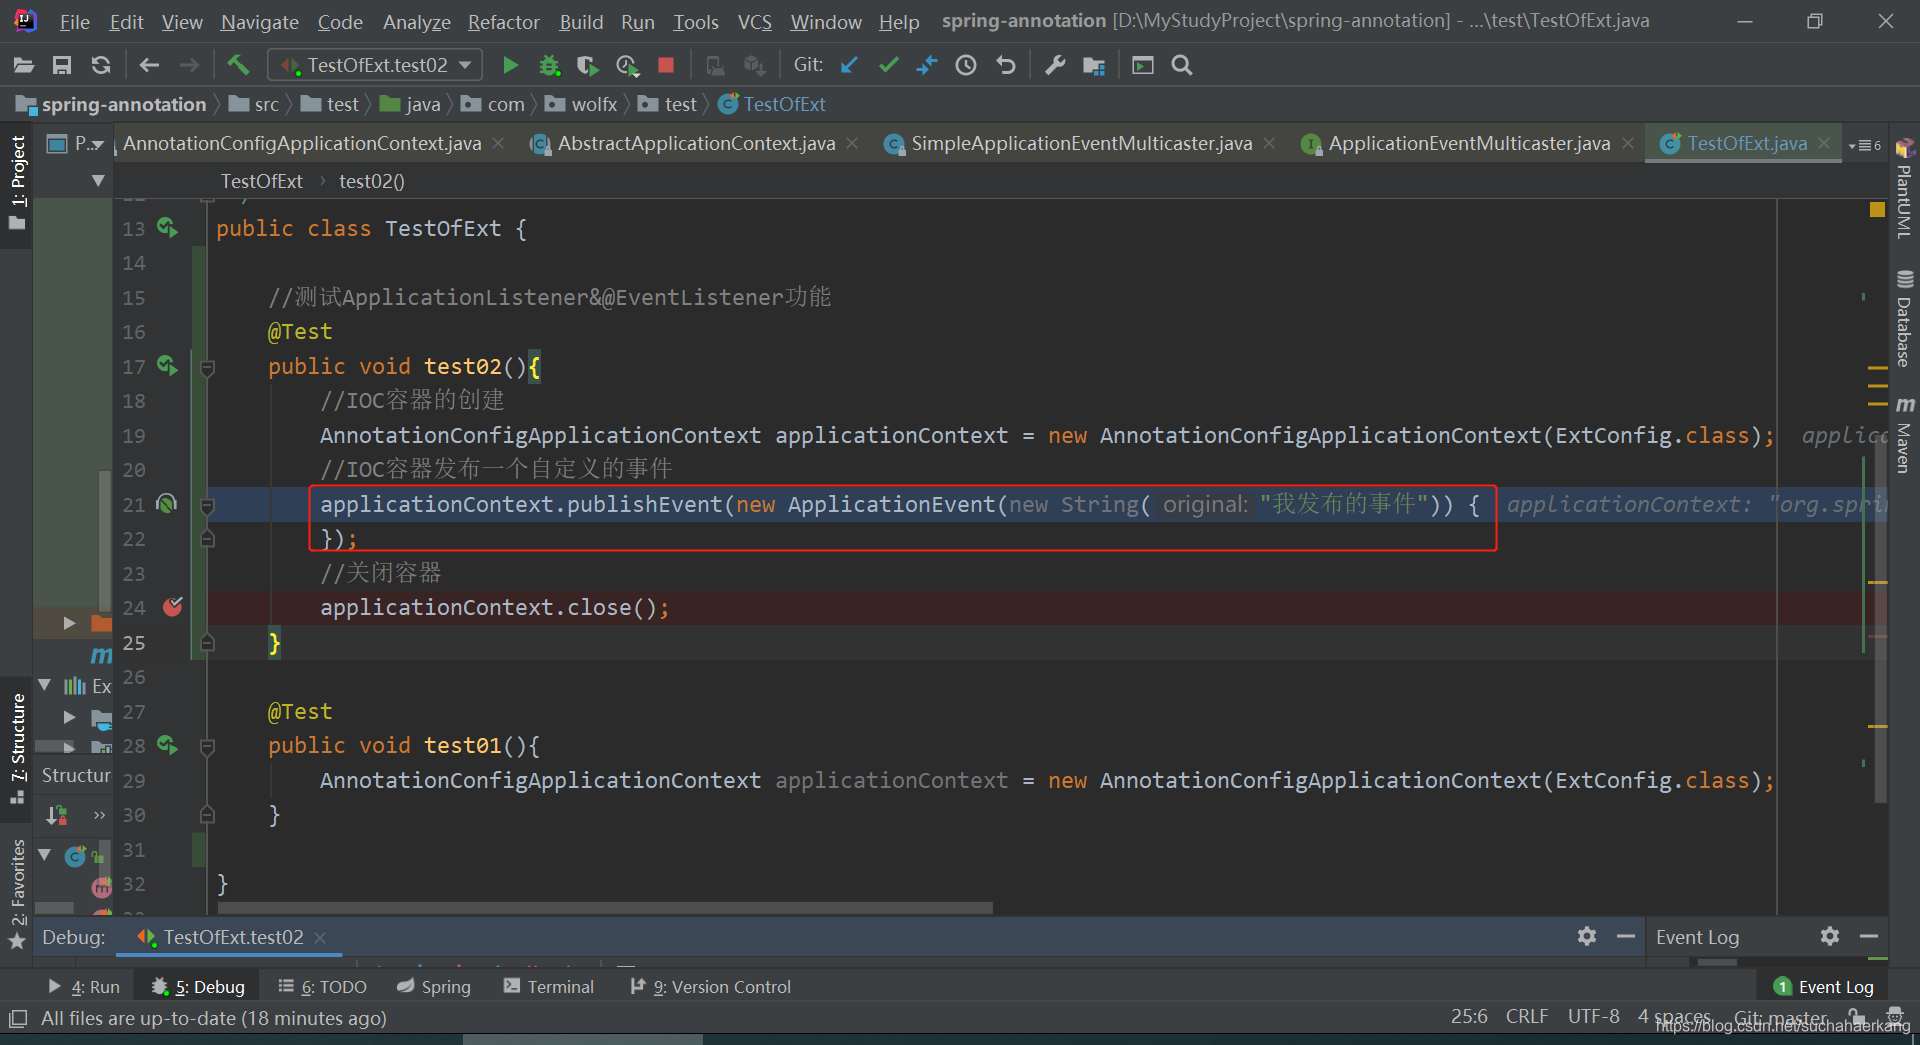
另外我们通过applicationContext.publishEvent();发布我们自定义的事件
写个测试用例
//测试ApplicationListener&@EventListener功能
@Test
public void test02(){
    //IOC容器的创建
    AnnotationConfigApplicationContext applicationContext = new AnnotationConfigApplicationContext(ExtConfig.class);
    //IOC容器发布一个自定义的事件
    applicationContext.publishEvent(new ApplicationEvent(new String("我发布的事件")) {
    });
    //关闭容器
    applicationContext.close();
}
运行结果

2 ApplicationListener源码分析
容器创建并且刷新

容器刷新完成会发布ContextRefreshedEvent事件
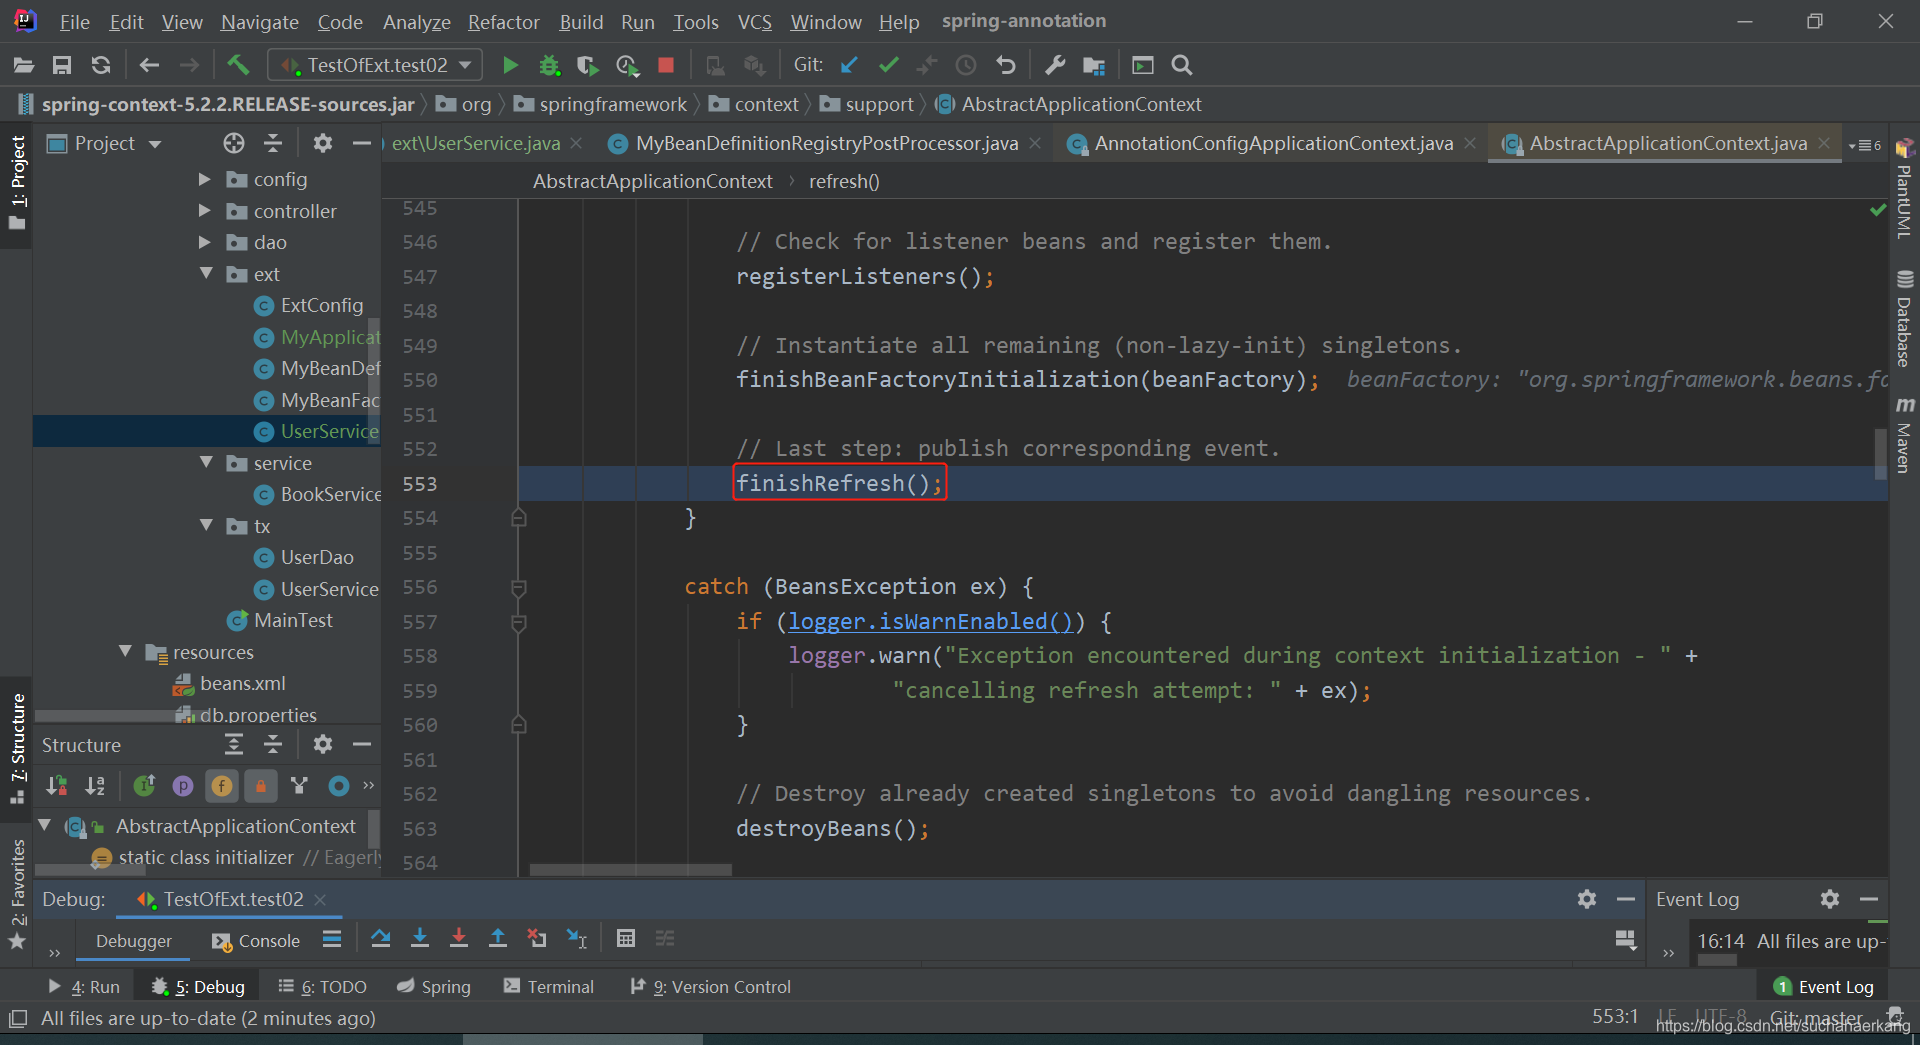
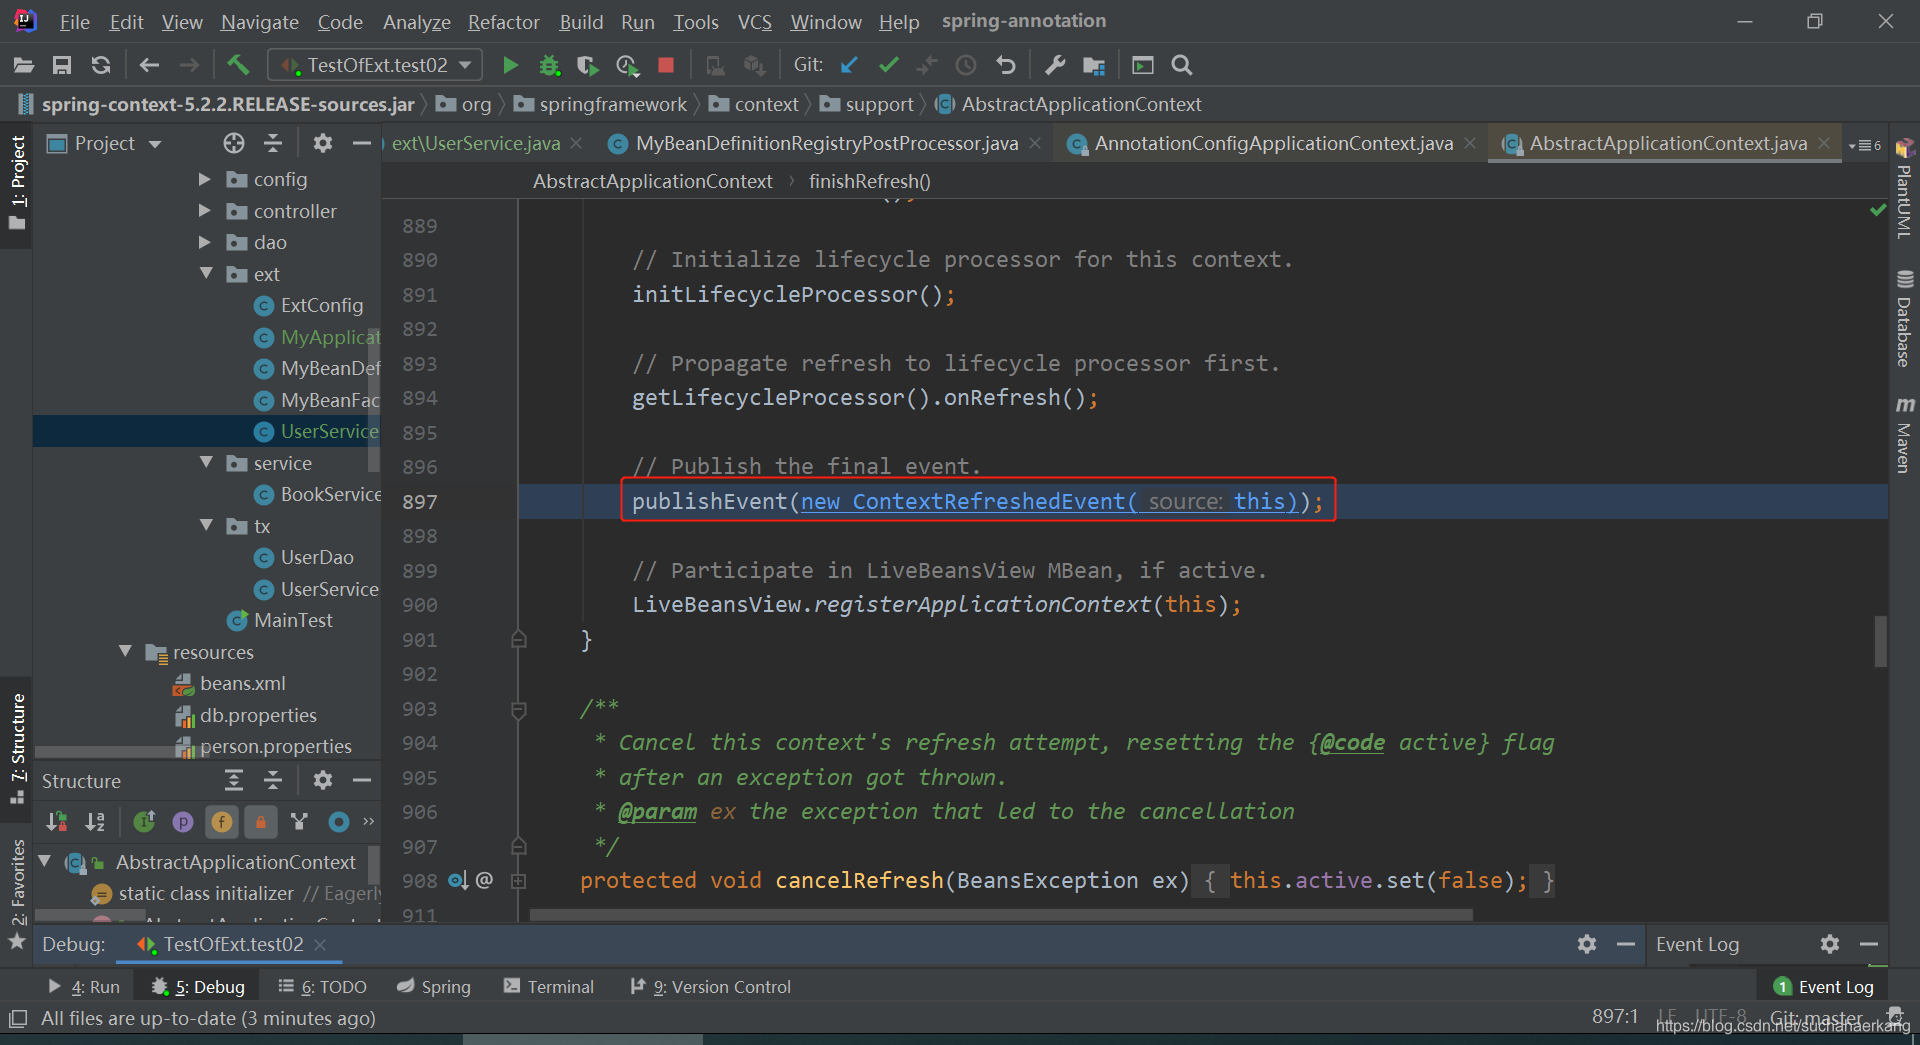
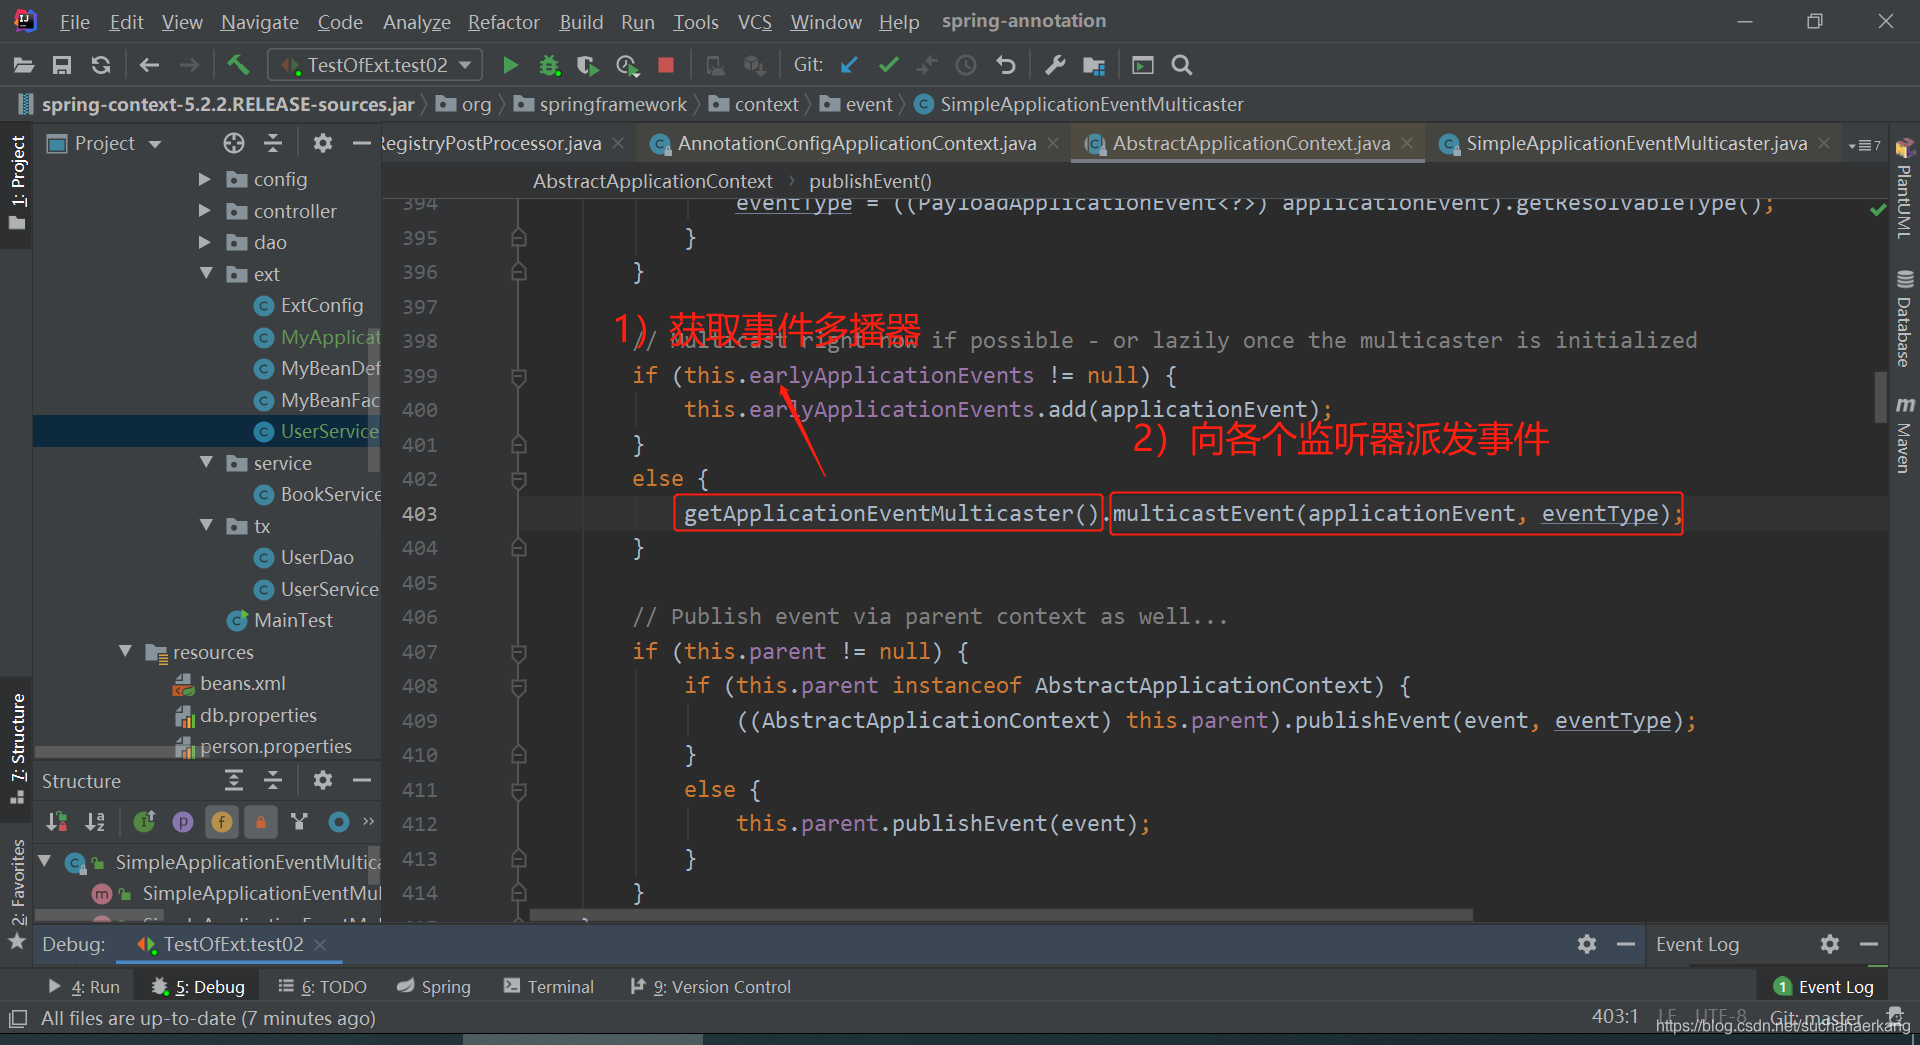
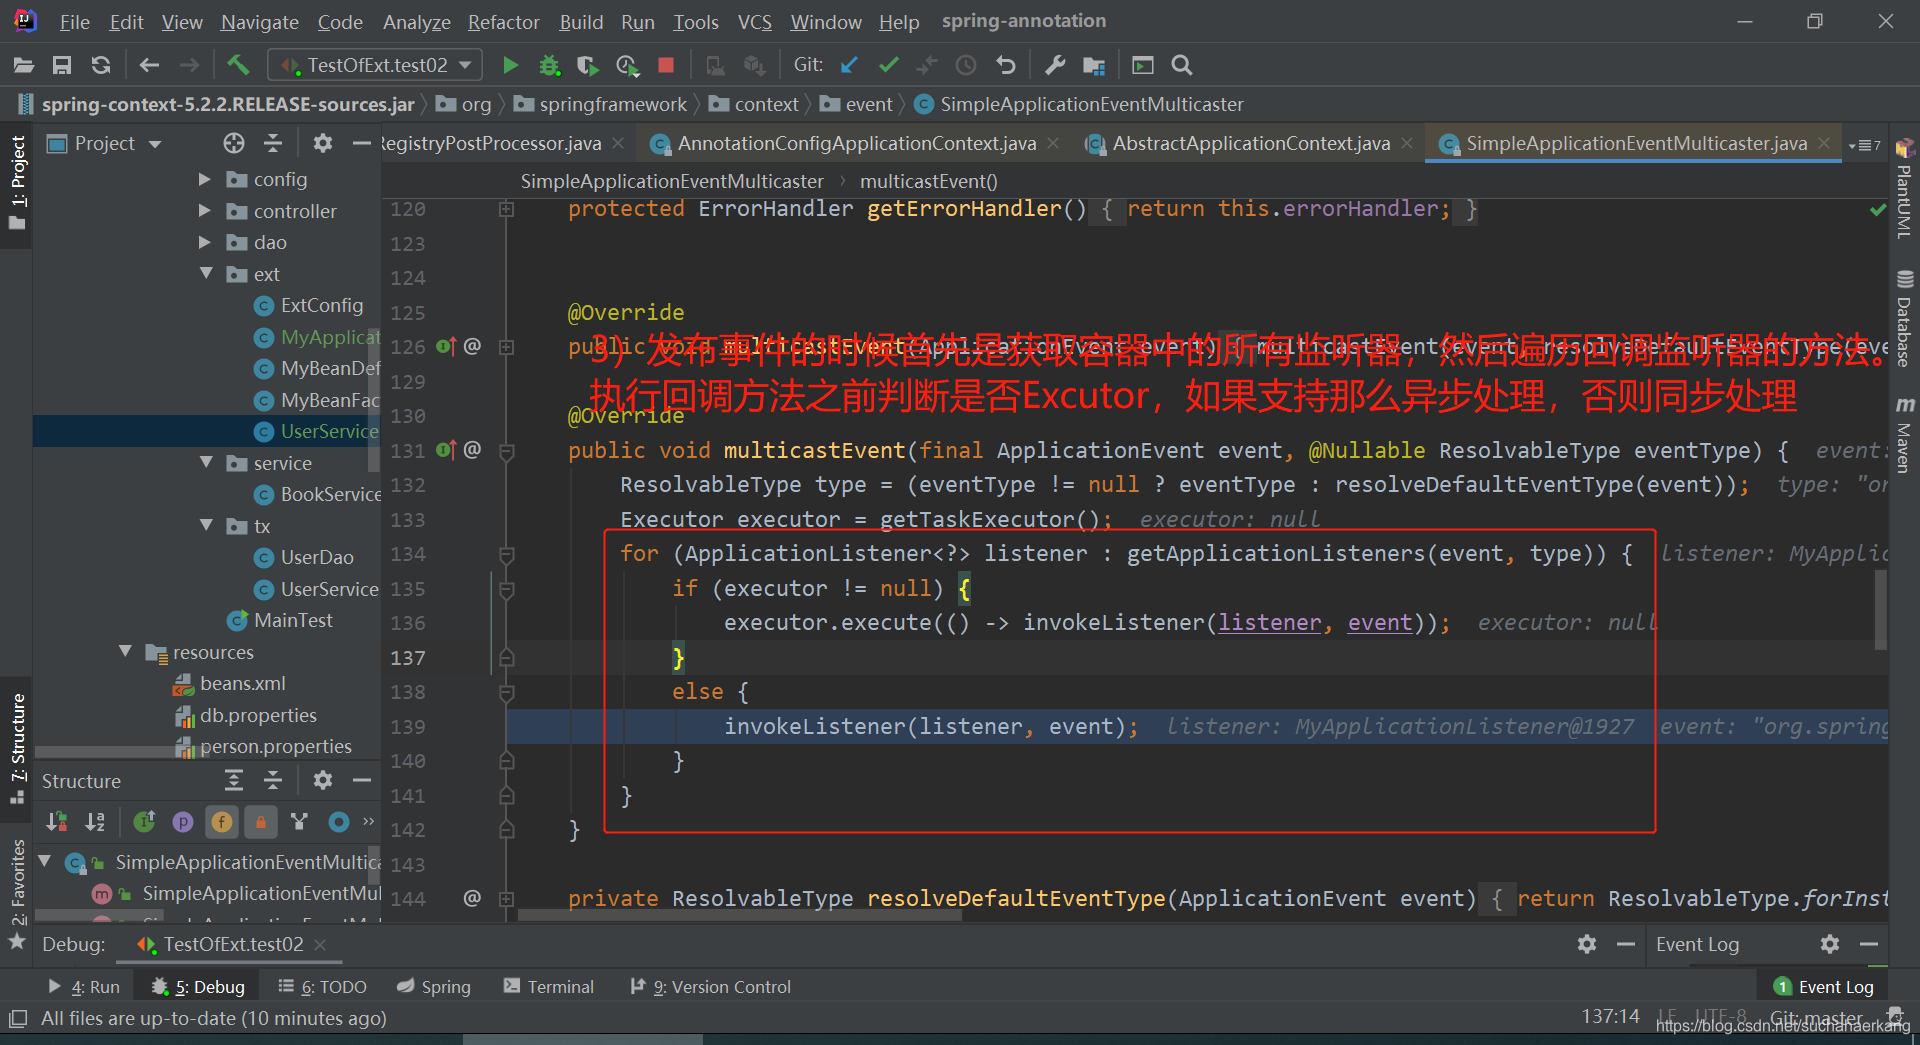
事件发布流程
自己发布事件
事件发布流程和上面一样
容器关闭会发布ContextClosedEvent

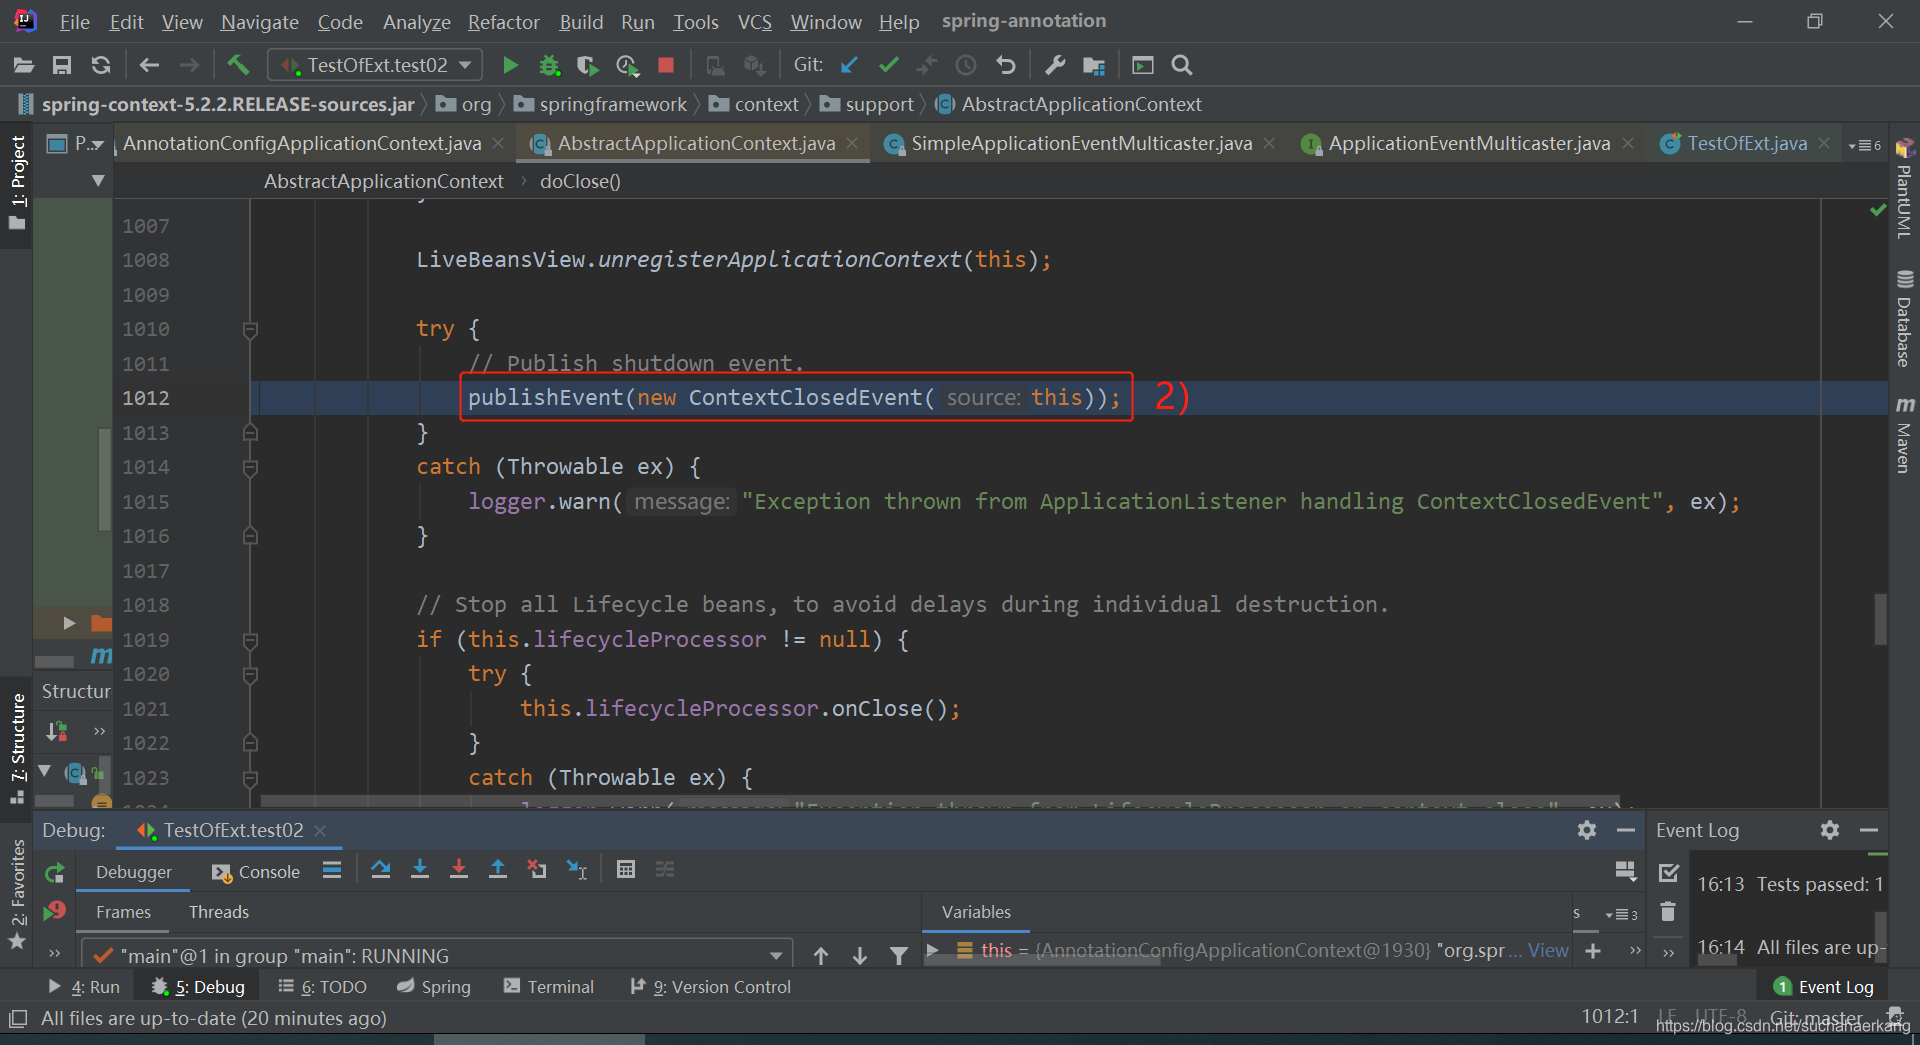
发布流程也同上
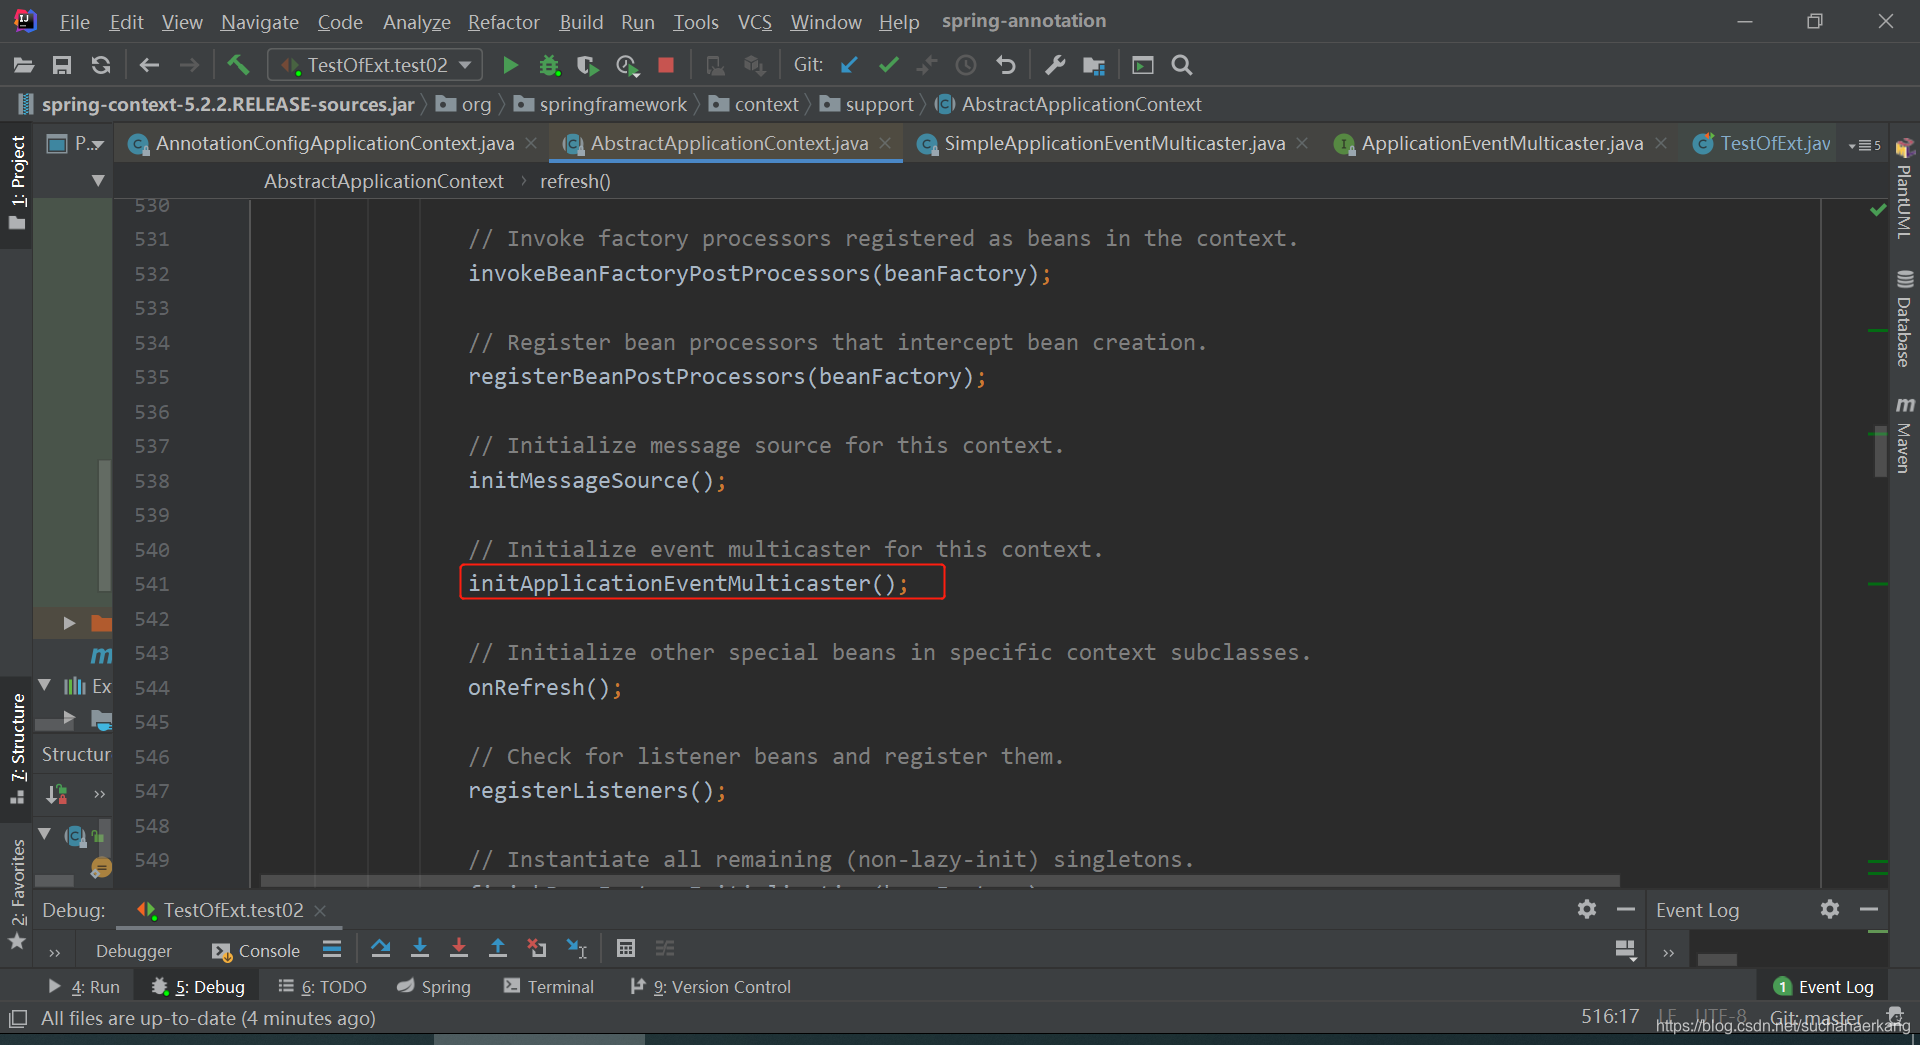
下面我们看一下事件多播器是怎么注册到容器中去的
1)刷新容器

2)初始化ApplicationEventMulticaster
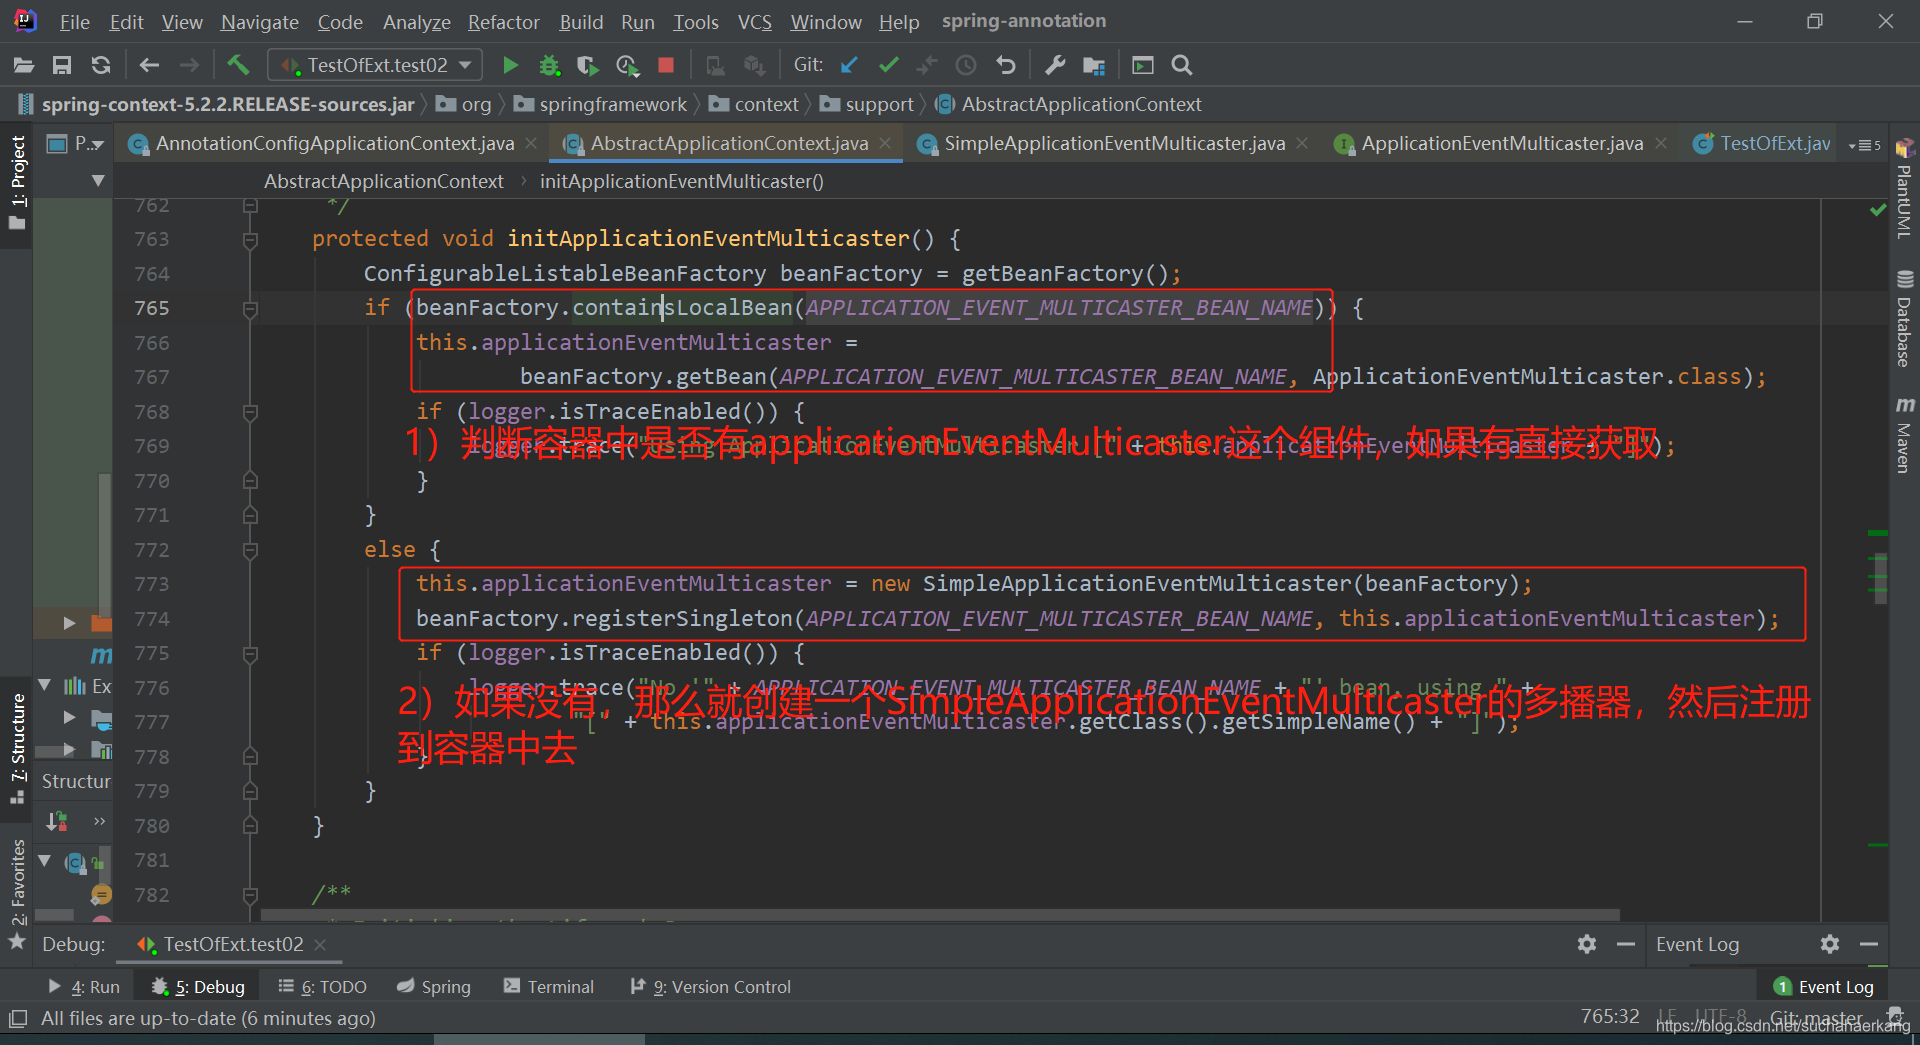
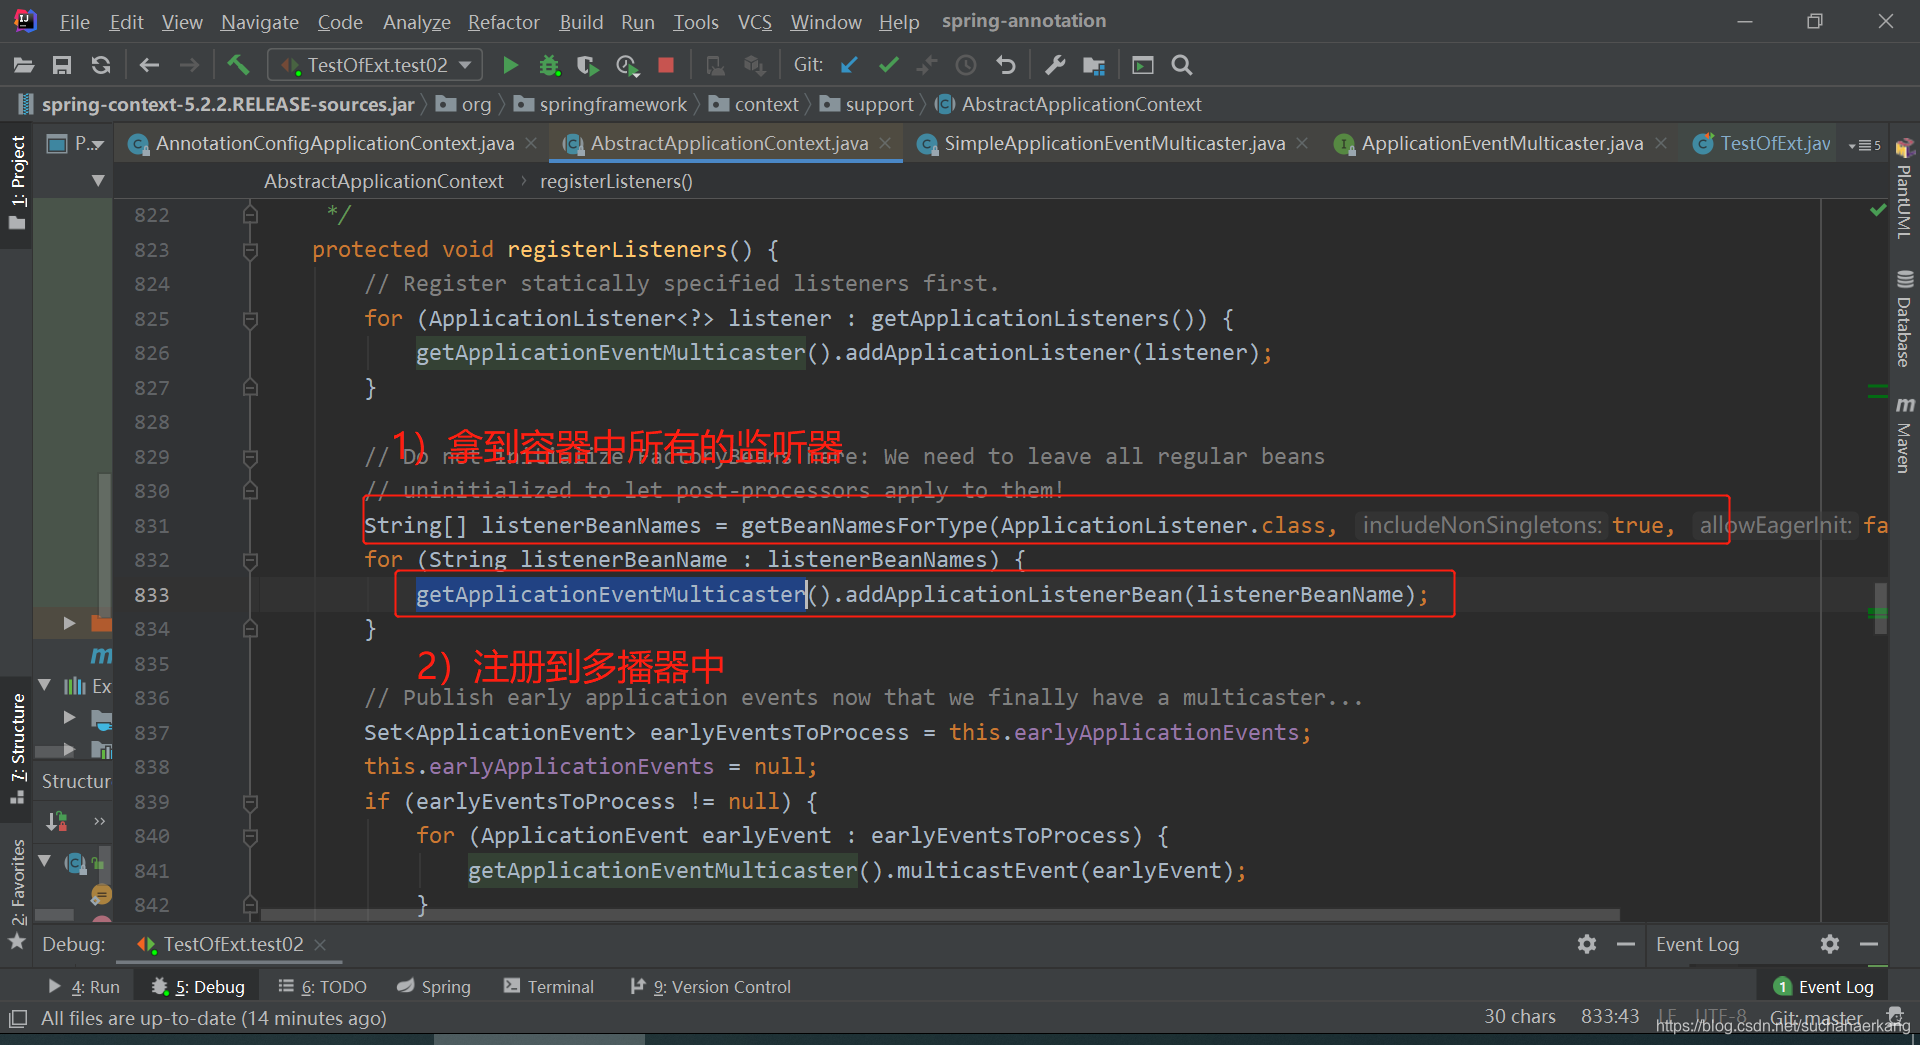
容器是怎么将容器中的监听器注册到多播器中去的?
1)刷新容器
2)从容器中拿到所有的监听器,把他们注册到applicationEventMulticaster中

3 @EventListener原理
查看@EventListener的源码,源码要我们查看EventListenerMethodProcessor这个组件

EventListenerMethodProcessor 实现了 SmartInitializingSingleton组件的afterSingletonsInstantiated()方法

下面什么时候开始触发执行afterSingletonsInstantiated()方法
1)ioc容器创建对象并刷新容器
2)初始化剩下的单实例bean

遍历容器中的所有单实例bean并创建

4)获取所有创建好的单实例bean,判断是否是SmartInitializingSingleton类型的;如果是就调用afterSingletonsInstantiated()
