一、背景说明
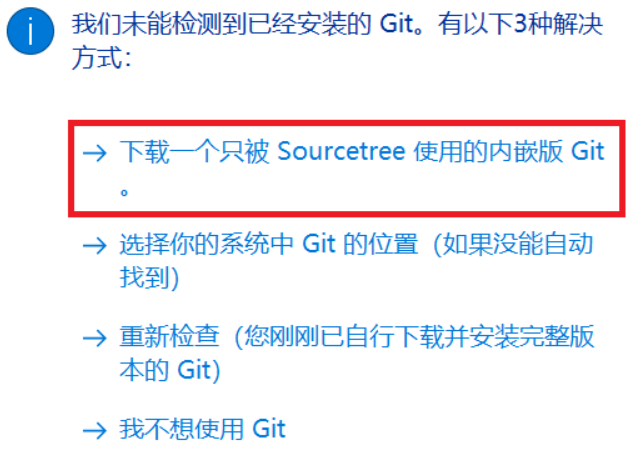
SourceTreeSetup-3.3.8是最新的版本,安装了好多次,只配置accounts.json后,还是不能跳过注册步骤; 所以找了一些资料,记录一下安装过程。
二、找到SourceTree的安装路径,新增文件
1、找到本地文件夹里的SourceTree路径:
%LocalAppData%\Atlassian\SourceTree\
2、在该路径下,新建文件accounts.json
3、往accounts.json写入以下内容:
 [{
  "$id": "1",
  "$type": "SourceTree.Api.Host.Identity.Model.IdentityAccount, SourceTree.Api.Host.Identity",
  "Authenticate": true,
  "HostInstance": {
    "$id": "2",
    "$type": "SourceTree.Host.Atlassianaccount.AtlassianAccountInstance, SourceTree.Host.AtlassianAccount",
    "Host": {
      "$id": "3",
      "$type": "SourceTree.Host.Atlassianaccount.AtlassianAccountHost, SourceTree.Host.AtlassianAccount",
      "Id": "atlassian account"
    },
    "BaseUrl": "https://id.atlassian.com/"
  },
  "Credentials": {
    "$id": "4",
    "$type": "SourceTree.Model.BasicAuthCredentials, SourceTree.Api.Account",
    "Username": "",
    "Email": null
  },
  "IsDefault": false
}]
三、找到SourceTree的另一个文件夹,在文件中新增内容
1、其路径如下:
%LocalAppData%\Atlassian\SourceTree.exe_Url_2qhsvotkhzbojgv35nzesc3mwcycmzps
注:以上加粗路径每个用户可能不一样,可先到%LocalAppData%\Atlassian,再选择如下文件夹
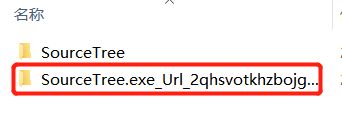
2、进入到指定文件夹后,在它的下级目录中,找到user.config文件
3、打开user.config文件,按照格式插入以下内容:
<setting name="AgreedToEULA" serializeAs="String">
    <value>True</value>
</setting>
<setting name="AgreedToEULAVersion" serializeAs="String">
    <value>20160201</value>
</setting>
四、重新点击SourceTreeSetup-3.3.8安装包,进行安装

至此,SourceTreeSetup-3.3.8就成功安装,可以随便使用啦。