运行Flask
执行manage.py文件
python manage.py runserver -h 0.0.0.0 -p 80
- 在地址
0.0.0.0端口号80启动服务器
python manage.py runserver 可选参数
optional arguments:
  -?, --help            show this help message and exit
  -h HOST, --host HOST
  -p PORT, --port PORT
  --threaded
  --processes PROCESSES
  --passthrough-errors
  -d, --debug           enable the Werkzeug debugger (DO NOT use in production
                        code)
  -D, --no-debug        disable the Werkzeug debugger
  -r, --reload          monitor Python files for changes (not 100% safe for
                        production use)
  -R, --no-reload       do not monitor Python files for changes
  --ssl-crt SSL_CRT     Path to ssl certificate
  --ssl-key SSL_KEY     Path to ssl key
路由层
路由规则
# views.py
from flask import Blueprint
blue = Blueprint('blue',__name__)

# 蓝图懒加载
def init_blue(app):
    app.register_blueprint(blue)
—不传递参数
# views.py
@blue.route('/index/')
def index():
    return "index"
—传递任意参数
# views.py
@blue.route('/get_param/<id>/')
def get_param(id):
	print("参数:%s 类型:%s"%(id,type(id)))
    return "get_param success!"
—传递int型参数
# views.py
@blue.route('/get_int/<int:id>/')
def get_int(id):
    print("参数:%s 类型:%s"%(id,type(id)))
    return "get_int success!"
—传递float型参数
# views.py
@blue.route('/get_float/<float:id>/')
def get_float(id):
    print("参数:%s 类型:%s"%(id,type(id)))
    return "get_float success!"
—传递string型参数
# views.py
@blue.route('/get_string/<string:token>/')
def get_string(token):
    print("参数:%s 类型:%s"%(token,type(token)))
    return "get_string success!"
—传递path型参数 以最后一个"/"结束
# views.py
@blue.route('/get_path/<path:path>/')
def get_path(path):
    print("参数:%s 类型:%s"%(path,type(path)))
    return "get_path success!"
—传递uuid型参数
# views.py
@blue.route('/get_uuid/<uuid:uuid>/')
# uuid:cfc37378-5420-69f0-bd7c-57933b317afb
def get_uuid(uuid):
    print("参数:%s 类型:%s"%(uuid,type(uuid)))
    return "get_uuid success!"
—传递可选参数
# views.py
@blue.route('/get_any/<any(a,b):any_one>/')
def get_any(any_one):
    print("参数:%s 类型:%s"%(any_one,type(any_one)))
    return "get_any success!"
多路由映射
# blue.py
@blue.route('/get_string/<string:token>/')
@blue.route('/get_token/<int:token>/')
def get_string(token):
    return "传入的参数:%s 类型:%s"%(token,what_type(token))
路由请求类型
—默认请求类型
默认支持 GET,HEAD,OPTIONS 其余请求不支持
支持其他请求(POST,PUT,DELETE,CONNECT,TRACE,PATCH)需手动注册
—注册其他请求类型
# blue.py
@blue.route('/get_token/<int:token>/',methods=['POST','DELETE','PATCH'])
def get_string(token):
    return "请求成功!"
视图层
Flask内置四大对象
—内置四大对象
内置四大对象:
	request
	g
	session
	config
—引入实例对象
from flask import request,g,session,config
● request(请求相关)
类型      request对象属性    说明
---------------------------------------------
str	     url               # url地址
str	     url_charset       # url编码规则
str	     url_root          # url根路径
str	     url_rule          # url规则

str      headers           # 请求头
dict     args              # get请求的参数
dict     form              # 提交的表单数据
dict     cookies           # 客户端cookies的值
dict     files             # 文件数据
str      remote_addr       # 远程地址
str      remote_user       # 远程用户
str      referrer          # 参考链接
str      method            # 请求方法
str      host              # 主机
str      host_url          # 主机url地址
str      base_url          # 基本url地址

str      charset           # 请求报文编码
dict     environ           # 环境和报文信息
bytes    query_string      # 请求参数字节形式
str      path              # 视图路径
str      full_path         # 视图带参路径
str      blueprint         # 蓝图名
list     trusted_hosts     # 可信任的主机列表

str      accept_mimetypes  # 资源媒体类型
dict     access_route      # 通过的路由
str      accept_languages  # 可接受的语言
str      accept_encodings  # 可接受的编码
str      accept_charsets   # 可接受的字符编码

bool	 is_multiprocess   # 是否是多进程
bool	 is_multithread    # 是否是多线程
bool	 is_json           # 是否是json数据
bool	 is_run_once       # 是否立即运行
bool	 is_secure         # 是否安全

content_type
content_md5
max_forwards
date
script_root
want_form_data_parsed
shallow
stream
scheme
routing_exception
pragma
parameter_storage_class
mimetype_params
max_form_memory_size
is_xhr
input_stream
if_unmodified_since
if_range
if_none_match
cache_control
authorization
if_match
values
range
url_charset
url
if_modified_since
content_length
dict_storage_class
max_content_length
endpoint
view_args
disable_data_descriptor
data
encoding_errors
json_module
● g(数据相关)
● session(会话相关)
● config(配置相关)
Request
args
	请求参数
	query_string
	query_params
	get请求参数
	所有请求都能获取该参数
form
	表单数据
	post请求参数(直接支持put,patch)
	ImmutableMultiDict args和form都是该类型数据是dict的子类
Response
● 参数设置
@blue.route('路径地址')
def response():
	return 文本内容,状态码
● 返回方式
1.直接返回字符串
# views.py
@blue.route('/test_response1/')
def test_response1():
    return '<h1>This is content</h1>',403
2.使用make_response()
# views.py
from flask import make_response
@blue.route('/test_response2/')
def test_response2():
    response=make_response('<h1>This is content</h1>')
    return response,200
3.构建Response对象
# views.py
from flask import Response
@blue.route('/test_response3/')
def test_response3():
    response=Response('<h1>This is content</h1>')
    return response,200
4.加载html模板返回
# views.py
from flask import render_template
@blue.route('/test_response4/')
def test_response4():
    response=render_template('index.html')
    return response,200
● 重定向
—引入重定向
from flask import redirect
—使用重定向
# views.py
from flask import redirect
@blue.route('/redirect/')
def redirect_to_index():
    return redirect('/')
● 反向解析
—引入重定向和反向解析
from flask import redirect,url_for
—反向解析格式
# blue = Blueprint('blue',__name__) Blueprint里面的'blue'就是蓝图名
from flask import redirect,url_for
@blue.route('/redirect/')
def redirect_to_index():
    return redirect(url_for('蓝图名.函数名',参数名=值))
—不传参反向解析
# blue.py
from flask import redirect,url_for
@blue.route('/redirect/')
def redirect_to_index():
    return redirect(url_for('blue.index'))
—传参数反向解析
# blue.py
from flask import redirect,url_for
@blue.route('/redirect/')
def redirect_to_index():
    return redirect(url_for('blue.get_any',an='a'))
● 终止处理
—引入终止处理
from flask import abort
—构造403终止处理
from flask import abort
@blue.route('/test_abort/')
def test_abort():
    abort(403)
    return '403 is setted ok!'
—修改错误码提示
# exceptions.py
class Forbidden(HTTPException):
    """*403* `Forbidden`

    Raise if the user doesn't have the permission for the requested resource
    but was authenticated.
    """

    code = 403 # 错误码
    description = (
        "You don't have the permission to access the requested"
        " resource. It is either read-protected or not readable by the"
        " server." # 错误码描述内容
    )
● 异常捕获
@blue.errorhandler(403)
def feedback(error): # error为必选自定义参数,缺少则会报错
    return 'this is a 403'
会话技术
● cookie
—设置客户端cookie中的键值
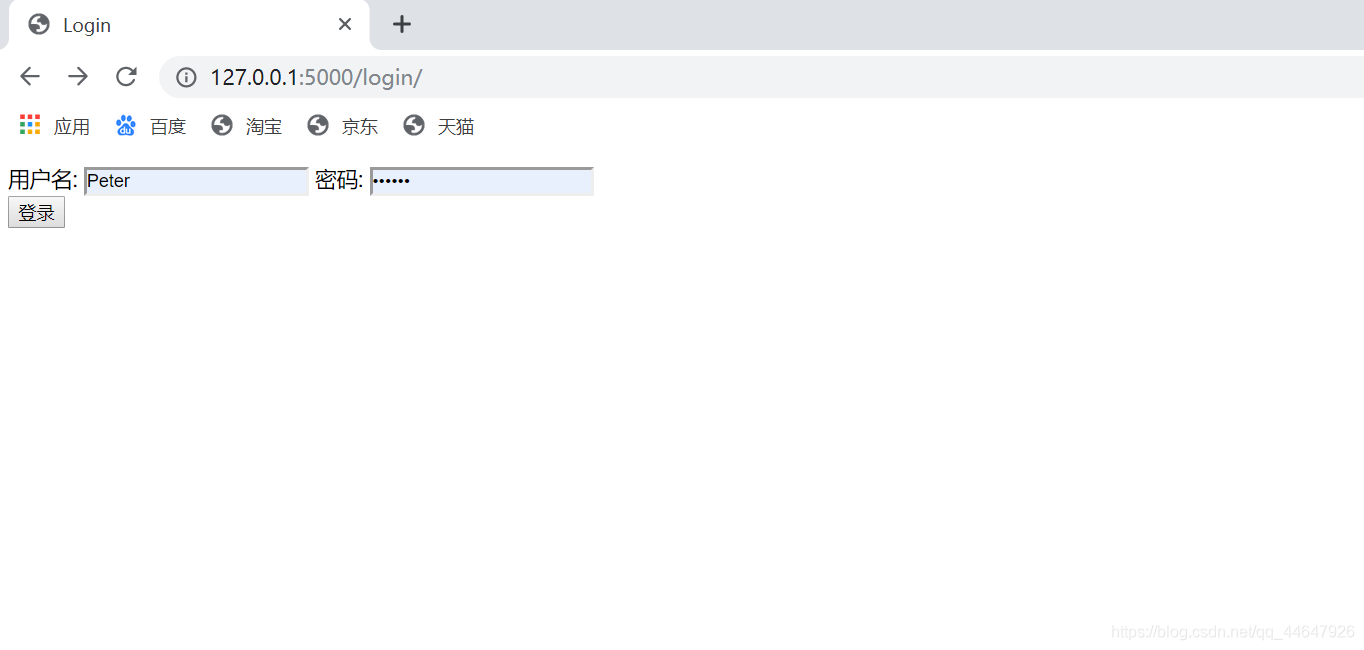
@blue.route('/login/',methods=['GET','POST'])
def login():
    if request.method == 'GET':
        return render_template('login.html')
    elif request.method == 'POST':
        username = request.form.get('username')
        password = request.form.get('password')
        response = Response("登录成功%s"%username)
        response.set_cookie('username',username)
        response.set_cookie('password',password)
        return response
—获取客户端cookie中的键值
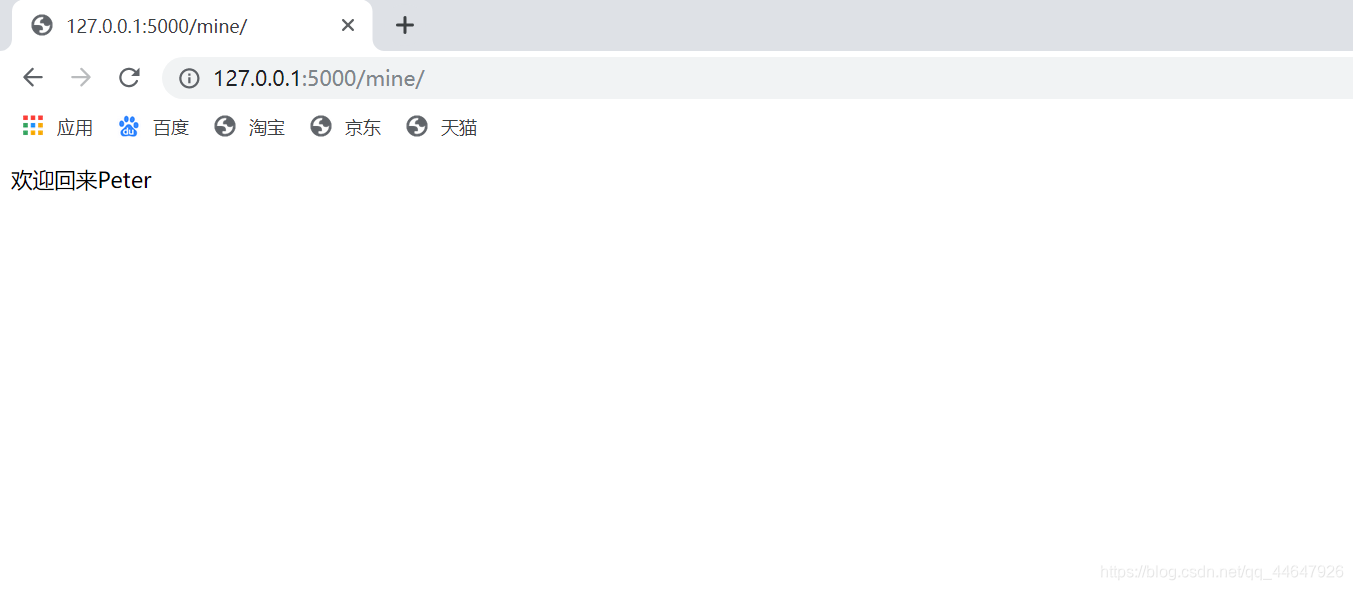
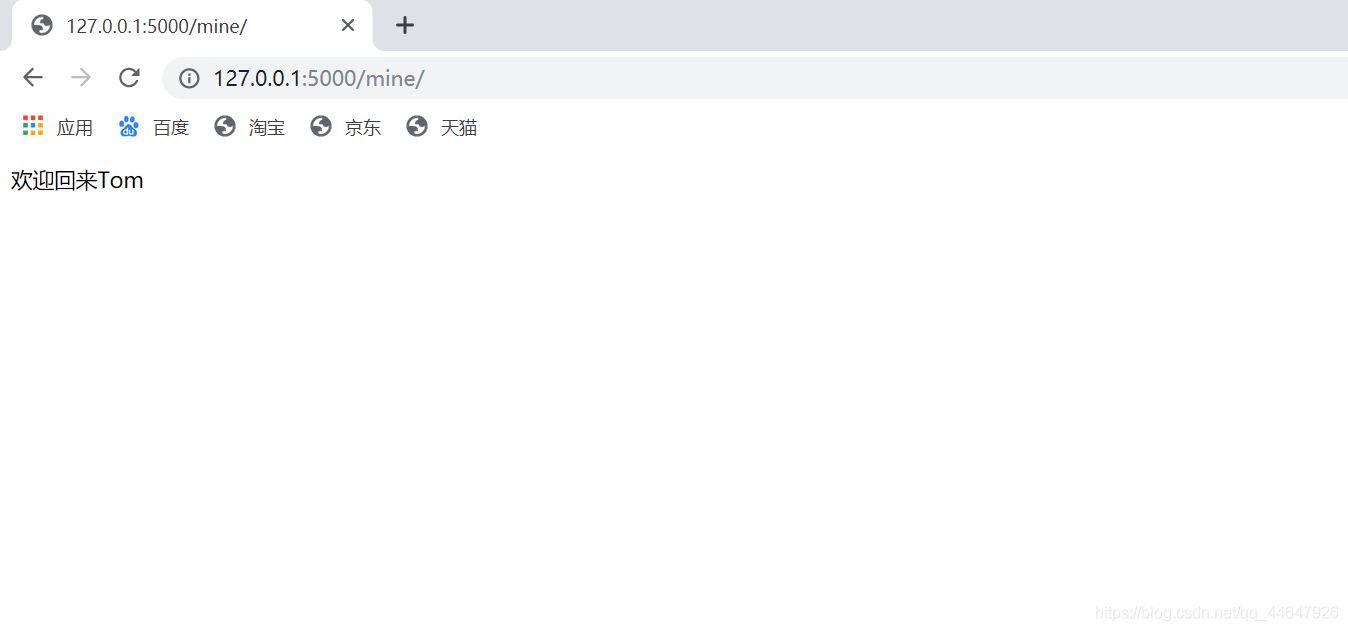
@blue.route('/mine')
def profile():
    username = request.cookies.get('username')
    response = Response("欢迎回来%s"%username)
    return response
● session
—设置session中的键值
@blue.route('/login/',methods=['GET','POST'])
def login():
    if request.method == 'GET':
        return render_template('login.html')
    elif request.method == 'POST':
        username = request.form.get('username')
        password = request.form.get('password')
        session['username'] = username
        session['password'] = password
        response = Response("登录成功%s"%username)
        return response
    else:
        return 'ERROR!'

—获取session中的键值
@blue.route('/mine/')
def profile():
    username = session.get('username')
    response = Response("欢迎回来%s"%username)
    return response
—session持久化
安装模块
官方文档 https://pythonhosted.org/Flask-Session/
pip install flask-session
配置flask-session
# settings.py
class Config:
    DEBUG = False
    TESTING = False
    SQLALCHEMY_TRACK_MODIFICATIONS = False
    SECRET_KEY = 'abc'                     # 设置session的安全秘钥

    SESSION_TYPE = 'redis'                 # 设置session的储存方式
    SESSION_COOKIE_NAME = 'session'        # 设置session名
    SESSION_REDIS = redis.Redis(host="127.0.0.1",port=6379) # 设置redis服务器地址端口
加载插件
from flask_sqlalchemy import SQLAlchemy
from flask_migrate import Migrate
from flask_session import Session
db = SQLAlchemy()
migrate = Migrate()


def init_extension(app):
    db.init_app(app)
    migrate.init_app(app,db)
    # 加载session插件
    Session(app)
flask-session中可选用的配置参数
# settings.py 中 Config类可配置选项
    SESSION_TYPE = 'redis'                 # 设置session的储存方式
    SESSION_PERMANENT = True               # 设置session是否为永久
    SESSION_USE_SIGNER = False             # 设置session签名
    SESSION_KEY_PREFIX = 'session:'        # 设置session的key的前缀
    SESSION_REDIS = redis.Redis(host="127.0.0.1", port=6379)  # 设置redis服务器地址端口
    SESSION_MEMCACHED = memcache.Client()  # 设置memcache服务器地址端口
    SESSION_FILE_DIR = '/'                 # 设置session的文件路径
    SESSION_FILE_THRESHOLD =500            # 设置session最大的会话数
    SESSION_FILE_MODE = 'o6oo'             # 设置文件的模式
    SESSION_MONGODB = pymongo.MongoClient(host='127.0.0.1',host=27017)# 设置Mongo服务器地址端口
    SESSION_MONGODB_DB = 'flask_session'   # 设置存储session的Mongo数据库名
    SESSION_MONGODB_COLLECT = 'sessions'   # 设置存储session的Mongo文档名
    SESSION_SQLALCHEMY = SQLAlchemy()      # 设置SQLAlchemy映射数据库
    SESSION_SQLALCHEMY_TABLE = 'sessions'  # 设置SQLAlchemy的表名


    SESSION_COOKIE_NAME = 'session'        # 设置session名为App1-cookie
    SESSION_COOKIE_DOMAIN = ''             # 设置session的域名
    SESSION_COOKIE_PATH = '/'              # 设置session的路径
    SESSION_COOKIE_HTTPONLY = True         # 设置session是否仅HTTP模式
    SESSION_COOKIE_SECURE = False          # 设置session是否加密
    delta = timedelta(                     # 设置session的过期时间
        days=50,
        seconds=20,
        microseconds=10,
        milliseconds=1000,
        minutes=5,
        hours=2,
        weeks=6,
    )
    PERMANENT_SESSION_LIFETIME = delta     # session的过期时间默认值:30days
模板层
模板是呈现给用户的界面
在MVT中充当T的角色,实现了VT的解耦,开发中VT有这N:M的关系,
一个V可以调用任意T,一个T可以被任意V调用

模板处理分为两个过程
	1. 加载
	2. 渲染

模板代码包含两个部分
	1. 静态HTML
	2. 动态插入的代码段
Jinja2
Flask中使用Jinja2模板引擎
Jinja2由Flask作者开发
	一个现代化设计和友好的Python模板语言
	模仿Django的模板引擎

优点
	速度快,被广泛使用
	HTML设计和后端Python分离
	减少Python复杂度
	非常灵活,快速和安全
	提供了控制,继承等高级功能
模板语法
模板语法主要分为两种
	变量
	标签

模板中的变量	{{   var  }}
	视图传递给模板的数据
	前面定义出来的数据
	变量不存在,默认忽略

模板中的标签	{% tag  %}
	控制逻辑
	使用外部表达式
	创建变量
	宏定义
结构标签
block
	{% block xxx %}
	{% endblock %}
	块操作
		父模板挖坑,子模板填坑

extends
	{% extends ‘xxx’ %}

	继承后保留块中的内容
	{{ super() }}

挖坑继承体现的是化整为零的操作
include
	{% include ’xxx’ %}
	包含,将其他html包含进来,体现的是由零到一的概念

marco
	{% marco hello(name) %}
		{{ name }}
	{% endmarco %}
	宏定义,可以在模板中定义函数,在其它地方调用

宏定义可导入
	{% from ‘xxx’ import xxx %}
逻辑语句
—循环语句
<ul>
    {% for student in student_list %}
    <li>{{ student }}</li>
    {% endfor %}
</ul>
—选择语句
{% if a==b %}
    <h1>a和b相等 a=b={{ a }}</h1>
{% endif %}
—循环中的loop
# loop 属性
loop.first
loop.last
loop.length
loop.cycle
loop.index
loop.index0
loop.reindex
loop.reindex0
<ul>
{% for item in items %}
    {% if loop.first %}
     <li style="color: red">{{ item }}</li>
        {% elif loop.last %}
        <li style="color: blue">{{ item }}</li>
        {% else %}
        <li style="color: gold">{{ item }}</li>
    {% endif %}
{% endfor %}
</ul>
—实例
<!DOCTYPE html>
<html lang="en">
<head>
    <meta charset="UTF-8">
    <title>Student</title>
</head>
<body>
<ul>
    {% for student in student_list %}
    <li>{{ student }}</li>
    {% endfor %}
</ul>
<hr>
{% if a==b %}
    <h1>a和b相等 a=b={{ a }}</h1>
{% endif %}

{% if a!=b %}
    <h1>a和b不相等 a={{ a }} b={{ b }}</h1>
{% endif %}
</body>
</html>
继承与导入
—覆盖型继承
{% extends 'user/register.html' %}
{% block content %}
    <b>继承来自register.html的模板</b>
{% endblock %}
—不覆盖型继承
{% extends 'user/register.html' %}
{% block content %}
    {{ super() }}
    <b>继承register.html后新添加的内容</b>
{% endblock %}
—导入模板
{% include 'part_demo.html' %}
宏定义
不传参的函数定义
	{% macro hi()%}
	<b>嗨</b>
	{% endmacro %}

传参的函数定义
	{% macro hello(name)%}
	<b>你好{{name}}</b>
	{% endmacro %}

导入函数
{{% from 'html_func.html' import hello,hi %}}

调用函数
{{hi()}}
{{ hello('Tom') }}
过滤器
语法
	{{  变量|过滤器|过滤器… }}

capitalize
lower
upper
title
trim
reverse
format
striptags 渲染之前,将值中标签去掉
safe
default
last
first
length
sum
sort
Bootstrap
https://blog.csdn.net/qq_44647926/article/details/103911134
模型层
数据库知识
ORM
Flask默认并没有提供任何数据库操作的API
我们可以选择任何适合自己项目的数据库来使用
Flask中可以自己的选择数据,用原生语句实现功能,也可以选择ORM(SQLAlchemy,MongoEngine)

原生SQL缺点
	代码利用率低,条件复杂代码语句越长,有很多相似语句
	一些SQL是在业务逻辑中拼出来的,修改需要了解业务逻辑
	直接写SQL容易忽视SQL问题

ORM优点
	将对对象的操作转换为原生SQL,易用性,可以有效减少重复SQL
	性能损耗少
	设计灵活,可以轻松实现复杂查询
	移植性好

python的ORM(SQLAlchemy)
针对于Flask的支持
	pip install flask-sqlalchemy
URI通用格式
数据库连接
	dialect+driver://username:password@host:port/database

dialect:数据库实现
driver:数据库的驱动
username:用户名
password:密码
host:主机
port:端口
database:数据库名
连接MySQL数据库
USERNAME=‘root’
PASSWORD=‘rock1204’
HOSTNAME = ’localhost’
PORT=‘3306’
DATABASE=‘HelloFlask’

DB_URI=‘mysql+pymsql://{}:{}@{}:{}/{}’.format(
	USERNAME,
	PASSWORD,
	HOSTNAME,
	PORT,
	DATABASE)
字段类型
Integer
SmallInteger
BigInteger
Float
Numeric
String
Text
Unicode
Unicode Text
Boolean
Date
Time
DateTime
Interval
LargeBinary
约束
primary_key
autoincrement
unique
index
nullable
default

ForeignKey()
模型的操作
1.安装扩展模块
pip install flask-script
pip install flask_migrate
2.添加db命令参数到Manager
# manage.py
from flask_script import Manager
from flask_migrate import MigrateCommand
from App import create_app

# 创建初始化插件和配置后的app对象
app = create_app(env)

# 将app传入Manager中创建manager对象
manager = Manager(app=app)

# 将数据库模型的迁移命令添加至manager对象中
manager.add_command('db',MigrateCommand)
3.创建模型
# models.py
class User(db.Model):
	__tablename__="user_tb" # 自定义表名 默认表名为类名的小写
	id = db.Column(db.Integer,primary_key=True)
	name = db.Column(db.String(16),unique=True)
4.生成模型迁移文件
python manage.py db migrate
- 若是第一次使用db命令,先执行
python manage.py db init进行初始化。
5.将模型同步到服务器
python manage.py db upgrade
6.python manage.py db xx 命令可选参数
positional arguments:
  {init,revision,migrate,edit,merge,upgrade,downgrade,show,history,heads,branches,current,stamp}
    init                Creates a new migration repository
    revision            Create a new revision file.
    migrate             Alias for 'revision --autogenerate'
    edit                Edit current revision.
    merge               Merge two revisions together. Creates a new migration
                        file
    upgrade             Upgrade to a later version
    downgrade           Revert to a previous version
    show                Show the revision denoted by the given symbol.
    history             List changeset scripts in chronological order.
    heads               Show current available heads in the script directory
    branches            Show current branch points
    current             Display the current revision for each database.
    stamp               'stamp' the revision table with the given revision;
                        don't run any migrations

optional arguments:
  -?, --help            show this help message and exit
数据库操作
引入相关对象
from ..ext import db
from ..models import User
from flask import Blueprint
blue = Blueprint('blue',__name__)
添加
# blue.py
# 添加单条数据
@blue.route('/add_user/')
def add_user():
	user = User()
	user.id = 1
	user.name = 'Tom'
	db.session.add(user)
	db.session.commit()
	return 'Add user success!'

# 添加多条数据
@blue.route("/add_users/")
def add_users():
    users = []
    for i in range(1,6):
        user = User()
        user.name = "用户%s" % i
        users.append(user)
    db.session.add_all(users)
    db.session.commit()
    return "Add users success!"
删除
# blue.py
@blue.route('/delete_user/')
def delete_user():
	user = User.query.first()
    db.session.delete(user)
    db.session.commit()
    return "Delete user success!"
更改
# blue.py
@blue.route('/update_user/')
def update_user():
	user = User.query.first()
	user.id = user.id + 1
	user.name = '用户:'+user.name
	db.session.add(user)
	db.session.commit()
	return 'Update user success!'
查询
# blue.py
# 条件查询
@blue.route('/condition_query/')
def condition_query():
	'''运算符'''
	user = User.query.filter(User.id > 1)
	#user = User.query.filter(User.id < 1)
	#user = User.query.filter(User.id == 1)
	#user = User.query.filter(User.id >= 1)
	#user = User.query.filter(User.id <= 1)

	user = User.query.filter(User.id.__gt__(1))
	#user = User.query.filter(User.id.__lt__(1))
	#user = User.query.filter(User.id.__eq__(1))
	#user = User.query.filter(User.id.__ge__(1))
	#user = User.query.filter(User.id.__le__(1)).all()

    # user = User.query.filter(User.name=="Tom")
    # user = User.query.filter(User.name.contains("m"))
    # user = User.query.filter(User.name.startswith("T"))
    # user = User.query.filter(User.name.endswith("m"))
    # user = User.query.filter(User.name.like("To_%"))
    # user = User.query.filter(User.id.in_(User.query.filter()))


	print('学号:',user.id)
	print('姓名:',user.name)
	return 'Query user success!'
创建数据库
db.create_all()
删除数据库
db.drop_all()
数据查询
运算符
运算符
	contains
	startswith
	endswith
	in_
	like
	__gt__
	__ge__
	__lt__
	__le__

筛选
	filter_by()
	offset()
	limit()
	order_by()
	get()
	first()
	paginate()

逻辑运算
	与
		and_
		filter(and_(条件),条件…)
	或
		or_
		filter(or_(条件),条件…)
	非
		not_
		filter(not_(条件),条件…)
钩子函数
before_request,after_request
1.在app中调用before_request,after_request
# App/middleware.py
def load_middleware(app):

    @app.before_request
    def before():
        """
        before_request一般用途:
                        统计
                        优先级
                        反爬虫
                        用户认证
                        用户权限
        """
        print("请求报文处理之前,执行该函数")
        print(request.url)

    @app.after_request
    def after(res):
        """
        after_request一般用途:
                        响应报文的处理
        """
        print("请求报文处理完成之后,返回响应报文之前,执行该函数")
        print(type(res))
        print(res)

        return res # 必须返回一个<class 'flask.wrappers.Response'>类型
# App/__init__.py
......
......
from App.middleware import load_middleware

def create_app(env):
	......
	......

    # 加载中间件
    load_middleware(app)

    return app
2.在blue中调用before_request,after_request
# App/views/blue.py
@blue.before_request
def before():
	print("请求报文处理之前,执行该函数")

@blue.after_request
def ater(res):
	print("请求报文处理完成之后,返回响应报文之前,执行该函数")
    return res # 此处的res响应报文会返回客户端
- after_request必须返回一个
<class 'flask.wrappers.Response'>类型
四大对象中的g,config
1.在视图函数中传入g使用
# App/views/blue.py
@blue.before_request
def before():
    # from flask import g
    g.msg = "此变量用于在不同的函数间传递"

@blue.route("/test_g/")
def test_g():
    return g.msg,200
2.在模板中直接使用g
# App/views/blue.py
@blue.route("/test_g/")
def test_g():
    g.msg = "此变量用于在不同的函数间传递"
    return render_template("test.html")
# App/templates/test.html
<!DOCTYPE html>
<html lang="en">
<head>
    <meta charset="UTF-8">
    <title>Title</title>
</head>
<body>

    <li>{{ g.msg }}</li>

</body>
</html>
3.在视图函数中传入config使用
# App/views/blue.py
@blue.route("/test_config/")
def test_g():
    # from flask import current_app
    # current_app对象需要在app初始化后才可调用
    return render_template("test.html",config=current_app.config)
from flask import current_app- current_app对象需要在app初始化后才可调用
# App/templates/test.html
<!DOCTYPE html>
<html lang="en">
<head>
    <meta charset="UTF-8">
    <title>Title</title>
</head>
<body>
    {% for c in config %}
        <li>{{ c }}={{ config[c] }}</li>
    {% endfor %}

</body>
</html>
4.在模板中直接使用config
# App/views/blue.py
@blue.route("/test_config/")
def test_g():
    return render_template("test.html")
# App/templates/test.html
<!DOCTYPE html>
<html lang="en">
<head>
    <meta charset="UTF-8">
    <title>Title</title>
</head>
<body>
    {% for c in config %}
        <li>{{ c }}={{ config[c] }}</li>
    {% endfor %}

</body>
</html>
其他
文件传输
# 服务器接收文件
@blue.route("/upload_img/", methods=['POST'])
def receive_file():
    upload_file = request.files['file']
    old_file_name = upload_file.filename
    file_path = "./upload/image/"+old_file_name
    if upload_file:
        upload_file.save(file_path)
        return 'Upload success!'
    else:
        return 'Upload failed!'
# 客户端文件上传
def upload_file(upload_url,file_path):
	import requests
	import os
	# 定义文件路径
	split_path = file_path.split('\\')
	filename = split_path[-1]
	# 获取文件大小
	filesize = os.path.getsize(file_path)/1024**2
	# 输出详细信息
	print("文件路径:%s"%file_path)
	print("文件名:%s"%filename)
	print("文件大小:%s M"%str(round(filesize,2)))
	print("文件状态:上传中...")
	# 打开文件进行数据传输
	with open(file_path, 'rb') as f:
		files = {'file':(filename, f, '*/*')}
		r = requests.post(upload_url,files = files)
		if r.status_code == 200:
			print("上传成功!")
		else:
			print("上传失败!")

upload_file("http://127.0.0.1:5000/upload_img/",r"C:\Users\Mr.m\Desktop\Python\Python3网络爬虫开发实战.pdf")
