缘起
就是无事干想体验一下Windows上直接运行Linux的感觉,这样以后下载各种包啥的,就不用连远程的服务器了。
安装
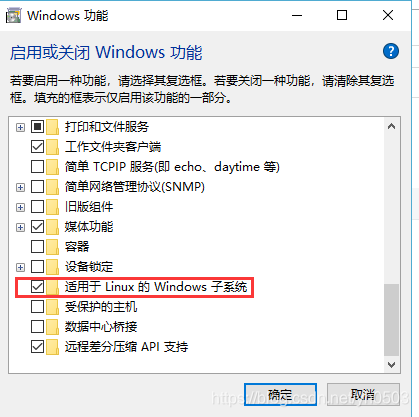
- 先进入控制面板->程序->程序和功能->启用或关闭Windows功能 打开 适用于Linux的Windows子系统 选项,打勾确定。
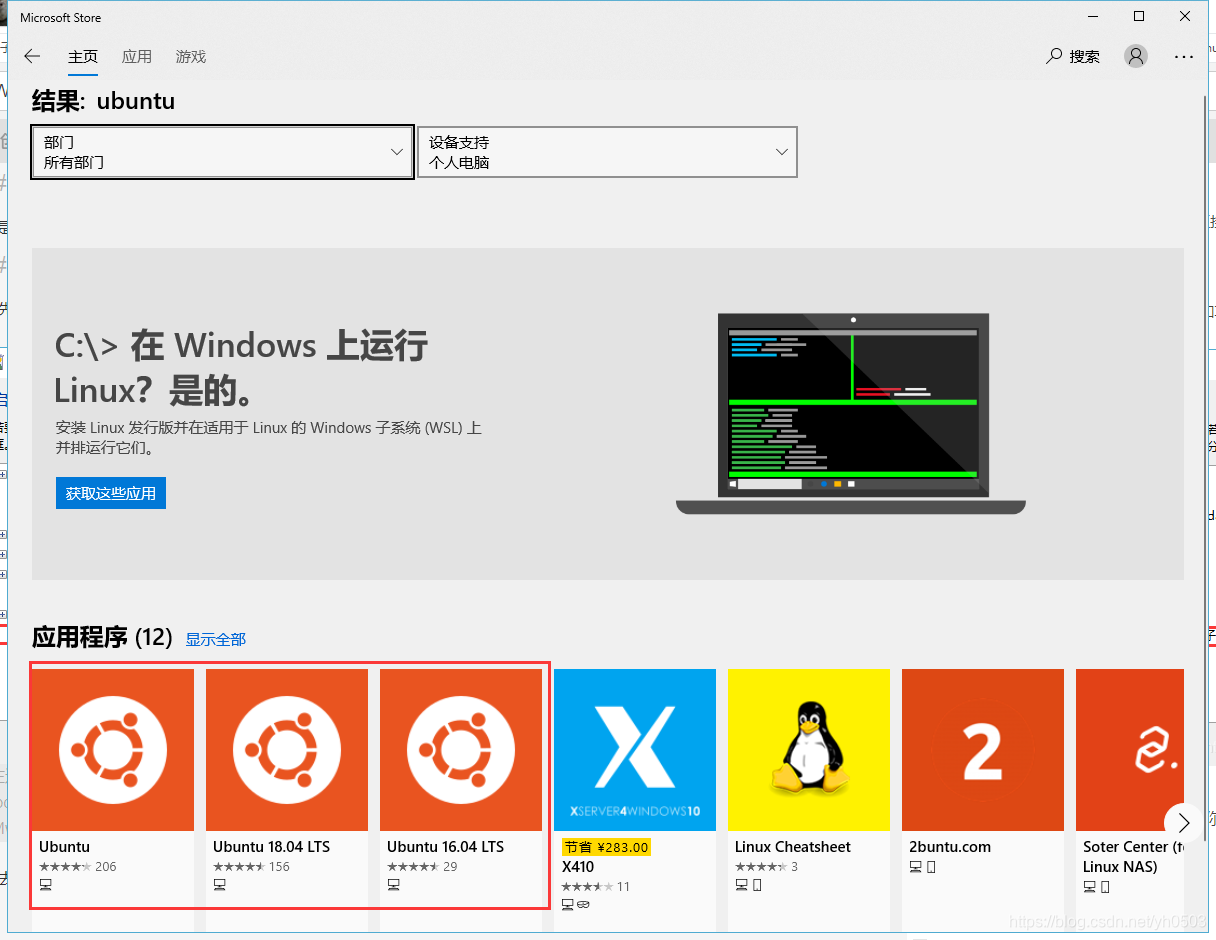
- 去应用商店下载Ubuntu,下载你需要的版本,这块我是安装的Ubuntu16.0.4。
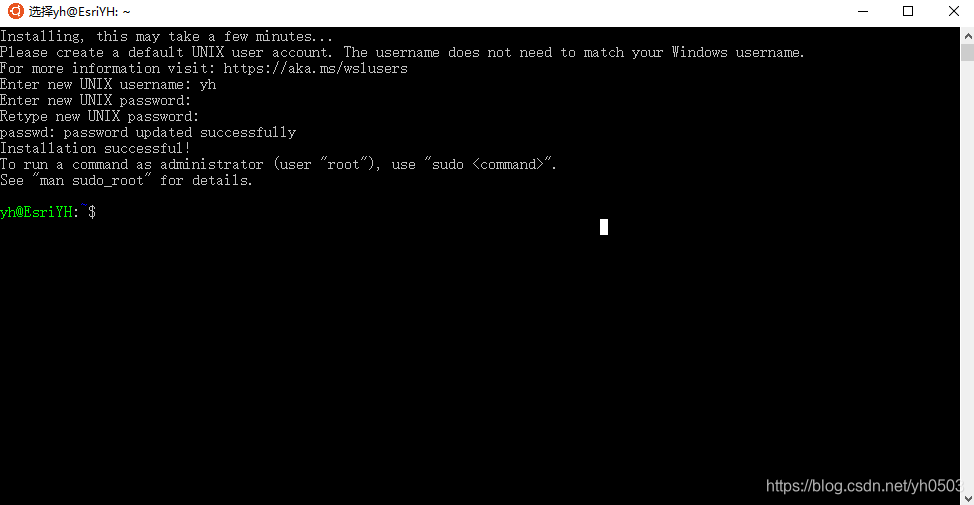
- 下载完毕后启动Ubuntu,第一次登陆需要设置用户名和密码。
配置
- 使用
sudo su切换到root用户 - 更换镜像源为阿里云镜像源,参考我之前的博客:传送门
- 配置ssh
# 卸载自带的ssh
sudo apt-get remove openssh-server
# 安装openssh-server
sudo apt-get install openssh-server
# 修改ssh_config配置文件
vi /etc/ssh/ssh_config
# 修改内容个如下
Port为2222
PasswordAuthentication yes
# 修改sshd_config配置文件
vi /etc/ssh/sshd_config
# 修改内容如下
Port 2222
UsePrivilegeSeparation no
PasswordAuthentication yes
# 重启服务
service ssh --full-restart
使用xftp工具连接测试
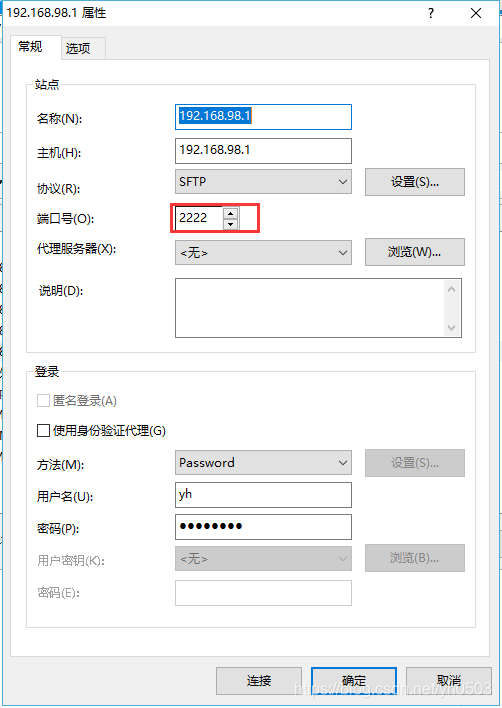
如果连接成功,那么大功告成,可以嗨皮的玩耍了!
配置代理
参考博文:ubuntu wsl 子系统使用win10 系统ss代理步骤
-
安装python pip
apt install python3-pip -
升级pip
pip3 install --upgrade pippip升级后Import Error:cannot import name main解决方案:传送门
-
安装genpac工具
pip3 install genpac -
生成配置
genpac --proxy="SOCKS5 127.0.0.1:1080" -o autoproxy.pac --gfwlist-url="https://raw.githubusercontent.com/gfwlist/gfwlist/master/gfwlist.txt" -
编辑 /etc/profile 在文件最后添加(具体端口配置和ss 客户端保持一致)
export http_proxy=http://127.0.0.1:1080 export https_proxy=http://127.0.0.1:1080 export ftp_proxy=http://127.0.0.1:1080 -
编辑~/.bashrc文件
vi ~/.bashrc插入如下内容:
source /etc/profile使用命令
source ~/.bashrc使上面的配置成功。
访问本机目录
在“/mnt”目录下有“c”、“d”、“e”等文件夹,分别表示本地的C盘、D盘、E盘,直接cd到相应路径下即可。
