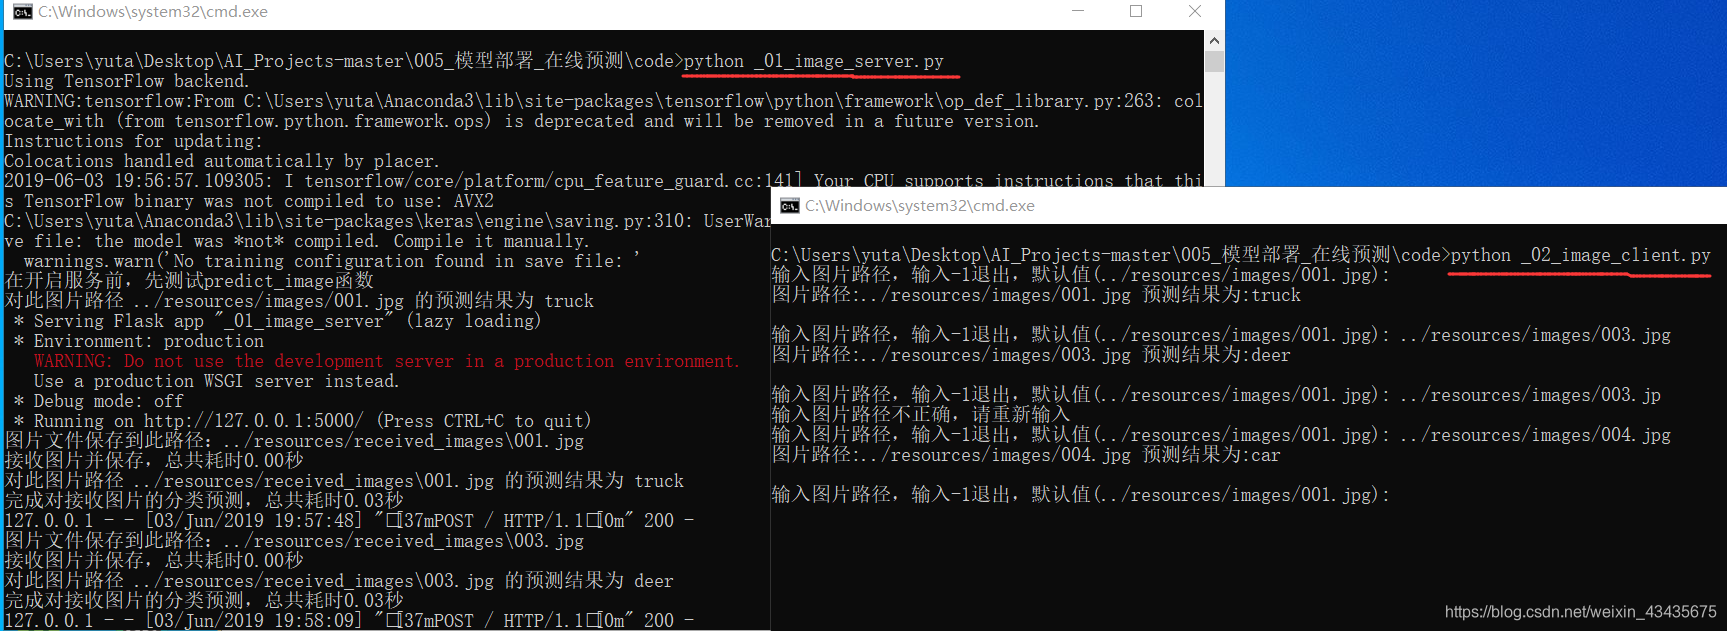
1. 图像分类:纯终端运行
服务端开启服务后,flask库等待接收post请求。
客户端在cmd中传入需要检测图片的路径,requests库发起post请求并打印返回值。
新建:模型部署(在线预测)文件夹,创建以下两个文件夹,将网盘资源放入resources中。链接:https://pan.baidu.com/s/1X0PbGLnjO2vQsQFcwdMgYw 提取码:z8ax
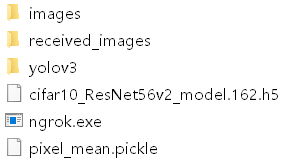
在resources文件夹中:
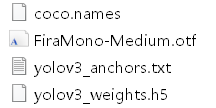
在yolov3文件夹中:
1.1 在code文件夹下新建image_server.py写入下面服务端代码
# -*- coding: utf-8 -*-
# 导入常用的库
import time
import os
import cv2
import numpy as np
from flask import request, Flask # 导入flask库的Flask类和request对象
app = Flask(__name__) #实例化Flask对象,这个对象变量是app

import pickle  # 训练时保存的pixel_mean.pickle ,导入pickle加载图像数据要减去的(像素均值pixel_mean)
with open('../resources/pixel_mean.pickle', 'rb') as file:
    pixel_mean = pickle.load(file) #'rb'是以二进制流读入文件赋给file变量

className_list = ['plane', 'car', 'bird', 'cat', 'deer', 'dog', 'frog', 'horse', 'ship', 'truck']
id2name_dict = {a:b for a, b in enumerate(className_list)} # 定义字典id2name_dict:把种类索引 转换为 种类名称

from keras.models import load_model
from keras.optimizers import Adam
model_filePath = '../resources/cifar10_ResNet56v2_model.162.h5' # 加载图像分类模型ResNet56
model = load_model(model_filePath)
model.compile(loss='categorical_crossentropy',
              optimizer=Adam(lr=0.001),
              metrics=['accuracy'])

def get_imageNdarray(imageFilePath):
    image_ndarray = cv2.imread(imageFilePath) # 根据图片文件路径,cv2.imread获取图像数据矩阵
    resized_image_ndarray = cv2.resize(image_ndarray,
        (32, 32), #大小统一变为32*32
        interpolation=cv2.INTER_AREA)
    return resized_image_ndarray


def process_imageNdarray(image_ndarray, pixel_mean): #模型预测前必要的图像处理,image_ndarray是32*32*3和pixel_mean大小一样
    rgb_image_ndarray = image_ndarray[:, :, ::-1]
    image_ndarray_1 = rgb_image_ndarray / 255
    image_ndarray_2 = image_ndarray_1 - pixel_mean
    return image_ndarray_2

def predict_image(model, imageFilePath, id2name_dict): #使用模型对指定图片文件路径完成图像分类,返回值为预测的种类名称
    image_ndarray = get_imageNdarray(imageFilePath) #get_imageNdarray方法获得图像数据矩阵
    processed_image_ndarray = process_imageNdarray(image_ndarray, pixel_mean)#process_imageNdarray方法获得图像处理后的数据
    inputs = processed_image_ndarray[np.newaxis, ...] #np.newaxis将32*32*3变为1*32*32*3,因为模型只接受4维矩阵
    predict_Y = model.predict(inputs)[0]  # 4维第一维表示batch,所以可输入多张图片
    predict_y = np.argmax(predict_Y)   # Y:对于每个类别的预测概率,y:哪个类别概率最大
    predict_className = id2name_dict[predict_y] # 种类id转成种类名称
    print('对此图片路径 %s 的预测结果为 %s' %(imageFilePath, predict_className))
    return predict_className

@app.route("/", methods=['POST'])# 只有下面函数和服务端相关,其他都是定义一个函数然后返回结果
# 定义回调(callback)函数,接收来自/的post请求,并返回预测结果。回调函数就像是开了一个线程,我先运行主线程,相关的计算问题抛给回调函数,让它先算,我继续运行我的程序,等你算出来了发回给我就行,不影响我当前执行
def anyname_you_like(): # 其他地方不会引用该函数
    startTime = time.time() # 单位是秒
    received_file = request.files['file'] #往下涉及到了前端:因为request(从flask库导入)是个对象所以才有.files属性,里面的'file'对应image_client.py中file_dict(按要求输入)中'file'
    imageFileName = received_file.filename #received_file类似于列表

	if received_file: # 如果不为空
        received_dirPath = '../resources/received_images' #上一级文件夹
        if not os.path.isdir(received_dirPath):
            os.makedirs(received_dirPath) #如果没有的话就创建它

		imageFilePath = os.path.join(received_dirPath, imageFileName)#(图像文件名)放入(图像文件夹)中形成(图像文件路径)
        received_file.save(imageFilePath)#将(接收到的文件)保存到(文件路径)
        print('图片文件保存到此路径:%s' % imageFilePath)
        usedTime = time.time() - startTime
        print('接收图片并保存,总共耗时%.2f秒' % usedTime)

		startTime = time.time()  #调用predict_image方法,上面定义过
        predict_className = predict_image(model, imageFilePath, id2name_dict)
        usedTime = time.time() - startTime
        print('完成对接收图片的分类预测,总共耗时%.2f秒' % usedTime)
        return predict_className
    else:
        return 'failed'

# 主函数
if __name__ == "__main__":
    print('在开启服务前,先测试predict_image函数')
    imageFilePath = '../resources/images/001.jpg'
    predict_className = predict_image(model, imageFilePath, id2name_dict) #测试函数有没有写对,写错的话下一步就不进行,model是在外面定义的,在main方法里可以用。
    app.run("127.0.0.1", port=5000) #第一个参数ip地址,第二个参数是开在哪个端口
    #如果接收到 127.0.0.1:5000/ 的话调用上面回调函数anyname_you_like()方法,如果/后加其他东西就要写其他回调函数
1.2 在code文件夹下新建image_client.py写入下面客户端代码
import requests
import os

if __name__ == "__main__": # 主函数
    url = "http://127.0.0.1:5000"
    while True: #可循环输入图片
        input_content = input('输入图片路径,输入-1退出,默认值(../resources/images/001.jpg): ') #input()以字符串的方式获取用户输入
		if input_content.strip() == "":
            input_content = '../resources/images/001.jpg'
        if input_content.strip() == "-1":
            break

        elif not os.path.exists(input_content.strip()):
            print('输入图片路径不正确,请重新输入')
        else:
            imageFilePath = input_content.strip()  # 下面是正文:怎么把数据发过去
			# 下面一行用os.path.split将文件路径中文件名提取出来,第一段文件夹名,第二段文件名
            imageFileName = os.path.split(imageFilePath)[1] # 取第二段文件名
            file_dict = { # file_dict为一字典,键是'file',值是一元组包含三元素  #必须按file_dict方法传入
                'file':(imageFileName, # 做post请求时有这三行规范,第一段文件名
                    open(imageFilePath,'rb'), # 第二段二进制流
                    'image/jpg')}  # 第三段后缀名类型
            result = requests.post(url, files=file_dict) # 这里files参数(默认)对应服务端的files
            predict_className = result.text # result是响应response为一对象有.text属性,result.text为一字符串
            print('图片路径:%s 预测结果为:%s\n' %(imageFilePath, predict_className))
1.3 cmd文件双击启动
在code文件夹下新建名为开启服务_ResNet56v2图片分类模型.cmd文件,写入:
python image_server.py
pause
在code文件夹下新建名为客户端发送图片数据做分类检测.cmd文件,写入:
python image_client.py
pause
运行结果:传入如下图图片路径如:../resources/images/004jpg
2.图像分类:有web页面
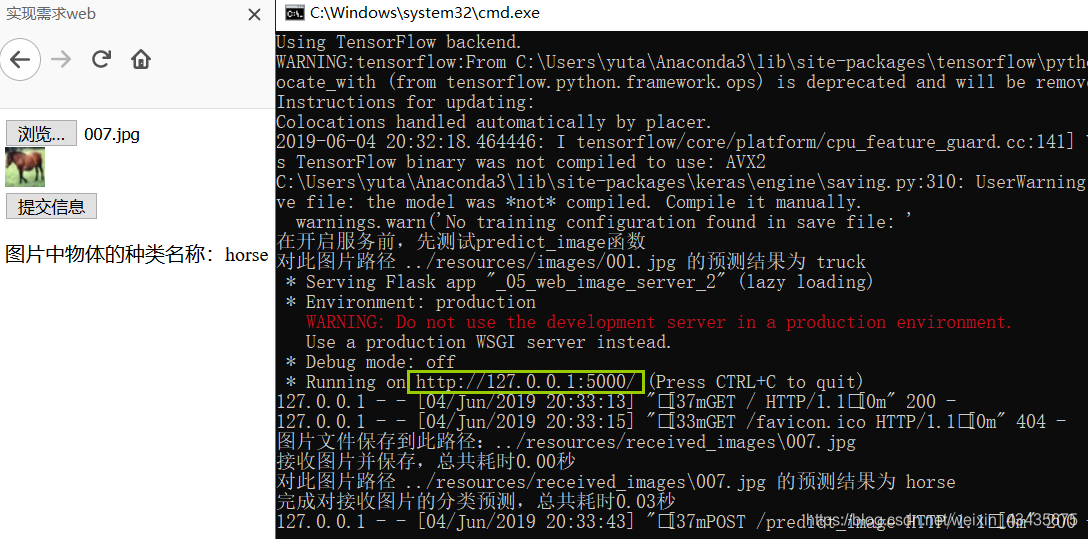
提交post请求后,不做网页跳转,停留在原始网页。从而使图像、预测种类名同时显示在同一网页,在网页中可以改变图片的显示大小。
2.1 新建_11_web_image_server_2.py文件写入下面服务端代码:
# -*- coding: utf-8 -*-
# 导入常用的库
import time
import os
import cv2
import numpy as np
# 导入flask库
from flask import Flask, render_template, request, jsonify
# render_template为返回一个网页,返回jsonify数据
# Flask, render_template, request, jsonify是四个方法

from keras.models import load_model
from keras.optimizers import Adam
# 导入pickle库
import pickle

# 实例化Flask对象
app = Flask(__name__)
# 设置开启web服务后,如果更新html文件,可以使更新立即生效
app.jinja_env.auto_reload = True
app.config['TEMPLATES_AUTO_RELOAD'] = True

# 调用pickle库的load方法,加载图像数据处理时需要减去的像素均值pixel_mean
with open('../resources/pixel_mean.pickle', 'rb') as file:
    pixel_mean = pickle.load(file)
# 加载已经训练好的cifar10数据集的ResNet56图片分类模型的模型文件
model_filePath = '../resources/cifar10_ResNet56v2_model.162.h5'
model = load_model(model_filePath)
model.compile(loss='categorical_crossentropy',
              optimizer=Adam(lr=0.001),
              metrics=['accuracy'])

# 定义函数classId_to_className,把种类索引转换为种类名称
def classId_to_className(classId):
    category_list = ['plane', 'car', 'bird', 'cat', 'deer', 'dog', 'frog', 'horse', 'ship', 'truck']
    className = category_list[classId]
    return className

# 根据图片文件的路径获取图像矩阵
def get_imageNdarray(imageFilePath):
    image_ndarray = cv2.imread(imageFilePath)
    resized_image_ndarray = cv2.resize(image_ndarray,
        (32, 32),
        interpolation=cv2.INTER_AREA)
    return resized_image_ndarray

# 模型预测前必要的图像处理
def process_imageNdarray(image_ndarray, pixel_mean):
    rgb_image_ndarray = image_ndarray[:, :, ::-1]
    image_ndarray_1 = rgb_image_ndarray / 255
    image_ndarray_2 = image_ndarray_1 - pixel_mean
    return image_ndarray_2

# 使用模型对指定图片文件路径完成图像分类,返回值为预测的种类名称
def predict_image(model, imageFilePath):
    image_ndarray = get_imageNdarray(imageFilePath)
    processed_image_ndarray = process_imageNdarray(image_ndarray, pixel_mean)
    inputs = processed_image_ndarray[np.newaxis, ...]
    predict_Y = model.predict(inputs)[0]
    predict_y = np.argmax(predict_Y)
    predict_classId = predict_y
    predict_className = classId_to_className(predict_classId)
    print('对此图片路径 %s 的预测结果为 %s' %(imageFilePath, predict_className))
    return predict_className

# 访问首页时的调用函数
@app.route('/')
def index_page(): # flask库要求'_05_web_page.html'必须在templates文件夹下
    return render_template('_05_web_page.html')

# anyname_you_like()是使用predict_image这个API服务时的调用函数 ,POST指向一个url链接
# 下行/前:.route是IP地址和端口。/后:predict_image:调用下行anyname_you_like()方法
@app.route("/predict_image", methods=['POST'])
def anyname_you_like():
    startTime = time.time()

    # 解析接收到的图片  # post传送 request请求 ,post过来是个字典file相当于一个键
    received_file = request.files['input_image']
	#input_image对应_05_web_page.html中input_image
    imageFileName = received_file.filename
    if received_file:
        # 保存接收的图片到指定文件夹
        received_dirPath = '../resources/received_images'
        if not os.path.isdir(received_dirPath):
            os.makedirs(received_dirPath)
        imageFilePath = os.path.join(received_dirPath, imageFileName)
        received_file.save(imageFilePath)
        print('图片文件保存到此路径:%s' % imageFilePath)
        usedTime = time.time() - startTime
        print('接收图片并保存,总共耗时%.2f秒' % usedTime)
        # 对指定图片路径的图片做分类预测,并打印耗时,返回预测种类名称
        startTime = time.time()
        predict_className = predict_image(model, imageFilePath)
        usedTime = time.time() - startTime
        print('完成对接收图片的分类预测,总共耗时%.2f秒' % usedTime)
        return jsonify(predict_className=predict_className) # jsonify是个字典
# 所有post请求返回要么jsonify,要么新的网页链接

# 主函数(和之前一样)
if __name__ == "__main__":
    print('在开启服务前,先测试predict_image函数')
    imageFilePath = '../resources/images/001.jpg'
    predict_className = predict_image(model, imageFilePath)
    app.run("127.0.0.1", port=5000)
2.2 新建templates文件夹里_12_web_page.html文件
<!DOCTYPE html>
<html lang="en">
    <head>
        <meta charset="UTF-8"> #meta参数意思,字符编码设为UTF-8
        <title>实现需求web</title> #对应页面标题
        <script src="https://code.jquery.com/jquery-3.3.1.min.js"></script> #从网络下载并运用jQuery库
        <script>
            $(document).ready(function(){   #$符就是find element
                $("#image_file").change(function(){ #不管什么标签,只要id="image_file",就找到下面input这个元素,只要发生改变change,函数function()作为参数传入change这个方法里
                    var file = $(this)[0].files[0]; #取到文件
                    $(".img").attr("src", URL.createObjectURL(file));
                    });   # #号表示id=,.号表示class=
                $("button#button_1").click(function(){ #当被点击促发function()函数
                    var formData = new FormData($("#upload_form")[0]);
#找("#upload_form")这个元素,结果是一个list,找到第一个。$("#upload_form")[0]这个作为参数传给FormData,FormData变为对象再赋值给formData变量,formData变量在下面被调用,不能写在函数外,唯独python可以
                    $.ajax({ #字典类型
                        url: "/predict_image", #对应.py文件中"/predict_image"发起POST请求
                        type: 'POST',
                        data: formData, #发送表格数据
                        processData: false,
                        contentType: false,
                        success: function(return_data){ #如果发出请求成功传回结果
                            $("#image_className").text("图片中物体的种类名称:" + return_data["predict_className"]) #找到"#image_className"标签,改文本内容为后面
                            },  #"predict_className"是个键,找到对应值
                        error: function(return_data){  #返回的状态码是404
                            alert("上传失败!")
                            }
                        })
                    });
                });
        </script>
    </head>

    <body>  #<body>里是网页显示的内容
        <form id="upload_form" enctype="multipart/form-data"> #</form>做表格,方便做post请求
            <input type="file" name="input_image" id="image_file"/>
        </form>
        <div> #<div>就是分开一行
            <img src="" class="img" />
        </div>
        <button id="button_1">提交信息</button> #设置一个按钮显示提交信息
        <p id="image_className"></p> #p代表文本
    </body>
</html>
jQuery是javaScript的一个库,javaScript就是js
ajax是一种异步请求方式,ajax的全称是 asynchronous javascript and xml
2.3 cmd文件双击启动
在code文件夹下新建名为_11_开启web服务.cmd文件,写入
python _11_web_image_server_2.py
pause
复制下图绿框到浏览器,每上传一张图,resources文件夹里多出received_images文件夹,里面存着上传的图片
3.目标检测:纯终端运行
3.1 新建_21_yolov3.py文件,写入:
# -*- coding: utf-8 -*-
# 导入常用的库
import os
import time
import numpy as np
import cv2
# 导入keras库
from keras import backend as K
from keras.layers import Input
# 导入yolo3文件夹中mode.py、utils.py这2个代码文件中的方法
from yolo3.model import yolo_eval, yolo_body
from yolo3.utils import letterbox_image
# 导入PIL画图库
from PIL import Image, ImageFont, ImageDraw


# 通过种类的数量,每个种类对应的颜色,颜色变量color为rgb这3个数值组成的元组
import colorsys
def get_colorList(category_quantity):
    hsv_list = []
    for i in range(category_quantity):
        hue = i / category_quantity
        saturation = 1
        value = 1
        hsv = (hue, saturation, value)
        hsv_list.append(hsv)
    colorFloat_list = [colorsys.hsv_to_rgb(*k) for k in hsv_list]
    color_list = [tuple([int(x * 255) for x in k]) for k in colorFloat_list]
    return color_list


# 定义类Detector
class Detector(object):
    defaults = {
        "weights_h5FilePath": '../resources/yolov3/yolov3_weights.h5',
        "anchor_txtFilePath": '../resources/yolov3/yolov3_anchors.txt',
        "category_txtFilePath": '../resources/yolov3/coco.names',
        "score" : 0.3,
        "iou" : 0.35,
        "model_image_size" : (416, 416) #must be a multiple of 32
    }

    @classmethod
    def get_defaults(cls, n):
        if n in cls.defaults:
            return cls.defaults[n]
        else:
            return 'Unrecognized attribute name "%s"' %n

    # 实例化对象后的初始化方法
    def __init__(self, **kwargs):
        self.__dict__.update(self.defaults) # 设置默认值
        self.__dict__.update(kwargs) # 根据传入的参数更新
        self.category_list = self.get_categoryList()
        self.anchor_ndarray = self.get_anchorNdarray()
        self.session = K.get_session()
        self.boxes, self.scores, self.classes = self.generate()

    # 从文本文件中解析出物体种类列表category_list,要求每个种类占一行
    def get_categoryList(self):
        with open(self.category_txtFilePath, 'r', encoding='utf8') as file:
            fileContent = file.read()
        line_list = [k.strip() for k in fileContent.split('\n') if k.strip()!='']
        category_list = line_list
        return category_list

    # 从表示anchor的文本文件中解析出anchor_ndarray
    def get_anchorNdarray(self):
        with open(self.anchor_txtFilePath, 'r', encoding='utf8') as file:
            number_list = [float(k) for k in file.read().split(',')]
        anchor_ndarray = np.array(number_list).reshape(-1, 2)
        return anchor_ndarray

    # 加载模型,准备好绘图的颜色,准备模型运算的输出
    def generate(self):
        # 在Keras中,如果模型训练完成后只保存了权重,那么需要先构建网络,再加载权重文件
        num_anchors = len(self.anchor_ndarray)
        num_classes = len(self.category_list)
        self.yolo_model = yolo_body(Input(shape=(None, None, 3)),
                                    num_anchors//3,
                                    num_classes)
        self.yolo_model.load_weights(self.weights_h5FilePath)
        # 给不同类别的物体准备不同颜色的方框
        category_quantity = len(self.category_list)
        self.color_list = get_colorList(category_quantity)
        # 目标检测的输出:方框box,得分score,类别class
        self.input_image_size = K.placeholder(shape=(2, ))
        boxes, scores, classes = yolo_eval(self.yolo_model.output,
            self.anchor_ndarray,
            category_quantity,
            self.input_image_size,
            score_threshold=self.score,
            iou_threshold=self.iou)
        return boxes, scores, classes

    # 检测图片
    def detect_image(self, image):
        startTime = time.time()
        # 模型网络结构运算所需的数据准备
        boxed_image = letterbox_image(image, tuple(reversed(self.model_image_size)))
        image_data = np.array(boxed_image).astype('float') / 255
        image_data = np.expand_dims(image_data, 0)  # Add batch dimension.
        # 模型网络结构运算
        out_boxes, out_scores, out_classes = self.session.run(
            [self.boxes, self.scores, self.classes],
            feed_dict={
                self.yolo_model.input: image_data,
                self.input_image_size: [image.size[1], image.size[0]],
            })
        # 调用ImageFont.truetype方法实例化画图字体对象
        font = ImageFont.truetype(font='../resources/yolov3/FiraMono-Medium.otf',
             size=np.floor(2e-2 * image.size[1] + 0.5).astype('int32'))
        thickness = (image.size[0] + image.size[1]) // 300
        # 循环绘制若干个方框
        for i, c in enumerate(out_classes):
            # 调用ImageDraw.Draw方法实例化画图对象
            draw = ImageDraw.Draw(image)
            # 定义方框上方文字内容
            predicted_class = self.category_list[c]
            score = out_scores[i]
            label = '{} {:.2f}'.format(predicted_class, score)
            label_size = draw.textsize(label, font)
            box = out_boxes[i]
            top, left, bottom, right = box
            top = max(0, np.floor(top + 0.5).astype('int32'))
            left = max(0, np.floor(left + 0.5).astype('int32'))
            bottom = min(image.size[1], np.floor(bottom + 0.5).astype('int32'))
            right = min(image.size[0], np.floor(right + 0.5).astype('int32'))
            # 如果方框在图片中的位置过于靠上,调整文字区域
            if top - label_size[1] >= 0:
                text_origin = np.array([left, top - label_size[1]])
            else:
                text_origin = np.array([left, top + 1])
            # 方框厚度为多少,则画多少个矩形
            for j in range(thickness):
                draw.rectangle([left + j, top + j, right - j, bottom - j],
                    outline=self.color_list[c])
            # 绘制方框中的文字
            draw.rectangle([tuple(text_origin), tuple(text_origin + label_size)],
                fill=self.color_list[c])
            draw.text(text_origin, label, fill=(0, 0, 0), font=font)
            del draw
        # 打印检测图片使用的时间
        usedTime = time.time() - startTime
        print('检测这张图片用时%.2f秒' %(usedTime))
        return image


# 使用cv2库显示图片
def cv2_display(image_ndarray):
    windowName = "object_detection_result"
    cv2.imshow(windowName, image_ndarray)
    while True:
        pressKey = cv2.waitKey(0)
        # 按Esc键或者q键可以关闭显示窗口
        if 27 == pressKey or ord('q') == pressKey:
            cv2.destroyAllWindows()
            break


# 主函数
if __name__ == "__main__":
    detector = Detector(
        weights_h5FilePath='../resources/yolov3/yolov3_weights.h5',
        anchor_txtFilePath='../resources/yolov3/yolov3_anchors.txt',
        category_txtFilePath='../resources/yolov3/coco.names'
        )
    while True:
        input_content = input('输入图片路径,输入-1退出,默认值(../resources/images/person.jpg): ')
        if input_content.strip() == "":
            input_content = '../resources/images/person.jpg'
        if input_content.strip() == "-1":
            break
        elif not os.path.exists(input_content.strip()):
            print('输入图片路径不正确,请重新输入')
        else:
            imageFilePath = input_content.strip()
            image = Image.open(imageFilePath)
            drawed_image = detector.detect_image(image)
            # 使用cv2库显示已经画框的图片,cv2库图像数据矩阵第3维度的通道顺序是bgr
            drawed_image_ndarray = np.array(drawed_image)
            bgr_image_ndarray = drawed_image_ndarray[..., ::-1]
            cv2_display(bgr_image_ndarray)
3.2 cmd文件双击启动
在code文件夹下新建名为_22_使用YOLOv3检测单张图片.cmd文件,写入
python _21_yolov3.py
pause
在cmd中输入图片路径,或者按Enter键使用默认值,运行结果如下图所示
在cv窗口界面可以按Esc键或者q键退出,在cmd中可以多次输入路径检测多张图片。

