Let's go!
First, the installation package
Professional-2018.3.4-PyCharm
Anaconda3-4.2.0-Windows-x86_64
JetBrains-Agent-Latest (PyCharm crack file)
Two, PyCharm installation
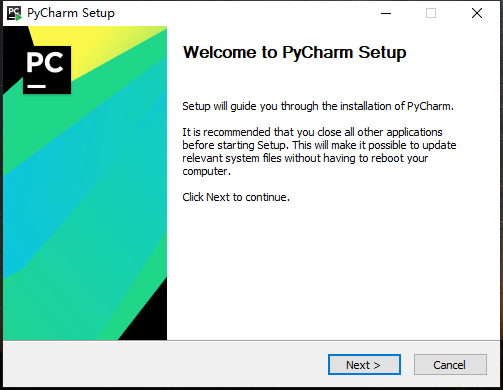
1. Double-click the installation, click Next
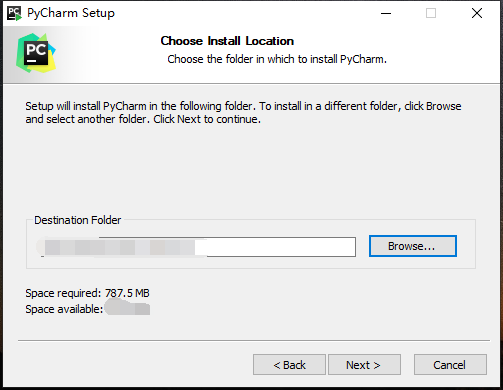
2. Select the installation directory, you need to install space of approximately 800M
3. Install option is selected, you can choose according to the figure

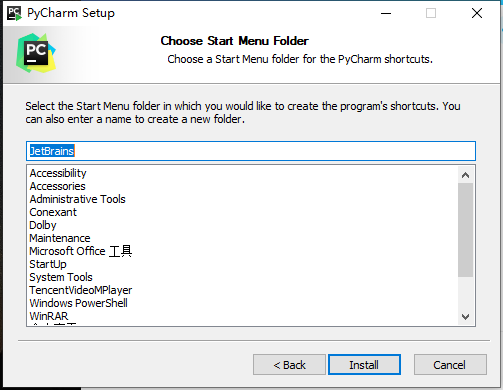
4. Click Install to install directly to
5. Wait silently installed :), and timely restart.


Three, PyCharm break
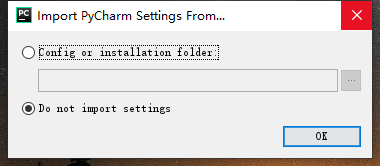
1. Run the already installed PyCharm, without introducing select settings
2. Accept Terms

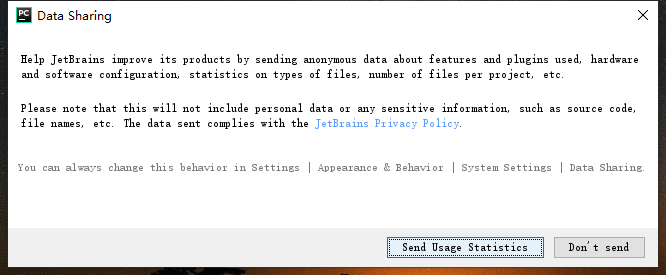
3. The freedom to choose whether to send user data
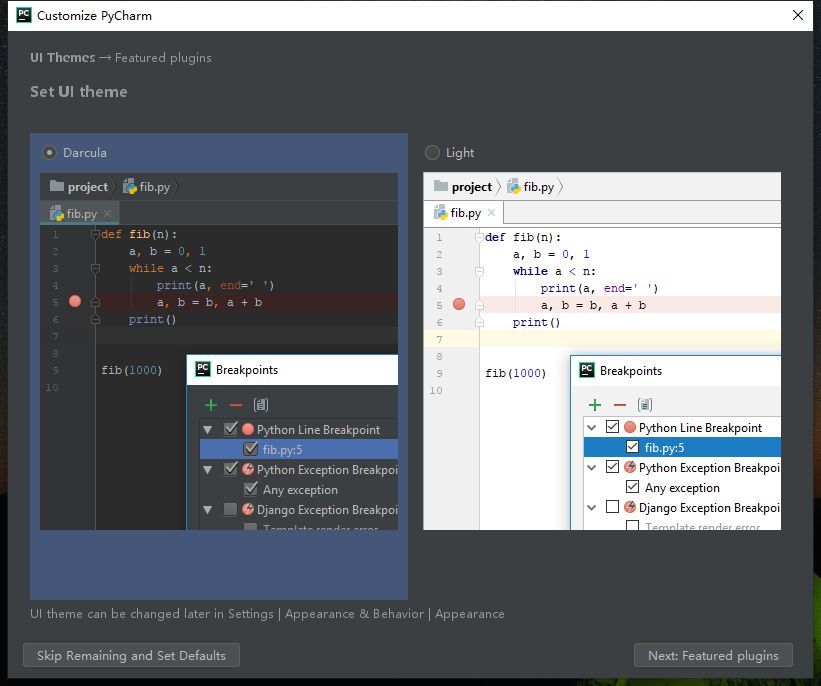
4. Select the favorite UI theme (optional black and white, the latter can be changed, you can click on the bottom left button to skip)
The first run To select Evaluate for free! After clicking Evaluate!

Then will appear the following interface, a progress bar shows the following period, we can see valid for one month.

6. The following step is critical! It is critical! It is critical!
First, the jetbrains-agent-latest unpack the archive and extract the jetbrains-agent.jar file, copy it to your location is not due to operational errors and to remove it . Here is recommended to copy it to PyCharm installation directory! After clicking the lower right corner of the interface Configure.

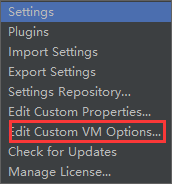
7. Select the Edit Custom VM Options
8. The last line in the input box opened added : -javaagent: (jetbrains-agent installation directory) \ jetbrains-agent.jar
例如-javaagent:E:\pycharm\PyCharm 2018.3.4\jetbrains-agent.jar,之后点击save,并关闭所有PyCharm相关界面。(一定不要有错)
如不小心输错,则参考破解文件压缩包中的说明文档。

9.重新运行PyCharm,选择Configure中的Manage License。

之后选择License Server,并点击按钮Discover Server。之后点击Activate就激活成功啦!:)


注:此处输入框中自动生成网址,如未生成,可以按照图片手动输入,也可检查网络,可尝试更换手机热点再次尝试!
10.检查。此时再次重启PyCharm。可以看到不再显示有效期,因为网址激活为永久激活!

四、Anaconda安装
相比于PyCharm,Anaconda则简单了许多!Anaconda完全免费,无需破解!
1.双击开始安装,点击Next。

2.一些相关的许可,点击I Agree即可。

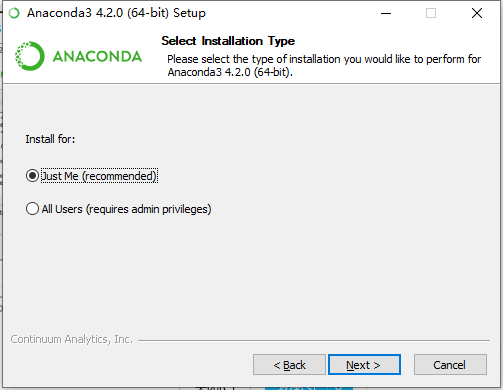
3.按照推荐选择Just me。
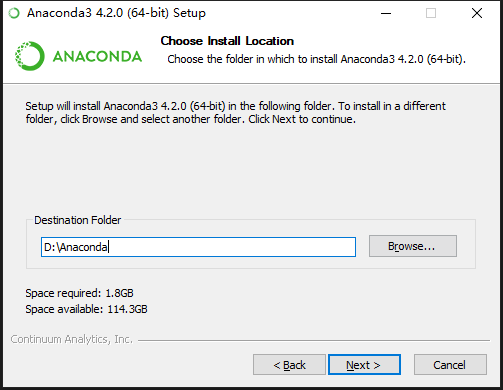
4.这里有一点要注意。安装目录要注意。这里的安装目录的最后一个文件夹手动输入(这里也就是Anaconda一定要是所选目录中不存在的文件夹),也就是说,不要到目录中先新建再选择!否则会出现错误,出现错误就把对应的文件夹删除即可正常安装。
例如:我这里就先利用Browser选择D盘,之后手动输入Anaconda,再点Next。
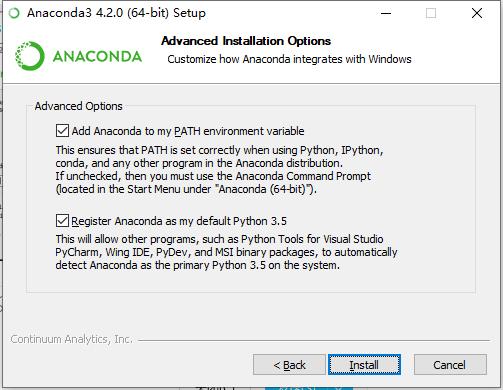
5.按图中选择后,点击Install。
6.静静等待。:)

7.这里同样自由选择。安装完毕!:)

五、PyCharm中配置Anaconda解释器
1.在PyCharm中创建新项目 Create New Project。
2.点击红圈中的按钮。

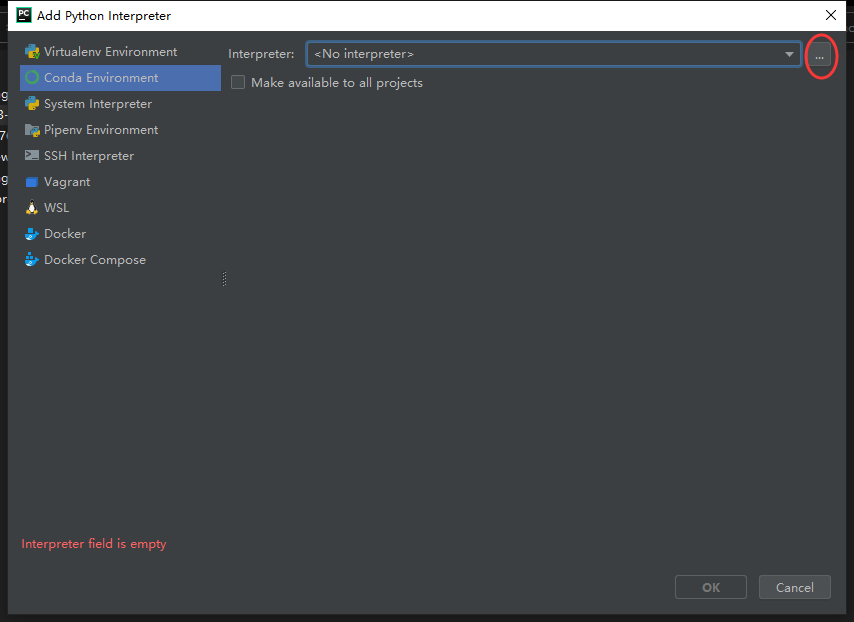
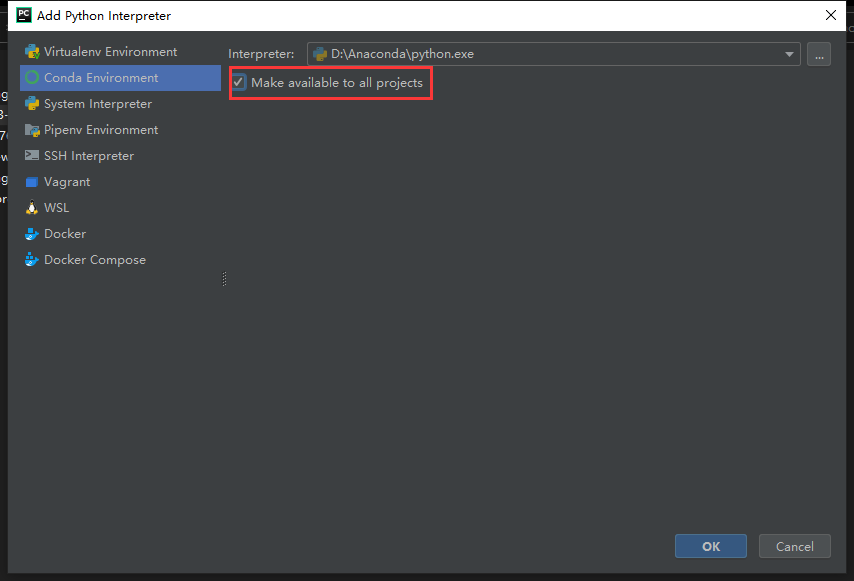
3.在弹出的界面中,左侧选择Conda Environment,再点击红圈中按钮。
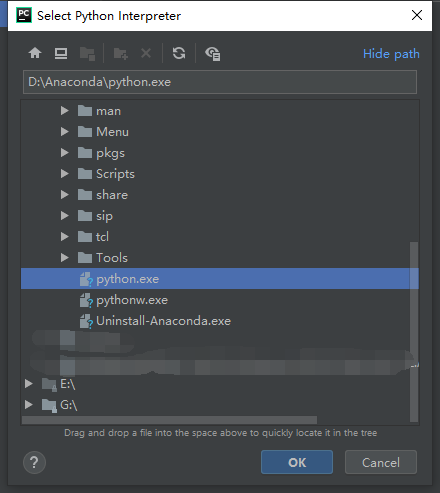
4.在弹出的界面中打开Anaconda的安装目录,并选择Tools文件夹下面的python.exe。点击OK。
5.让Anaconda解释器的环境适用于所有项目。(可选)勾选红色框中复选框即可。点击OK。
6.点击右下角Create。之后会进入PyCharm的工作界面。

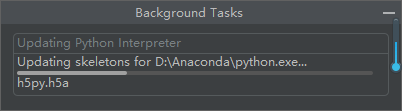
7.配置环境需要一定时间。(10-30min)可参考红框中进度条。

点击进度条可以查看配置解释器的详细信息。
8.检查。File-->Settings。
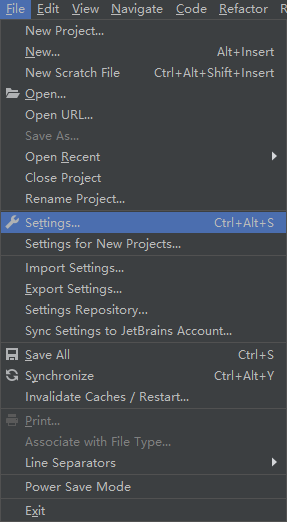
选择左边列表中的Project Interpreter,即可在右侧看到已经安装了哪些包。

大功告成!:)
作者水平有限,上述安装过程虽经千锤百炼,但仍不能保证100%成功。欢迎各位大佬在留言区补充或留下问题,欢迎讨论!
安装包网盘链接:(如失效请留言)
链接:https://pan.baidu.com/s/11zqa3fWeI8yFIPwp0weDuw
提取码:raeu
(注:其中含配置tf-gpu相关文件,总大小约2G)
原创成果来之不易,转载请注明出处~