PyTorch Learning 1 - Install NVIDIA Cuda9.0 in Win10 environment + multi-environment Anaconda3-5.2.0 + PyTorch 0.4.1 GPU version + PyCharm environment configuration
Preparation
1. The computer must support NVIDIA discrete graphics card and the discrete graphics driver has been installed
(If it is below 8G, there is no need to consider installing it),As shown below
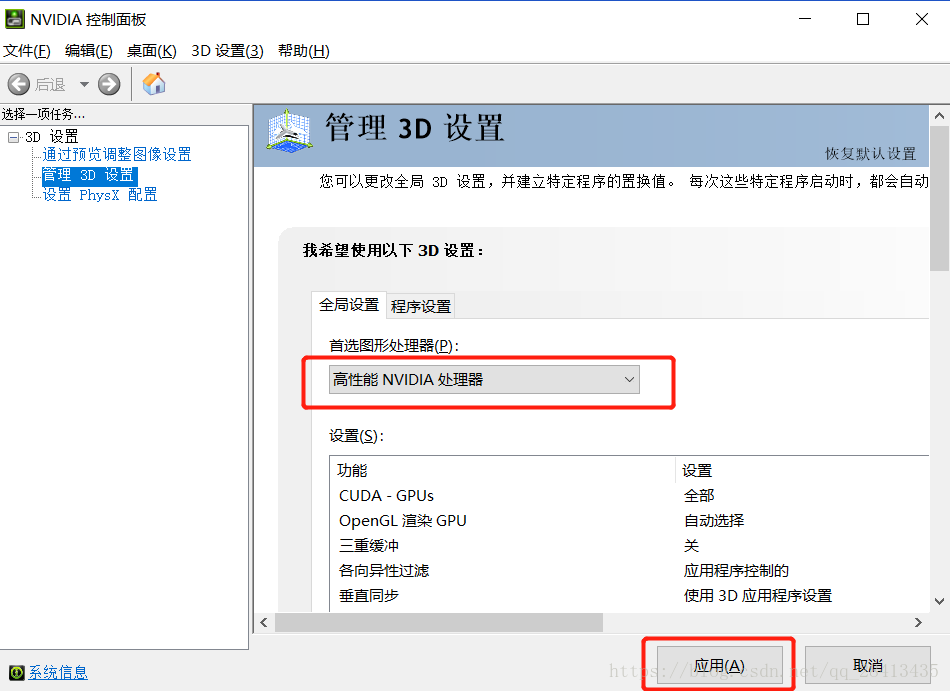
2. Set the preferred graphics processor
In the NVIDIA Control Panel -> Select Manage 3D Settings -> Global Settings -> Preferred Graphics Processor Select High Performance NVIDIA Processor and click Apply
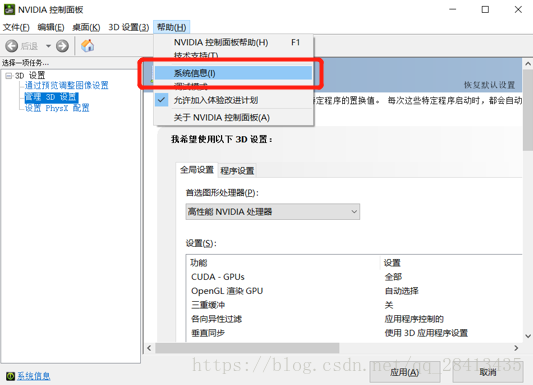
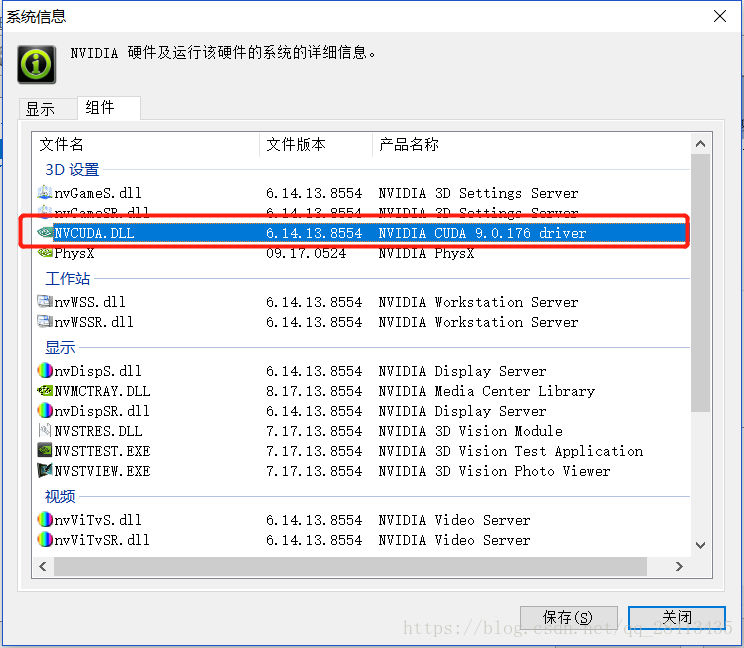
3. Check the Cuda version supported by the independent graphics card
(Very important! It will not work if it does not support PyTorch!)
Click Help -> System Information -> Build View
Install Cuda9.0
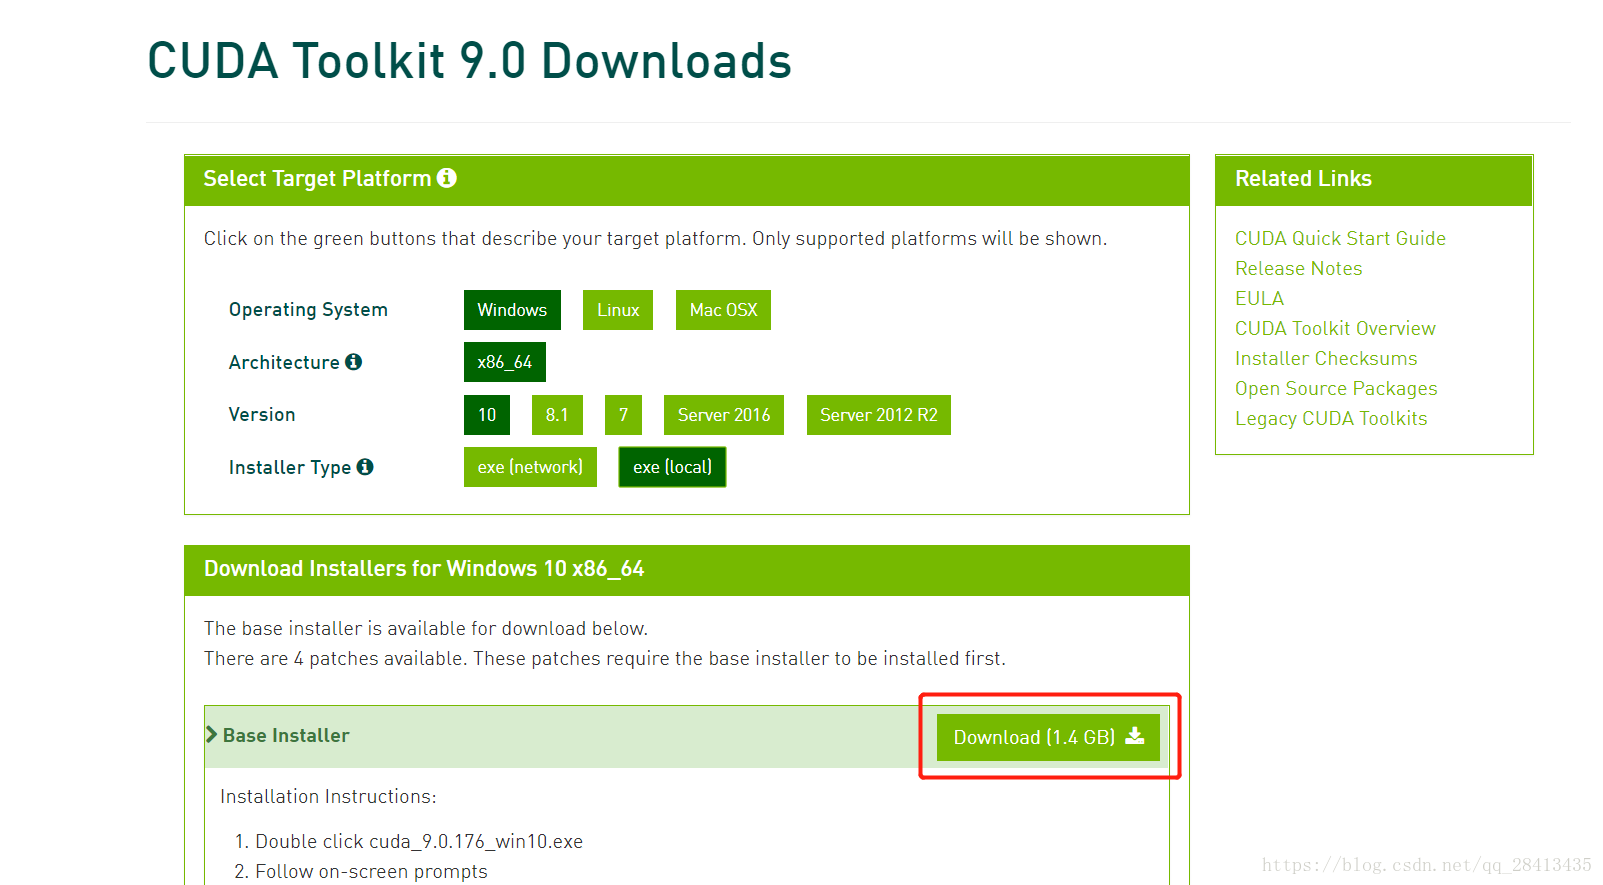
1. Download Cuda9.0 from the official website
Official website: https://developer.nvidia.com/cuda-90-download-archive
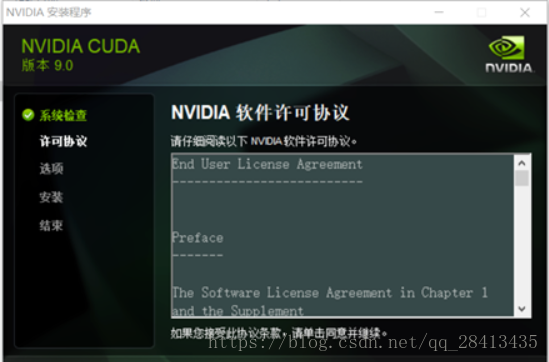
2. Install Cuda9.0
Run cuda_9.0.176_win10.exe
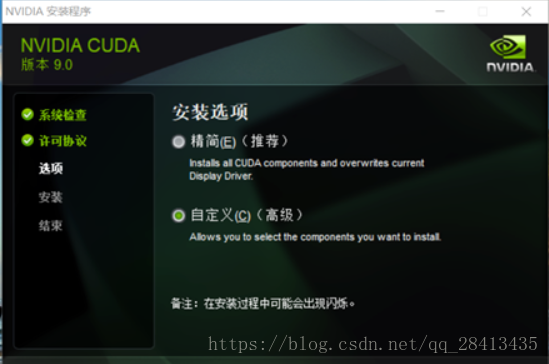
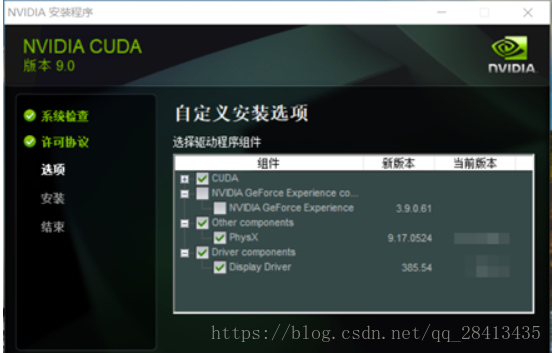
to select custom installation.
GeForce Experience is generally not installed when selecting installation items. CUDA is a core component that must be checked. If the current version of the remaining two options is lower than the new version, you can also check it. Then click Next to start the installation.
3. Verify cuda installation
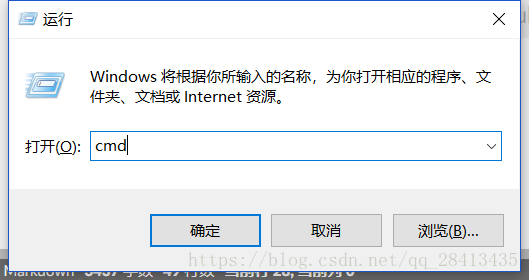
win+r -> cmd run nvcc -V to view

Install cuDNN v7.3.1
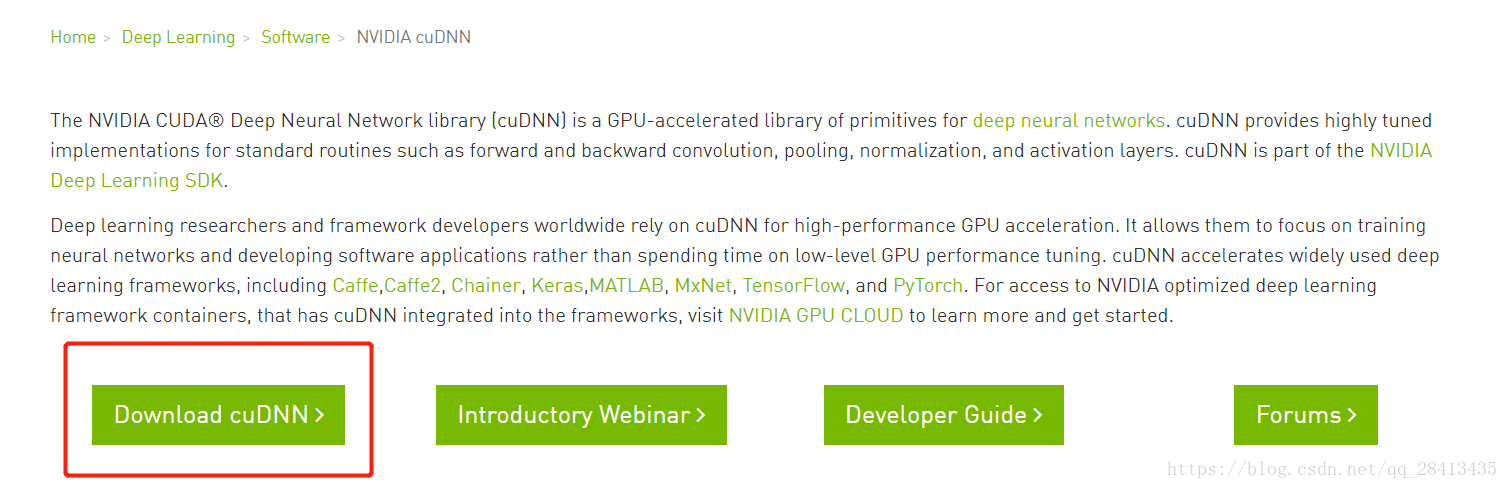
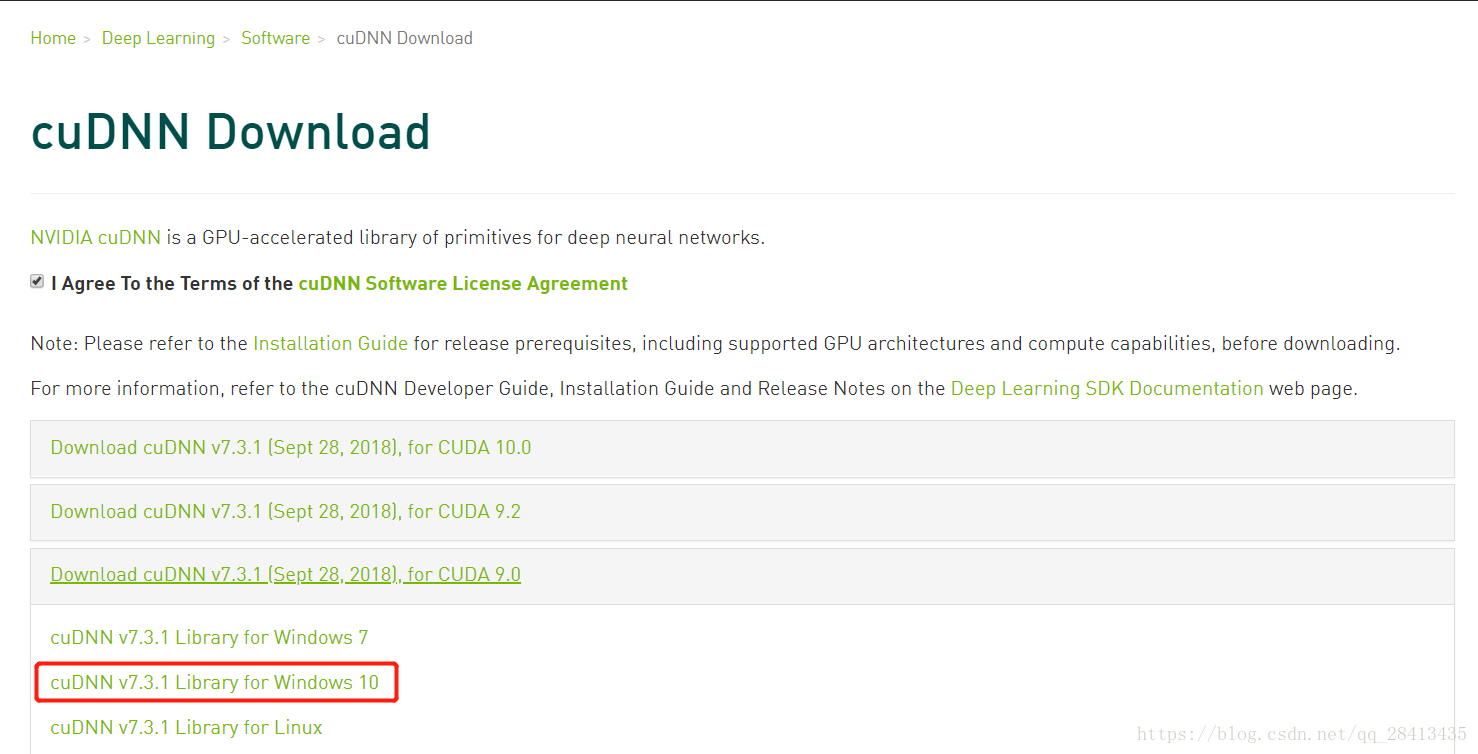
1. Official website download
Official website: https://developer.nvidia.com/cudnn
Select Download cuDNN -> Download cuDNN v7.3.1 (Sept 28, 2018), for CUDA 9.0 -> cuDNN v7.3.1 Library for Windows 10
2. Install cuDNN v7.3.1
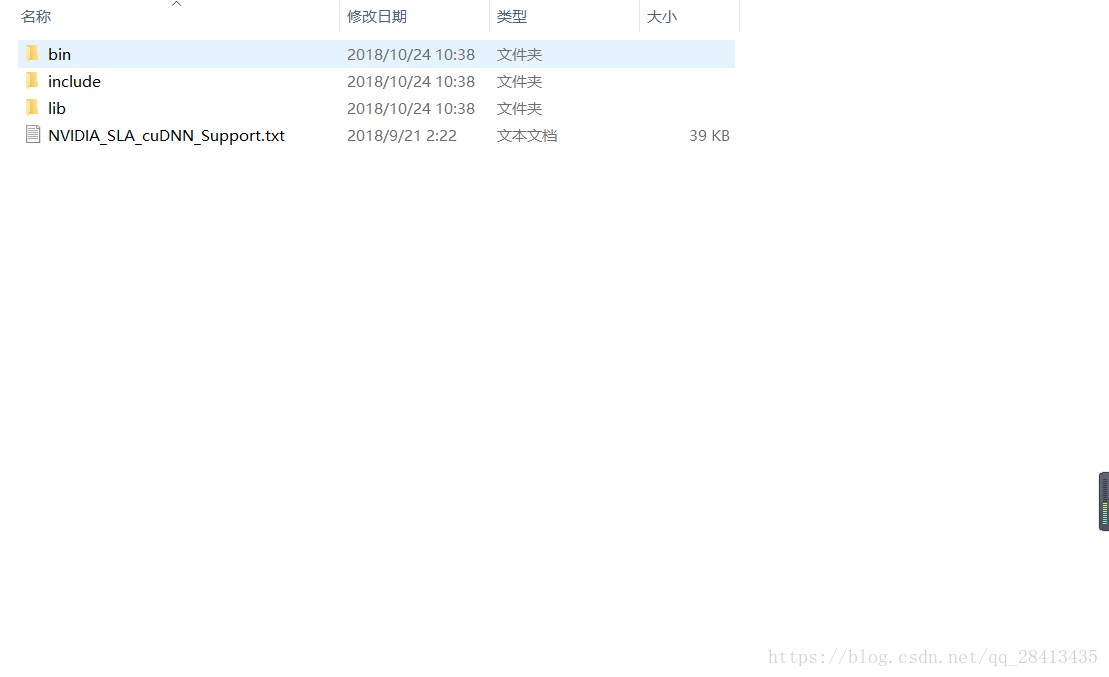
Unzip and download cudnn-9.0-windows10-x64-v7.3.1.20.zip
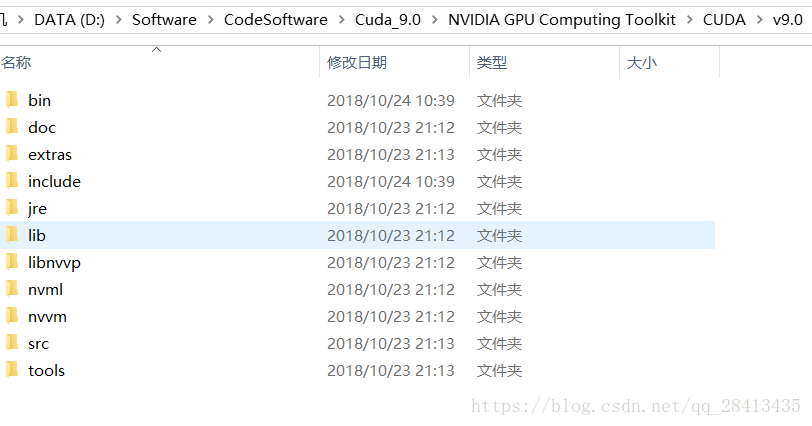
and copy these three files to the root folder of the installation path of CUDA9.0
Install Anaconda3-5.2.0
1. Install Anaconda3-5.2.0
Run Anaconda3-5.2.0-Windows-x86_64.exe
and check the first item to automatically add environment variables


2. Verify the anaconda installation
win+r -> cmd run conda -V view

Using Anaconda Navigator to configure multi-environment Anaconda3-5.2.0
1. Start Anaconda Navigator

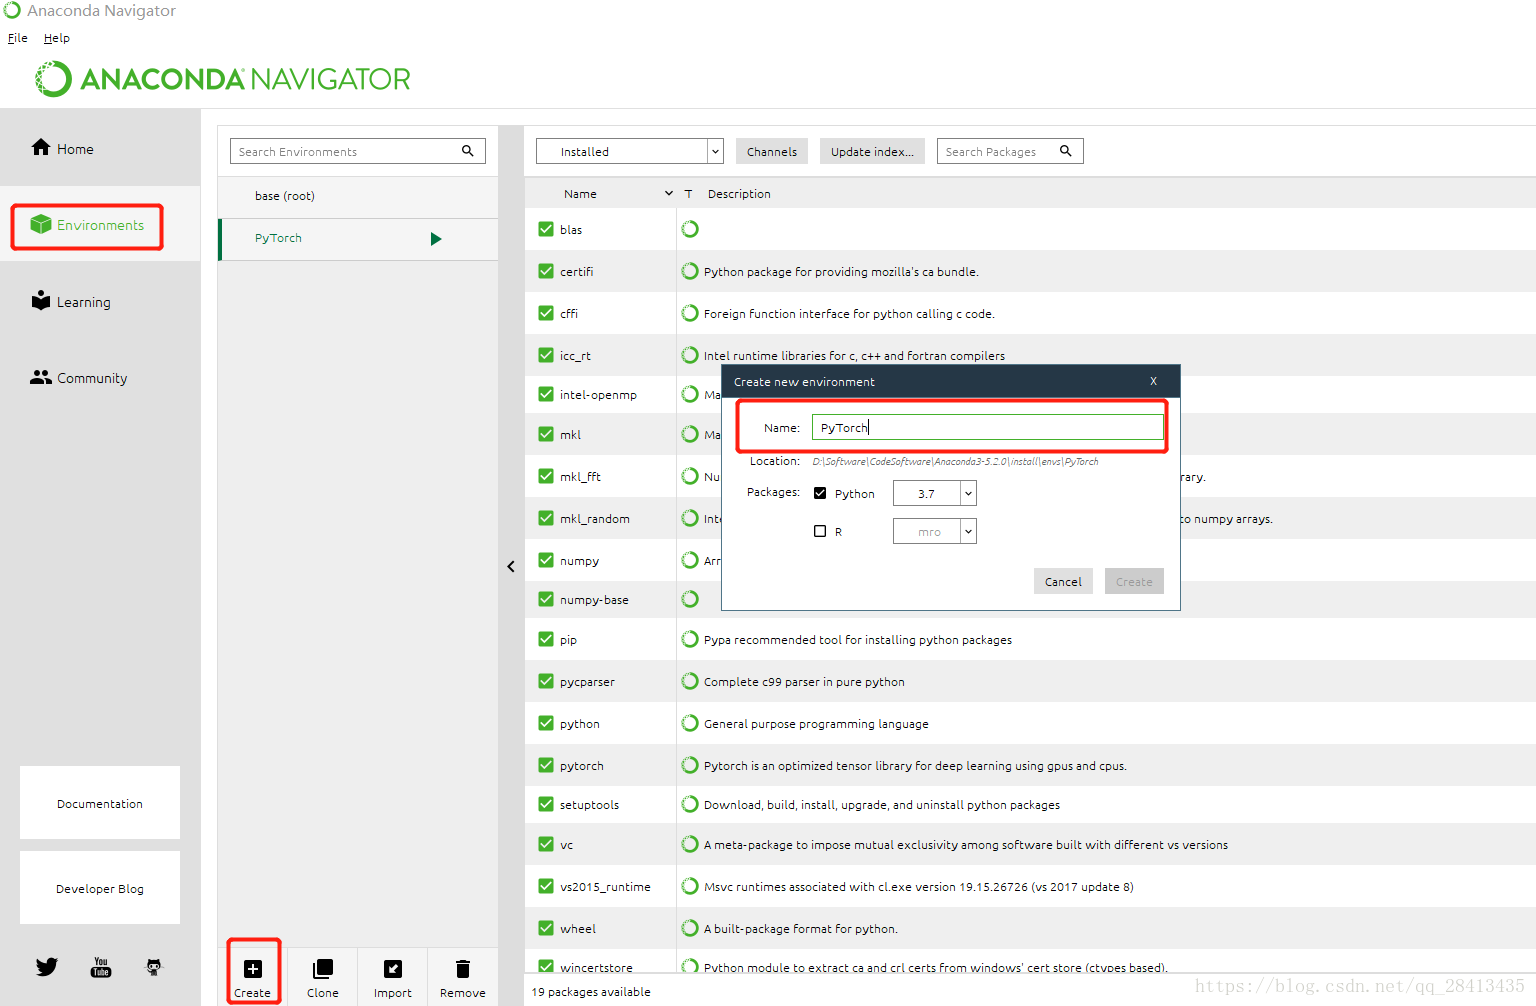
2. New operating environment
Environments -> Create Enter the environment name (PyTorch) and select the python version (3.7)
3. Activate the operating environment (PyToch)
Run Anaconda Prompt -> Enter activate PyTorch to switch the environment from base to PyTorch


4. Set Tsinghua Mirror
Tsinghua mirror official website: https://mirrors.tuna.tsinghua.edu.cn/help/anaconda/
Enter the following command
conda config --add channels https://mirrors.tuna.tsinghua.edu.cn/anaconda/pkgs/free/
conda config --add channels https://mirrors.tuna.tsinghua.edu.cn/anaconda/pkgs/main/
conda config --add channels https://mirrors.tuna.tsinghua.edu.cn/anaconda/cloud/pytorch/

# for legacy win-64
conda config --add channels https://mirrors.tuna.tsinghua.edu.cn/anaconda/cloud/peterjc123/

conda config --set show_channel_urls yes
Install PyTorch 0.4.1 GPU version
1. Check the installation command on the official website
Official website: https://pytorch.org/
Click Get Started

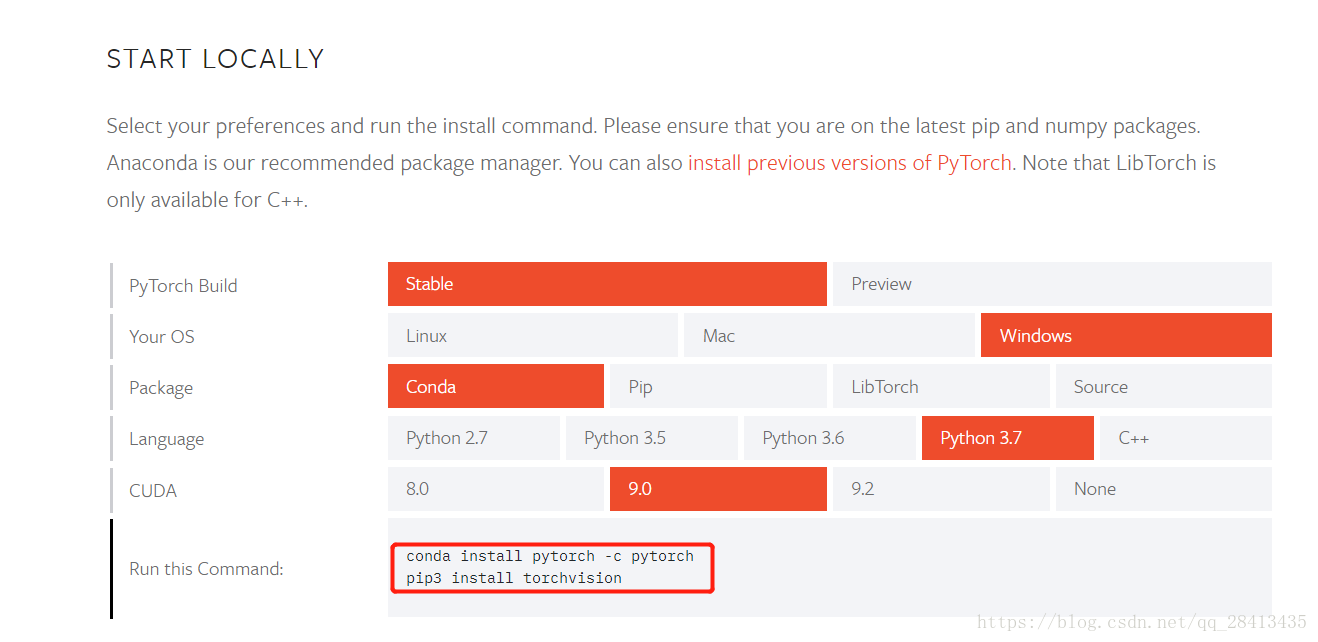
2. Run in the PyToch environment
conda install pytorch -c pytorch

pip3 install torchvision

# for no installed pip3
pip install torchvision


3. Verify PyTorch-GPU installation
run the following command
python

import torch

torch.cuda.is_available()
torch.cuda.is_available() If the return value is True, congratulations, your installation is successful~
If the return value is False, the installation failed, congratulations, you can change the matching version and reinstall~
So far Cuda9.0 + multi-environment Anaconda3-5.2.0 + PyTorch 0.4.1 GPU version has been installed~
The following is the environment configuration of PyCharm

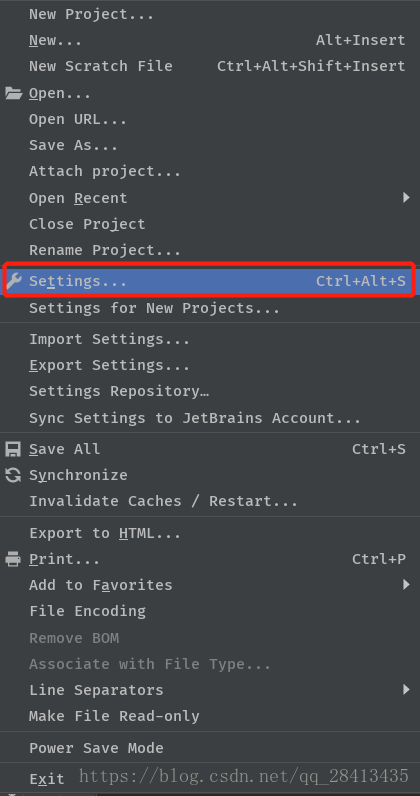
Environment configuration of PyCharm
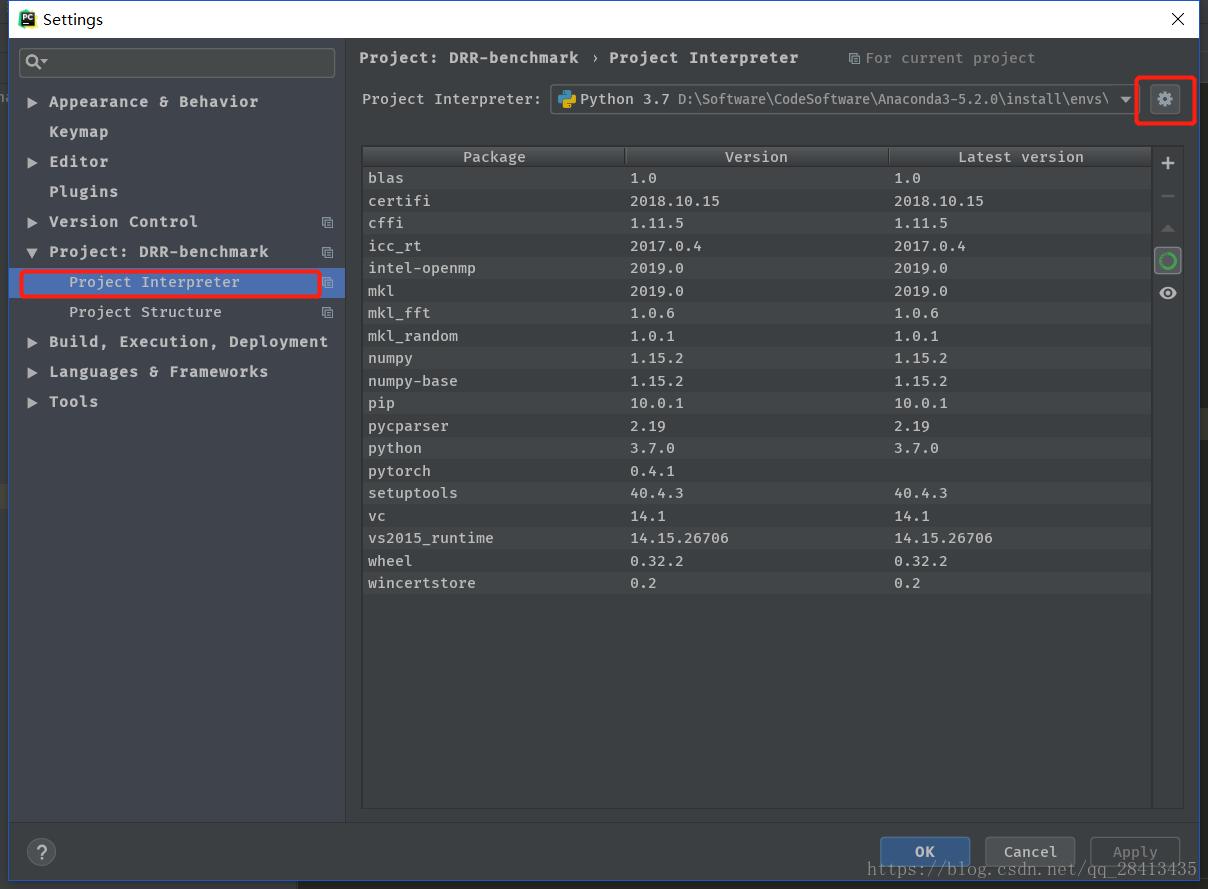
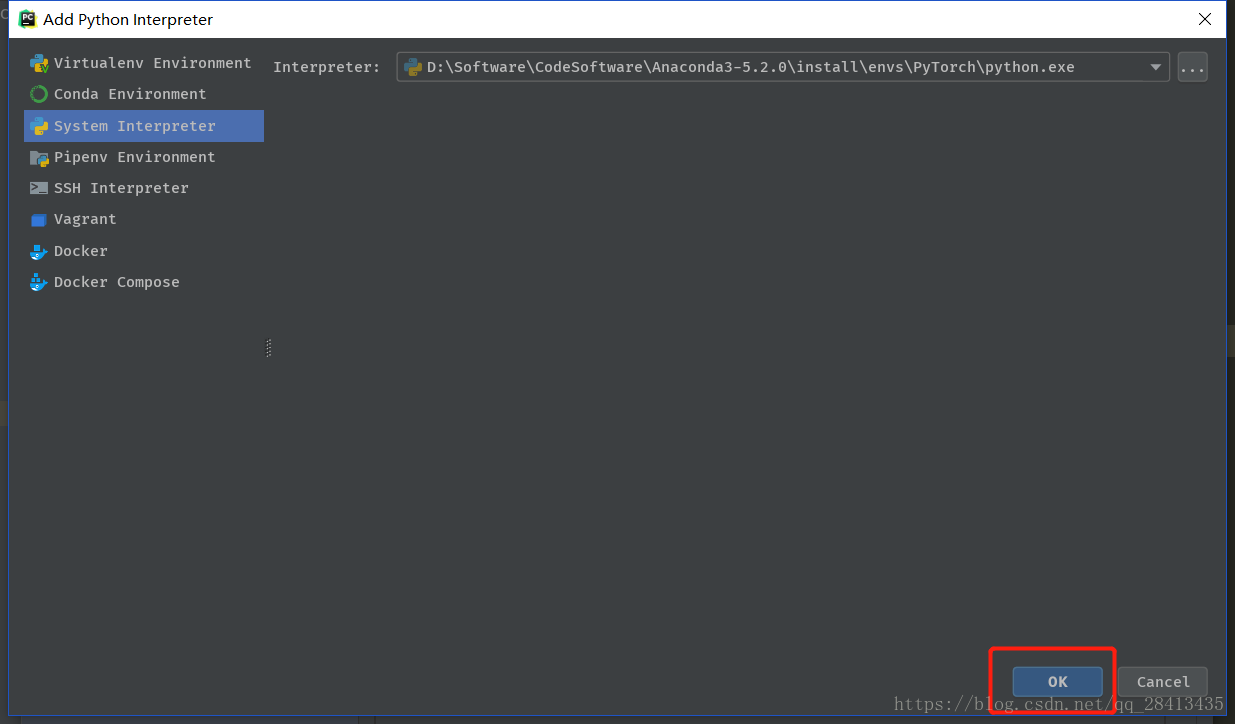
Settings -> Project Interpreter,
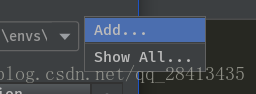
click the small gear in the upper right corner, select Add
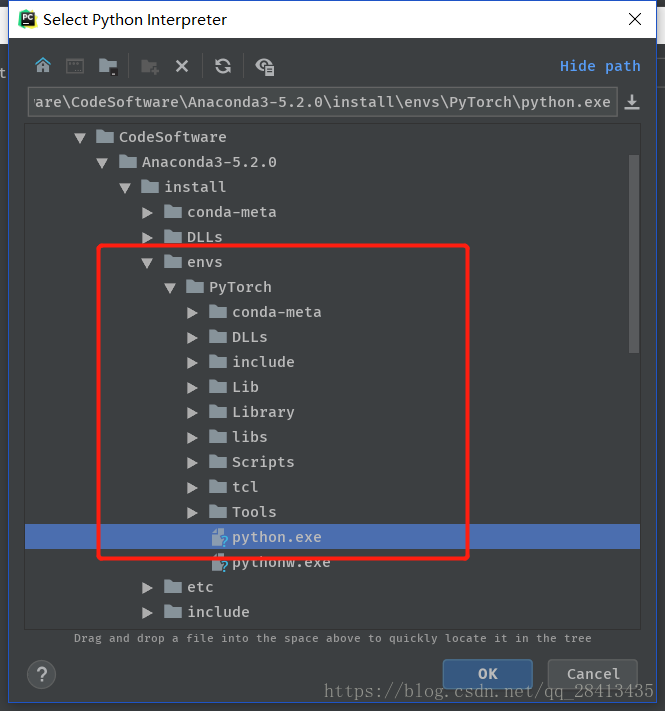
, select System Interpreter -> select ... in the upper right corner,
select envs in the Anaconda installation directory -> PyTorch -> python.exe,
click ok
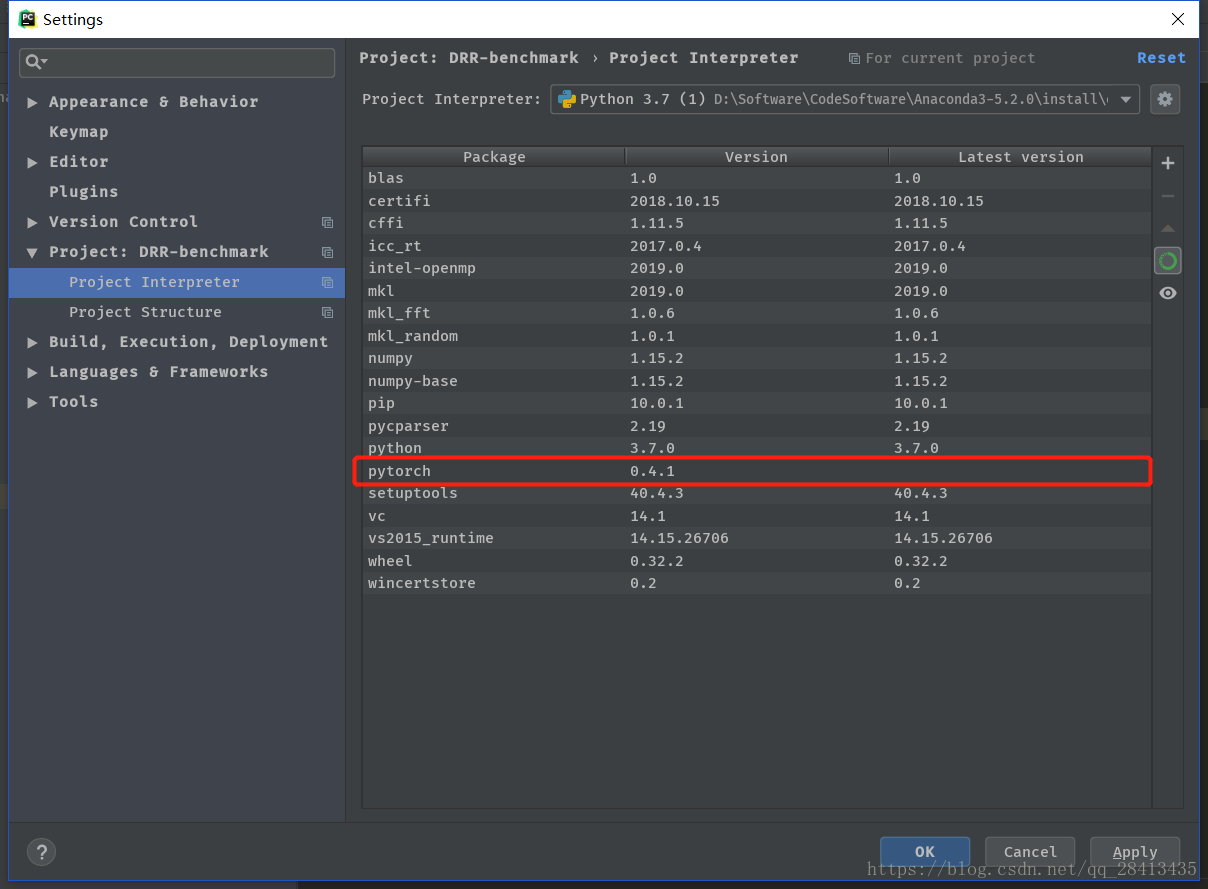
, and pytorch appears, then the configuration is complete.
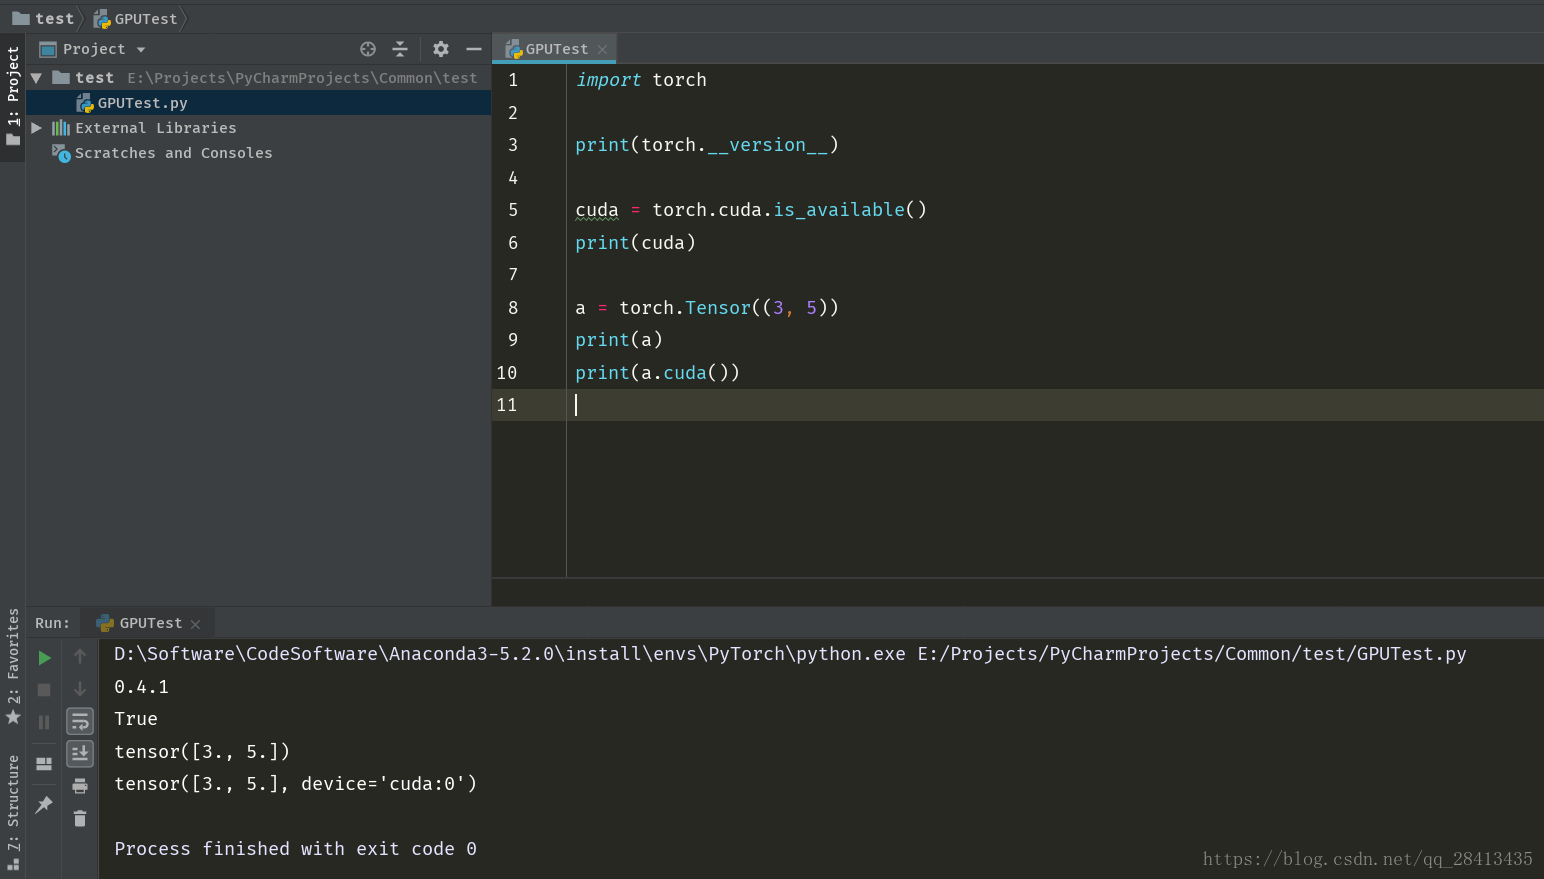
Verify the configuration and create a new GPUTest.py file and run

import torch

print(torch.__version__)

cuda = torch.cuda.is_available()
print(cuda)

a = torch.Tensor((3, 5))
print(a)
print(a.cuda())
configuration successful