WebSerivice test plan sampler in two ways: HTTP requests, SOAP / XML-RPC Request.
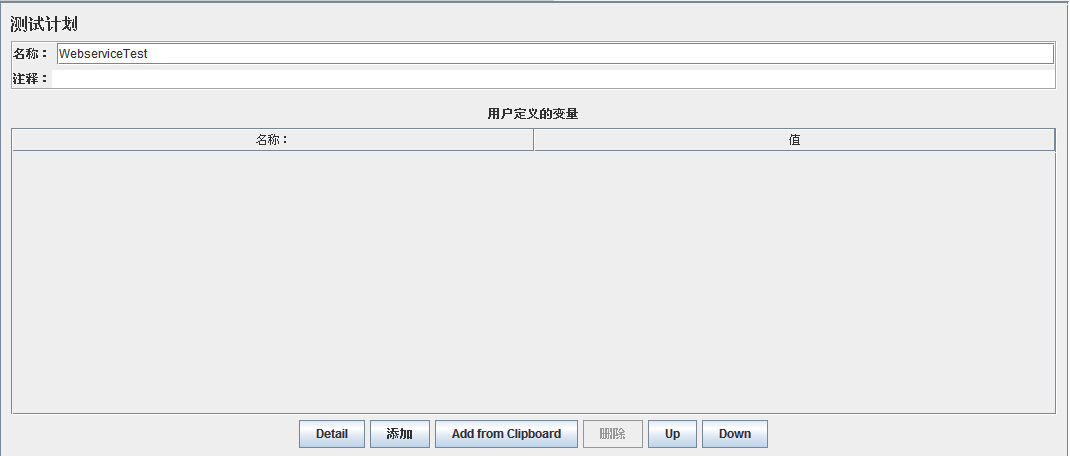
1. Test Plan
Start JMeter, click on the Test Plan node, rename test plan:. WebserviceTest below:
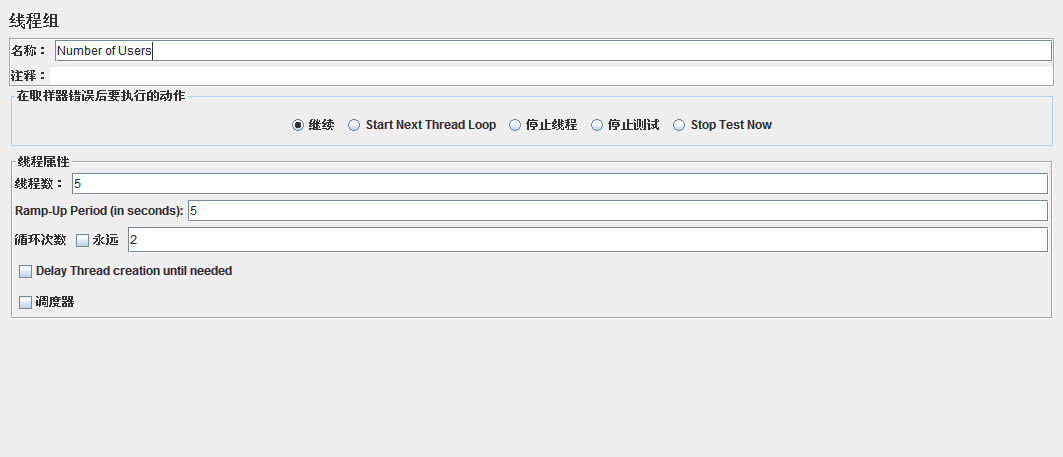
2. Add thread group
Adding a thread group, right-click the test plan WebserviceTest - Add - Threads (Users)> thread group. Next, modify the default attributes thread group. Modify the following attributes:
   Name: Number of Users
   Number of Threads (Users): 5
   Ramp-Up Period: 5
   Loop Count:2
As shown below:
3. Add configuration elements
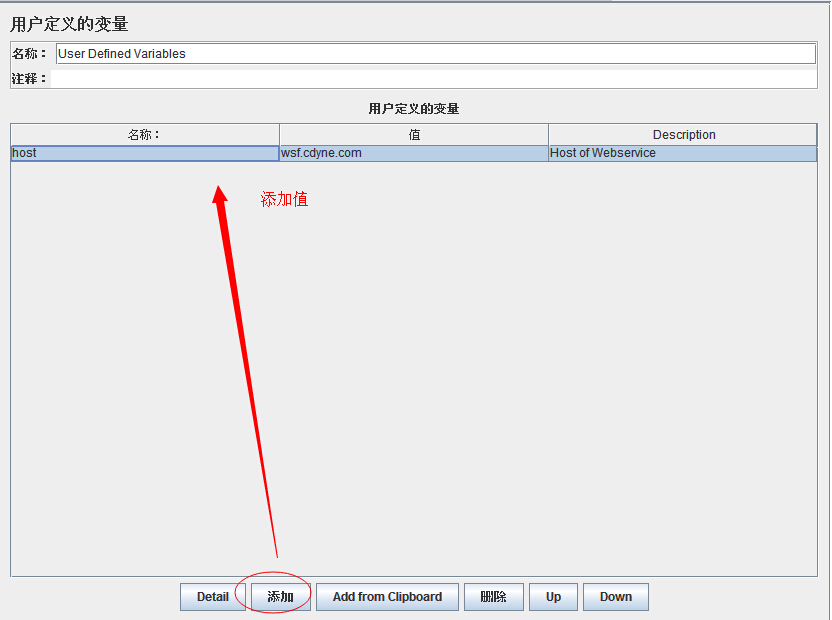
Right-click a test plan WebserviceTest -. Add - configuration elements> User-defined variables
名称:User Defined Variables
Click Add, set the name: host,
Setting values: wsf.cdyne.com,
Set Description: Host of Webservice.
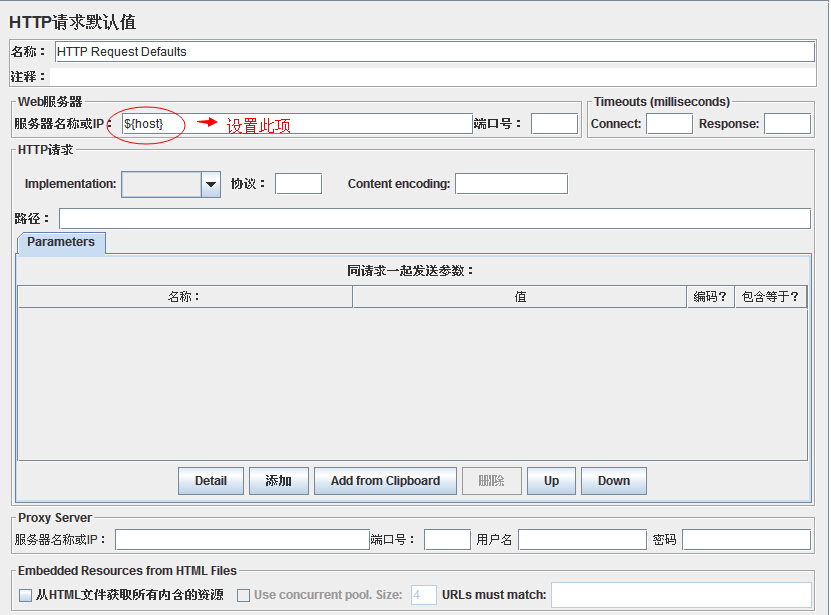
. B Right-click the test plan WebserviceTest - Add - configuration elements> HTTP Request Defaults, name: HTTP Request Defaults
Click Add, set the server name or IP: $ {host}
4. Add sampler
Note: there are two samplers are, HTTP request or SOAP / XML-RPC Request
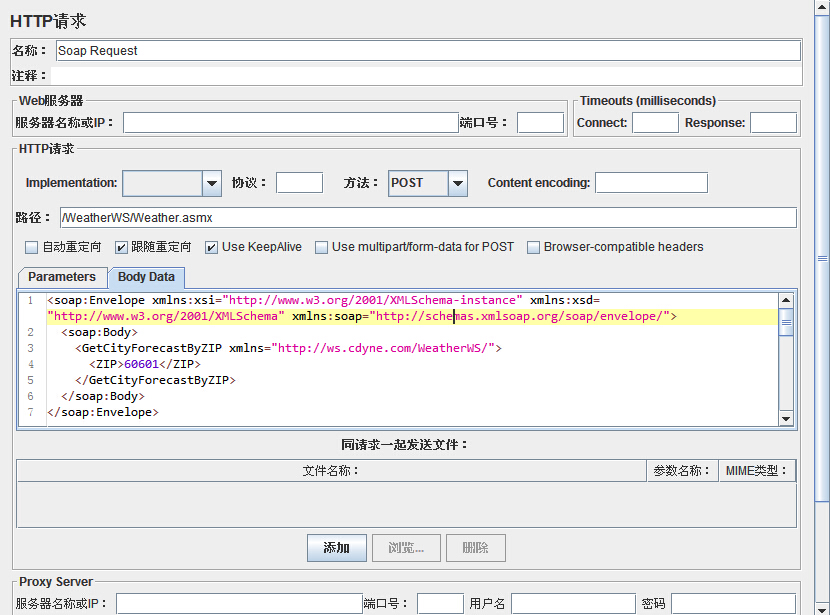
- Introduce the practice of HTTP requests: Right-click the Thread Group Number of Users- add -Sampler> HTTP request
Set the following parameters:
Name: Soap Request
Path: /WeatherWS/Weather.asmx
BodyData:

<soap:Envelope xmlns:xsi="http://www.w3.org/2001/XMLSchema-instance" xmlns:xsd="http://www.w3.org/2001/XMLSchema" xmlns:soap="http://schemas.xmlsoap.org/soap/envelope/">
<soap:Body>
<GetCityForecastByZIP xmlns="http://ws.cdyne.com/WeatherWS/">
<ZIP>60601</ZIP>
</GetCityForecastByZIP>
</soap:Body>
</soap:Envelope>
- 介绍SOAP/XML-RPC Request的做法:右键单击线程组 Number of Users-添加 -Sampler > SOAP/XML-RPC Request
设置如下参数:
名称:Soap Request
URL:http://${host}/WeatherWS/Weather.asmx
BodyData:
<soap:Envelope xmlns:xsi="http://www.w3.org/2001/XMLSchema-instance" xmlns:xsd="http://www.w3.org/2001/XMLSchema" xmlns:soap="http://schemas.xmlsoap.org/soap/envelope/">
<soap:Body>
<GetCityForecastByZIP xmlns="http://ws.cdyne.com/WeatherWS/">
<ZIP>60601</ZIP>
</GetCityForecastByZIP>
</soap:Body>
</soap:Envelope>
如下图所示:
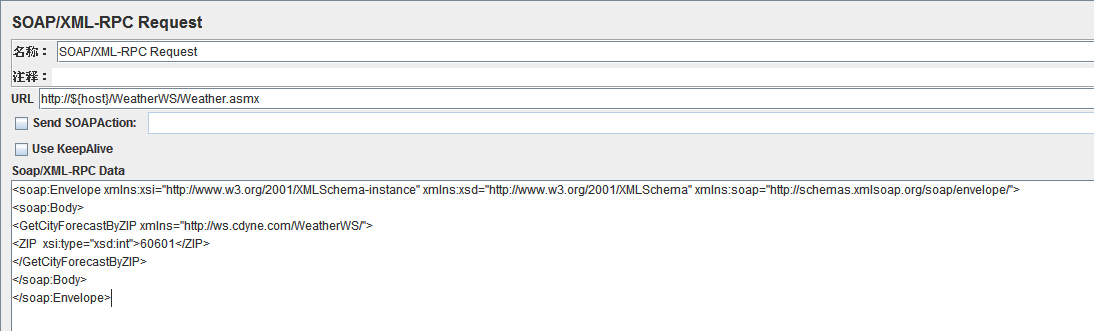
简单讲解一下Soap/XML-RPC Data的编写:
GetCityForecastByZIP是WebService发布的方法;
http://ws.cdyne.com/WeatherWS/是GetCityForecastByZIP所在类的域名;
ZIP是GetCityForecastByZIP类的参数名,参数类型是int;
60601是输入的实参。
5. 添加监听器
右键单击线程组 Number of Users-添加 -监听器> 察看结果树
6. 运行此测试计划
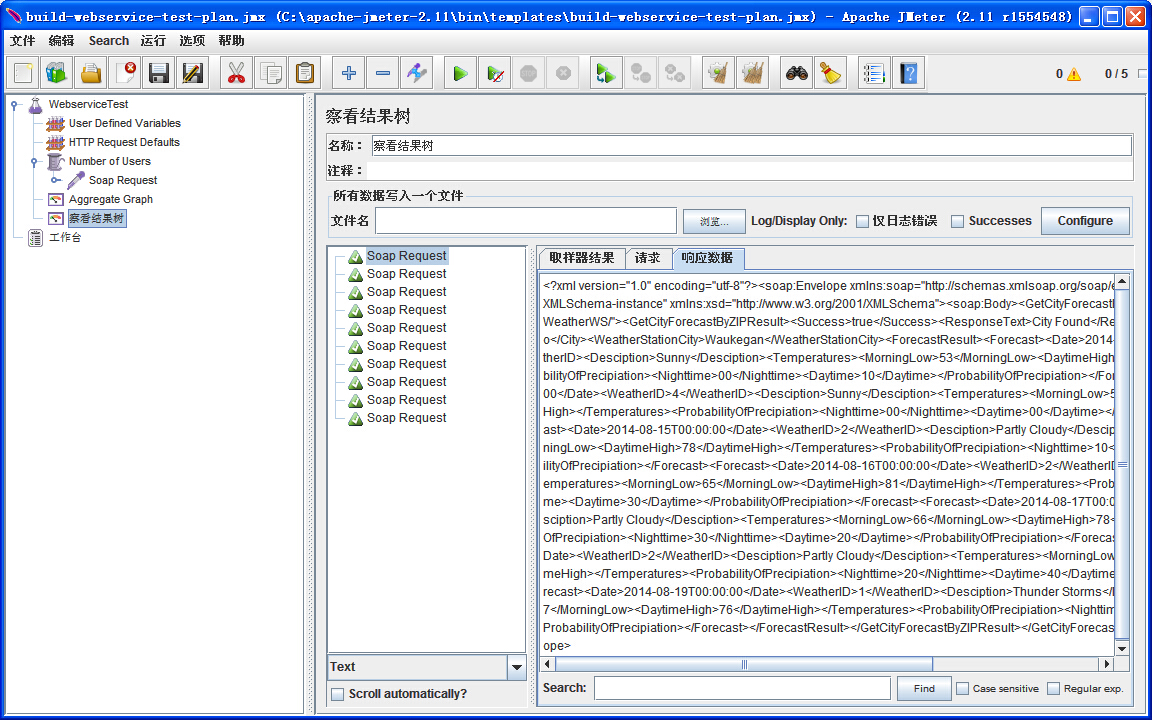
现在保存的以上测试计划 test_webservice.jmx。执行本测试计划使用 Run > Start 选项。
至此,整个测试计划就完成了。
注:此事例是Jmeter自带的一个事例,待以后工作中用到的时候,再来详细说一说。