The basic installation and optimization of Centos7
Dude specifically for CentOS7 version installed explained, in my learning process 7 in a little bit of experience, look ignorant when forced from the fourth year, and later more and more like, really TM too intelligent friends, okay nonsense Not much to say, directly on dry goods.
1.1 mounting system of
this installation by means of the virtual machine, the virtual machine is provided not described in detail, a direct positive articles system installation.
1.1.1 u disk boot into the installation as in FIG.

Press the Tab key, then enter the following command a space, and installation starts checking the system.
net.ifnames = 0 biosdevname = 0
if you do not write the above command is installed, the card will become CentOS7 default name ens33 or ens34 beginning, and will not have this type of a name eth0.
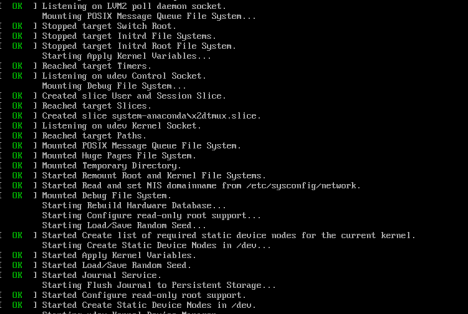
The emergence of these checks look after, you can wait for installation interface.
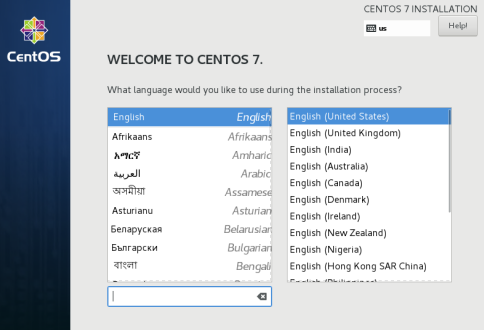
1.1.2 Keyboard and language
selection English
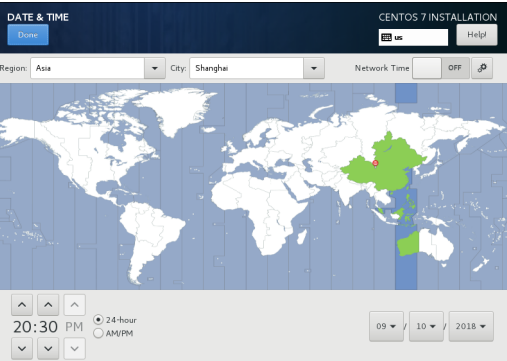
1.1.3 Select the time and regions
timing Beijing East eight districts, select shanghai area
After selecting click Done on the top left corner of the interface completion time and regional settings.
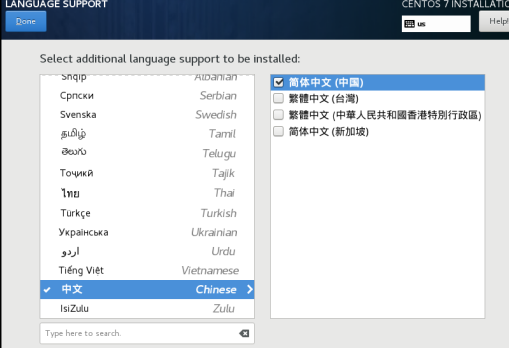
1.1.4 Select the default system language (English is recommended)
Alternatively Chinese (China), after selection, press Done.
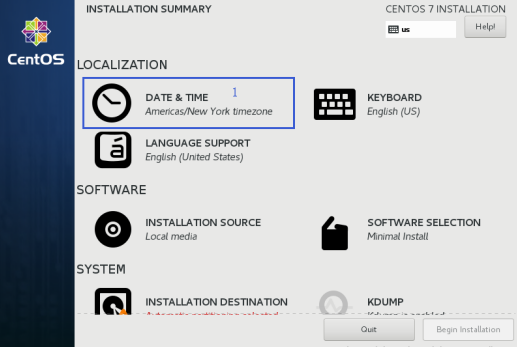
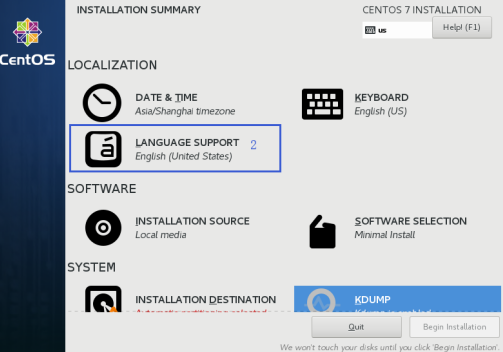
1.1.5 Select Package Installation
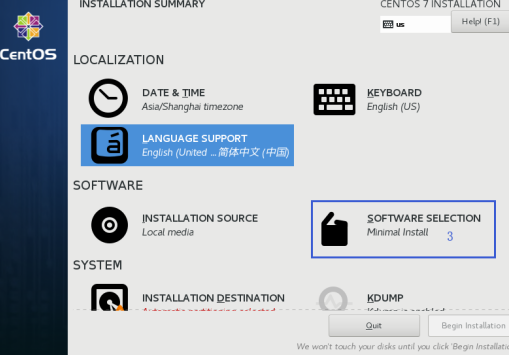
Select minimize installation, and select the package to our most basic need. According to the selection shown in FIG.

Virtual machines can turn off KDUMP option, no choice.
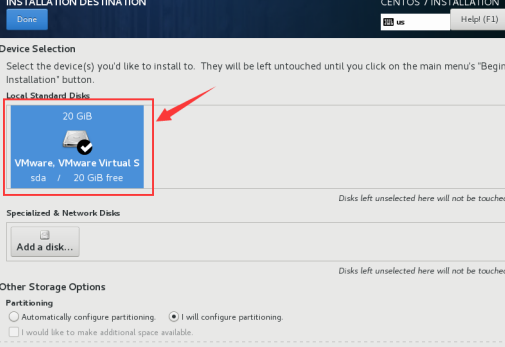
1.1.6 the system partition, CentOS7 series default xfs file system disk, partition selection to select custom partitioning, use the xfs file system. Referring to the following figure disks have been selected, enter the partitioning screen.

1.1.7 custom partitioning
map add reference under the system partition, click the "+" to add
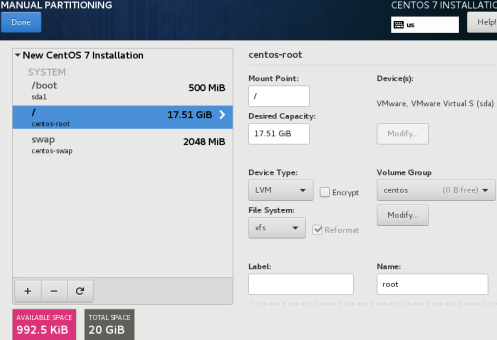
the system will automatically / boot partition using standard partition, the other partition using LVM partition, CentOS7 in this very intelligent.
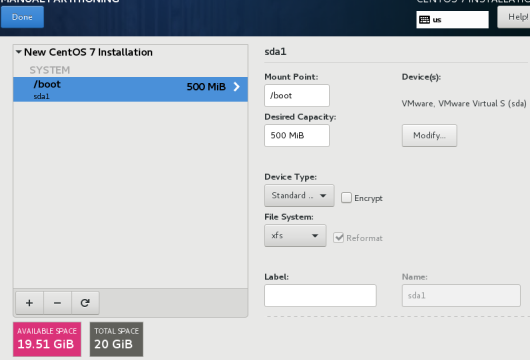
boot partition
swap partition

Root partition
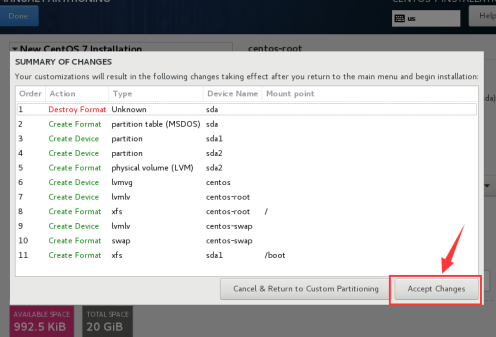
After selecting click on "Done" will pop has a good selection information, click on "Accept Changes" to start the installation system, of course, you can select the following network card settings here to install the system directly, Bahrain and then to configure the network card.
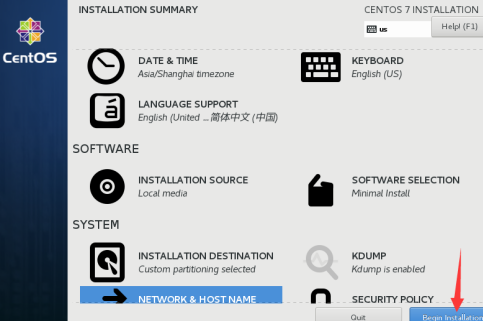
Click "Begin installation" to start the installation system.
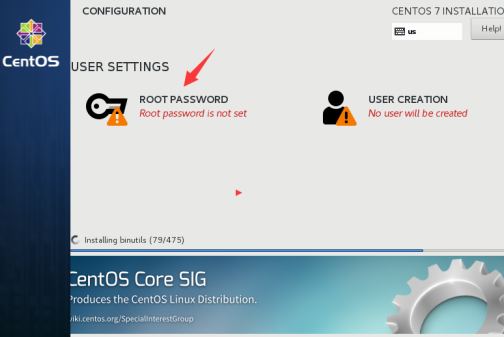
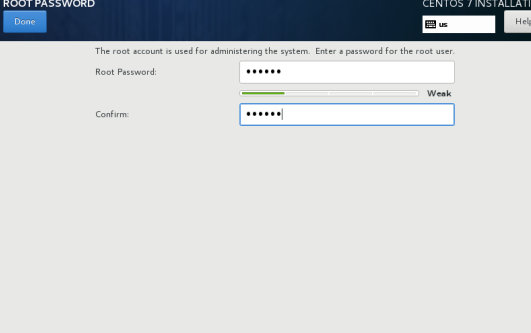
1.1.8 set the root password
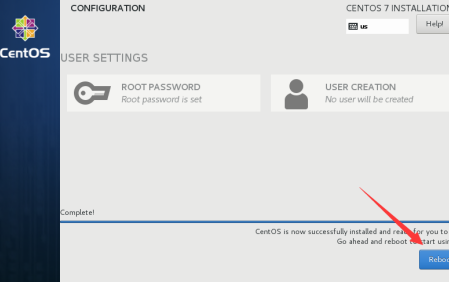
1.1.9 After installation click on reboot reboot the system.
1.1 Configuration NIC (easiest)
to configure the network card and CentOS6 almost the same, but there is no default vim this command, you can directly use vi.
Or at the command line interface command to enter nmtui set the card, enter the following command to set the choice nmtui, nmtui command is equivalent to the setup command CentOS6, but without CentOS7 in this command.
The configuration shown in the following two NIC
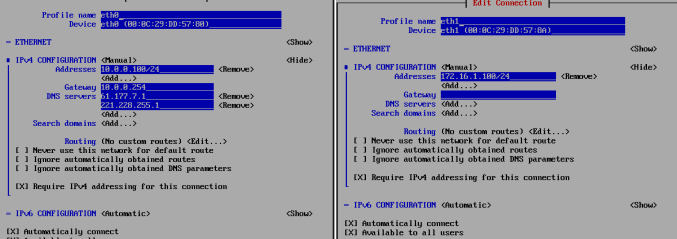
Note:
VI / etc / sysconfig / network-scripts / in ifcfg- eth0 # edit modify the following two network configuration file (eth1 Similarly)
ONBOOT=yes
BOOTPROTO=static
Deleted UUID MAC
1 .2 hostname
[the root @ localhost ~] # VI / etc / hostname
 . 1 .3 mounting base package
[root@localhost ~]# yum -y install gcc glibc gcc-c++ make net-tools screen vim lrzsz tree dos2unix lsof tcpdump bash-completion wget ntp
1.4更改yum源地址
wget -O /etc/yum.repos.d/epel.repo HTTPS: // mirrors.aliyun.com/centos/RPM-GPG-KEY-CentOS-7
View modified information.
LS /etc/yum.repos.d/
 . 1 .5 turn off the firewall and selinux
# Turn off the firewall
systemctl disable firewalld
systemctl stop firewalld
# Disable selinux
Sed -i ' S = Disabled the SELINUX # # # enforcing the SELINUX = G ' / etc / sysconfig / SELinux
 . 1 .6 george provide the right user can use sudo
useradd xxxx
echo "123456"|passwd --stdin niwei
\cp /etc/sudoers /etc/sudoers.ori
echo "xxxx ALL=(ALL) NOPASSWD: ALL " >>/etc/sudoers
tail -1 /etc/sudoers
the visudo - C
 . 1 .7 UUID information is deleted and the two NIC MAC address information
For subsequent cloning of virtual machine network problems you do not need to adjust the two NIC eth0 and eth1 configuration file.
vim /etc/sysconfig/network-scripts/ifcfg-eth0
vim /etc/sysconfig/network-scripts/ifcfg-eth1
Deletes the information therein UUID and MAC address.
Or use the following command once executed.
Sed -ri ' / the UUID | the HWADDR / D ' / etc / sysconfig / Network-scripts / the ifcfg-Eth [ 01 ]
 . 1 .8 rule configuration file and clear the network
All the information network rules in the configuration file is cleared, the purpose is to be able to without errors in subsequent cloning machine template.
/etc/udev/rules.d/70-persistent-net.rules
echo ' > /etc/udev/rules.d/70-persistent-net.rules ' >> / etc / the rc.local
 . 1 .9 Directory Server Planning
Script storage directory is set to: mkdir -p / Server / scripts
Application directory is set to: mkdir -p / the Application
Tools directory is set to: mkdir -p / Tools
mkdir -p /server/scripts
mkdir -p /application
mkdir -p / Tools
 . 1 .10 set English character set
cp /etc/locale.conf /etc/locale.conf.ori
echo 'LANG="en_US.UTF-8"' >/etc/locale.conf
source /etc/locale.conf
echo $ LANG
1 .11 Internet time synchronization system
Individuals tend to use Ali cloud server.
echo '#time sync by niwei at 2018-09-10' >>/var/spool/cron/root
The basic installation and optimization of Centos7
crontab - L
 1 .12 increase the file descriptor
Permanent modification to increase the number of files open.
echo '* - nofile 65535 ' >>/etc/security/limits.conf
tail -1 /etc/security/limits.conf
Temporarily modify the number of open files.
ulimit -n 65535
Check the default number of open files.
ulimit -a
Check the information.
open files (-n) 1024
A file descriptor is a default number of files that can be opened service.
1 .13 kernel file optimization
cat >>/etc/sysctl.conf<<EOF
net.ipv4.tcp_fin_timeout = 2
net.ipv4.tcp_tw_reuse = 1
net.ipv4.tcp_tw_recycle = 1
net.ipv4.tcp_syncookies = 1
net.ipv4.tcp_keepalive_time = 600
net.ipv4.ip_local_port_range = 4000 65000
net.ipv4.tcp_max_syn_backlog = 16384
net.ipv4.tcp_max_tw_buckets = 36000
net.ipv4.route.gc_timeout = 100
net.ipv4.tcp_syn_retries = 1
net.ipv4.tcp_synack_retries = 1
net.core.somaxconn = 16384
net.core.netdev_max_backlog = 16384
net.ipv4.tcp_max_orphans = 16384
EOF
※ The following parameters are optimized for iptables firewall, if the firewall is not in session when prompted, you can ignore ignore.
net.nf_conntrack_max = 25000000
net.netfilter.nf_conntrack_max = 25000000
net.netfilter.nf_conntrack_tcp_timeout_established = 180
net.netfilter.nf_conntrack_tcp_timeout_time_wait = 120
net.netfilter.nf_conntrack_tcp_timeout_close_wait = 60
net.netfilter.nf_conntrack_tcp_timeout_fin_wait = 120
Entry into force of the above configuration information.
sysctl - P
 . 1 .14 modify the default port connected ssh
[jiazhigang the root @ ~] # CP / etc / SSH / the sshd_config {,.} ori
sed -ir '13 iPort 52113\nPermitRootLogin no\nPermitEmptyPasswords no\nUseDNS no\nGSSAPIAuthentication no' sshd_config
[root@jiazhigang ~]# systemctl restart sshd