Ali cloud, cloud Baidu or Tencent cloud acquisition of a cloud server. I bought here is Ali cloud, and the choice of operating system is Linux.
After the purchase, we go back to Ali cloud homepage, click on the top right corner of the console, and then find a cloud server in the left navigation bar, click enter, we will see a cloud server.
Then, we make some configuration of cloud servers.
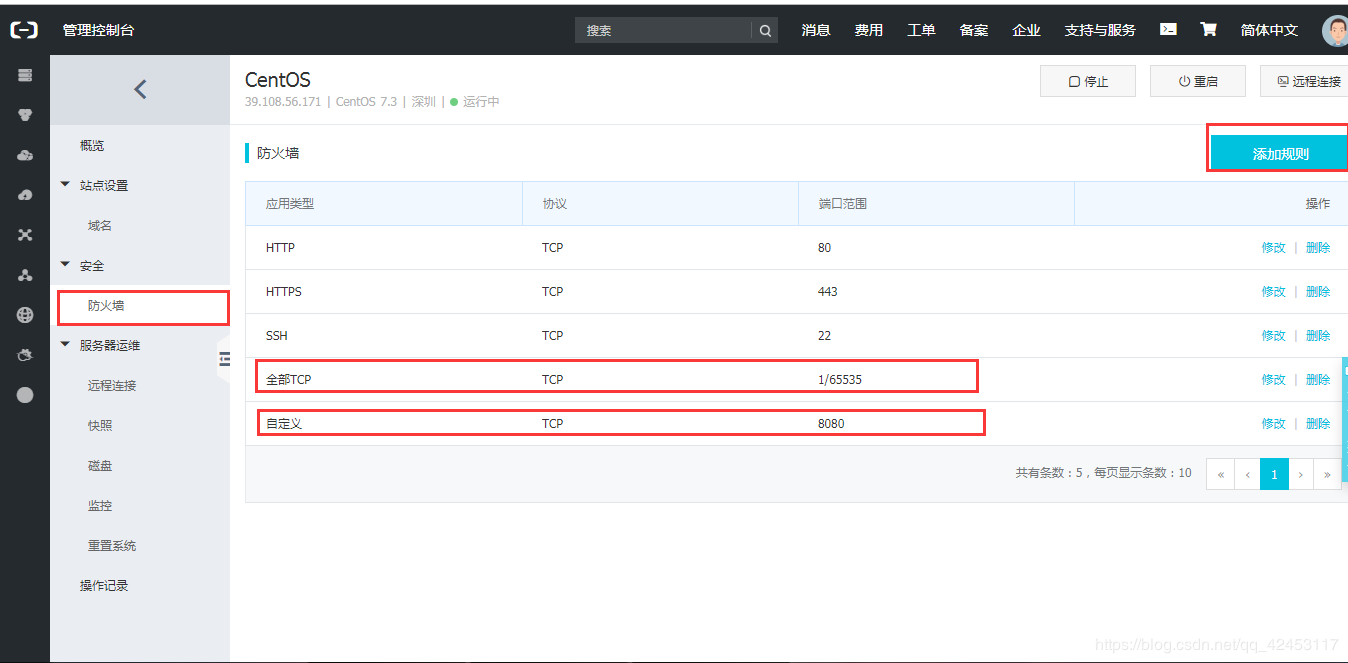
Here I added two firewall rules, if you do not add, you have the port number will be the firewall guard.
Then we have to set a password cloud server. The default user name is root.
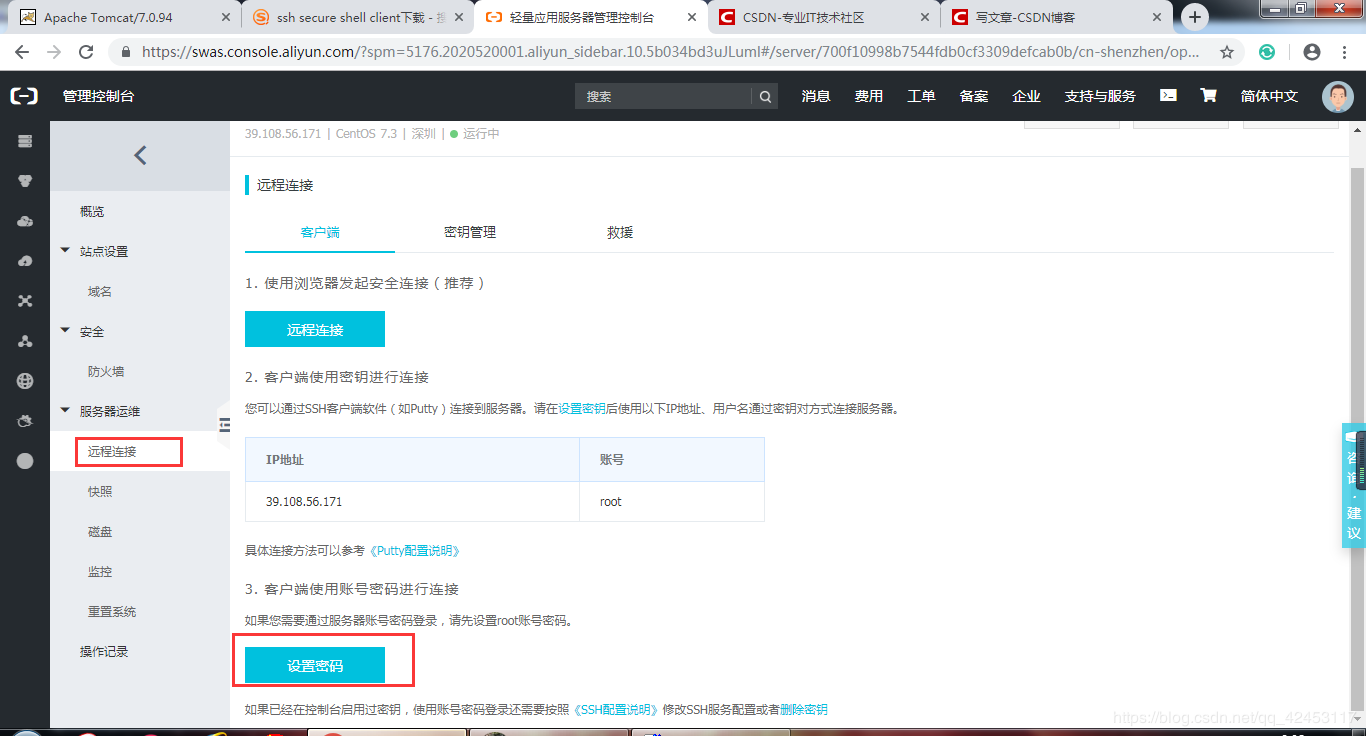
Click Set password. Press the operation step by step to complete.
Upon completion we configured, if you want to parse domain name, you can click the left of the domain name, do not make me explain.
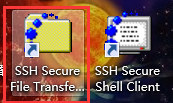
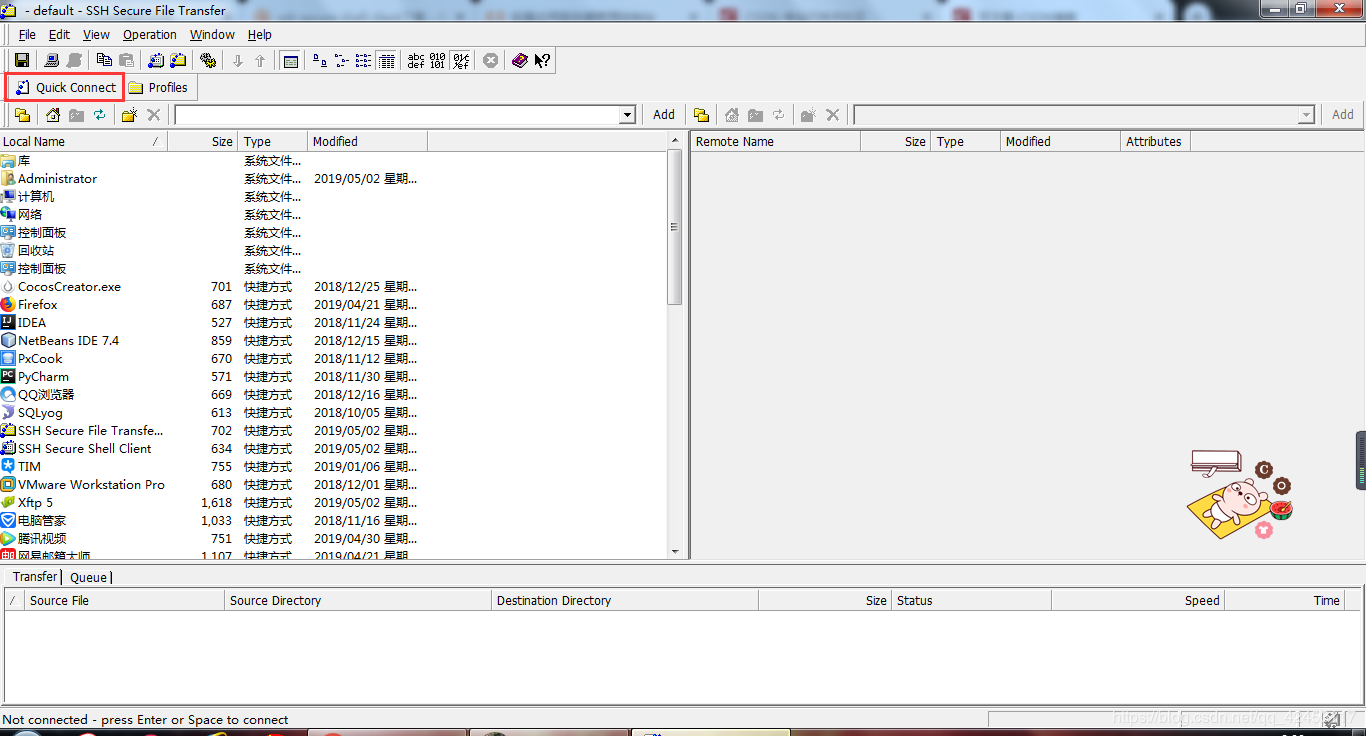
Next, we want to install some software on the cloud server. First, we have to download SSH, full name ssh secure shell client. All the way next to the installation, the installation is complete, there will be two programs.
We open the program within the red border.
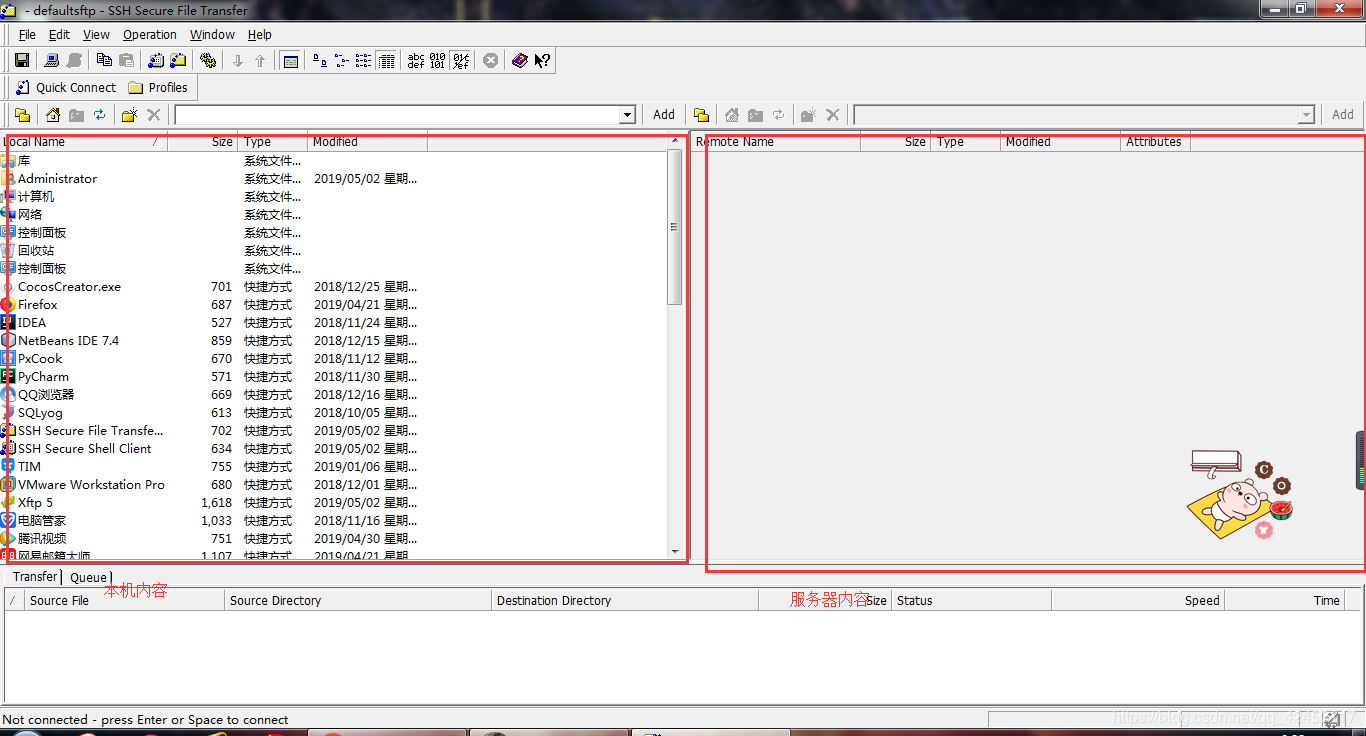
On the left is your computer, the right is your cloud server, because there is no connection, so the right is gray, then, we are connected to the cloud server.

Click this button, input box will pop up.
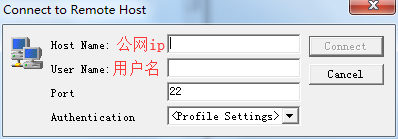
Enter the corresponding information, and then click Connect, you will be asked to enter a password, lost after determining the connection is complete.
Once connected, we can click on the
command window will pop up linux, then, we can operate on the cloud server.
Next, we explain how to install the software on the cloud server.
First download a good linux version jdk and tomcat corresponding archive
and upload the archive to the cloud server via SSH, we find your compressed position to the left, then right click archive, select upload, upload progress will be under , wait a little, upload was successful.
- Jdk installed in Linux
entering / root directory, jdk extracted to / usr / local directory
input command
tar -xvf jdk-8u161-linux-x64.tar.gz -C /usr/localAfter the completion of decompression, configure jdk environment variables, command input
vi /etc/profileOpen files vim profile editor, and then the i edit mode, the end of the file is added
#set java enviroment
JAVA_HOME=/usr/local/jdk1.8.0_211
CLASSPATH=$JAVA_HOME/lib/
PATH=$PATH:$JAVA_HOME/bin
export PATH JAVA_HOME CLASSPATH
This time, it will ask you to enter the save mode, we enter wq, then Enter, it will save the file and exit: press esc to exit edit mode, where you enter the command mode, we press shift +
configuration is complete we reload the configuration file, enter the command
source /etc/profileThen we enter
java -versionIf prompted by the jdk version, the installation was successful.
- Tomcat mounted in Linux
The tomcat extracted to / usr / local directory, input command
tar -xvf apache-tomcat-8.5.28.tar.gz -C /usr/localNext we open the external access port Linux 8080, by default, Linux does not open the port number
back to the next local directory, enter the command
/sbin/iptables -I INPUT -p tcp --dport 8080 -j ACCEPTWhere Linux open port 8080 on
we came to the tomcat bin directory, enter
./startup.shIn this way, tomcat server starts, ./ indicates the current directory
to stop the server input
./shutdown.shAfter the server starts, enter the address in the browser http://39.108.56.171:8080/ tomcat you will see a welcome screen, ip address for your public cloud server ip.
If you want your project to run on a cloud server, simply pack your project or war under webapps tomcat uploaded to the cloud server, and then restart the tomcat, you can access your project through external networks.