Buy cloud server
Now the market is very wide selectivity cloud server, such as Ali cloud, cloud Baidu, Tencent cloud, cloud Huawei, etc., and many companies will choose as their cloud server server. I chose to buy Tencent cloud cloud server configuration is 1 nuclear 1G bandwidth of 1Mbps one of the most basic cloud server. When buying choose to configure the server, including the operating system is Windows or linux, 64 or 32, and the system version or something.
1、

2、

... (omitted here)
You can also choose to quickly configure, do not have a step by step so chose. After the purchase will tell you the server public IP network and do some simple settings, such as the administrator password.
Telnet server
The next thing to do is log on to your remote server, the tool I use to Xshell and Xftp, very easy to use interface is also nice. Well, with the administrator login account you set up, you will find that this is a clean system, only the system comes with the application, very good, this is the piece of paper you could paint.
Install the necessary software
Because we want to deploy JAVA Web project, so we have to install some required software.
1、JDK
Running JAVA Web java environment is essential to the project, first we installed JDK and configuration environment variable.
Install JDK not go online there.
Installing the increase follows the configuration file (/ etc / profile), the
export JAVA_HOME=/usr/jdk/jdk1.8.0_211
export PATH=$PATH:$JAVA_HOME/bin:$PATH
export CLASSPATH=.:$JAVA_HOME/lib:$JAVA_HOME/jre/lib
export JRE_HOME=$JAVA_HOME/jre
Then reload or restart the configuration file, and then execute java -version appear the following lines, the installation and configuration environment variable success.
java version "1.8.0_211"
Java(TM) SE Runtime Environment (build 1.8.0_211-b12)
Java HotSpot(TM) 64-Bit Server VM (build 25.211-b12, mixed mode)
2、Tomcat
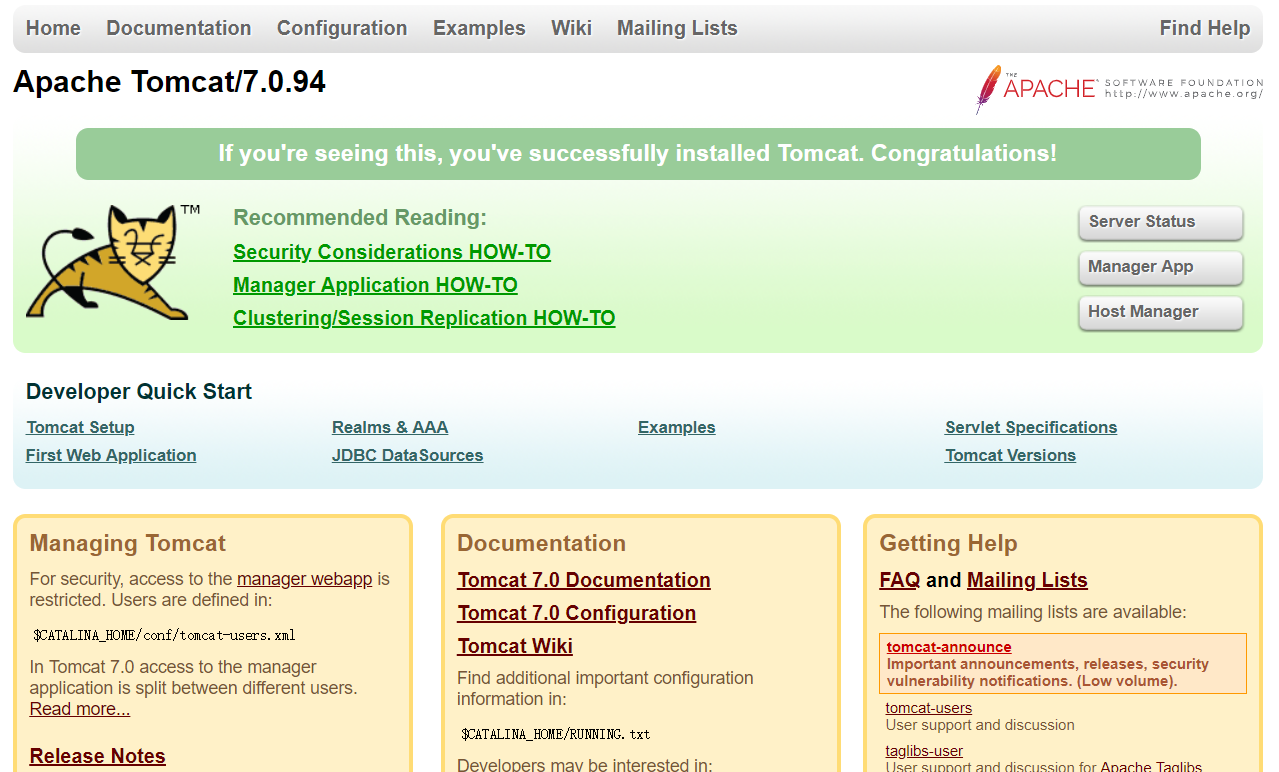
Install Tomcat, relatively easy to install, I was in the machine after the download linux versions compressed, uploaded to the server directly against the lower / opt, and then modify the default port number is 80 in tomcat / conf / server.xml, in under tomcat / bin execute ./startup.sh, then access your address in the browser, http: // ip, classic tomcat page appears, indicating Tomcat installation was successful.
3、Mysql
安装Mysql,这个是最麻烦的,这个我选择的是在线安装,很慢,等了好久才安装完成。
安装完成后,启动->登录–>查看初始密码,用初始密码登录->修改初始密码(修改时可能报错原因:密码策略检查不通过,可以把密码策略设置为LOW只校验长度)->设置访问权限(哪些ip可以访问)。
配置完强制刷新。
4、Redis
安装Redis,个人网站配置成单机的足够了。
项目部署
1、项目打包传至服务器
把做好的项目打war包,上传至tomcat/webapp下。
2、启动tomcat
访问你的网站资源,http://ip/war包名/资源路径。
浏览器转了很久最后出现,拒绝访问,然后就检查防火墙什么的,想着关闭防火墙试试,发现报错,原因是防火墙就没开,于是出于安全,把防火墙打开,在防火墙配置文件里配置开放80端口和一些端口如1000–2000,还有Mysql的3306,Redis的6379,然后重启防火墙。
再访问,页面出来了,调数据库的都失败了,报空指针,日志打了一些Mybatis的错误信息,打出了某个Mapper.xml的方法名,百度了一下,让我关防火墙试试,实在不行的话重装MySQL!。。什么鬼东西。
最后仔细检查了下,其实是因为我用的JNDI连接数据库,在Tomcat的context.xml里配置数据库连接信息也配了,最后找到原因了,是因为我本地环境的数据库密码和云服务器上数据库密码设置的不一样,修改完密码之后,重启,果然好了。JNDI,密码错了都不报错,记得以前用JDBC时会告诉你密码错误,JNDI是一点相关信息都没有,让我一顿好找!
小结
因为这里分享的是自己搭建网站的简单步骤和过程,属于练手的一次实践,而实际上生产环境搭建网站比这复杂多得多了,什么负载均衡、CND、域名解析等等。我想说的是搭建个人网站其实也并没有想象中的那么难,实践过一次就知道是怎么回事了,希望对有这种想法以及想实践的小伙伴有所帮助,在这个过程中踩的每一个坑都是满满的收获。
关注公众号@编程大道,让我们一起成长吧!
