Table of contents
This WeChat applet project uses the vant ui component library. The project page is complete and all functions are valid!
This project is a mini program front-end project that can be directly imported into the WeChat developer tool to open. It can be used for course design and graduation projects of computer majors, and can also be used as a front-end page template for commercial mini programs.
1. Core page renderings demonstration

2. Introduction to the core page of the mini program
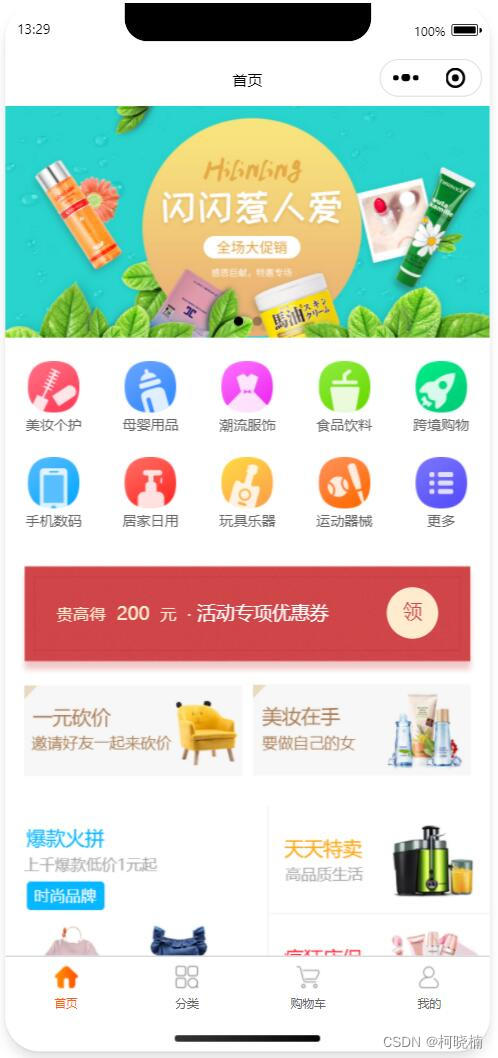
2.1 Home page
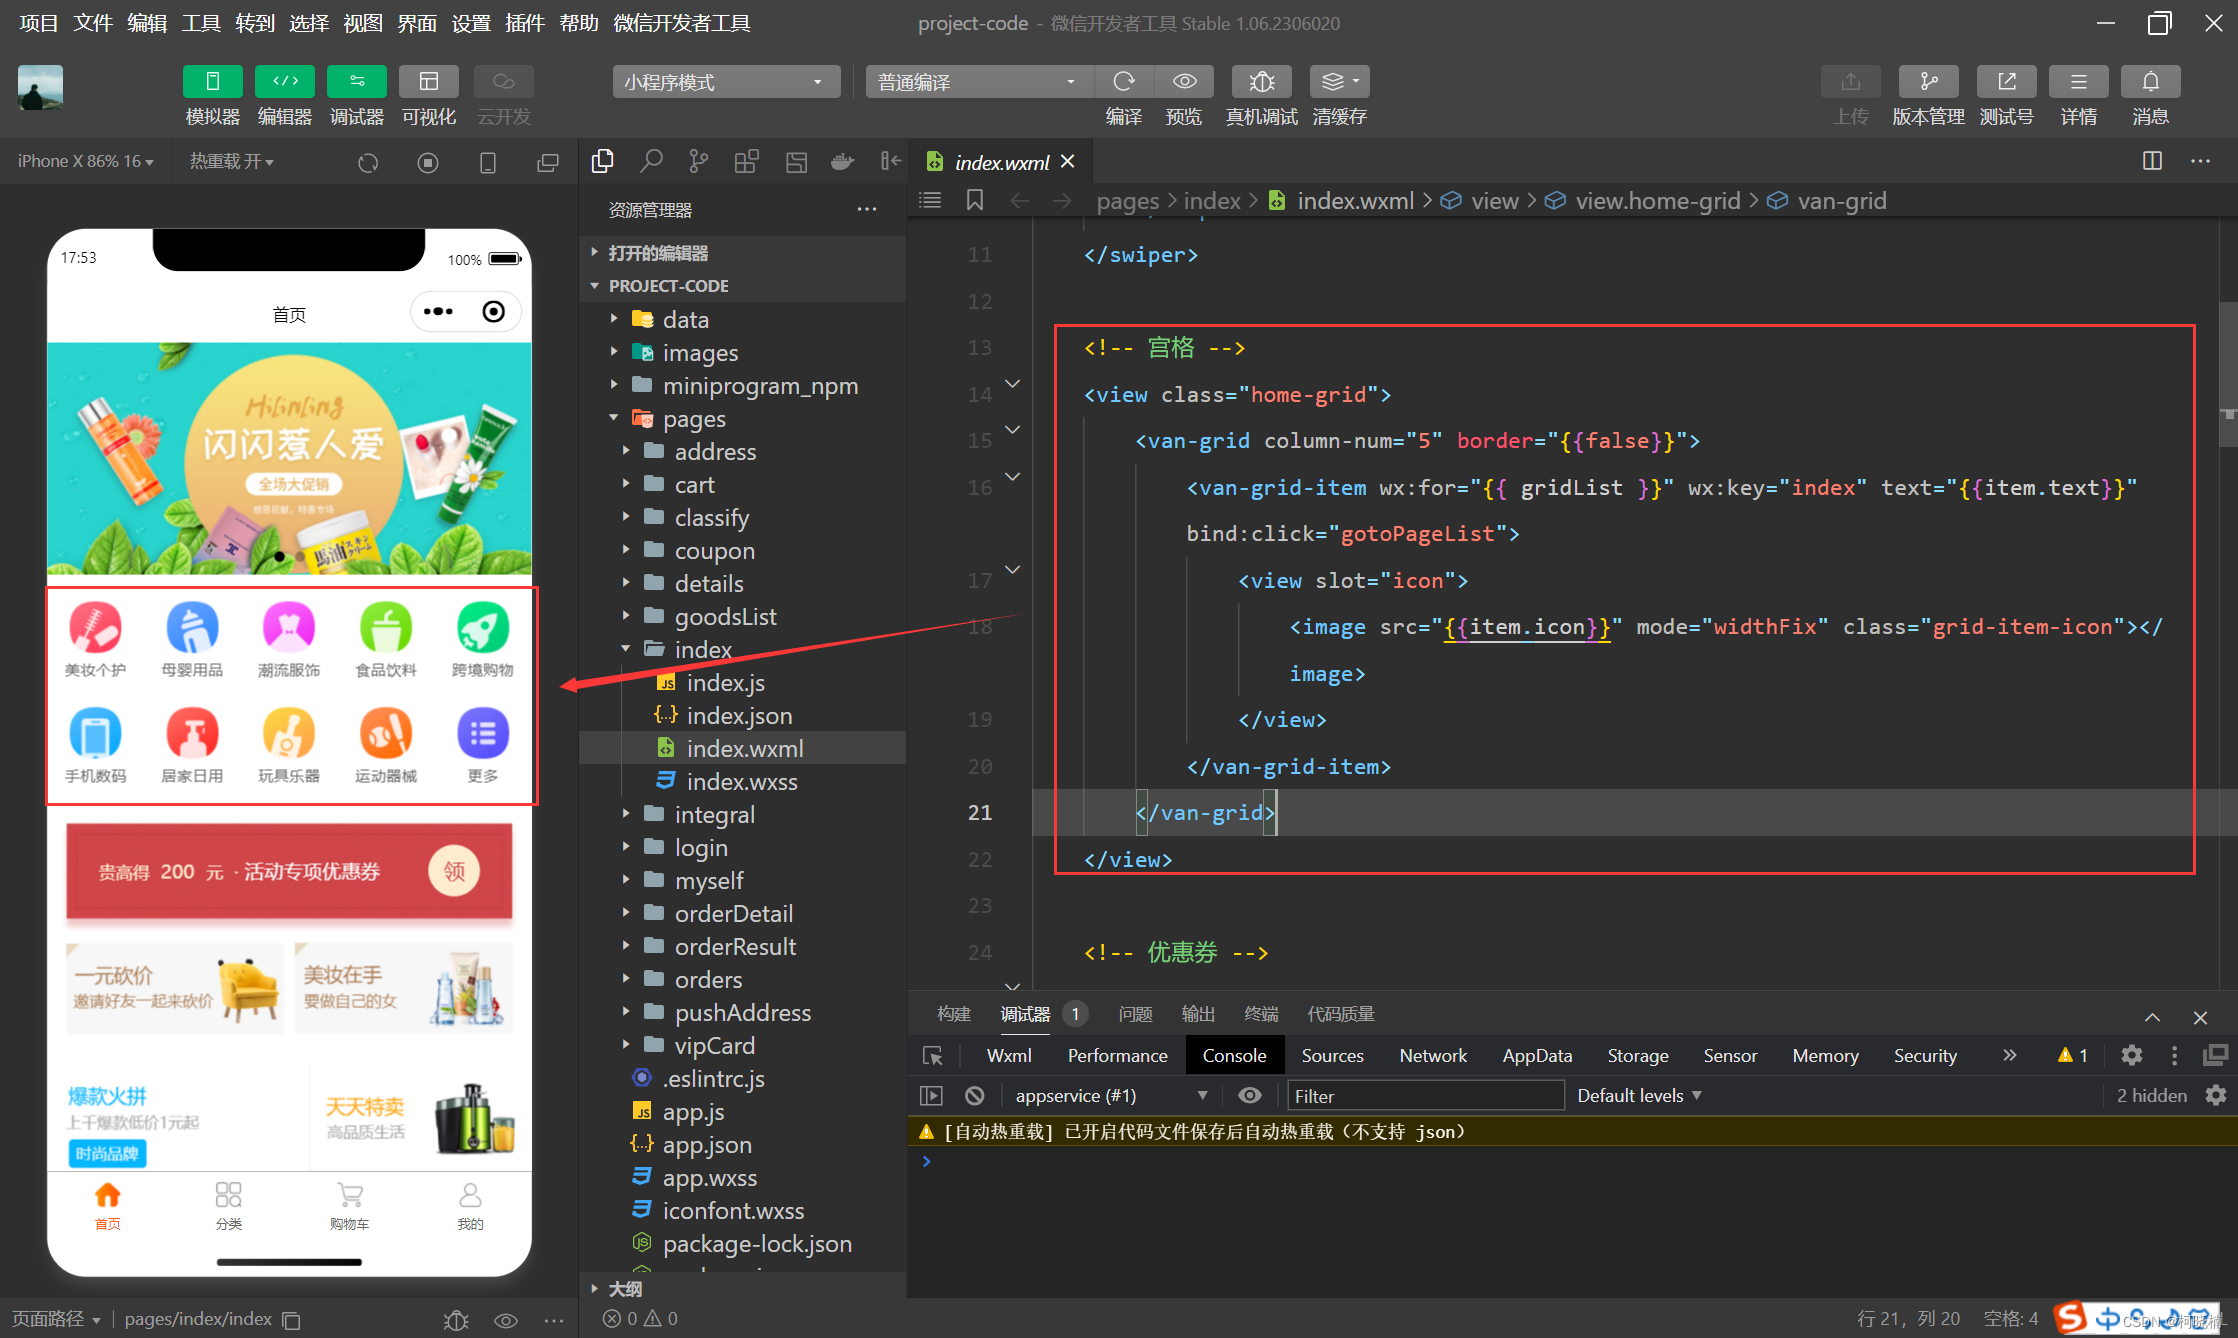
A carousel image is used as the header banner advertisement on the home page. This approach is a very common home page layout method. The carousel effect in the WeChat applet mainly uses native components <swiper>.
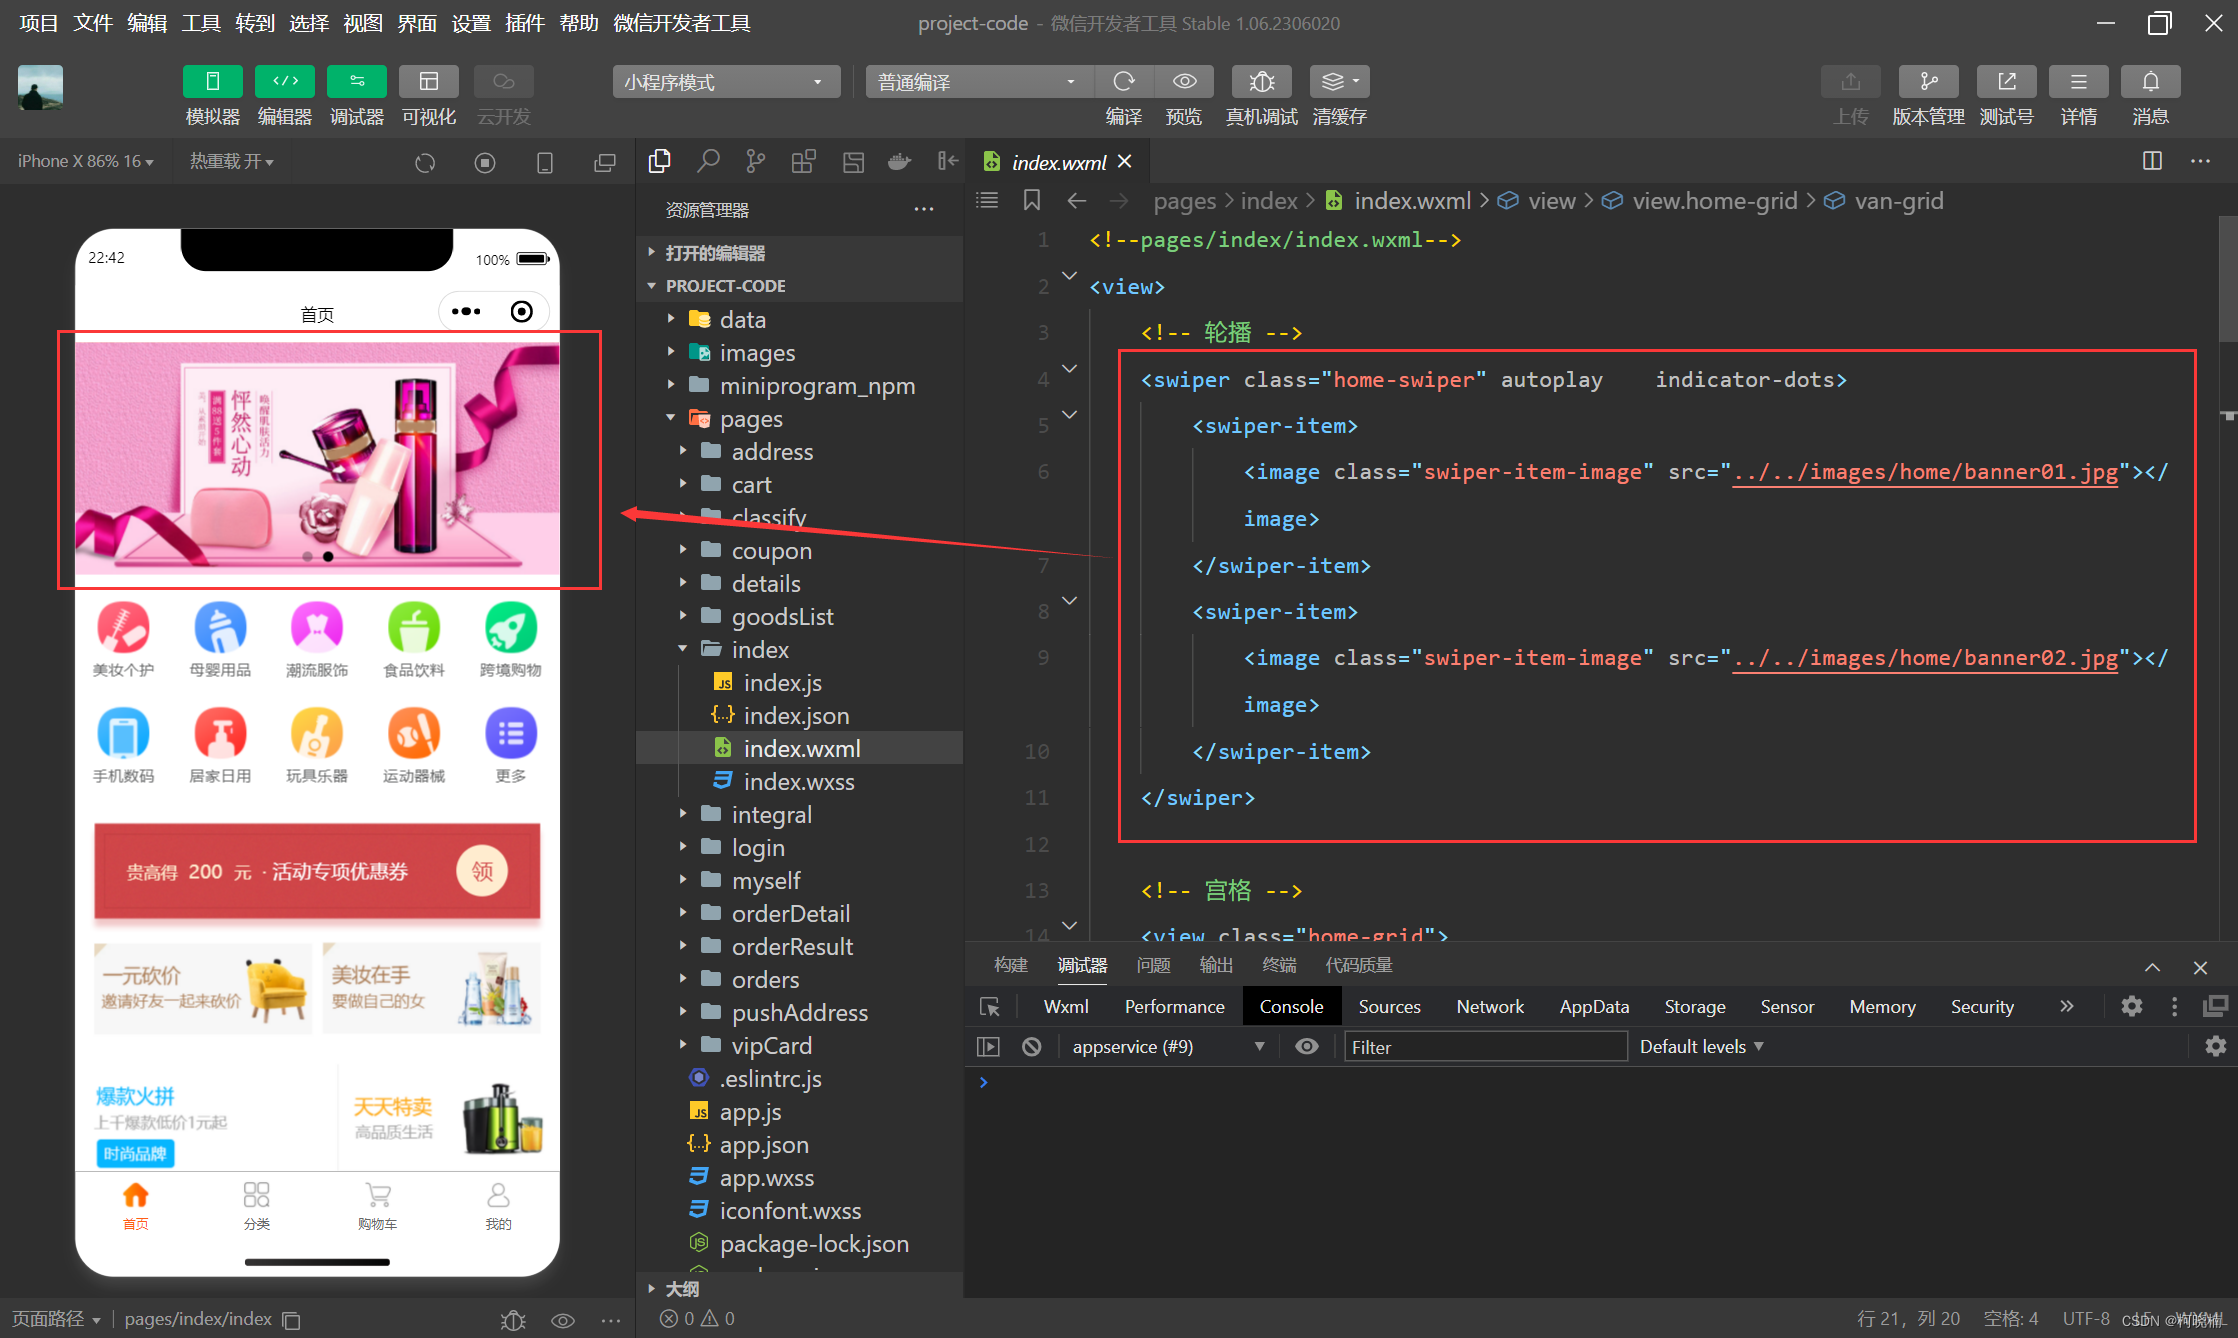
A grid layout is used below the carousel. The most common way to write a grid layout is to use a CSS grid. The grid in this project uses the grid <van-grid>component of the vant ui component library.
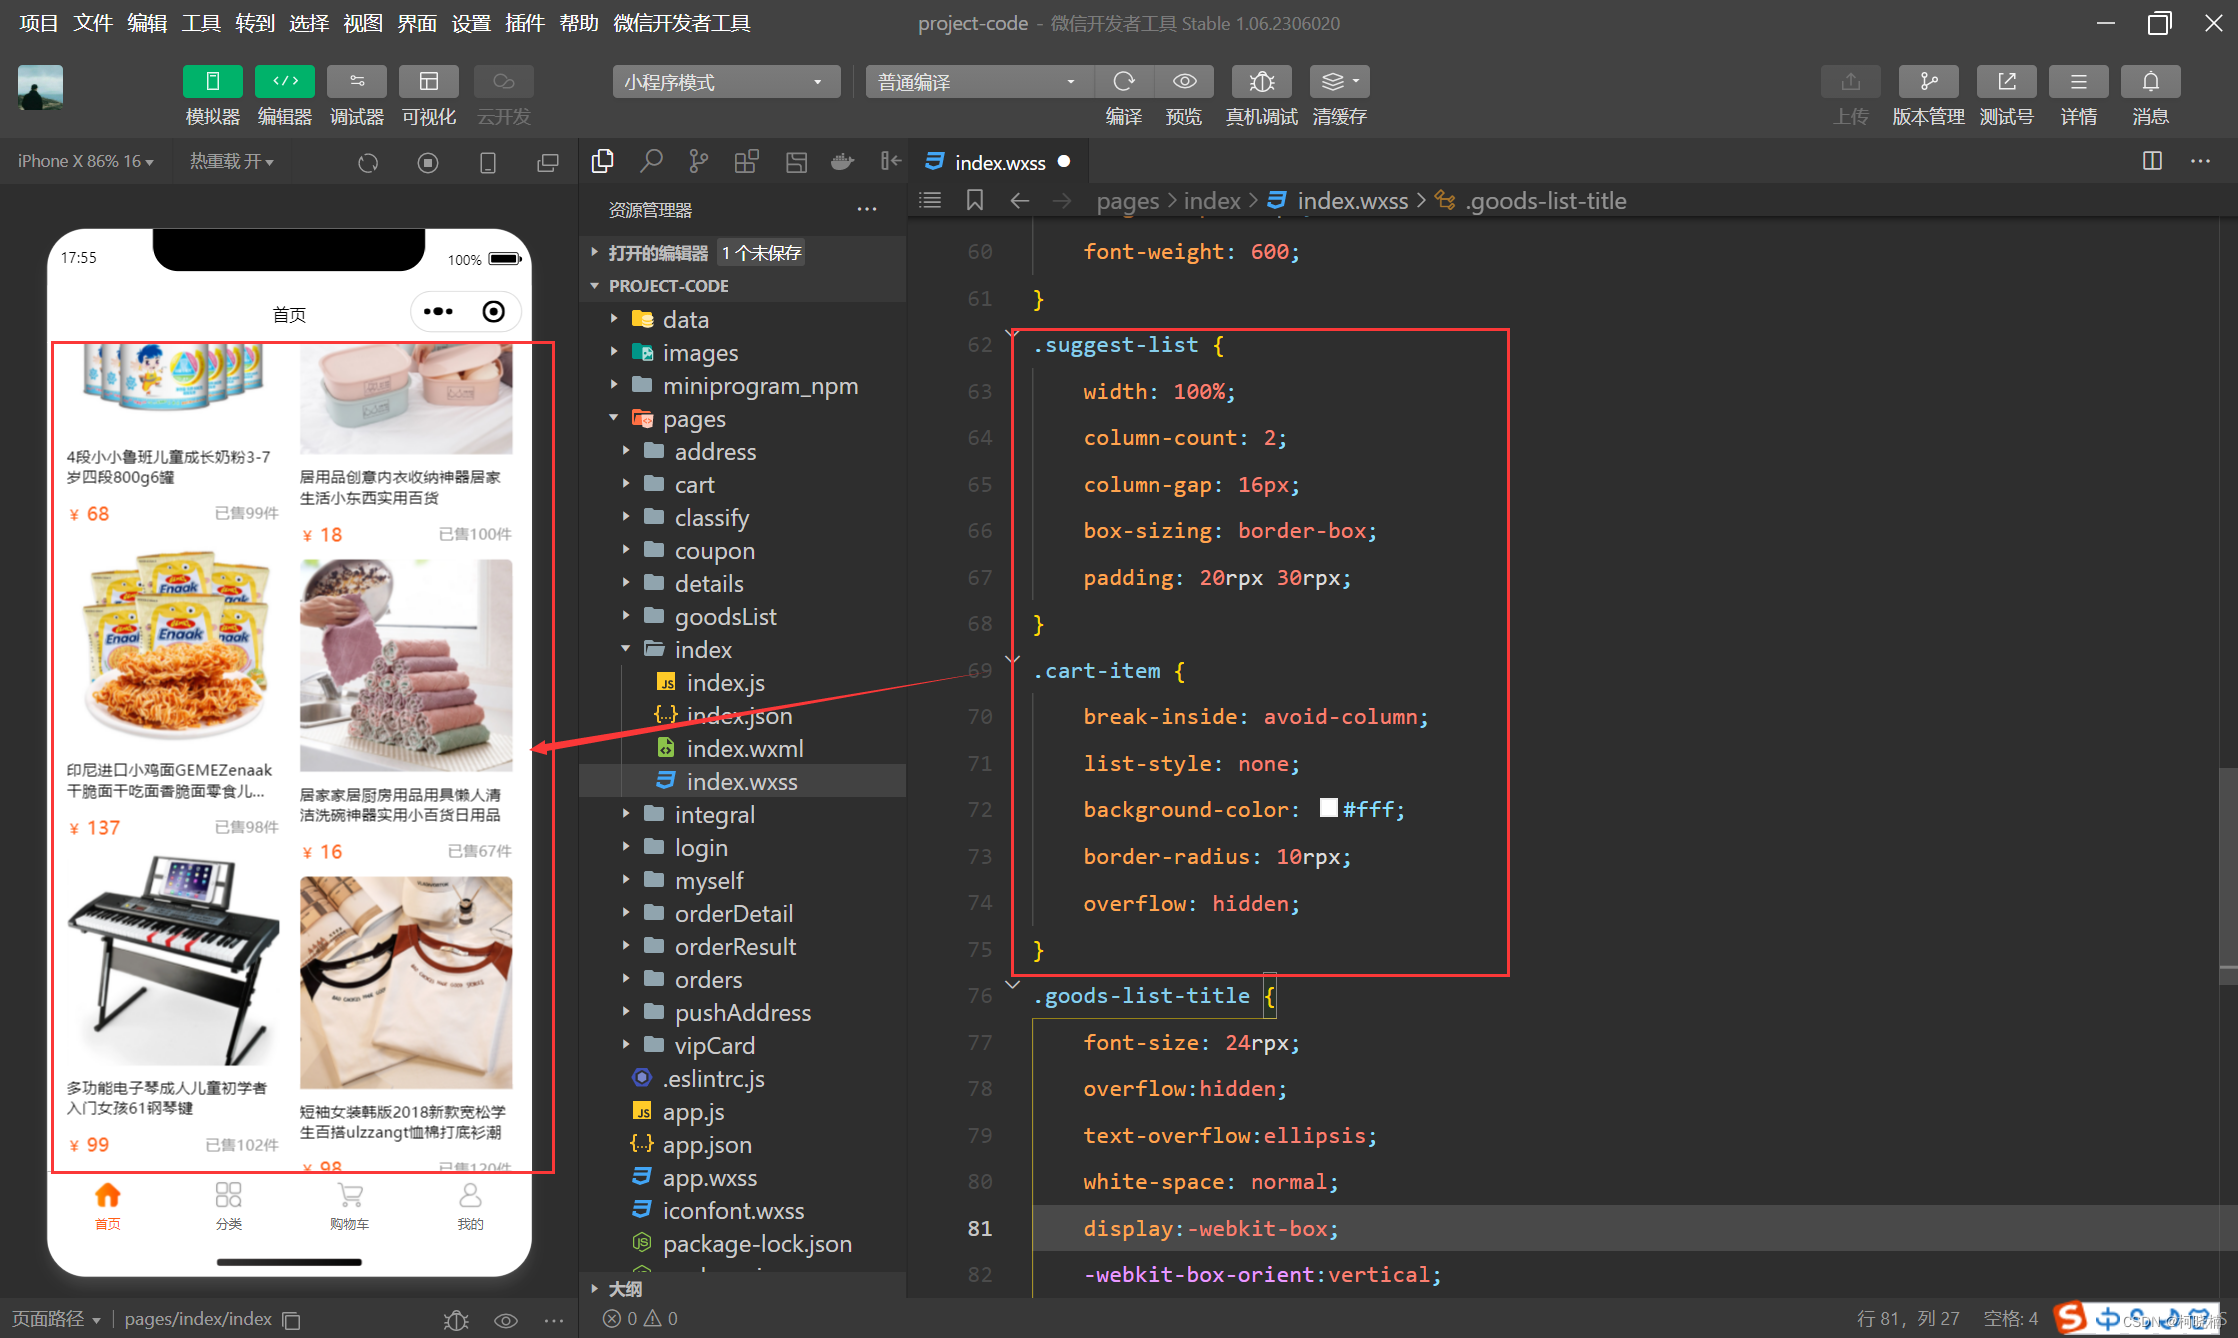
In the homepage layout, in addition to advertising space banners and grids, the most common one is to design a list of products you may like at the bottom. In the project, a vertical product card with a waterfall flow layout is used. Here, a flexflexible box layout is used to implement the waterfall. flow effect.
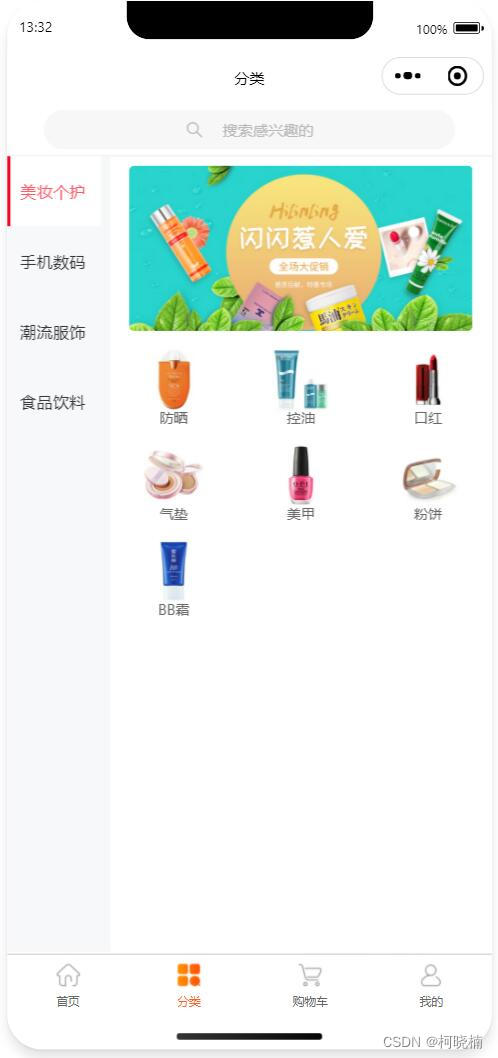
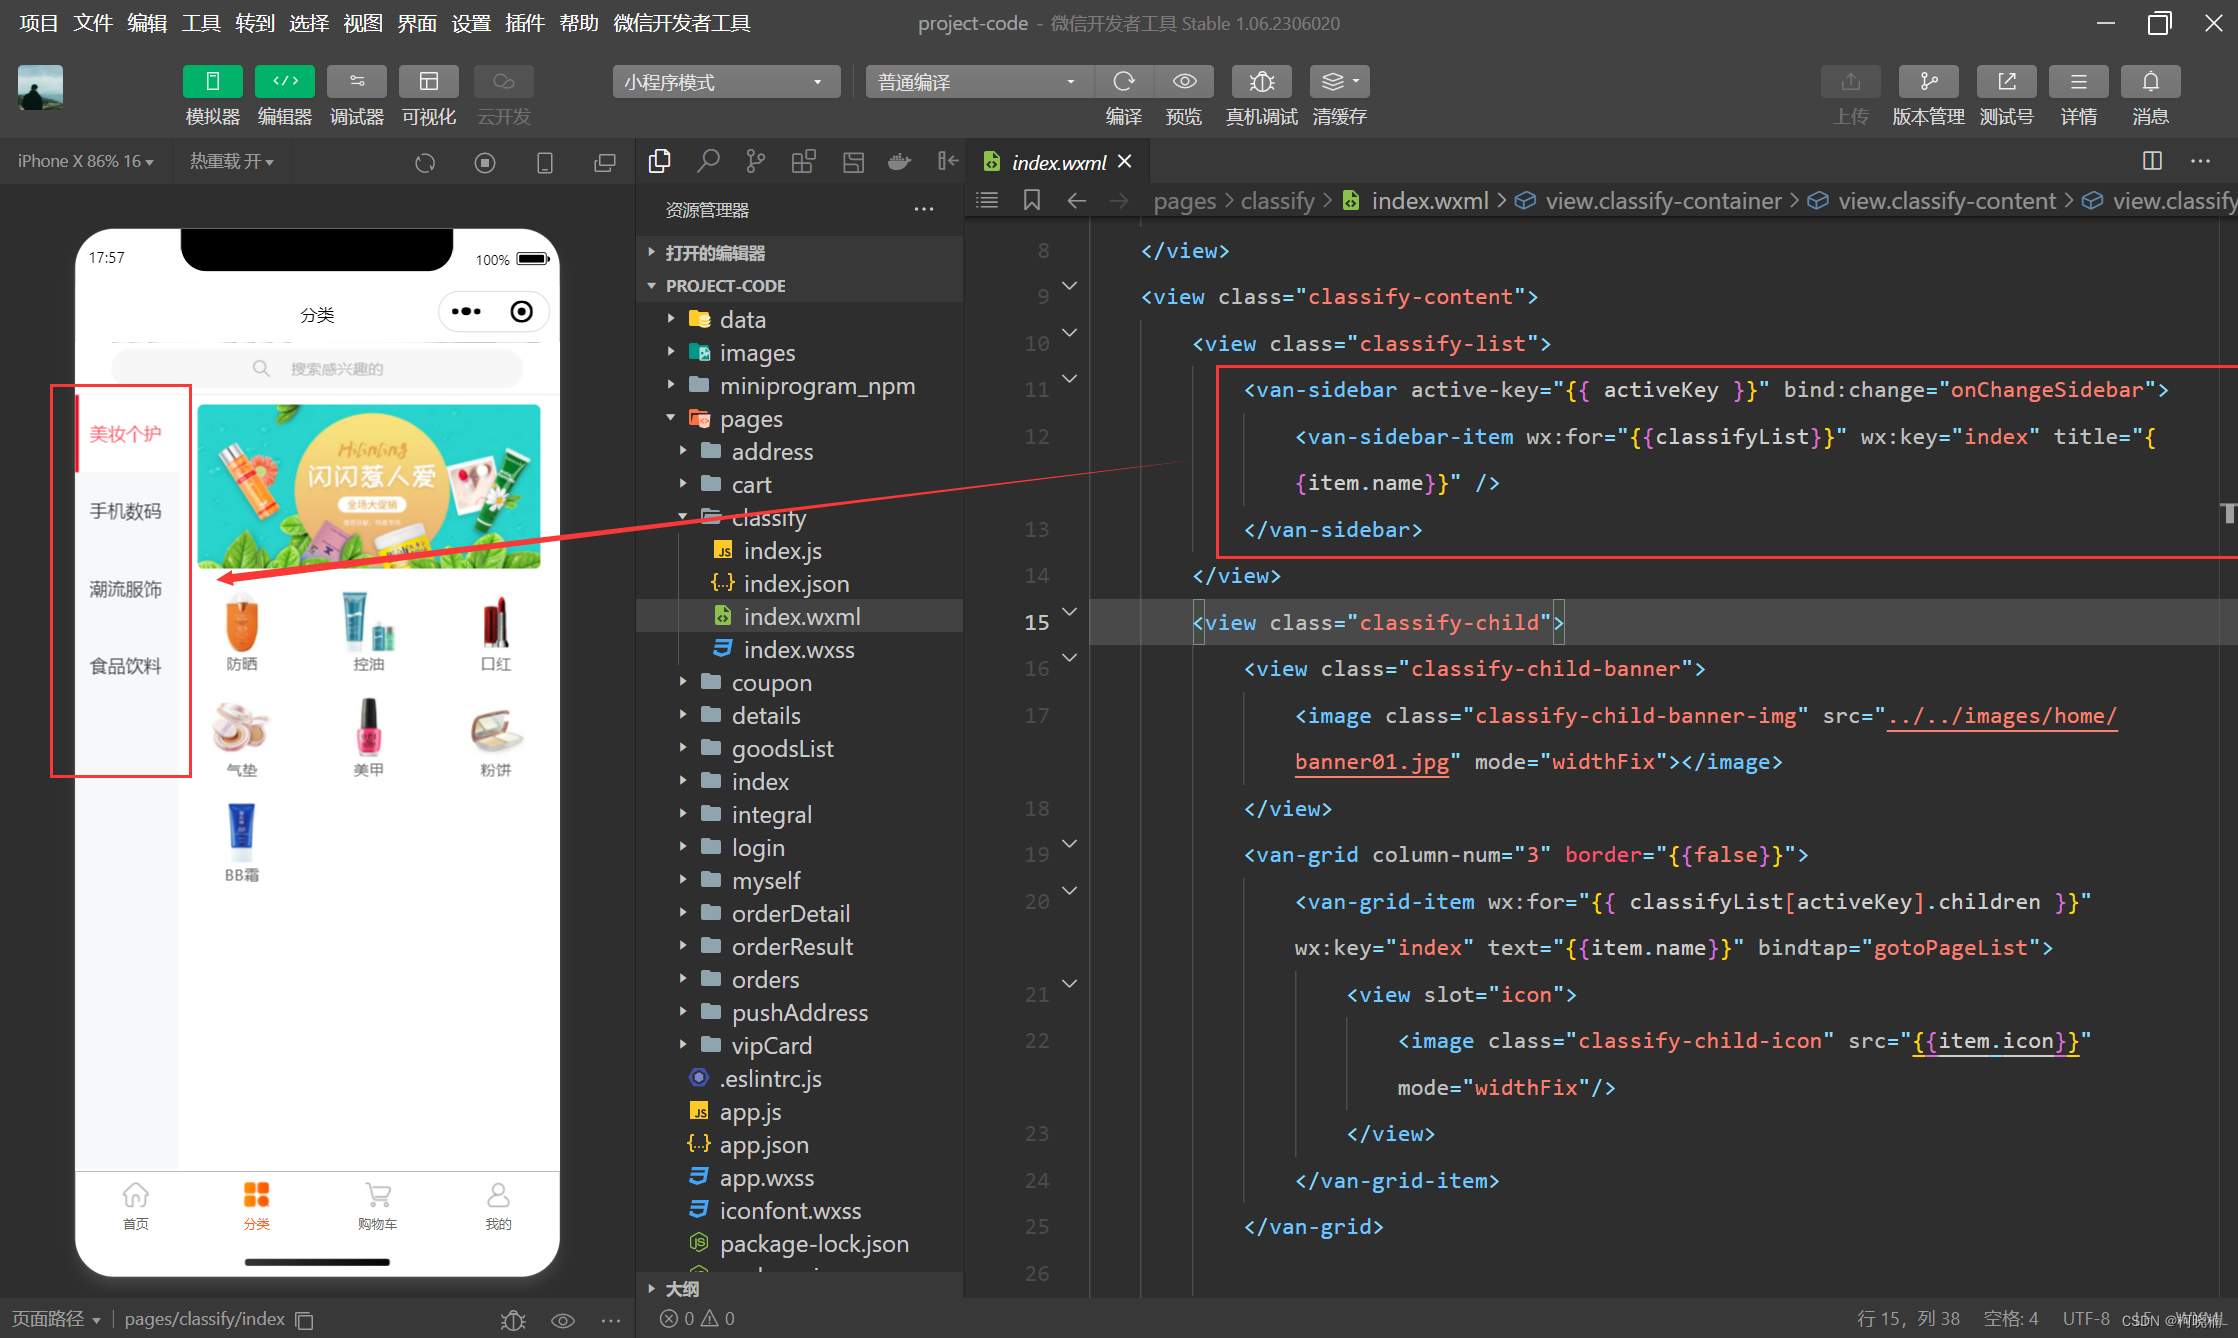
2.2 Product Category Page
The sidebar navigation of the product category page uses <van-sidebar>components in vant ui. The secondary navigation on the right uses a grid layout. When the side navigation on the left is switched, the right side can be switched accordingly.
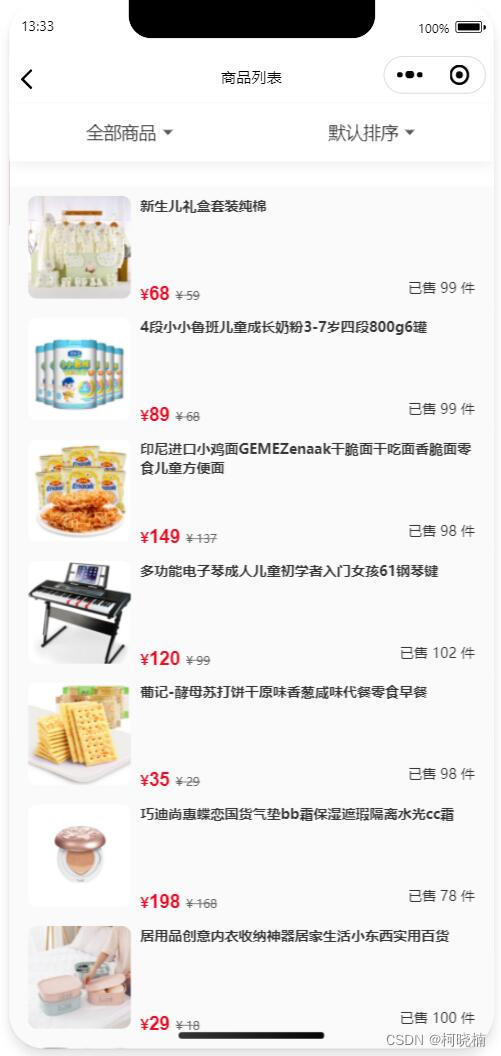
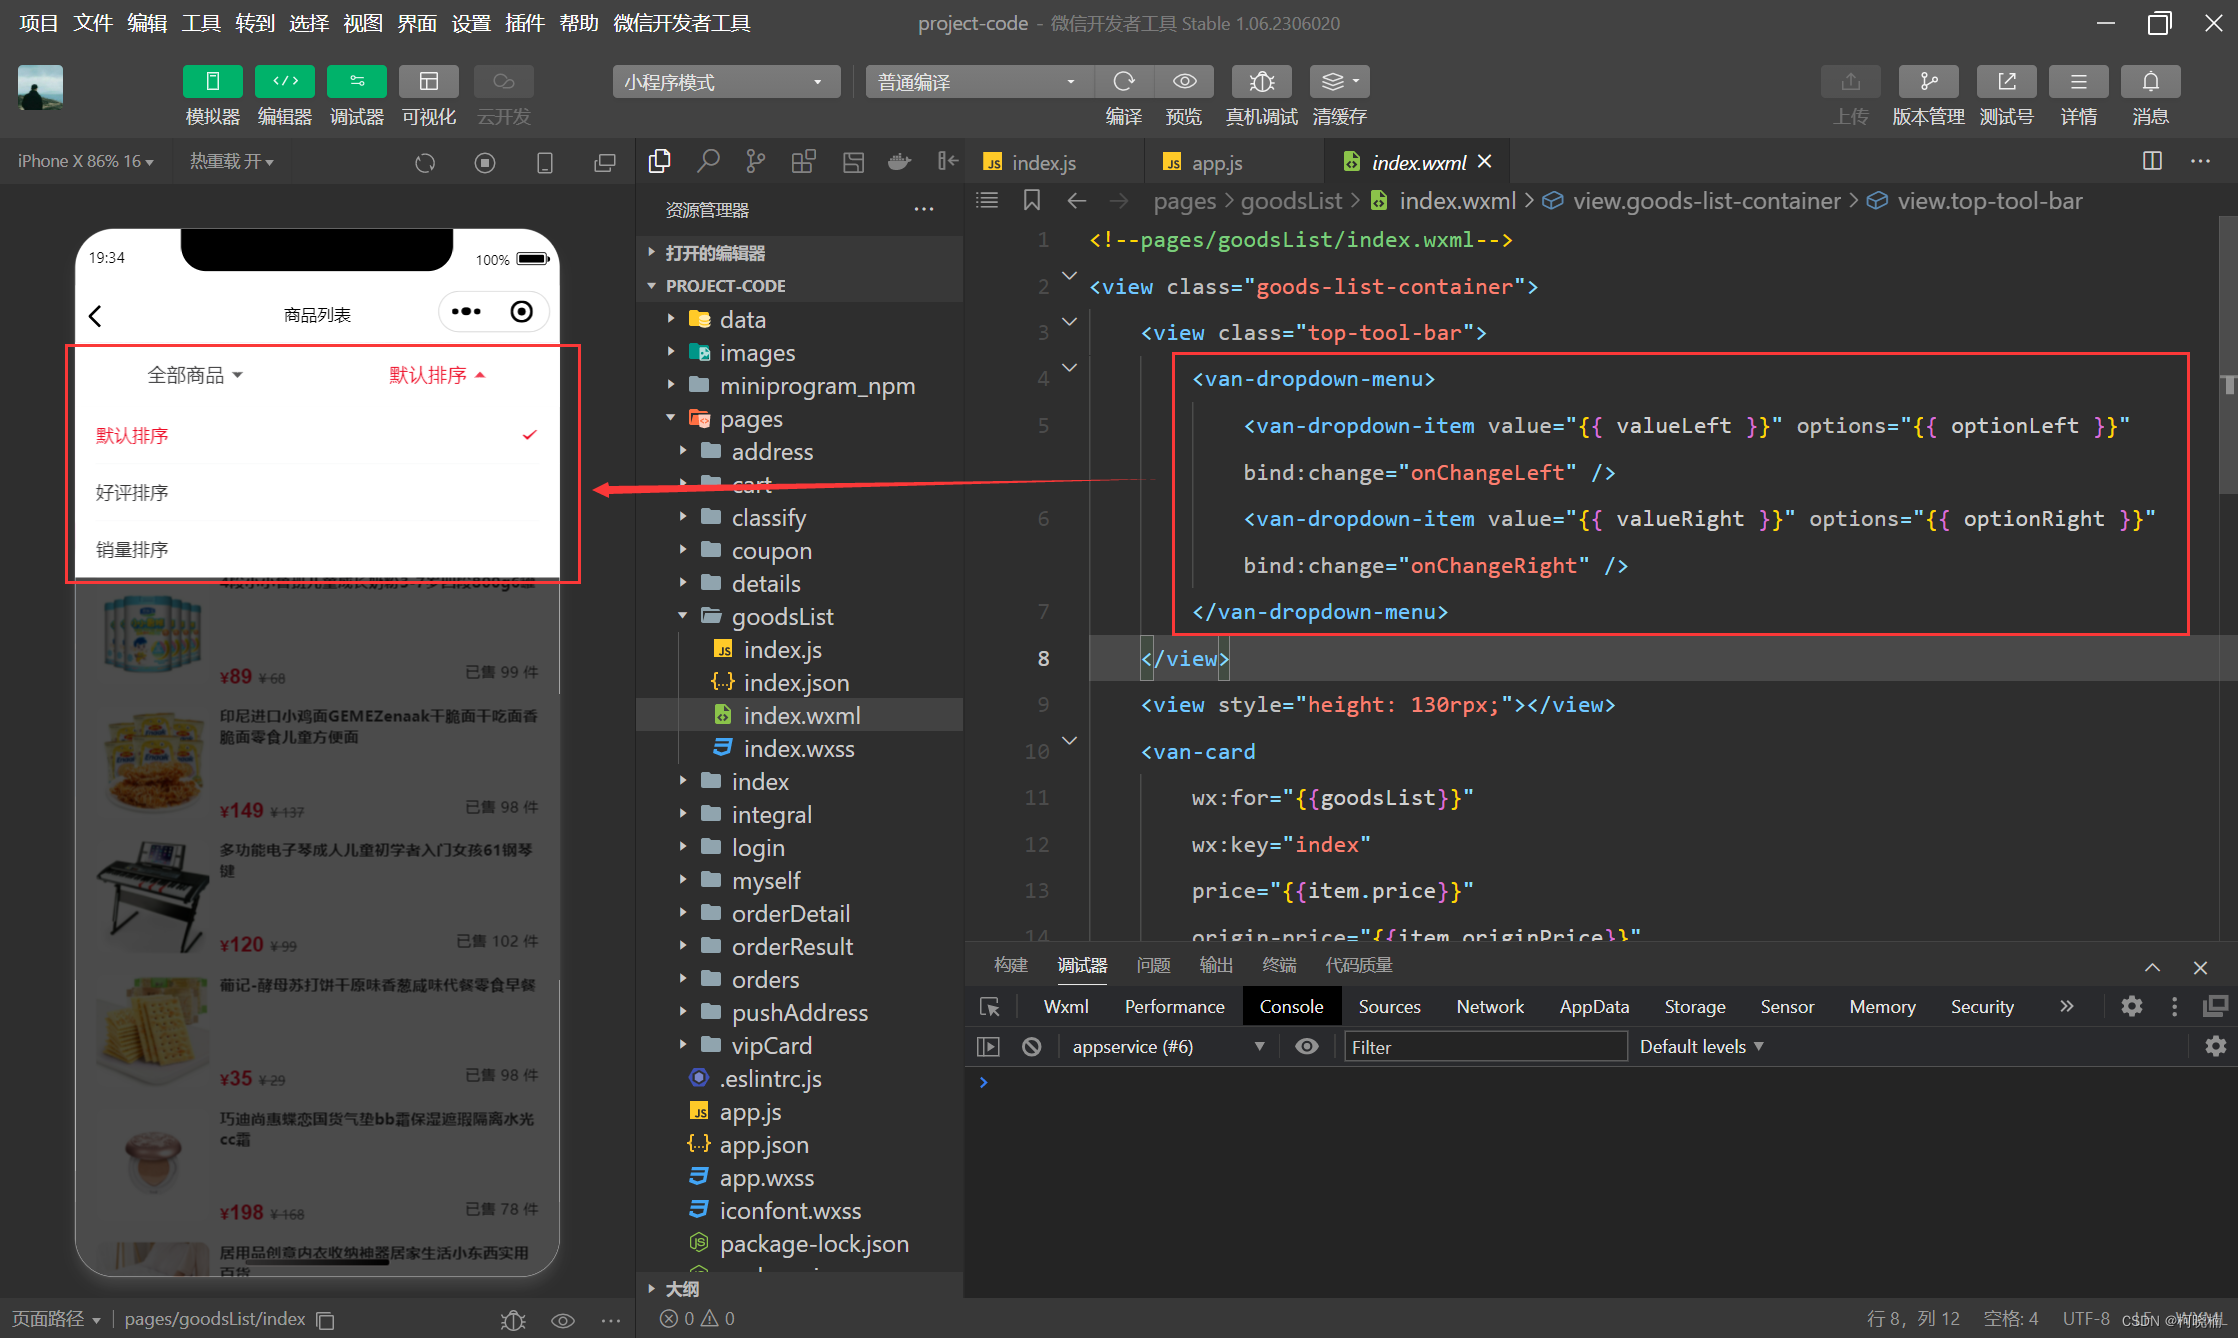
2.3 Product list page
The product list page uses <van-dropdown-menu>the drop-down menu component of vant ui to realize the sorting and filtering operations of the product list. The effect is as shown below.

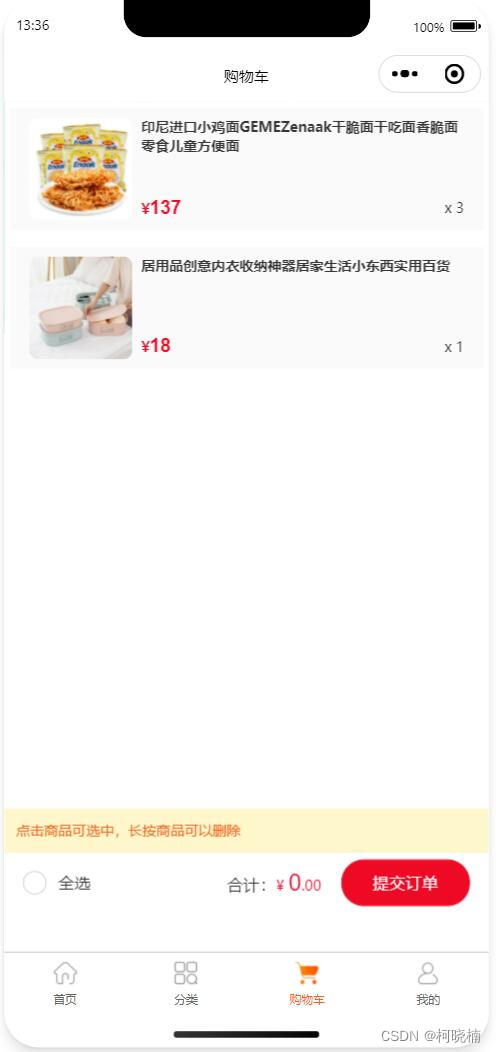
2.4 Shopping cart page
There is some business logic in the shopping cart page, that is, there are three states:
In the first state, the user is not logged in, and the effect is as shown below.

In the second state, the user is logged in and has not added products to the shopping cart. The effect is as shown below.

In the third state, the user is logged in and has added products to the shopping cart. The effect is as shown below.

The business logic of the shopping cart is also relatively complex in the entire project. It mainly has the following functional sections:
(1) Add a shopping cart, that is, display the number of shopping carts. The effect is as shown below.

(2) Single selection, all selection of products in the shopping cart, and automatic calculation of product prices, the effect is as shown below.

(3) Shopping cart product deletion. When the current shopping cart product card is clicked, it has a selected/unselected effect. Therefore, a special effect of long-pressing the pop-up operation button is designed to delete the shopping cart product card. The effect is as shown below.

(4) Submit an order for shopping cart items. This function mainly takes into account how many shopping cart items are currently selected. When jumping to the order page, the selected items must be calculated. The effect is as shown in the thumbnail.

The total price on the order details page is different from the total price on the shopping cart page because shipping charges need to be added to the order page. The total price on the order page is the sum of the total price of the product + shipping charges.
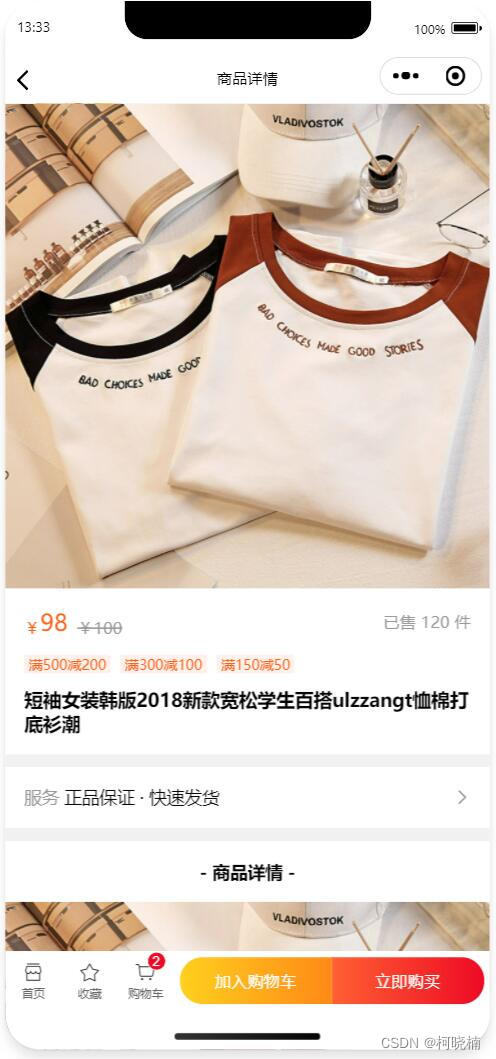
2.5 Order details page
There are two entrances to the order details page. One is from the product details page. Click the purchase button directly to enter the order details page. The effect is as shown below.
Another entrance is to select multiple products from the shopping cart page to submit an order at the same time, and enter the order details page. The effect is as shown below.

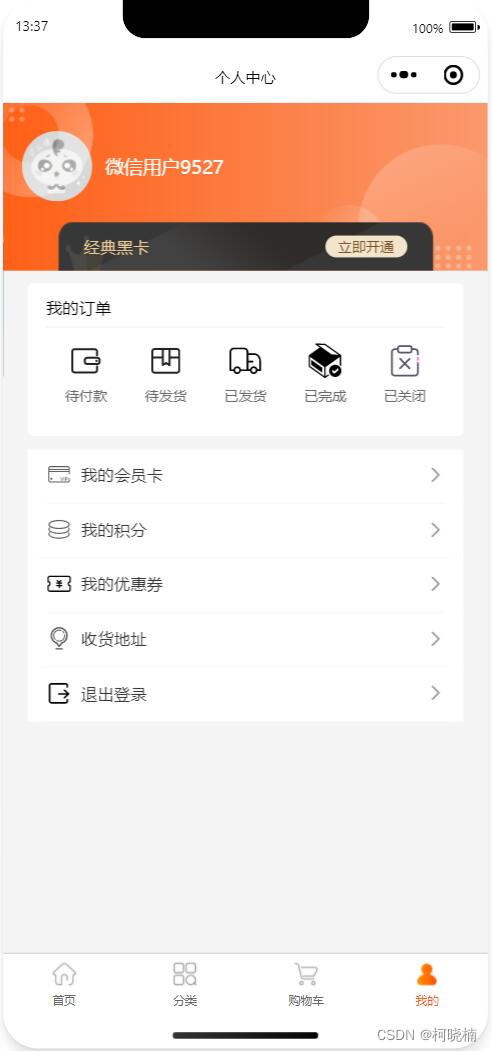
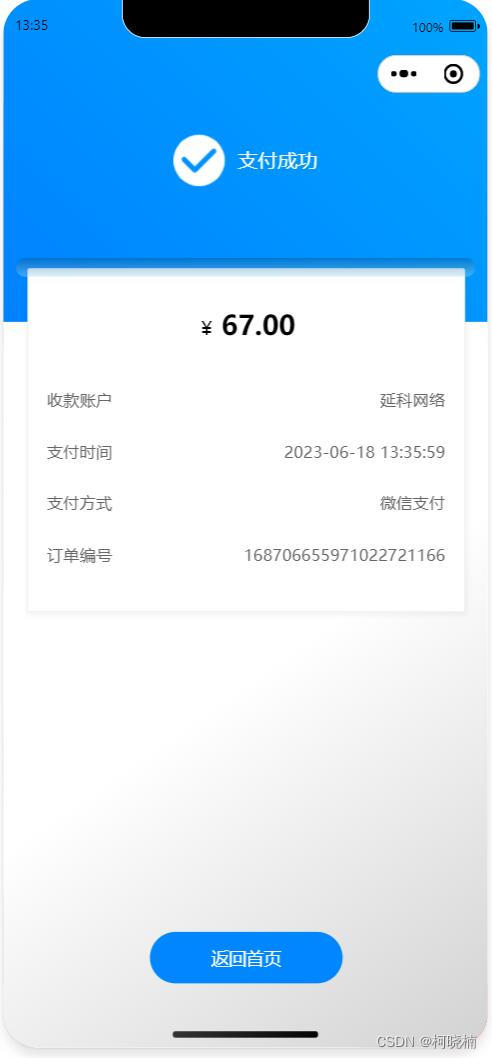
2.6 Order list page
For orders that have been paid, users need to view them in the order list in the personal center. The effect is as shown below.

If the current user is not logged in, you need to log in first before you can view the order list. The effect is as shown below.

2.7 Shipping address
When placing an order, users need to select their own shipping address. This requires users to add their own information in the shipping address management in the personal center in advance. The effect is as shown below.
When editing the user's delivery address, there are two business logics that need to be processed. One is form verification. If the user does not fill in the complete information, it cannot be submitted. The second is the data of provinces, cities, counties and districts across the country. You can use area-datathe data provided by the vant ui component library. Plug-in to realize the loading of national city information data.
For more page effects, you can download the source code and try it yourself
3. Core function code
3.1 WeChat authorized login
To log in within the WeChat applet, the safest way is wx.login()to get the code value through the method, and then submit the code to the server of the project in exchange for openId, sessionKey, and unionId. The specific operation is divided into two steps:
first Step: Click the login button to get the code
<!-- wxml文件 -->
<view bindtap="onLogin">微信授权登录</view>
// js文件
Page({


	onLogin() {


		wx.login({


            success: res => {


                // 发送 res.code 到项目的服务端,换取 openId, sessionKey, unionId
            }
       })
	}
})
Request the following URL on the server side to obtain the values of openId, sessionKey, and unionId.
https://api.weixin.qq.com/sns/jscode2session?appid=${appid}&secret=${secret}&js_code=${code}&grant_type=authorization_code
The parameter appid is the AppID of the current mini program, secret is the AppSecret (mini program key) of the current WeChat mini program, and code is the wx.login()code obtained through the method.
Since this project example is a pure front-end code example of the WeChat applet and does not involve the server, WeChat authorized login is not really implemented in the project. WeChat login is simulated through the front-end logic and a virtual openId is generated to complete the login result verification. .
3.2 WeChat payment within the mini program
The prerequisite for implementing WeChat payment in the WeChat applet is that you must have a WeChat merchant account. This project is not a pure front-end case and does not implement WeChat online payment. The WeChat payment code is posted below for your reference.
The WeChat payment API has been provided in the WeChat applet development documentation. To implement WeChat payment in the applet, it is recommended to use cloud functions. For example, create paya cloud function named and the sample code is as follows:
// 云函数入口文件
const cloud = require('wx-server-sdk')

cloud.init({

     env: cloud.DYNAMIC_CURRENT_ENV }) // 使用当前云环境

// 云函数入口函数
exports.main = async (event, context) => {


    const res = await cloud.cloudPay.unifiedOrder({


        "body": event.goodName, //商品名称 或 商品描述
        "outTradeNo": event.outTradeNoTo, //订单号
        "spbillCreateIp": "127.0.0.1", //回调地址
        "subMchId": "", // 微信支付商户号
        "totalFee": event.totalFee, //商品支付金额 单位(分) 100代表一块钱
        "envId": "", //云开发环境ID
        "functionName": "pay_cb" //回调的云函数
      })
      return res
}
In the payment event function in the mini program, call the cloud function pay. The sample code is as follows:
<!-- wxml文件 -->
<view bindtap="onPay">支付</view>
// js文件
Page({


	onPay() {


		const that = this
        const outTradeNoTo = `${

      Date.now()}${

      Math.floor(Math.random()*(99999-10000+1)+10000)}`
        // 调用云函数
        wx.cloud.callFunction({


            name: 'pay',
            data: {


                goodName: "xxxx商品",   // 商品名称 或 商品描述
                totalFee: 990,     // 需要支付的金额,单位分
                outTradeNoTo: outTradeNoTo   // 生成的订单号
            },
            success: res => {


              const payment = res.result.payment
              wx.requestPayment({


                ...payment,
                success (res) {


                	// 支付成功
                    console.log('支付成功', res)
                },
                fail (err) {


                	// 支付失败
                    console.error('支付失败', res)
                }
              })
            },
            fail: console.error,
          })
	}
})
4. Project features
This project restores as many requirements as possible for commercial e-commerce mini programs, including homepage advertising, product waterfall flow layout, product filtering and sorting, product purchase, product collection, order settlement, order tracking, delivery address management, etc. a core function.
In the project source code, codes such as WeChat online payment and WeChat authorized login are also implemented.
5. Project source code download
Respect originality, pay for downloading, and support remote technical guidance
Source code download address: https://download.csdn.net/download/p445098355/87928187
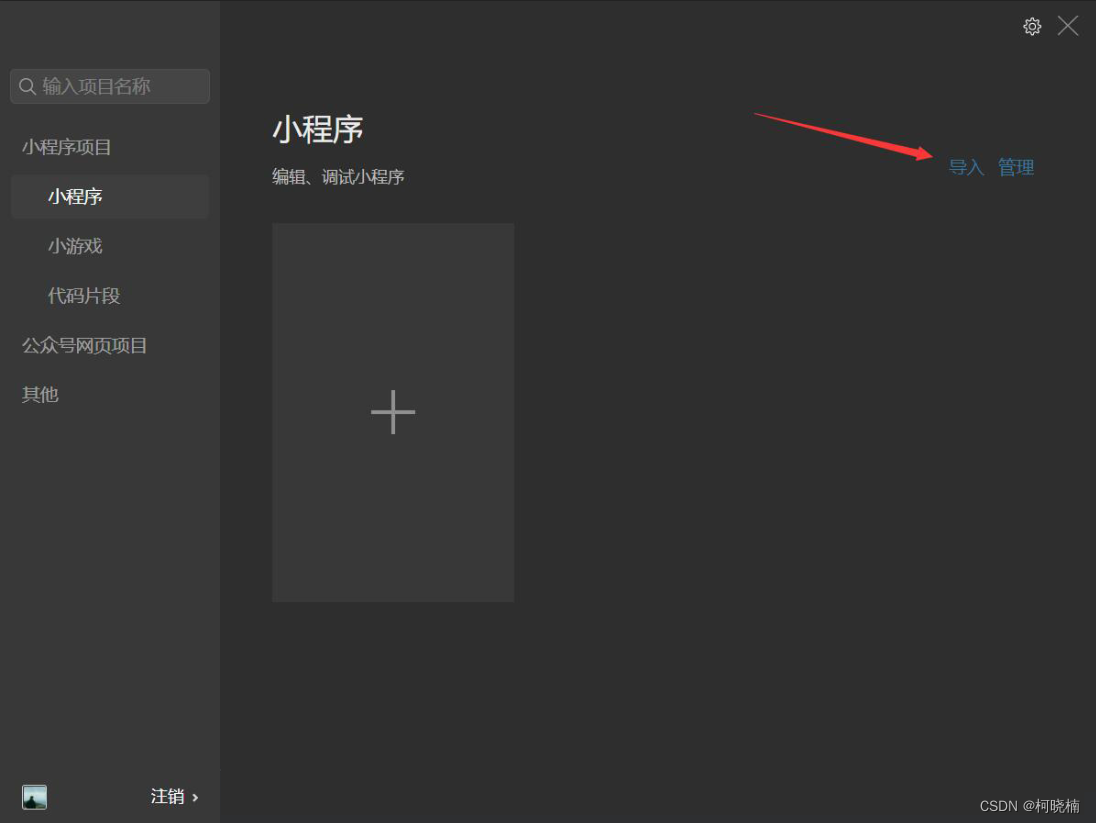
Project import
Open the WeChat Developer Tools, click Import in the mini program project panel , select the folder root directory of the current project in the file selection window, and click OK.
Follow the author and regularly push the latest mini program project cases!