This article describes how to convert a 3D model into a 2D pattern for simulation and sewing.
Start by downloading the latest version of the plugin . Save the archive somewhere on your computer. In Blender, go to Edit > ⚙️ Preferences > Add-ons > Install... and select the .zip file. Make sure to enable the add-on after installation.
Recommended NSDT tools : Three.js AI texture development kit - YOLO synthetic data generator - GLTF/GLB online editing - 3D model format online conversion - programmable 3D scene editor - REVIT export 3D model plug-in - 3D model semantic search engine
1. Prepare the grid
The input mesh should meet some requirements. It doesn't have to be perfect, but it should be clean. It should be faceted, make sure the normals are correct, and shouldn't be too dense.

2. Add seams
Now it's time to add the seams. As you may have guessed, the "sewing patterns" created by this plugin are actually just UV layouts, but in 3D. Therefore, in order to get a good sewing pattern, we need a good UV layout.
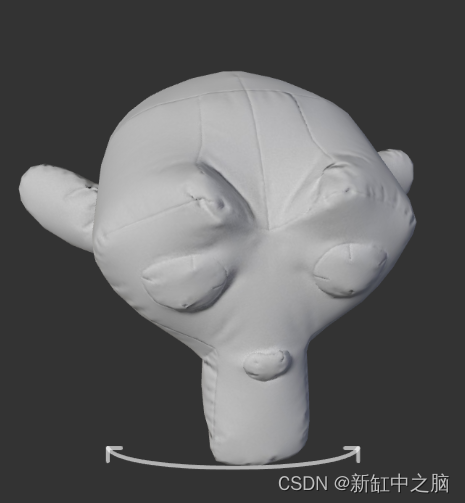
Continue adding seams around the mesh where you see fit. Some seams wrap existing geometry nicely, as is the case in Suzanne's example shown here:

This is not always the case, sometimes you need to make additional cuts using tools like Knife K or Connect vertex path J. This usually leaves you with bad geometry, as this cut creates tiny edges and triangles.
You can use the Edge > Clean Cut operator included in this add-on. Solve this problem cleanly. Select the edge strand you want to clean (usually the section you just cut) and run the operation. Increase the Minimum Side Length until all the small triangles disappear. If the side chain is bent, you can loosen it. You can also relax adjacent vertices.
Expand the model as usual. It is important that the seams always match the UV! This is because the seam is used for cutting and the UV is used for unfolding! You can see how well you're stretching by imagining stretching.
UV 编辑器 > 侧边栏 > 视图 > 叠加 > 拉伸 > 类型:区域
If it appears too green in places, it will put too much tension on the fabric. Based on the results below, where would you add the seams?

3. Expand
Now comes the fun part. If you're happy with the results, it's time to expand.
It's best to apply object proportions at this point!
Objects > Seam to Sewing Pattern > Seam to Sewing Pattern
You can see several options.
- Unwrap: You can choose to perform unwrap before executing the operator, or keep existing UVs.
- Remesh: Check this option if you want to remesh each island after expansion. Also, this is a good idea for cloth simulation. The target number of triangles refers to the number of output triangles. It won't be exactly that number, but it's close.
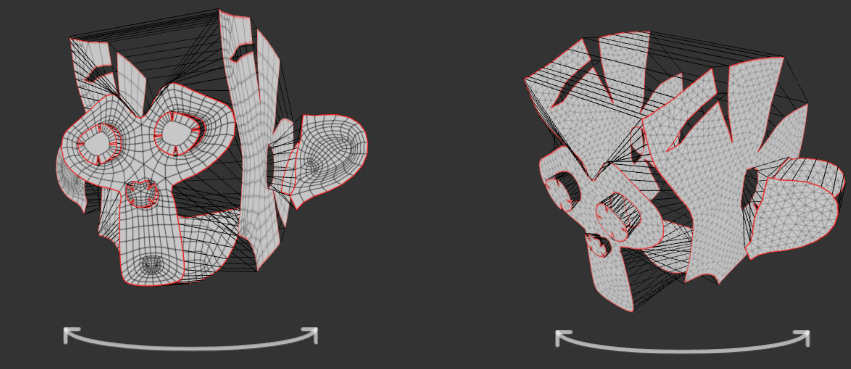
Notice the edges that appear between the islands. These will be used for sewing later!
4. Cloth simulation
对象 > 缝纫图案接缝 > 快速布料模拟Can help you set up a simple cloth simulation.
Cloth simulation can be finicky. There are a lot of settings to adjust, but I'll highlight a few important ones:
形状 > 缝纫和最大缝纫力: Enables sewing to collapse the empty edges between islands.压力和目标体积: Enables pressure to "inflate" objects. In addition, target volumes can be used. Before unfolding, the original volume of the mesh is stored对象属性>自定义属性>S2S_InitalVolumebelow . Copy/paste the value.物理特性 > 空气粘度: If the fabric seams are sagging, they can be increased.
If the object has features that you don't want to "pop," set the Pressure key to a higher value at frame 0 and to a more reasonable amount later.
Below you can see the results of the cloth simulation for 20.000 triangles:
5. Export layout
If you are just interested in simulation, you can stop here and enjoy your model. If you want to hold the model in your hands, let's go ahead!
We can 对象>缝纫图案接缝>导出缝纫图案export sewing patterns using .
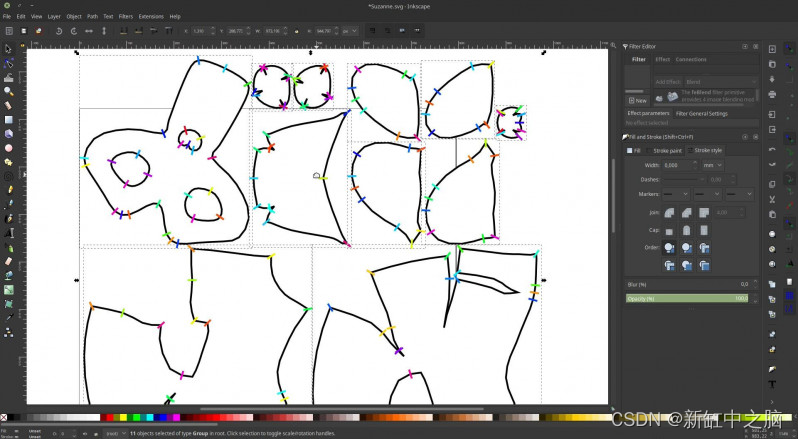
This will generate a .svg file with dimensions in millimeters that should correspond to the sides of the 3D model:
Please note: this operation should be called after expanding the grid!
To help you align your pieces while sewing, marks are also exported. Here's how they work:
Each sewing line marked as a seam (an empty edge bridging a mesh island) will result in a mark. You can add these manually or have the plugin generate them for you by setting the Alignment Marks option to Auto-detect + seams.
I then used Inkscape to place my island on an A4 page.
6. Sewing
I used some old cotton curtains as a test.

If you have a sewing machine, you can use it to sew larger pieces. Smaller parts must be sewn by hand. On the left is what it looks like after sewing is complete. I left a small hole in the back for filling and turned it over. On the right is what the piece looks like when standing upside down.
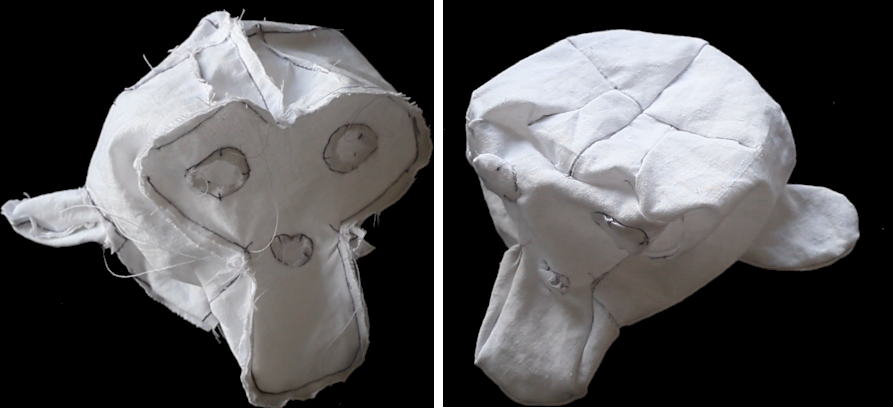
All that's left is to fill the piece with some whole and sew it up.
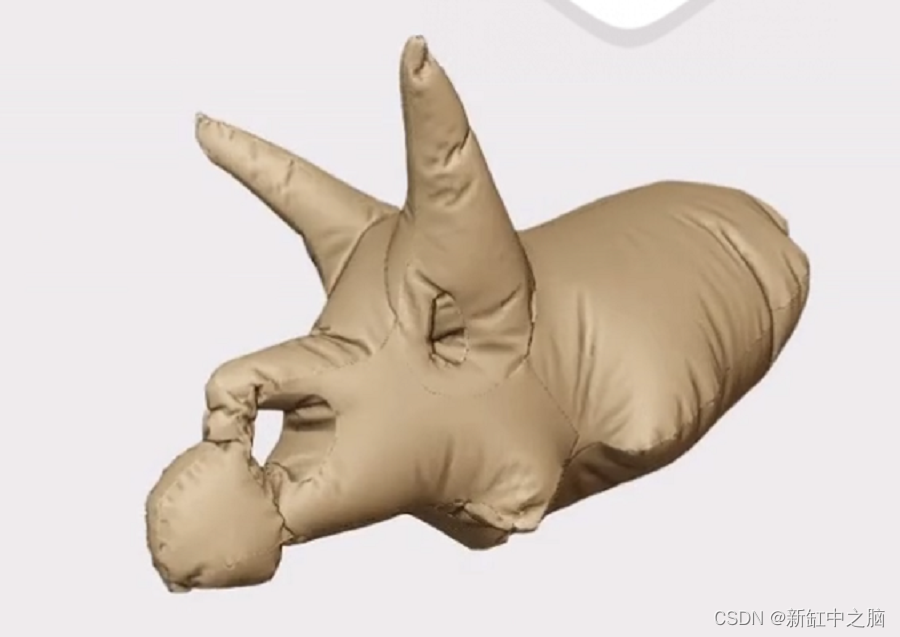
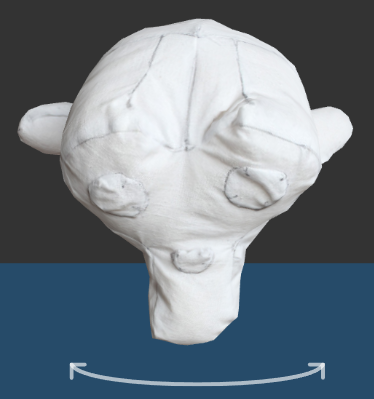
Below is a 3D scan of the finished product. Looks a lot like a simulation, right?
have fun!
Original link: 3D model exhibition 2D version-BimAnt