1. Understanding Canvas
Canvas is an HTML5 element used to draw 2D or 3D graphics on web pages. It allows the creation and manipulation of graphics on web pages using JavaScript. The main function of Canvas is drawing, but it can also be used to implement other functions, such as animation and interactive games.
Using Canvas, you can create a variety of shapes, paths, text, and images. You can use JavaScript to draw basic shapes such as straight lines, rectangles, circles, and arcs. By using the path API, complex shapes and paths can be created. At the same time, you can also add images to the Canvas and process them through operations such as scaling, rotating, and moving.
Canvas can also be used to create animation effects. Canvas elements can be modified and updated frame by frame using JavaScript to create animation effects. You can use the setTimeout() or requestAnimationFrame() function to control the frame rate and time of the animation.
In addition to drawing and animation, Canvas can also be used to implement interactive games. You can use the Canvas element to detect user input such as mouse and keyboard, and perform corresponding operations based on the user's input to achieve game interactivity.
In short, Canvas is a powerful HTML5 tool that can be used to create various graphics and animation effects and implement interactive web applications.
2. Project introduction
This article project vue3 + ts
3. How to use Canvas
Canvas is a new tag in HTML5, used for drawing graphics, animations, etc. Here is a brief introduction to how to use Canvas.
3.1. Create Canvas element
To create a Canvas element using the <canvas> tag in HTML, you need to specify the width and height of the Canvas, for example:
<canvas id="myCanvas" width="400" height="400"></canvas>
3.2. Obtain Canvas context
In JavaScript, you need to use the getContext() method of the Canvas element to obtain the context object of the Canvas. You can draw the Canvas through the context object, for example:
import { onMounted } from "vue";

// 获取Canvas上下文
onMounted(()=>{
  let canvas: any = document.getElementById("myCanvas");
  let ctx = canvas.getContext("2d");
})
4. Draw basic graphics
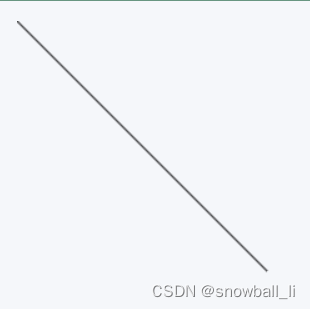
4.1. Draw a straight line
<template>
  <div class="contmian">
    <canvas id="myCanvas" width="400" height="400"></canvas>
  </div>
</template>
<script setup lang="ts">
import { onMounted } from "vue";
// 获取Canvas上下文
onMounted(()=>{
  let canvas: any = document.getElementById("myCanvas");
  let ctx = canvas.getContext("2d");
  // 绘制一条直线
  ctx.beginPath();
  ctx.moveTo(0, 0); //起点
  ctx.lineTo(200, 200); //终点
  ctx.stroke(); //绘制线条
})

</script>
<style scoped lang="less">
</style>
4.2. Draw a rectangle
<template>
  <div class="contmian">
    <canvas id="myCanvas" width="400" height="400"></canvas>
  </div>
</template>
<script setup lang="ts">
import { onMounted } from "vue";
// 获取Canvas上下文
onMounted(()=>{
  let canvas: any = document.getElementById("myCanvas");
  let ctx = canvas.getContext("2d");
  // 绘制一个矩形
  ctx.beginPath();
  ctx.rect(50, 50, 100, 100); //x轴坐标,y轴坐标,宽度,高度
  ctx.fill(); //填充矩形
})

</script>
<style scoped lang="less">
</style>

4.3. Draw a circle
<template>
  <div class="contmian">
    <canvas id="myCanvas" width="400" height="400"></canvas>
  </div>
</template>
<script setup lang="ts">
import { onMounted } from "vue";
// 获取Canvas上下文
onMounted(()=>{
  let canvas: any = document.getElementById("myCanvas");
  let ctx = canvas.getContext("2d");
  // 绘制一个圆形
  ctx.beginPath();
  ctx.arc(200, 200, 100, 0, 2*Math.PI); //中心点x轴坐标,中心点y轴坐标,半径,起始角度,终止角度
  ctx.stroke(); //绘制圆形
})

</script>
<style scoped lang="less">
</style>

4.4. Draw images
Through the context object of Canvas, images can also be drawn, for example:
<template>
  <div class="contmian">
    <canvas id="myCanvas" width="400" height="400"></canvas>
  </div>
</template>
<script setup lang="ts">
import { onMounted } from "vue";
// 获取Canvas上下文
onMounted(()=>{
  let canvas: any = document.getElementById("myCanvas");
  let ctx = canvas.getContext("2d");
  // 绘制图像
  var img = new Image();
  img.src = "../../../public/docker.png";
  img.onload = function() {
    ctx.drawImage(img, 50, 50, 200, 200); //绘制图像,x轴坐标,y轴坐标,宽度,高度
  }
})

</script>
<style scoped lang="less">
</style>

4.5. Draw animation
Animation effects on Canvas can be achieved through the setInterval() method, for example:
<template>
  <div class="contmian">
    <canvas id="myCanvas" width="400" height="400"></canvas>
  </div>
</template>
<script setup lang="ts">
import { onMounted } from "vue";
// 获取Canvas上下文
onMounted(()=>{
  let canvas: any = document.getElementById("myCanvas");
  let ctx = canvas.getContext("2d");
  // 绘制动画
  var x = 0;
  function draw() {
    ctx.clearRect(0, 0, canvas.width, canvas.height); //清除画布
    ctx.beginPath();
    ctx.rect(x, 50, 50, 50); //绘制矩形
    ctx.fill();
    x++;
    console.log(x)
    if(x > 400){
      clearInterval(timer)
    }
  }
  const timer = setInterval(draw, 10); //每10毫秒调用一次draw()函数
})

</script>
<style scoped lang="less">
</style>
The above are the basic methods of using Canvas. There are many other functions that can be achieved through Canvas, which require further learning and mastering.
5. canvas Demo
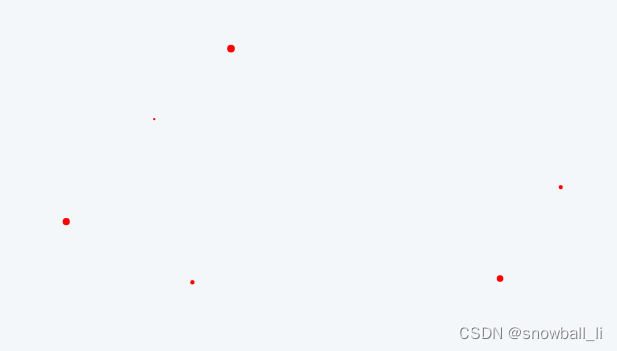
5.1. Canvas implements meteor shower
<template>
  <div class="contmian">
    <canvas id="myCanvas" width="400" height="400"></canvas>
  </div>
</template>
<script setup lang="ts">
import { onMounted } from "vue";
// 获取Canvas上下文
onMounted(()=>{
  let canvas: any = document.getElementById("myCanvas");
  let ctx = canvas.getContext("2d");
  // 设置canvas宽度和高度
  canvas.width = window.innerWidth;
  canvas.height = window.innerHeight;

  // 定义流星雨粒子对象
  function Particle (x, y, vx, vy, size, color) {
    this.x = x;
    this.y = y;
    this.vx = vx;
    this.vy = vy;
    this.size = size;
    this.color = color;
  }

  // 定义流星雨数组
  let particles = [];

  // 创建流星雨粒子函数
  const createParticle = () => {
    let x = Math.random() * canvas.width; // 随机横坐标
    let y = Math.random() * canvas.height; // 随机纵坐标
    let vx = -(Math.random() * 2 + 3); // x方向速度
    let vy = Math.random() * 2 + 2; // y方向速度
    let size = Math.random() * 3 + 1; // 大小
    let color = "#ff0000"; // 颜色
    particles.push(new Particle(x, y, vx, vy, size, color));
  }

  // 绘制流星雨
  const draw = () => {
    ctx.clearRect(0, 0, canvas.width, canvas.height); // 清空canvas
    for (let i = 0; i < particles.length; i++) {
      let p = particles[i];
      ctx.beginPath();
      ctx.fillStyle = p.color;
      ctx.arc(p.x, p.y, p.size, 0, Math.PI * 2, false);
      ctx.fill();
      p.x += p.vx;
      p.y += p.vy;
      if (p.x < -p.size || p.y > canvas.height + p.size) {
        // 如果粒子出了画布则删除
        particles.splice(i, 1);
        i--;
      }
    }
    requestAnimationFrame(draw);
  }

  // 创建流星雨粒子
  setInterval(createParticle, 50);

  // 开始绘制流星雨
  draw();
})

</script>
<style scoped lang="less">
</style>
A simple canvas meteor shower can be implemented through the above code. If you need more complex effects, you can adjust the particle attribute values or add other animation effects.
5.2. Use canvas to modify image hue, saturation, and brightness.
<template>
  <div class="contmian">
    <h1>Canvas修改图片色调、饱和度、亮度</h1>
    <p>请选择图片文件:</p>
    <input type="file" accept="image/*" @change="loadImage">
    <h2>修改颜色</h2>
    <p>
      <label for="hue">色调:</label>
      <input type="range" id="hue" min="0" max="360" value="0" @change="updateColor()">
    </p>
    <p>
      <label for="saturation">饱和度:</label>
      <input type="range" id="saturation" min="0" max="2" step="0.01" value="1" @change="updateColor()">
    </p>
    <p>
      <label for="lightness">亮度:</label>
      <input type="range" id="lightness" min="0" max="2" step="0.01" value="1" @change="updateColor()">
    </p>
    <canvas id="canvas"></canvas>
  </div>
</template>
<script setup lang="ts">
import { onMounted } from "vue";
// 获取Canvas上下文
let ctx:any = {}
let canvas:any = {}
onMounted(()=>{
  canvas = document.getElementById("canvas");
  ctx = canvas.getContext("2d");
})

let img:any;

const loadImage = (e: any) => {
  console.log('35', e)
  let reader = new FileReader();
    reader.onload = function(event: any) {
      img = new Image();
      img.onload = function() {
        canvas.width = img.width;
        canvas.height = img.height;
        ctx.drawImage(img, 0, 0);
      };
      img.src = event.target.result;
    };
    reader.readAsDataURL(e.target.files[0]);
  }

  const updateColor = () => {
    let hue = document.getElementById('hue').value;
    let saturation = document.getElementById('saturation').value;
    let lightness = document.getElementById('lightness').value;

    let imageData = ctx.getImageData(0, 0, canvas.width, canvas.height);
    let data = imageData.data;

    for (let i = 0; i < data.length; i += 4) {
      let hsl = rgbToHsl(data[i], data[i+1], data[i+2]);

      hsl[0] = (hsl[0] + hue) % 360;
      hsl[1] = hsl[1] * saturation;
      hsl[2] = hsl[2] * lightness;

      let rgb = hslToRgb(hsl[0], hsl[1], hsl[2]);

      data[i] = rgb[0];
      data[i+1] = rgb[1];
      data[i+2] = rgb[2];
    }

    ctx.putImageData(imageData, 0, 0);
  }

  // RGB转HSL
  const rgbToHsl = (r: any, g: any, b: any) => {
    r /= 255, g /= 255, b /= 255;
    let max = Math.max(r, g, b), min = Math.min(r, g, b);
    let h: any, s: any, l = (max + min) / 2;
    if(max == min){
      h = s = 0;
    }else{
      let d = max - min;
      s = l > 0.5 ? d / (2 - max - min) : d / (max + min);
      switch(max){
        case r: h = (g - b) / d + (g < b ? 6 : 0); break;
        case g: h = (b - r) / d + 2; break;
        case b: h = (r - g) / d + 4; break;
      }
      h /= 6;
    }
    return [h * 360, s, l];
  }

  // HSL转RGB
  const hslToRgb = (h:any, s:any, l: any) => {
    let r:any, g:any, b:any;
    if(s == 0){
      r = g = b = l;
    }else{
      function hue2rgb(p:any, q:any, t:any){
        if(t < 0) t += 1;
        if(t > 1) t -= 1;
        if(t < 1/6) return p + (q - p) * 6 * t;
        if(t < 1/2) return q;
        if(t < 2/3) return p + (q - p) * (2/3 - t) * 6;
        return p;
      }
      let q = l < 0.5 ? l * (1 + s) : l + s - l * s;
      let p = 2 * l - q;
      r = hue2rgb(p, q, h + 1/3);
      g = hue2rgb(p, q, h);
      b = hue2rgb(p, q, h - 1/3);
    }
    return [r * 255, g * 255, b * 255];
  }

</script>
<style scoped lang="less">
</style>
In this example, the <input> element is used to select an image file and draw it on the canvas when the image is loaded. Use three <input> elements to control hue, saturation, and brightness. When updating the color value, use the getImageData() method to obtain the pixel data of the image. Iterates over the pixel data and converts each pixel's RGB color value to an HSL value, modified according to the selected hue, saturation, and brightness values. Then use the putImageData() method to redraw the modified pixel data to the canvas. Note that the performance of this example may be affected by image size and computational complexity. If you need to process large images or perform more complex color modifications, consider using WebGL or another high-performance graphics library.
5.3. Canvas implements a click event to modify the content color of the area element in the middle point of the image to the specified color.
The following is a sample code that uses HTML canvas to modify the content color of the element in the center point of the image to a specified color through a click event.
<template>
  <div class="contmian">
    <h1>Canvas通过点击事件修改图片中点中区域元素内容颜色</h1>
    <p>请选择图片文件:</p>
    <input type="file" accept="image/*" @change="loadImage">
    <h2>修改颜色</h2>
    <p>
      <label for="color">颜色:</label>
      <input type="color" id="color" value="#ff0000">
    </p>
    <canvas id="canvas"></canvas>
  </div>
</template>
<script setup lang="ts">
import { onMounted } from "vue";
// 获取Canvas上下文
let ctx:any = {}
let canvas:any = {}
let color:any = {}
onMounted(()=>{
  canvas = document.getElementById("canvas");
	canvas.addEventListener('click', updateColor);
  ctx = canvas.getContext("2d");
  color = document.getElementById('color').value;
})

let img:any;

    const loadImage = (e: any) => {
			var reader = new FileReader();
			reader.onload = function(event) {
				img = new Image();
				img.onload = function() {
					canvas.width = img.width;
					canvas.height = img.height;
					ctx.drawImage(img, 0, 0);
				};
				img.src = event.target.result;
			};
			reader.readAsDataURL(e.target.files[0]);
		}

		const updateColor = (e) => {
			var x = e.offsetX;
			var y = e.offsetY;

			var imageData = ctx.getImageData(0, 0, canvas.width, canvas.height);
			var data = imageData.data;
			var index = (x + y * imageData.width) * 4;

			data[index] = parseInt(color.substr(1, 2), 16);
			data[index + 1] = parseInt(color.substr(3, 2), 16);
			data[index + 2] = parseInt(color.substr(5, 2), 16);

			ctx.putImageData(imageData, 0, 0);
		}


</script>
<style scoped lang="less">
canvas {
  border: 1px solid black;
}
</style>
In this example, the <input> element is used to select an image file and draw it on the canvas when the image is loaded. Use the <input> element to select the color of the element you want to change. Use the addEventListener() method to add a click event listener on the canvas. In the event handler, get the x and y coordinates of the mouse click location and use the getImageData() method to get the pixel data of the image. Calculate the index of the pixel to be changed and change its color to the selected color. Use the putImageData() method to redraw the modified image data. Note that this example only changes the color of the specified pixel when the image on the canvas is clicked. You can modify the logic and conditions for changing colors as needed.

5.4. Canvas implements scratch-off
The following is a sample code that uses HTML canvas to achieve scratch-off effects.
<template>
  <div class="contmian">
    <h1>Canvas实现刮刮乐效果</h1>
	<p>刮奖面板:</p>
    <canvas id="canvas"></canvas>
  </div>
</template>
<script setup lang="ts">
import { onMounted } from "vue";
// 获取Canvas上下文
let ctx:any = {}
let canvas:any = {}
let isDrawing = false;
let img:any;
onMounted(()=>{
  	canvas = document.getElementById("canvas");
  	canvas.addEventListener('mousedown', startDrawing);
	canvas.addEventListener('mousemove', draw);
	canvas.addEventListener('mouseup', stopDrawing);
	canvas.addEventListener('mouseleave', stopDrawing);
  	ctx = canvas.getContext("2d");
	init();
})

		const init = () => {
			canvas.width = 400;
			canvas.height = 200;

			ctx.fillStyle = '#ddd';
			ctx.fillRect(0, 0, canvas.width, canvas.height);

			ctx.font = 'bold 30px Arial';
			ctx.fillStyle = '#f00';
			ctx.fillText('刮一刮', 120, 100);

			img = new Image();
			img.onload = function() {
				ctx.drawImage(img, 0, 0, img.width, img.height, 0, 0, canvas.width, canvas.height);
			};
			img.src = 'image.jpg';
		}

		const startDrawing = () => {
			isDrawing = true;
		}

		const stopDrawing = () => {
			isDrawing = false;
		}

		const draw = (e) => {
			if (!isDrawing) return;

			var x = e.offsetX;
			var y = e.offsetY;

			ctx.globalCompositeOperation = 'destination-out';
			ctx.beginPath();
			ctx.arc(x, y, 20, 0, Math.PI * 2, false);
			ctx.fill();
		}

</script>
<style scoped lang="less">
canvas {
  border: 1px solid black;
}
</style>
In this example, a scratch-off panel is created using the <canvas> element and an image is drawn. When the mouse is pressed on the canvas, set the isDrawing variable to true. When the mouse moves, if isDrawing is true, use the globalCompositeOperation attribute to set the brush to destination-out mode so that each time you paint it changes the pixel color to a transparent color. When the mouse bounces up or leaves the canvas, set isDrawing to false to stop drawing the coating.
In this example, a gray rectangle is used to cover the image, but you can use any other mask layer, or use your own color when painting.
5.5. Use canvas to play with pictures
Use canvas to play with pictures [Duyi Education]_bilibili_bilibili
6. Convert html to canvas
How to convert HTML to canvas tutorial_htmltocanvas-CSDN blog
7. Process records
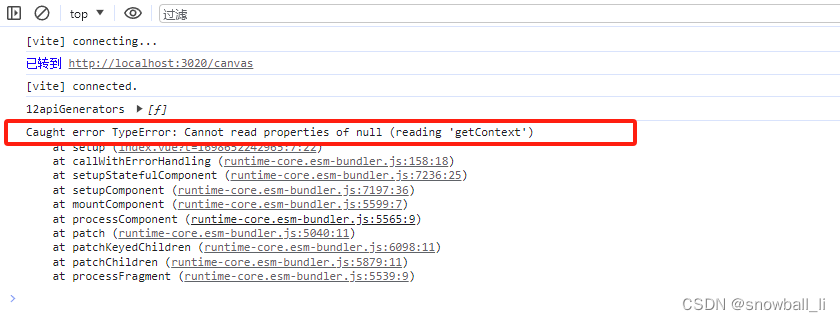
7.1、Caught error TypeError: Cannot read properties of null (reading 'getContext')
Pay attention to get the life cycle of the Canvas context, just inside onMounted
import { onMounted } from "vue";
7.2, html to canvas
The principle of converting HTML to Canvas is as follows
1. First, convert DOM elements (such as div, p, img, etc.) in HTML into elements on Canvas.
2. Then, apply CSS styles to the elements on the Canvas. This means that the styles in the HTML need to be calculated and applied to the Canvas.
3. Next, all content in the HTML needs to be drawn onto the Canvas. This can be done by using the drawing API on Canvas (such as drawing text, images, paths, etc.).
4. Finally, the content on the Canvas needs to be converted into images or data so that it can be saved or uploaded to the server.
Generally speaking, the process of converting HTML to Canvas can be divided into three main stages: parsing HTML and CSS, drawing content onto Canvas, and converting Canvas content into images or data.
demo to be completed
7.3. What value sets does canvas.getContext have?
let canvas: any = document.getElementById("myCanvas");
let ctx = canvas.getContext("2d");

canvas.getContext方法有一个参数,表示上下文类型,常见的有以下类型:
"2d":获取二维绘图上下文对象。
"webgl" 或 "experimental-webgl":获取 WebGL 绘图上下文对象。
"webgl2":获取 WebGL2 绘图上下文对象。
"bitmaprenderer":获取位图渲染器上下文对象,用于生成位图并使用 ImageBitmap 对象呈现。
7.3. Is webgl based on canvas?
WebGL is based on the canvas element in HTML5. WebGL uses the OpenGL ES 2.0 specification for writing 3D graphics. WebGL's API allows JavaScript to draw various types of 3D images on canvas elements, using GPU acceleration. Therefore, it can be said that WebGL is based on canvas, but it uses more advanced graphics processing technology to achieve complex 3D images.
7.4. Can canvas use display: none?
Browsers do. Use display: none to hide the canvas element and not display it on the page. However, it should be noted that when the canvas element is hidden, the graphics drawn on it will still exist, but will not be visible.
Can the mini program use display: none? The test has no effect.
You can use position: fixed; left: 5000px; top: 5000px;
This achieves the purpose of hiding the canvas element and does not use space. Tested.
Can the mini program canvas use visibility: hidden? | WeChat open community
8. Welcome exchanges and corrections
9. Reference links
Detailed explanation of Canvas-CSDN Blog
Basic use of Canvas_canvas font_19-year-old Mr. Mo’s blog-CSDN blog
This article is enough to learn HTML5 Canvas | Tutorial for beginners
HTML5 Canvas | Newbie Tutorial
Canvas Tutorial - Web API Interface Reference | MDN
Canvas detailed introductory tutorial (1W words vomiting blood sharing)_canvas tutorial-CSDN blog
Solving the problem of canvas clarity [Duyi Education]_bilibili_bilibili
canvas animation [Duyi Education]_bilibili_bilibili
Text can also be cool [Duyi Education]_bilibili_bilibili
Use canvas to play with pictures [Duyi Education]_bilibili_bilibili