Table of contents
5 Create an application, a simple blog
5.3 Create database tables and perform data migration
5.4 Management interface localization
5.7 Customize and modify the admin display page
6. Set up the blog’s user interface
1 Use tools
Pycharm, Windows platform
2 Install Django
Open the Terminal at the bottom of Pycharm and enter the command:
pip install djangoas the picture shows: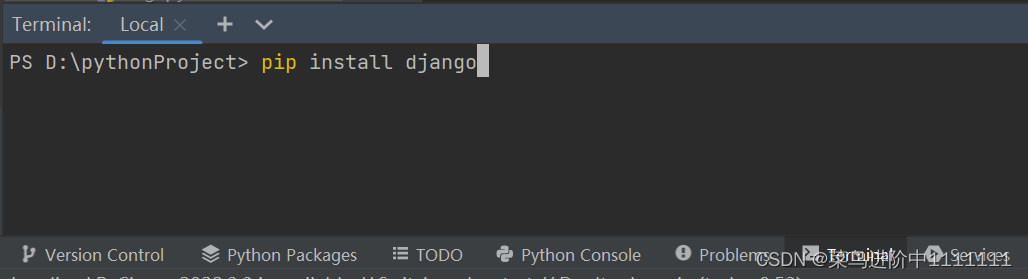
3 Create project
You need to use Django tools: django-admin.py, which is usually installed in the Scripts folder on Windows systems. This folder is in the python installation directory. You need to add this path to the PATH variable to ensure that django-admin. py can be executed from the command line. Add method: Open Control Panel--System--Advanced System Settings--Advanced--Environment Variables, edit the PATH item, and add the path, as shown below, mine is D:\pythonanzhuang\Scripts.

After completion, you can proceed to the next step on the command line:
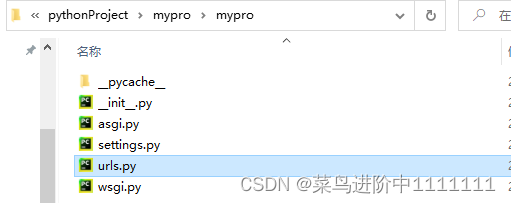
django-admin startproject myproAfter completion, you can see the created folder directory as follows:
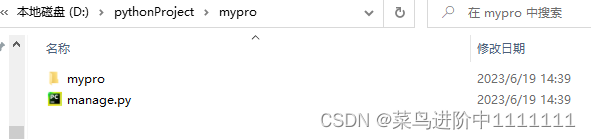
Continue to enter mypro:
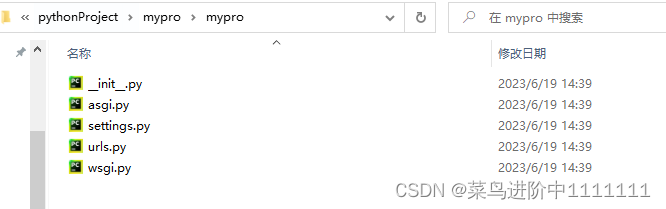
manage.py: application command line interface, project running entrance
_init_.py: tells python this is a package
asgi.py: An emerging Python standard for supporting asynchronous web servers and applications
Various configurations related to the settings.py project
urls.py: global URL configuration file
wsgi.py: Communication standard between web servers and python programs
4. Run the development server
Command line input:
python manage.py runserver
Open the link in a browser window:http://127.0.0.1:8000/

The Pycharm command line terminal appears:
![]()
From left to right: timestamp, request, HTTP response encoding, number of bytes.
These indicate that the server is currently running normally and applications can be created.
5 Create an application, a simple blog
You also need to use the manage.py tool and continue to enter the command in Pycharm’s Terminal:
python manage.py startapp myblogThe created file directory is as follows:


_init_.py: tells python this is a package
models.py: data model
views.py: view function
tests.py: unit tests
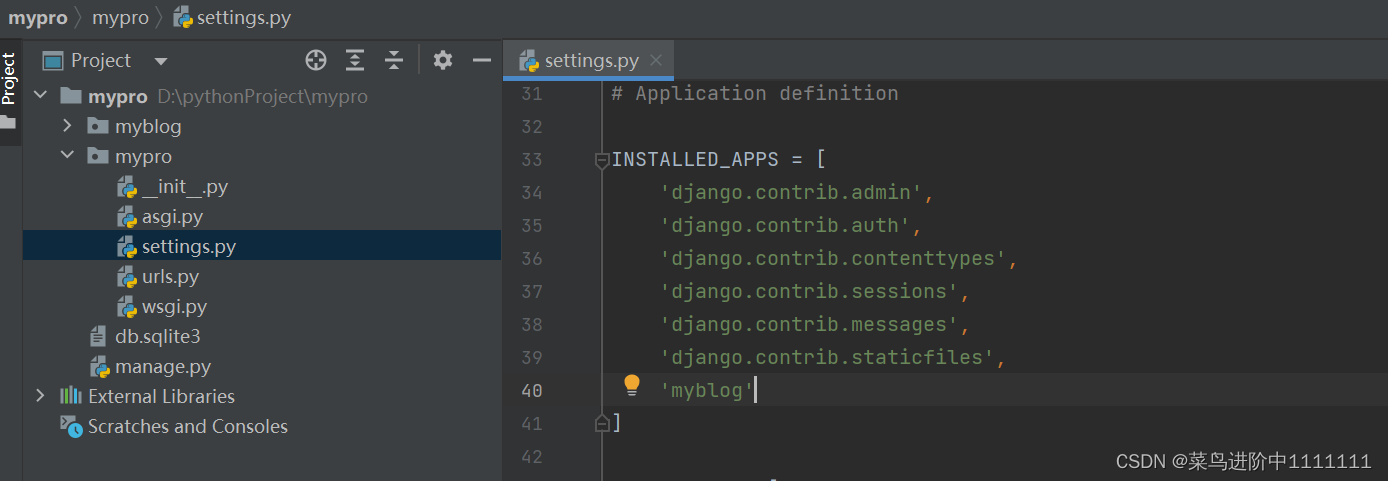
Add application:
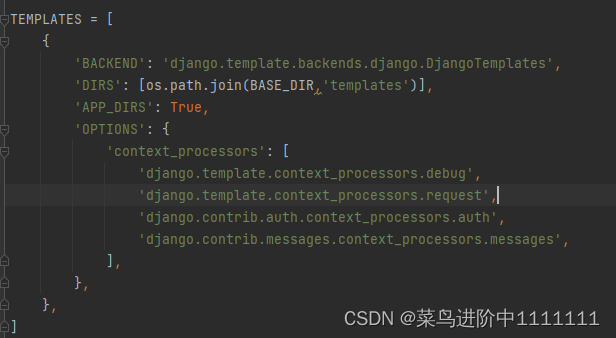
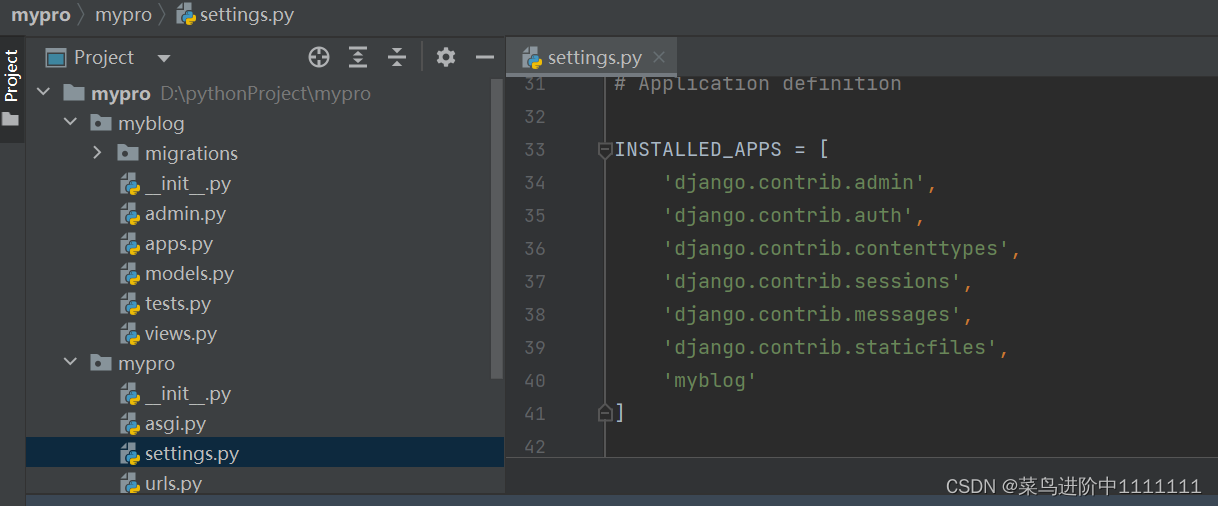
This application needs to be added to the previously created project for it to work properly. Open the settings.py file in the project mypro, find the INSTALLED_APPS tuple, and add the new application name at the end:
Still in this file, find the TEMPLATES item and add DIRS:
5.1 Create application model
Enter the myblog directory, open the models.py file, and add the model class:

from django.db import models

# Create your models here.

class BlogPost(models.Model):
    title = models.CharField(max_length=150) #博客的标题
    body = models.TextField()    #博客正文
    timestamp = models.DateTimeField() #博客创建时间
5.2 Set up database
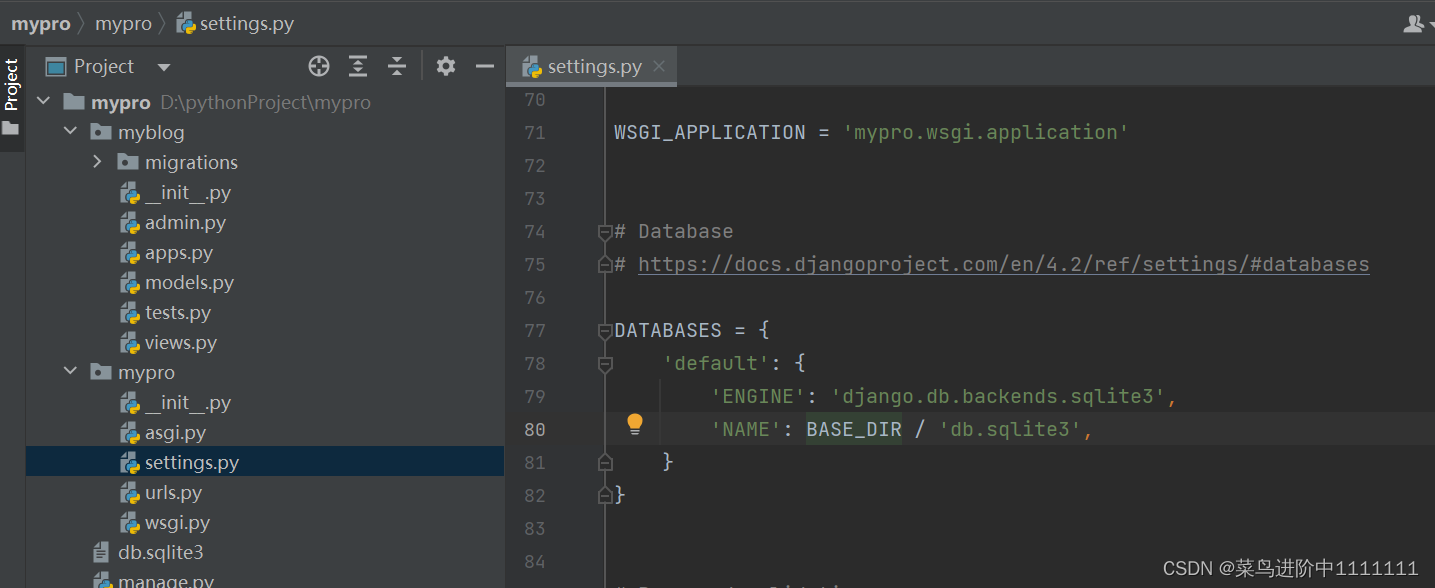
If using default SQlite:
Open the settings.py file in the mypro directory and find the DATABASES tuple, as shown in the figure below. SQlite is used by default.
If using MySQL database:
Change the settings.py file in the mypro directory, find the DATABASES tuple, and change it to:
DATABASES = {
    'default': {
        'ENGINE': 'django.db.backends.mysql',   #改为MySQL数据库
        'NAME': 'mydb',                         #数据库名称
        'USER': 'root',                         #数据库用户名
        'PASSWORD': '123abc',                   #数据库用户密码
        'HOST': '127.0.0.1',                    #主机地址
        'PORT': '3306',                         #端口号
    }
}
Before using the MySQL database in Django, you must first ensure that the database mydb has been created, and the username and password used in the above picture already exist. You also need to make modifications to the _init_.py file in the project mypro. First download the module pymysql. The command is:
pip install pymysql
5.3 Create database tables and perform data migration
First create a database table with the following command:
python manage.py makemigrations
Then execute the migration, the command is as follows:
python manage.py migrate
Note: Some old versions use the command: ./manage.py syncdb, which can no longer be used in the new version.
Note: Every time a new application is added to the project, that is, after a new application is added to the INSTALLED_APPS tuple, data migration needs to be performed, that is, step 7 is repeated.
5.4 Management interface localization
Change here to Chinese (Asia/Shanghai time zone)
Open the settings.py file under the mypro project and find the following settings:
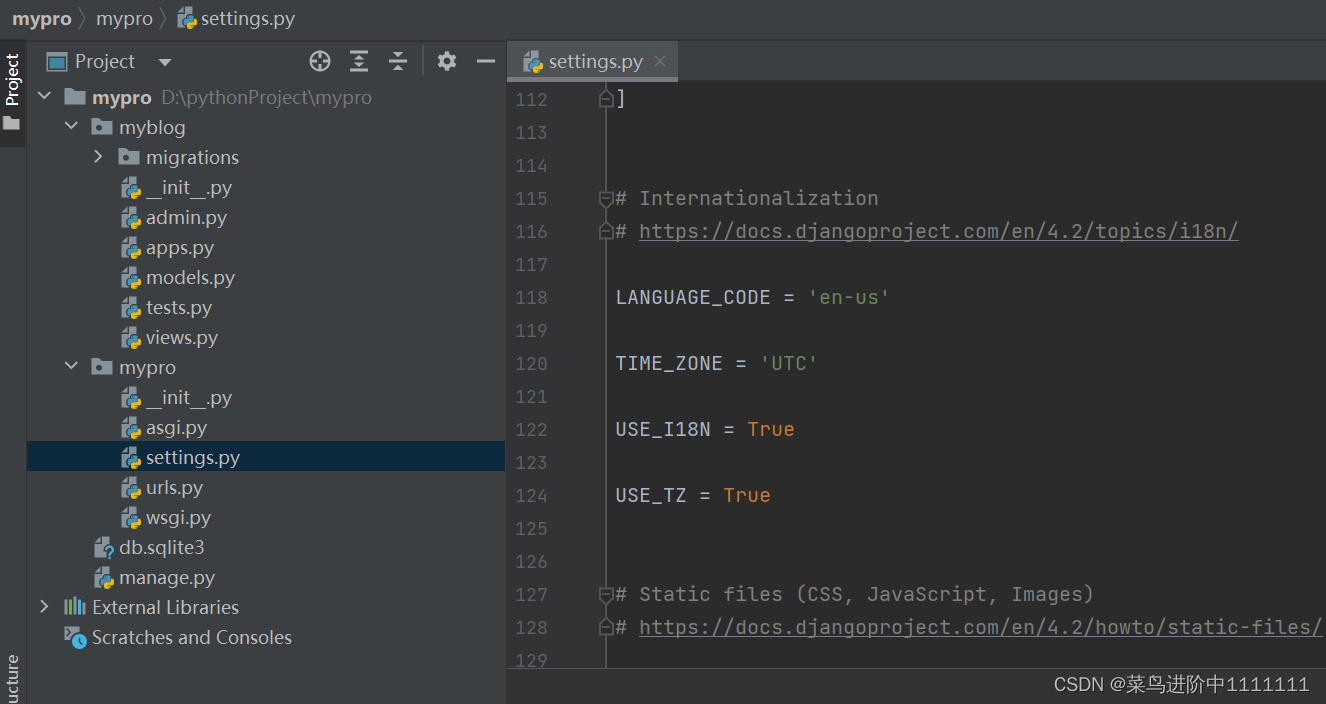
Modify the following two items:
LANGUAGE_CODE = 'zh-Hans'
TIME_ZONE = 'Asia/Shanghai'
5.5 Create super user
Enter at the Terminal command line:
python manage.py createsuperuser
Just follow the prompts to enter it step by step. If the password is too simple, you will be prompted.
5.6 Using admin
Admin is automatic background management. Open the settings.py file again, find the INSTALLED_APPS tuple, and observe whether the 'django.contirb.admin' in the first line is commented (the old version seems to be commented, you need to remove the comments yourself, the new version Won't).
After confirming that the admin settings are correct, you need to add the model displayed on the admin page, that is, register BlogPost. Open the admin and py files under myblog,

Add the following code so that the admin can manage registered objects:
from django.contrib import admin    #导入admin
from myblog import models           #导入数据模型

admin.site.register(models.BlogPost)  #使用admin注册BlogPost类
Then start the server:
python manage.py runserver Open the browser and enter the link: http://127.0.0.1:8000/admin
Note: The link address has changed slightly at this time and you need to enter admin.
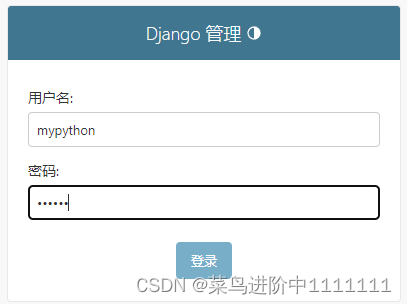
Use the previously created super user to log in. After successful login, the interface is as follows:

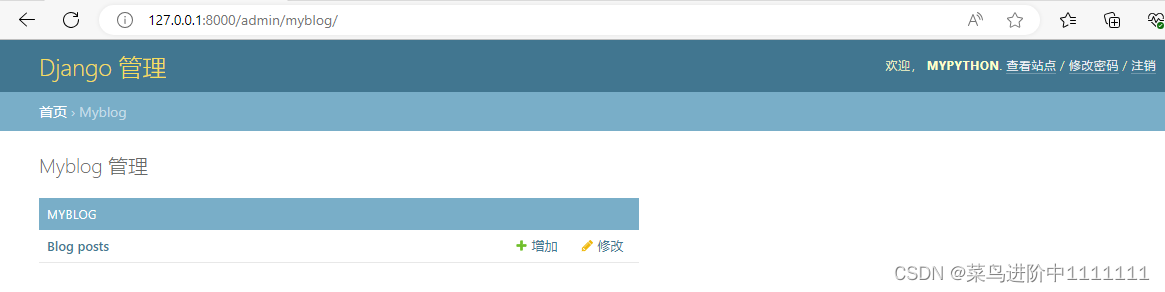
Note that if your blog interface does not have a class added at this time, the possible problems are: 1. The application is not added in INSTALLED_APPS in settings.py. 2. There is an error in the applied models.py. 3. There is no model registration in admin.py.
Click MYBLOG to enter the Blogpost model management interface:
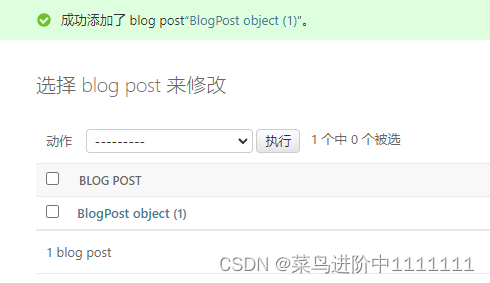
Click the Add button to enter the page as follows, which can be edited freely.

Click Save and the following page appears:
5.7 Customize and modify the admin display page
Modify the myblog/admin.py file, create the management class BlogPostAdmin, and register it:
from django.contrib import admin

# Register your models here.
from django.contrib import admin    #导入admin
from myblog import models           #导入数据模型

class BlogPostAdmin(admin.ModelAdmin):
    list_display = ('pk','title','body','timestamp') #设置要显示的属性,pk为索引。

admin.site.register(models.BlogPost, BlogPostAdmin)  #使用admin注册BlogPostAdmin类
Refresh the browser interface, as shown below:
6. Set up the blog’s user interface
The previous settings were for developers, now you need to set up user-facing pages. In Django, the classic components of web pages are:
Templates: Display the information passed in by the Python dictionary object
View function (view): obtain information from the database and display the results
URL pattern: Map the received request to the view, and you can also pass parameters to the view
Django running order:
1. First find the matching URL pattern
2. Call the corresponding view function
3. Present data to users through templates
The build order used this time is slightly different:
1. Create a template first so that there is content to observe.
2. Design the URL pattern so that Django can access it immediately
3. Design the view prototype and further develop it on this basis.
6.1 Create template
Django searches the templates directory in each application's subdirectory.
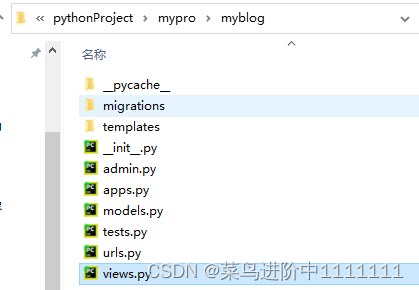
So create a templates folder in the directory where myblog is used, and create a template file archive.html in the templates folder. As shown below:

Then write the code in the archive.html file:
<!DOCTYPE html>
<html lang="en">
<head>
    <meta charset="UTF-8">
    <title>Title</title>
</head>
<body>
{% for post in posts %}
<h2>{

   { post.title }}</h2>
<p>{

   { post.timestamp }}</p>
<p>{

   { post.body }}</p>
<hr>
{% endfor %}
</body>
</html>
6.2 Create url pattern
There are two url settings, one for the project and one for the application.
The url settings in the project (mypro/urls.py) are as follows:
from django.contrib import admin   #导入对象
from django.urls import path
from django.urls import re_path as url,include  #新版使用 re_path

urlpatterns = [
    url(r'^myblog/', include('myblog.urls')),  #引号表示传递字符串,匹配应用中的url
    path(r'^admin/', admin.site.urls),  #不用引号,表示传递对象,要确保已经导入该对象。
]
The url settings in the application (mypro/myblog/urls.py) are as follows:
Create a new file mypro/myblog/urls.py and add code:
#from django.conf.urls.defaults import *
#改写法已被新版弃用,用下边的写法来代替

from django.urls import re_path as url
from . import views

urlpatterns = patterns(
    url(r'archive$',views.archive)
)
6.3 Create view function
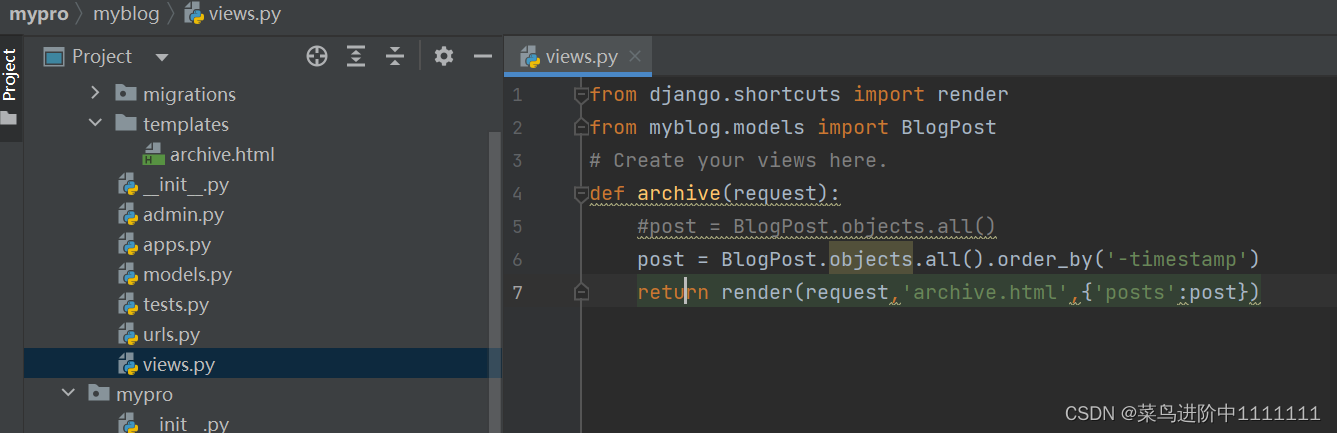
Open mypro/myblog/views.py
Add the following code:
from django.shortcuts import render
from myblog.models import BlogPost
# Create your views here.
def archive(request):
    posts = BlogPost.objects.all()
    return render(request,'archive.html',{'posts':post})
Start the server again:
python manage.py runserverThe following information is returned:
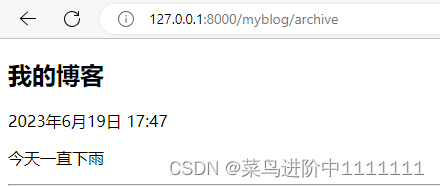
Browser accesshttp://127.0.0.1:8000/myblog/archive
6.4 Set page query method
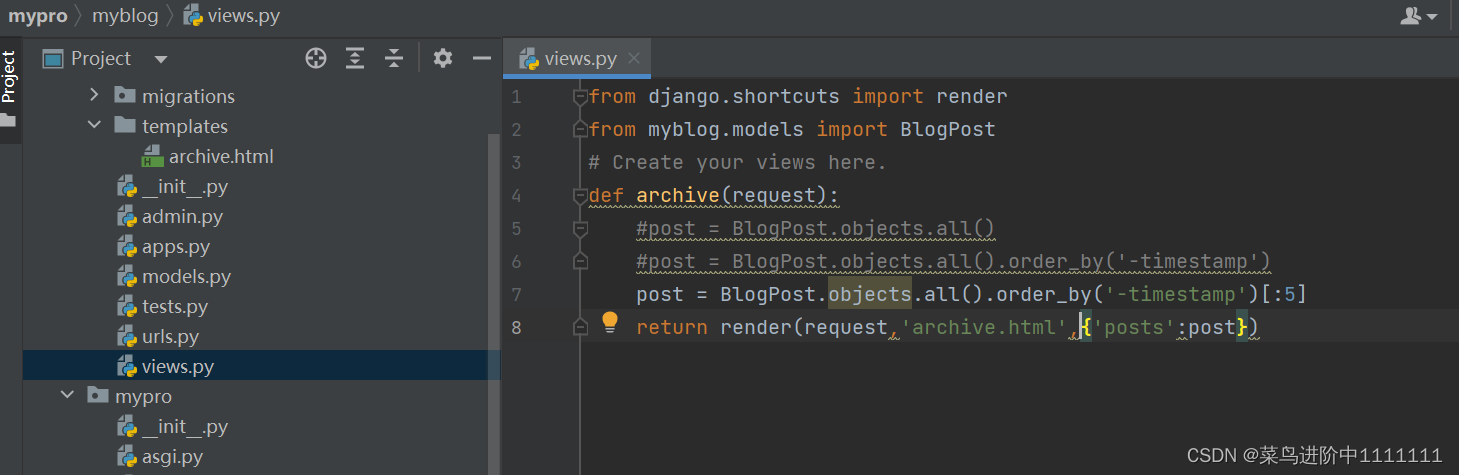
1. Modify myblog/views.py
Arranged in reverse chronological order:
The maximum number of blogs displayed on the settings page is 5:
2. Modify the default sorting method of the model. Modify myblog/models.py as follows:
from django.db import models

# Create your models here.

class BlogPost(models.Model):
    title = models.CharField(max_length=150) #博客的标题
    body = models.TextField()    #博客正文
    timestamp = models.DateTimeField() #博客创建时间

    class Meta:
        odering = ('-timestamp',)
If this article is helpful to you, please follow and collect it, thank you!
The next chapter explains how to handle user input.