Table of contents
Initial configuration uses Xshell connection
Start the Docker project in the server
Initial configuration uses Xshell connection
Because I prefer to use xshell to operate the server, if you are using Huawei Online's CloudShell or other methods, you can skip the first step of the connection operation.
When choosing a server, I chose the Docker visualization Portainer of Yunyao Cloud Server L instance. The docker environment we need has already been deployed in it, so there is no need to manually install it by yourself.

First of all, after the server is successfully purchased, the first step is to find our console, click on the server you want to use next, click on the server nickname, enter the basic information details page, and then click Reset in the more drop-down box in the upper right corner password.

Enter the password we want to set in the pop-up window, remember this secret, you will need it later.

After the input is completed, select the verification method, fill in the verification code, and click Confirm to complete the password change operation.

Then click on the elastic network card and copy the elastic public IP address below

Or go back to our console and a prompt box will pop up to view the IP address when the mouse stays on it.

Open xshell, fill in the above IP address into the host number, click Confirm, and then an authentication will pop up. Fill in the password we just entered in the reset password, and the connection is successful.


Project preparation
Because the theme of this chapter is to deploy YOLO's Ai project on the server using docker, we will not go into details on how to build the previous project, but only explain the docker configuration part.
Let’s briefly review the previous projects.
In the first blog, we installed the necessary system dependencies, pulled the yolov5 source code, and trained a .pt weight file.
Blog link: https://blog.csdn.net/weixin_65243968/article/details/127189585

In the second blog, we used the trained weight files to build a recognition web and API interface locally.

After the above steps are completed, we put the project in an app folder, and then create docker-compose, dockerfile and a .dockerignore

Then let's encode these three files.
docker-compose
version: '1'
services:
  core-api:
    build:
      context: .
      dockerfile: ./Dockerfile
    command: python server.py --host 0.0.0.0
    restart: always
    volumes:
      - "./apps:/apps"
    ports:
      - 8005:8005
    environment:
      - TZ=Asia/Guangzhou
    deploy:
      resources:
        limits:
          cpus: '4'
          memory: 20000M
    platform: "linux/amd64"
In this docker-compose
Version refers to the version number
services defines the list of services to be created
core-api is the name of the service and can be customized as needed.
build specifies the build context and the location of the Dockerfile.
command specifies the command to be executed when starting the container, and sets the host address to 0.0.0.0 so that the container can receive requests from any network interface.
Restart means that the container automatically restarts when exiting
Volumes: Define the data volume mapping relationship between the container and the host
Ports: Map port 8005 in the container to port 8005 of the host so that services in the container can be accessed through the host's port.
- TZ=Asia/Shanghai: Set the time zone to Shanghai (Asia/Shanghai)
cpus: '4': Specifies that the maximum number of CPU cores that the container can use is 4.
memory: 20000M: The maximum memory that the specified container can use is 2GB.
platform: "linux/amd64": Specifies the platform image type as Linux/AMD64. This means that the generated container image will be based on the x86_64 architecture Linux operating system.
Dockerfile
FROM python:3.8.6-buster  AS build
WORKDIR /apps
COPY ./apps ./
RUN apt-get update && apt-get install -y \
    libgl1-mesa-glx
RUN pip install -r requirements.txt -i https://pypi.tuna.tsinghua.edu.cn/simple --no-cache-dir
In the file file, first specify the base image as python:3.8.6-buster
Set the working directory to apps, and then copy our project into it through the command COPY
Execute apt-get command in the container to update the package list and install the libgl1-mesa-glx package.
Finally, execute the pip command in the container to install the dependency packages specified in the requirements.txt file, download and install them through the PyPI mirror source of Tsinghua University, and disable caching.
.dockerignore
__pycache__/*
*/__pycache__/*
The dockerignore file is used to tell Docker which files or directories do not need to be copied to the Docker image.
__pycache__/* represents all files in the __pycache__ directory, and */__pycache__/* represents __pycache__ files in all subdirectories
These are stored bytecode files generated by the Python interpreter, so we do not need to copy them to the image.
Start the Docker project in the server
Because the server I purchased is Yunyaoyun's Docker visualization Portainer, there is already a Docker environment inside, so I don't need to deploy it myself, which is very convenient.
Open Xftp and copy our project into it.

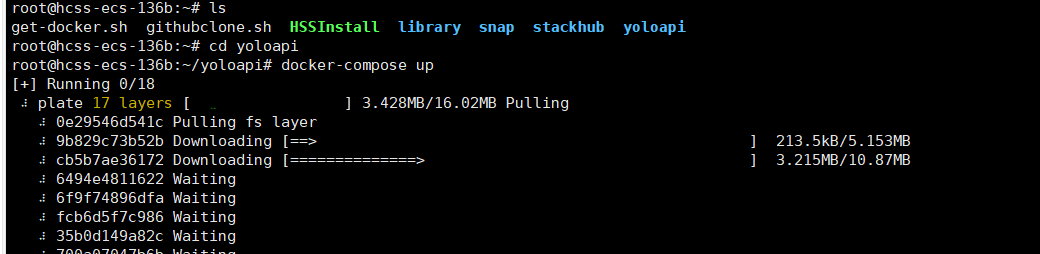
Enter the folder of our project in xshell and execute docker-compse up. At this time, the image is already downloading. If you need to let it run in the background, use docker-compse up -d
After the build is completed, you can use dockers ps -a to view our image

Then return to the Huawei Cloud console, find the security group, and click Configure Rules
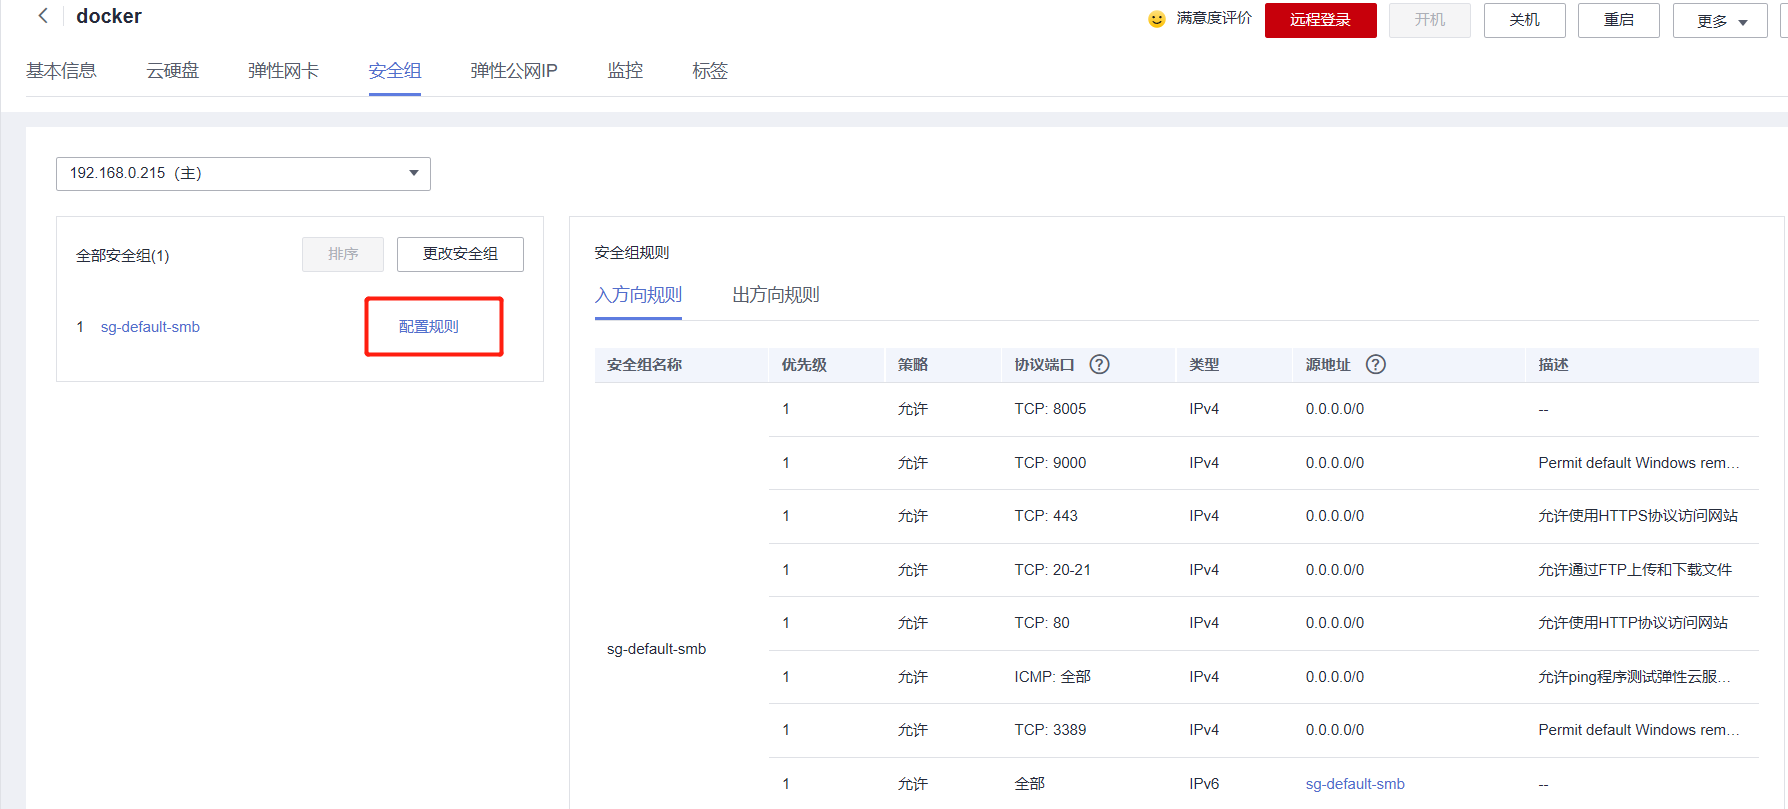
Add the port configured by our project so that it can be accessed through IP

Test it, use the public IP to access our project, and you can access it successfully.


Let’s test our API interface again and send a picture, and the recognition result can be returned successfully!

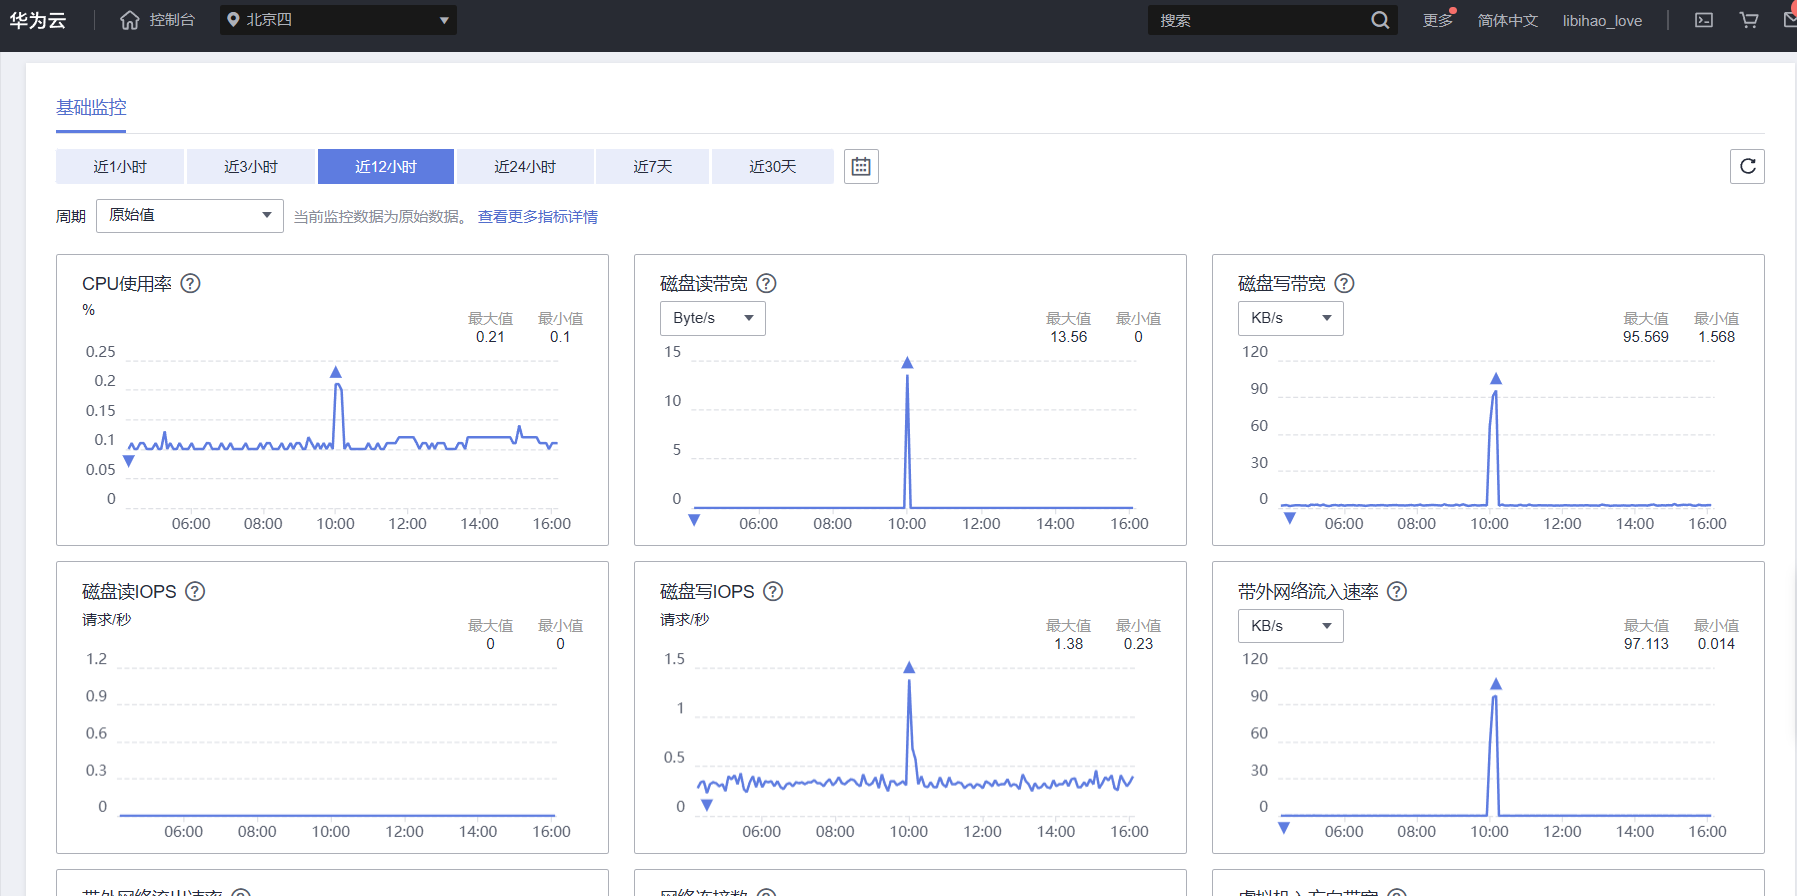
After running the project for a day, I checked the server monitoring and found that even when deploying high-performance applications such as large AI models, the performance of the L instance of Yunyao Cloud Server was quite outstanding.