Table of contents
How to run a project in Docker
Preface
This chapter introduces in detail the process and some details of the .net Core project from packaging to deployment on the Huawei Cloud Yaoyun Server L instance. Here we take CentOS as a system image and Docker visual Portainer as an application image as examples to describe the deployment process from zero to one.
How to run projects on CentOS
Login to CentOS
Server selection, take Huawei Cloud Yaoyun Server L instance as an example, select your region, and then select system image, CentOS

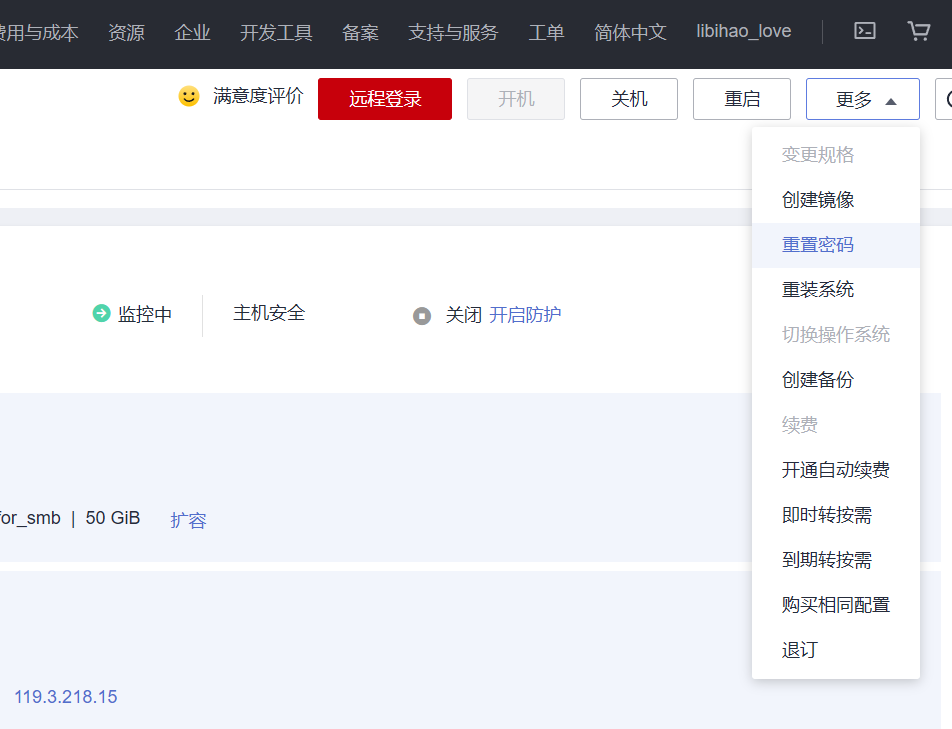
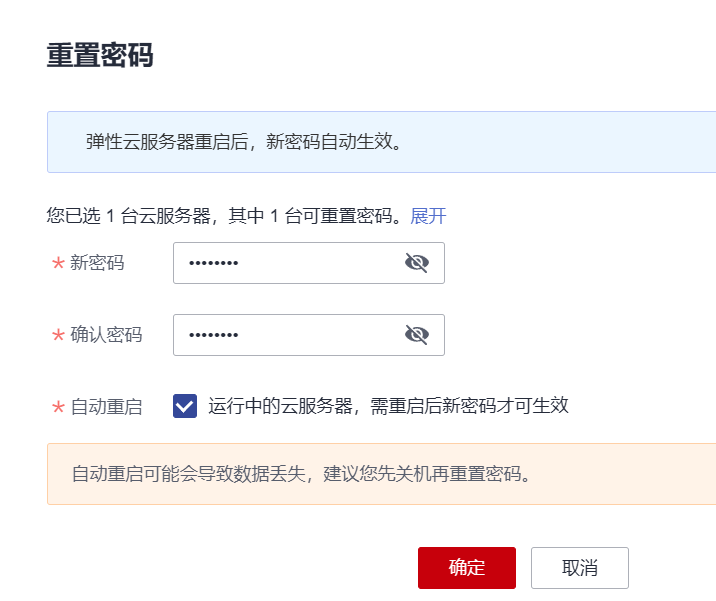
After the server purchase is completed, the first step is to go to the console, find the server you just purchased, and reset the password. Be sure to check "Automatic restart" so that the modified password can take effect immediately.
Then find the elastic public IP in the console, log in to your server with the password you just changed.

Packing with Rider
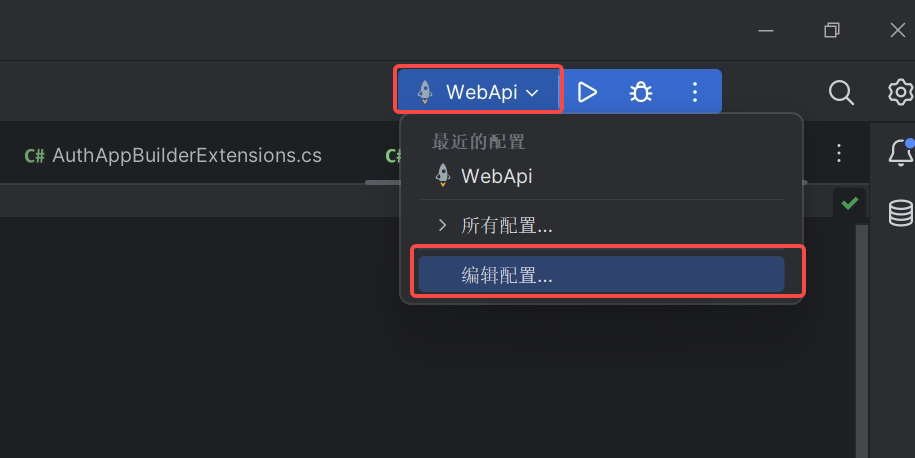
If the IDE you are using is Rider, click the small rocket icon in the upper right corner, and then click Edit Configuration in the drop-down box
In the pop-up window, click the + sign in the upper left corner and select Publish to folder.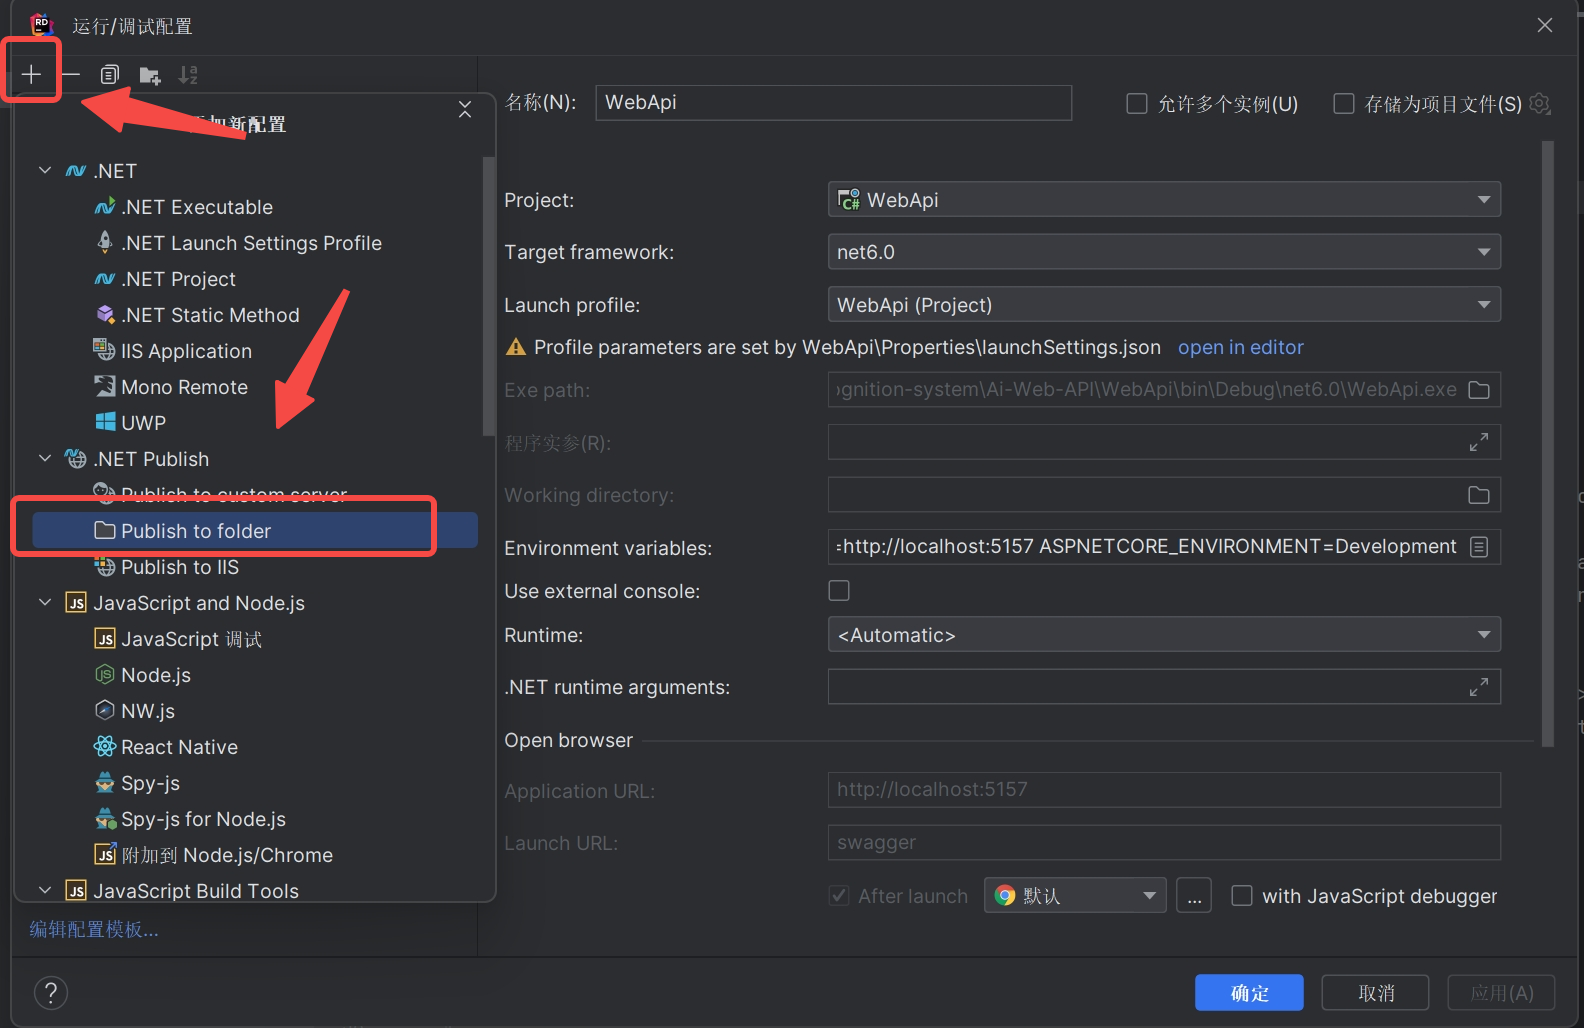
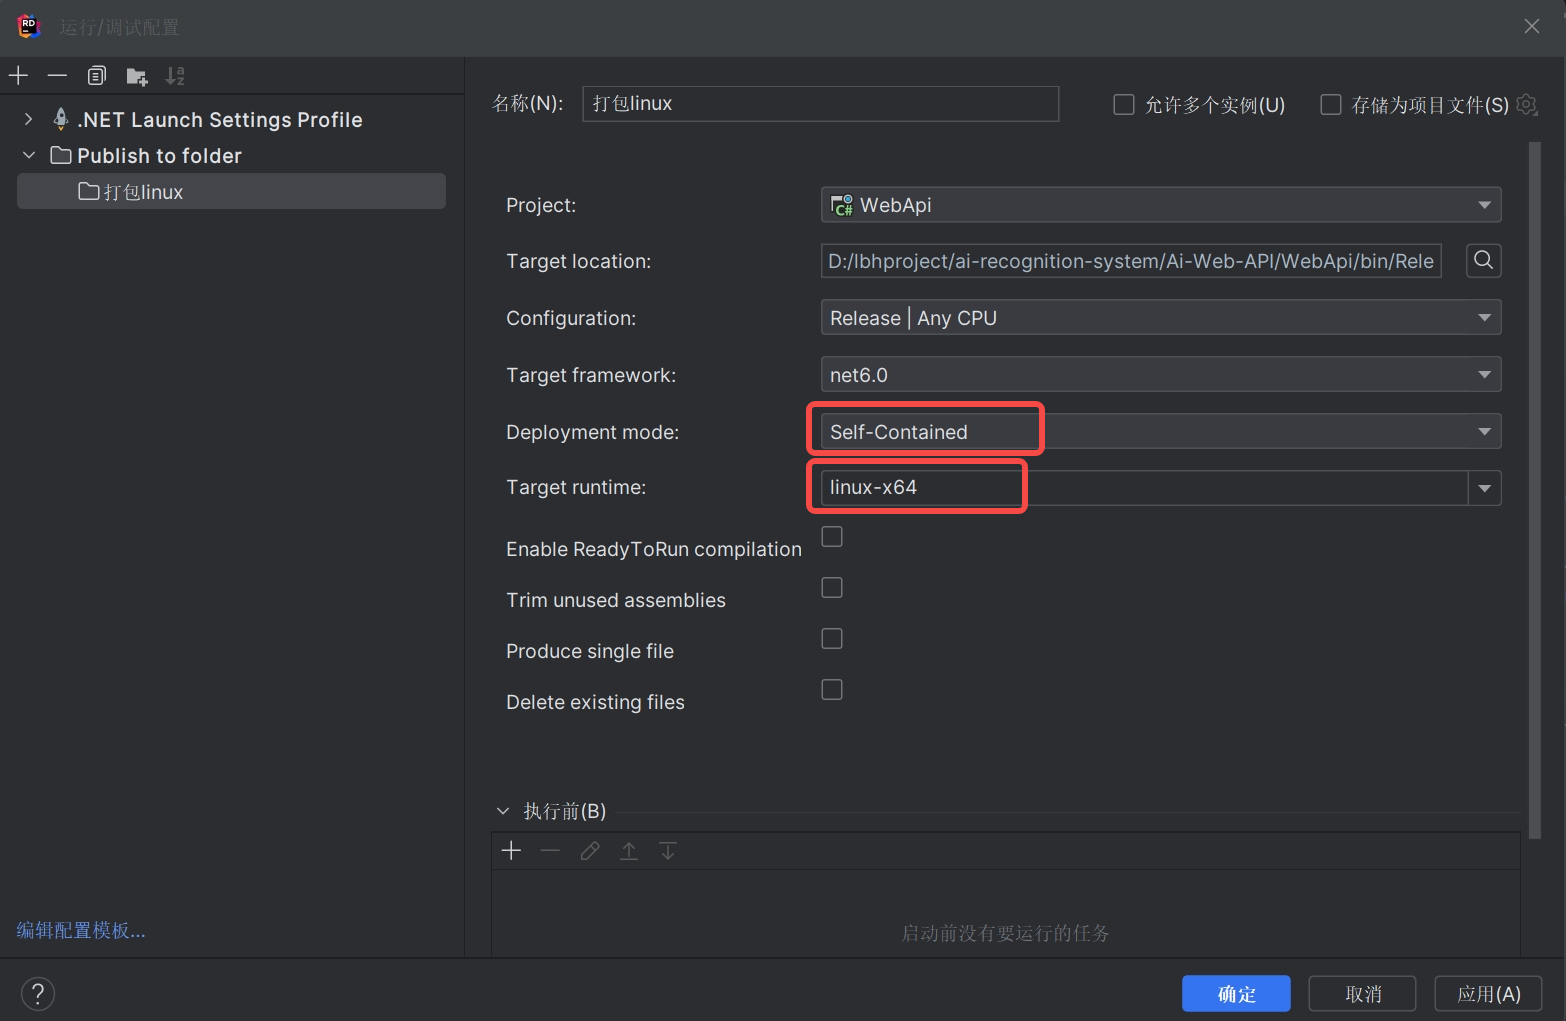
Then configure some of our packaging information
TargerLocation : The storage address of the packaged file, the default is enough
Targer framework : The version number of net. This will be the same as the version running in the current project by default.
DeployMent Mode : There are two release modes in the drop-down box of this option, one is Self-Contained and the other is Framework-Dependent
- Self-Contained: In this mode, the published application contains everything needed to run, including the .NET Core runtime and .NET Core libraries. This means that the application can run on machines that do not have the .NET Core runtime environment.
- Framework-Dependent: In this mode, the published application does not contain the .NET Core runtime and libraries. It depends on the .NET Core runtime environment on the target machine.
In layman's terms, one can be thrown in and run, and the other needs to configure the environment first. For convenience, I chose Self-Contained here. Generally, the package of small projects is not much larger. If there are many projects, consider using Framework-Dependent.
Target runtime : The running system. There is no doubt that Linux-x64 is selected here.
After the configuration is completed, click Save
Click Run, and then go to the TargerLocation path we just configured to find the packaged file. If it has not been changed, it usually defaults to the Release under the bin under the project.

Packaging with Visual Studio
Because many people use Visual Studio, here is also a demonstration of how to package using Visual Studio.
Right-click the project in Solution Explorer and select Publish.

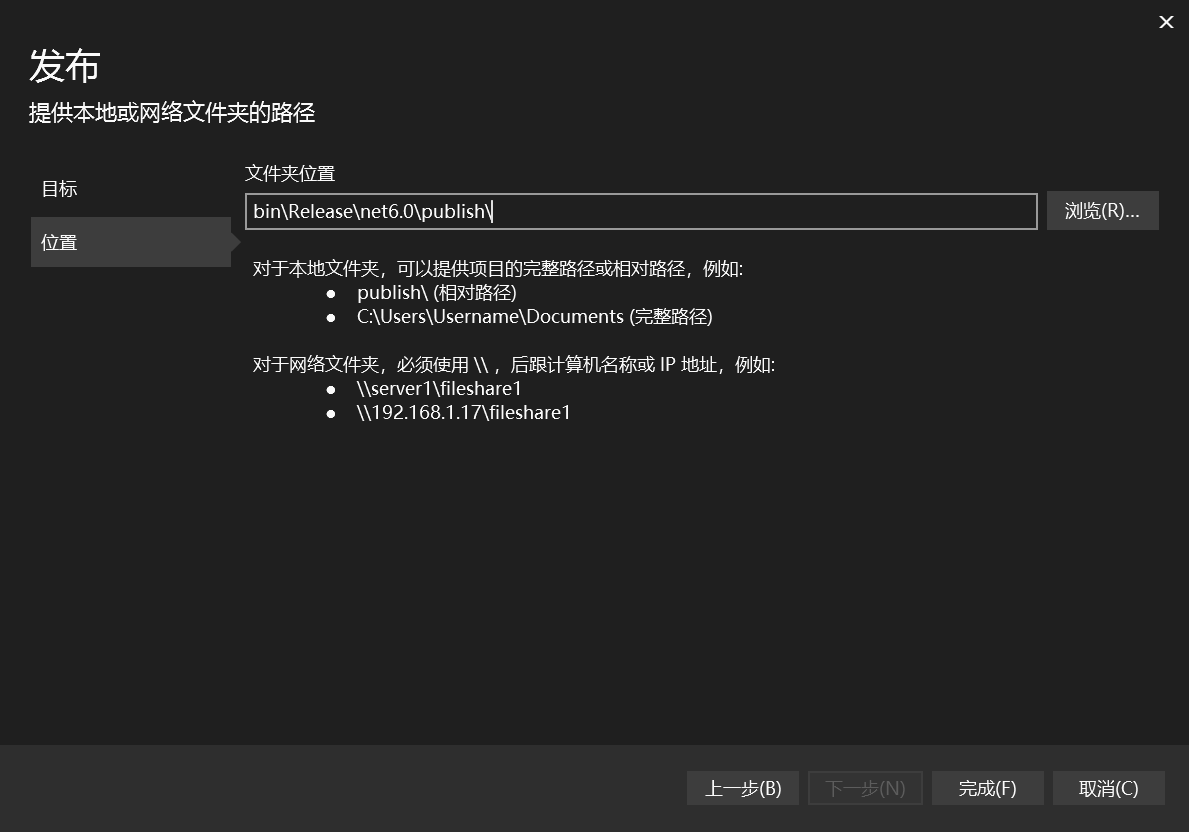
Click Publish in the right window, click Publish Profile, select the folder, and then Next

Then choose to publish the file (the default is enough) and click Finish!
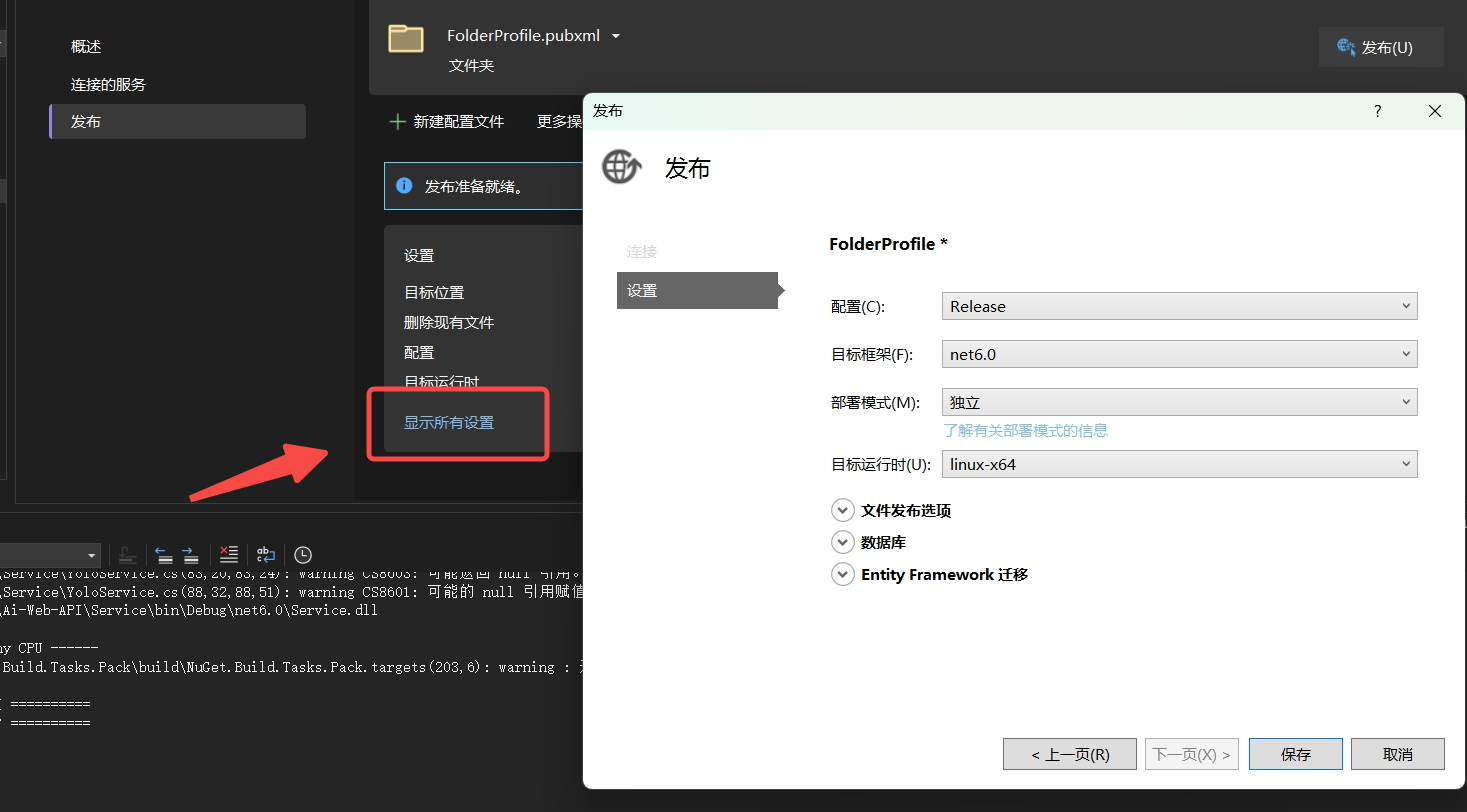
Then click Show All Settings. In the pop-up window, select Release for configuration. The deployment mode is Self-Contained (self-contained) in DeployMent Mode when we just packaged it on RD . Select our server system Linux-x64 for target operation. . Click save
Click the Publish button in the window, and then go to the packaging path you just set to see the packaged files.

Project operation
COPY the run file we just packaged through Rider or Visual Studio to the server
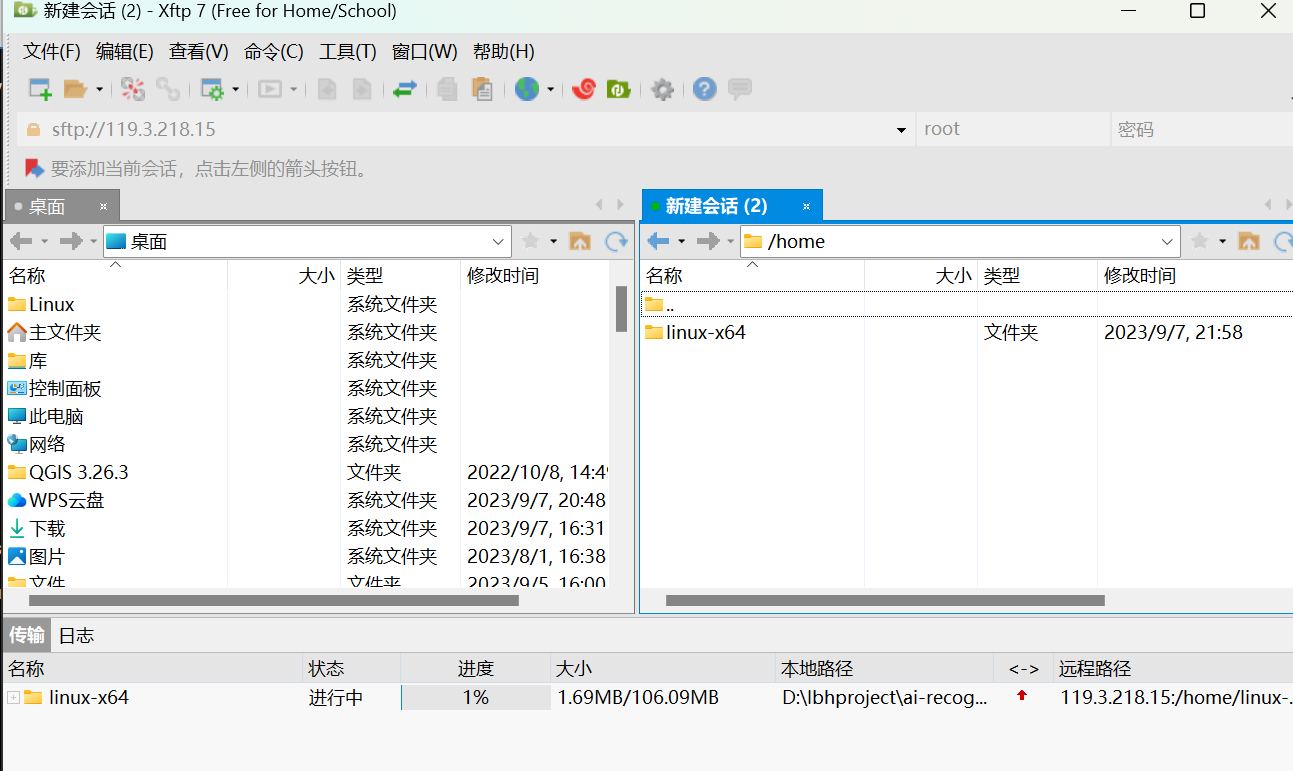
Because we selected "independent" when packaging, we do not need to install .net
cd to the path of the project copied to the server, and then start the project directly through the command ./yourapp, "yourapp" is the actual name of your application.
Then I found that an error may be reported
-bash: ./WebApi: Permission denied
This is the application file that has execute permission. You can use the chmod command to add execution permissions
chmod +x yourapp
Then after executing the command just now, you may find that a lot of error messages are reported.
Please install libicu using your package manager and try again. Alternatively you can set the configuration flag System.Globalization.Invariant to true if you want to run with no globalization support.

Don't panic, this error is because the .NET Core runtime requires the ICU library to handle globalization and localization strings. On some Linux distributions, this library may not be preinstalled.
You can solve this problem by installing the libicu library. On Ubuntu or Debian , you can install it using the following command:
sudo apt-get install libicu-dev
On CentOS or Fedora , you can install it using the following command:
sudo yum install libicuIf your application does not require globalization and localization support , you can disable ICU functionality by setting an environment variable:
export DOTNET_SYSTEM_GLOBALIZATION_INVARIANT=1
Then run your application. You can now run it successfully

Background process
We can use the nohup command to run the project in the background. nohupThe command can continue to run your process after you exit the shell.
CtRl + C ends the running task just now, and then uses the following command to run it, so that all output (including stdout and stderr) are redirected to the output.logfile
nohup ./your project name> output.log 2>&1 &
 Generally speaking, if the path of output.log is not specifically specified, it will be generated under the current project running path. If any problems arise in our project later, we can find the log and take a look.

If you want to check if your program is running you can use psthe command
ps aux | grep 你的项目名称

If you want to stop your program you can use killthe command
kill $(你的项目名称)
open port
Find the security group in the console and click Configure Rules
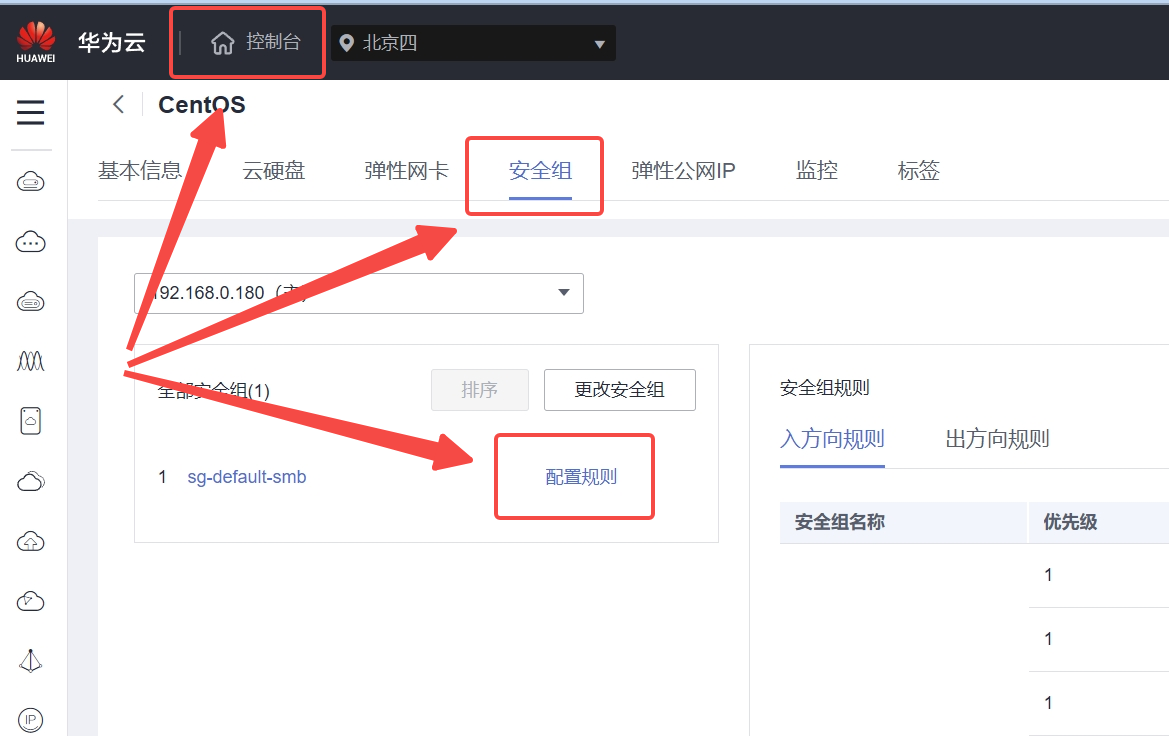
Add an inbound direction rule and set the priority to 1. My project port is 5000, so set it to 5000. Others can be defaulted.

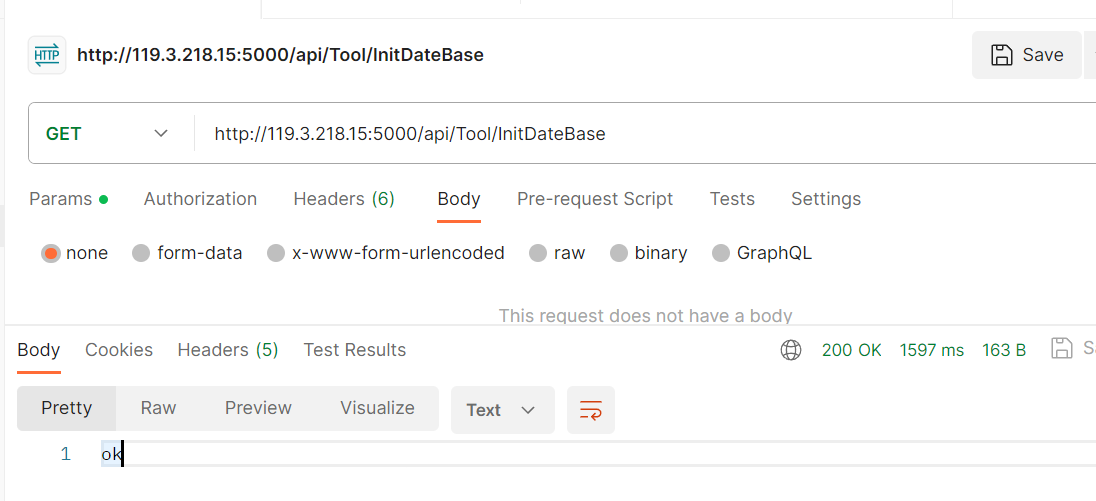
Let’s test that we can correctly send requests to the program on the server.
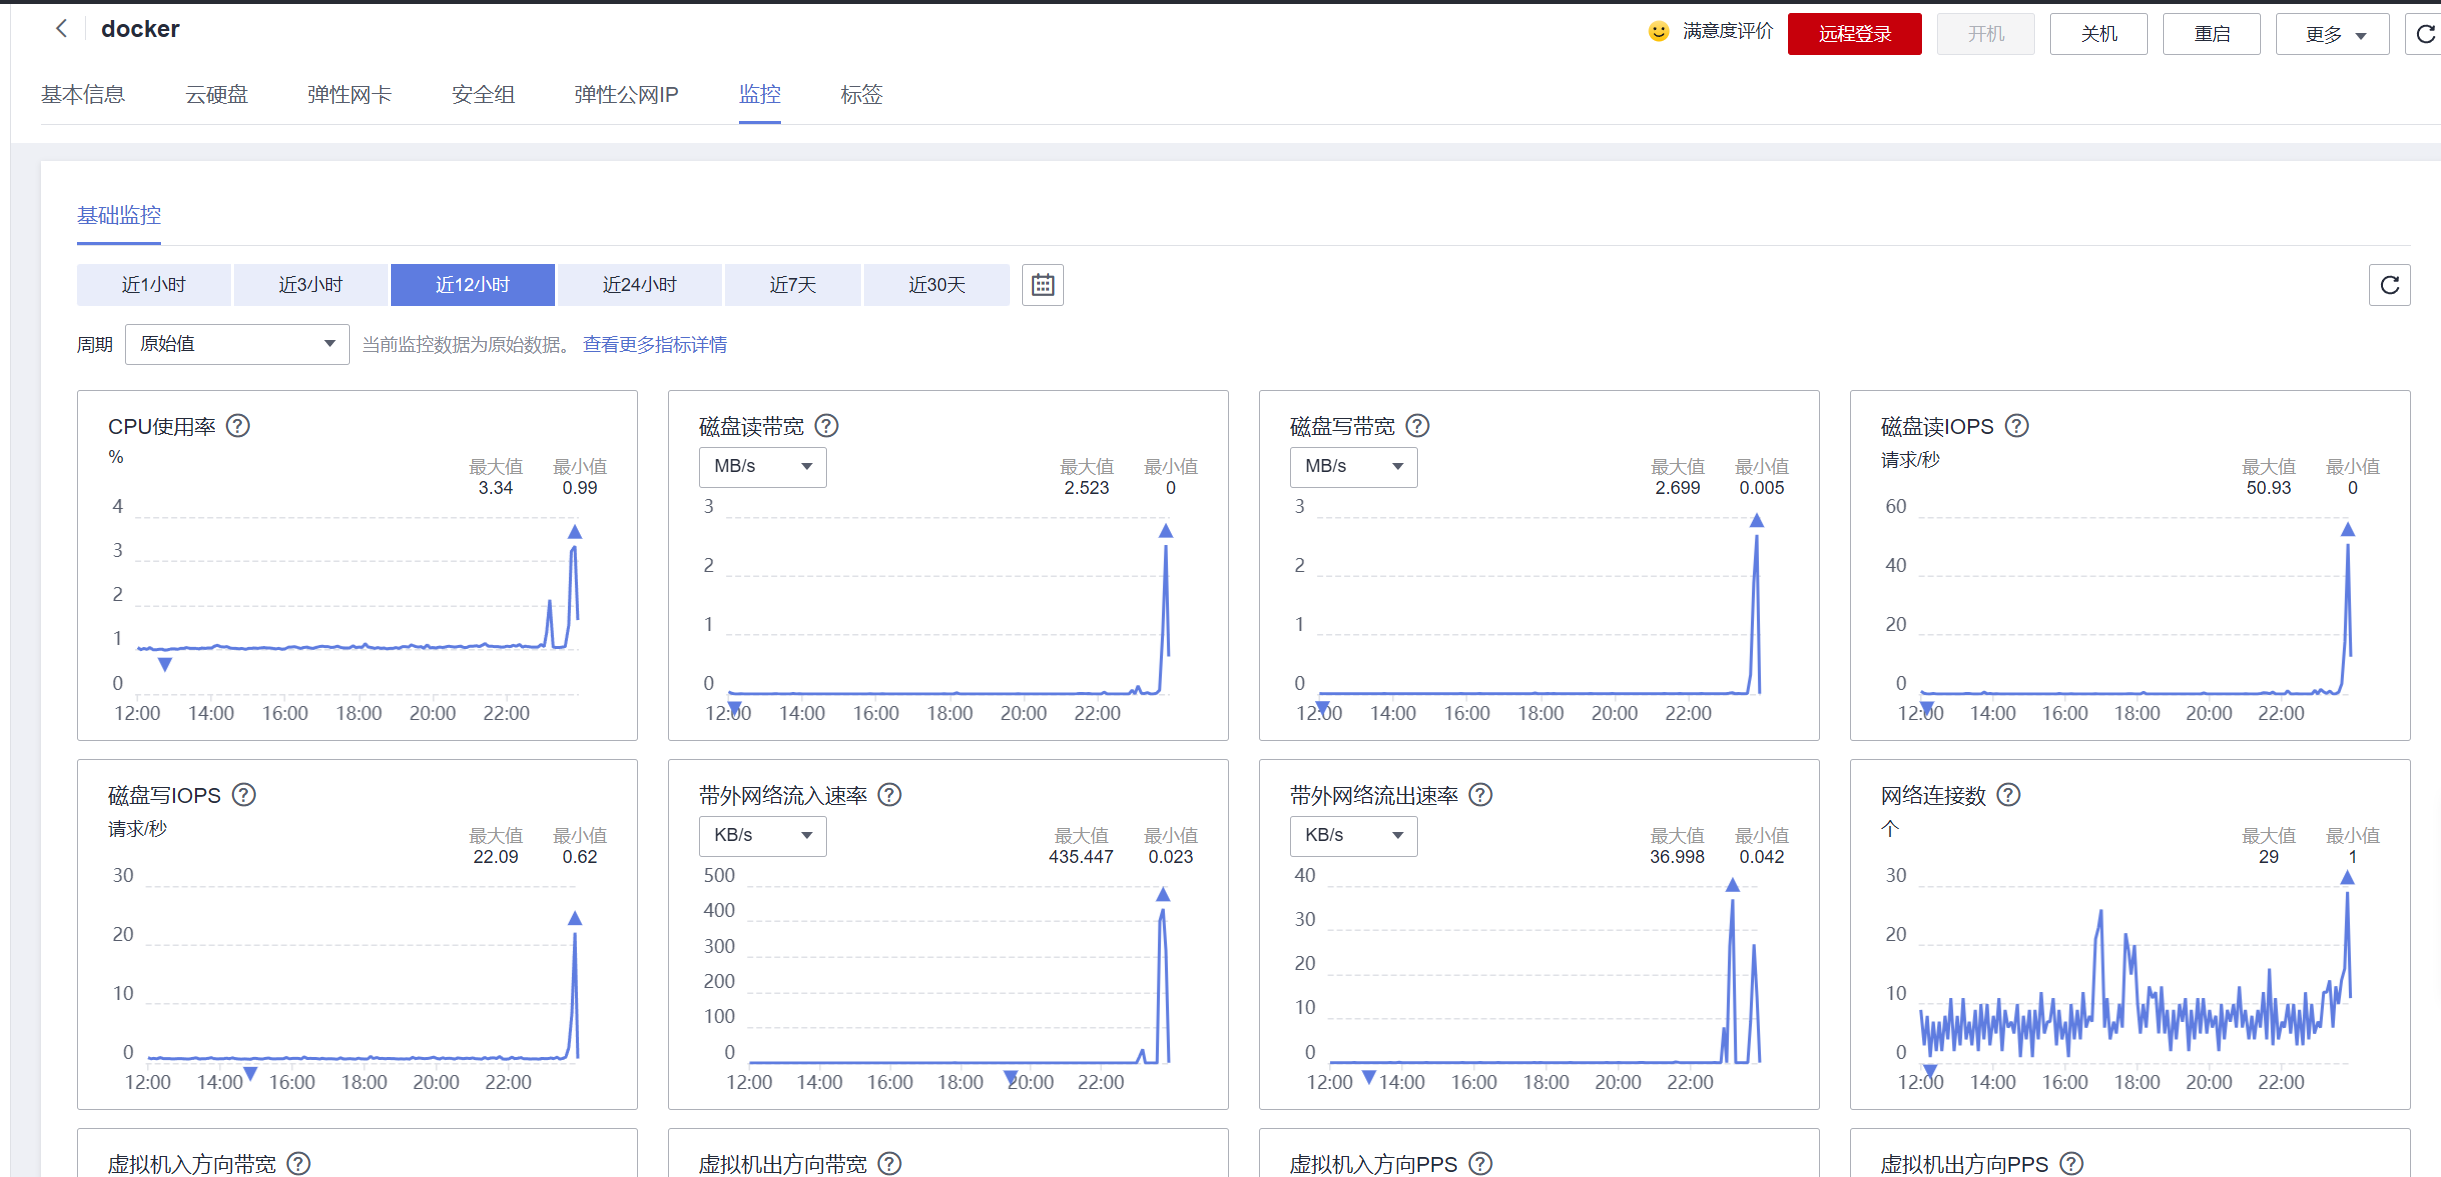
Go to the console to check the server monitoring. The server was purchased yesterday, which means that the CPU of the project just deployed has only used up to 2%, which is a waste. So I will write a few infinite loops to use the CPU.

How to run a project in Docker
Because I also bought a Docker visual portainer for Yunyao Cloud Server L instance, which has already installed the environment required by docker. We use this server to test using docker to run the project. If other systems are installed, you need to first do it yourself. Go and install docker

If you need to deploy quickly, you can directly publish the project to Docker Hub when Visual Studio is released. We can just pull the image directly on the server. However, the way I deploy in this chapter is not by pulling the image from the hub, but by taking everyone with me. Writing docker-compose and dockerfile together

In the above how to run the project in CentOS, we packaged the project, and now follow the steps just now to repackage a Framework-Dependent (framework dependency): the published application does not contain the .NET Core runtime and libraries. If you feel that It's troublesome and you don't want to move. It doesn't matter. The project you just packaged can also be used, but it will make the next thing we have to do unnecessary.
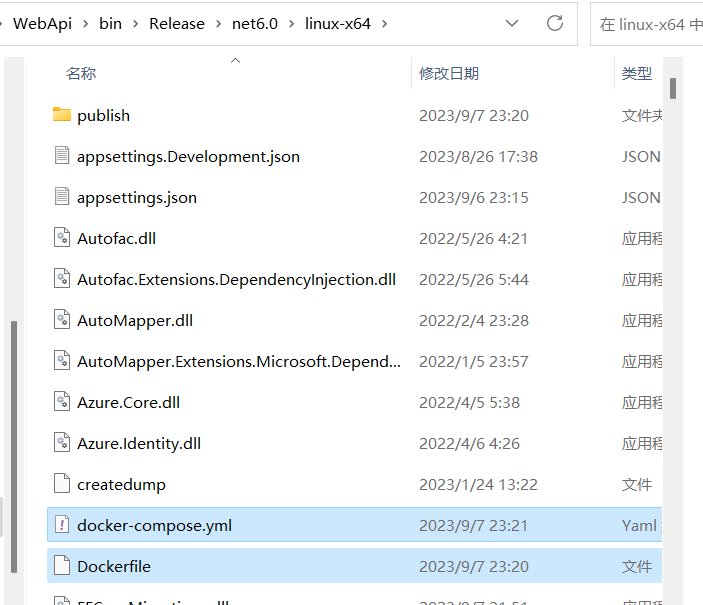
Create two files, docker-compose and dockerfile, under the same level path of packaged publish.
Next, let’s write these two files together
First open the Dockerfile, the first step is to build the image, which is the environment for running the project, then copy the project into it, change the port in the code below to that of your project, and then write the running command, and you are done.
#基于 `microsoft/dotnet:6.0-core` 来构建我们的镜像
FROM mcr.microsoft.com/dotnet/aspnet:6.0


#设置工作目录为 `/publish` 文件夹,即容器启动默认的文件夹
WORKDIR /publish
#拷贝项目publish文件夹中的所有文件到 docker容器中的publish文件夹中
COPY /publish /publish

# 监听5157
ENV ASPNETCORE_URLS=http://+:5157

#设置Docker容器对外暴露8003端口
EXPOSE 5157

#使用`dotnet WebApi.dll`来运行应用程序

CMD ["dotnet", "WebApi.dll", "--server.urls", "http://*:5157"]
Then open docker-compose
version: '3'
services:
  webapi:
    image: webapi
    build:
      context: .
      dockerfile: Dockerfile
    ports:
      - 5157:5157
In this file, version is the version number of this project. For image, first go to the hub to find the image, and pull it if you find it. If you can’t find it, execute the Dockerfile we just created, and then change ports to the corresponding version number in your project. finished.
One detail to pay attention to is that if you use a database in the project like me and also want to install the database in docker, as in the following code, I pulled a mysql5.7.18 and set the image name to mysql. Then, I installed it in the project In the sql connection string, you cannot use 127.0.0.1 or localhost. Instead, use the mysql set below.
version: '3'
services:
  mysql:
    restart: always
    image: mysql:5.7.18
    container_name: mysql-lable
    volumes:
      - /apps/mysql/mydir:/mydir
      - /apps/mysql/datadir:/var/lib/mysql
      - /apps/mysql/conf/my.cnf:/etc/my.cnf
      - /apps/mysql/source:/docker-entrypoint-initdb.d
    environment:
      - "MYSQL_ROOT_PASSWORD=password"
      - "MYSQL_DATABASE=lbhdatabase"
      - "TZ=Asia/Shanghai"
    ports:
      - 3306:3306
  webapi:
    image: webapi
    build:
      context: .
      dockerfile: Dockerfile
    ports:
      - 5157:5157
    depends_on:
      - mysql
Project operation
After these two files are prepared, directly pull publish to our server and change the name.
Then execute docker-compose up in this path

After running, open the port of your own project like the open port above. I will not repeat the screenshots here.
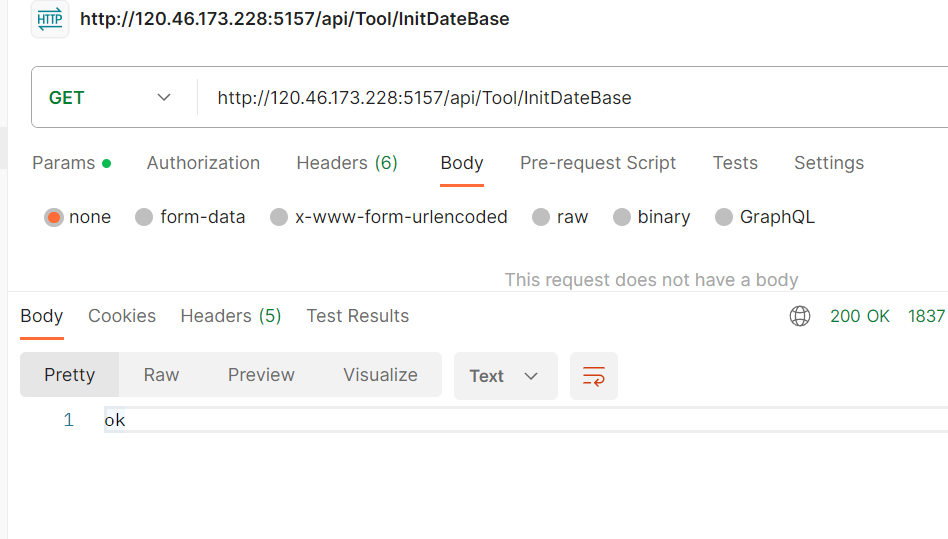
Test it, ok
Server information. If you want to execute it in the background, add -d after the command just now.
docker-compose up -d

At this time, my docker server has already run an AI recognition webapi that was run during yesterday's test, a .net core project, and a MySQL. Looking at the monitoring again, we can see that there is still no pressure.